2009 Hyundai Getz fuse
[x] Cancel search: fusePage 9 of 191

YOUR VEHICLE AT A GLANCE
F9
1. Glove Box
2. Passenger's Airbag (If installed)
3. Audio System (If installed)
4. Hazard Warning Light
5. Digital Clock
6. Windshield Wiper/Washer Switch
7. Horn and Driver's Airbag (If installed)
8. Instrument Cluster
9. Multi-Function Light Switch
10. Front Fog Light Switch (If installed)
11. Rear Drink Holder
CAUTION:
When installing a container of liquid air freshener inside a vehicle, do not place it near the instrument cluster nor on the instrument panel pad surface. If there is any leakage from the airfreshener onto these areas (instrument cluster, instrument panel pad or air ventilator), it may damage these parts. If the liquid from the air freshener does leak onto these areas, wash them with water immediately. 12. Hand Brake Lever
13. Shift Lever (If installed)
14. Front Drink Holder
15. Ashtray
16. Power Outlelet
17. Heating/Air Conditioning Control Panel
(If installed)
18. Audio Remote Control Switch (If installed)
19. Fuse Box
20. Bonnet Release Lever
!
Page 42 of 191
FEATURES OF YOUR HYUNDAI 1- 31
!
B240B05L-D o The SRS can function only when
the ignition key is in the "ON" position. If the SRS SRI does not come on, or continuously re-mains on, after flashing for about 6 seconds when the ignition key is turned to the "ON" position, orafter the engine is started, or comes on while driving, the SRS is not working properly. If thisoccurs, have your vehicle imme- diately inspected by your Hyundai dealer.
o Before you replace a fuse or dis- connect a battery terminal, turnthe ignition key to the "LOCK"position or remove the ignition key. Never remove or replace the air bag related fuse(s) when theignition key is in the "ON" posi- tion. Failure to heed this warning will cause the SRS SRI to illumi-nate.
CAUTION:
When installing a container of liq- uid air freshener inside a vehicle, do not place it near the instrumentcluster nor on the instrument panel pad surface. If there is any leakage from the air freshener onto theseareas (instrument cluster, instru- ment panel pad or air ventilator), it may damage these parts. If the liq-uid from the air freshener does leak onto these areas, wash them with water immediately.
!
WARNING:
o When the SRS is activated, there may be a loud noise and fine dust will be released throughout thevehicle. These conditions are normal and are not hazardous. However, the fine dust generatedduring airbag deployment may cause skin irritation. Be sure to wash your hands and face thor-oughly with lukewarm water and a mild soap after an accident in which the airbags were deployed.
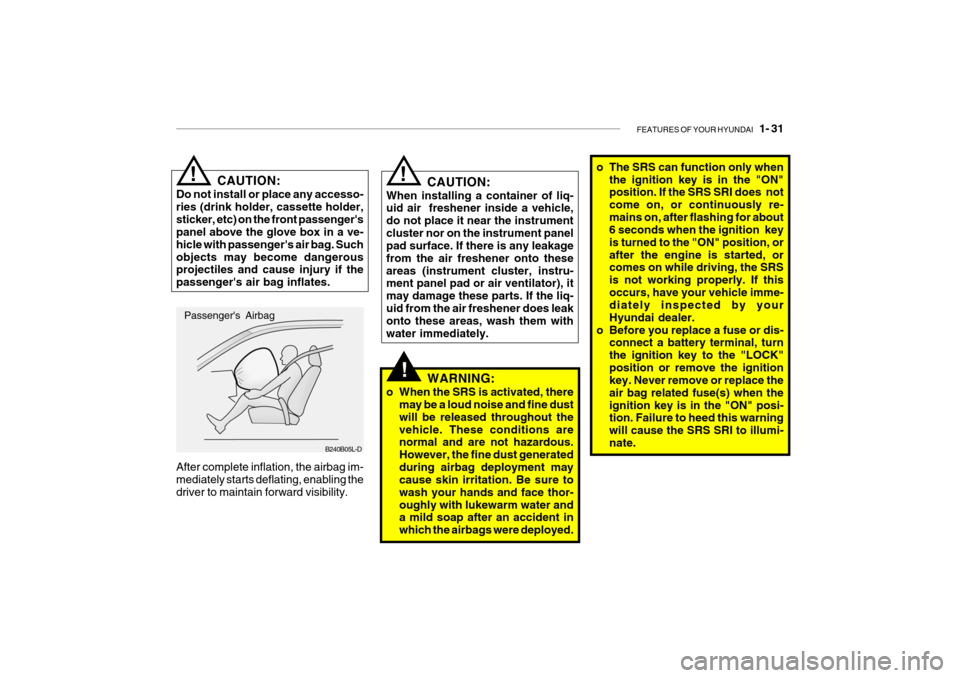
After complete inflation, the airbag im-mediately starts deflating, enabling thedriver to maintain forward visibility. Passenger's Airbag!
CAUTION:
Do not install or place any accesso- ries (drink holder, cassette holder,sticker, etc) on the front passenger's panel above the glove box in a ve- hicle with passenger's air bag. Suchobjects may become dangerous projectiles and cause injury if the passenger's air bag inflates.
Page 57 of 191
1- 46 FEATURES OF YOUR HYUNDAI
OTB048095R
OTB048090R
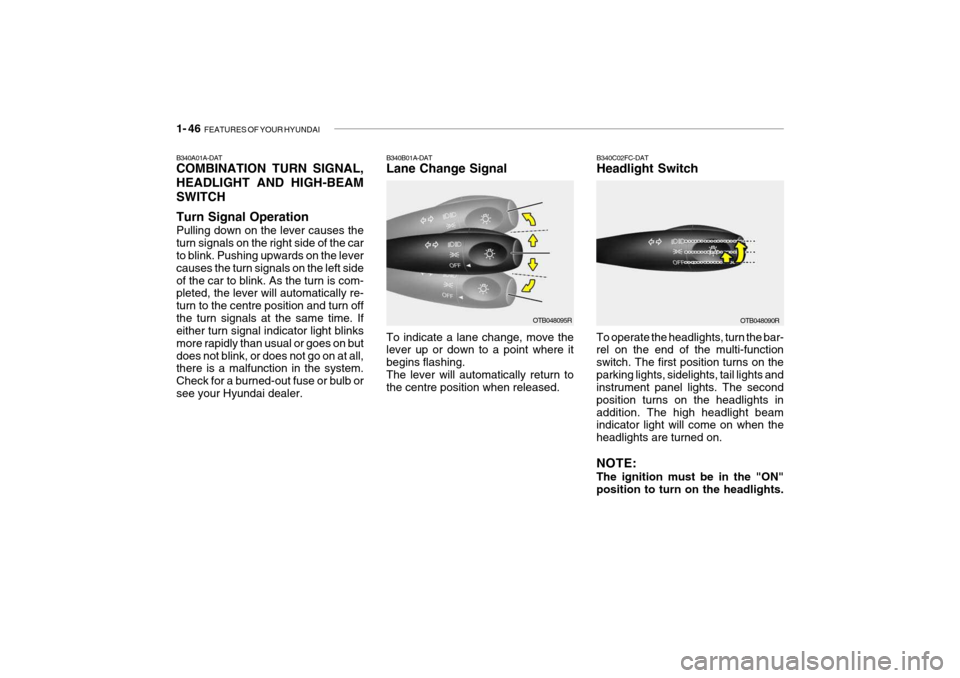
B340B01A-DAT Lane Change Signal
B340C02FC-DATHeadlight Switch
To indicate a lane change, move the lever up or down to a point where it begins flashing.The lever will automatically return to the centre position when released. To operate the headlights, turn the bar-rel on the end of the multi-function switch. The first position turns on theparking lights, sidelights, tail lights and instrument panel lights. The second position turns on the headlights inaddition. The high headlight beam indicator light will come on when the headlights are turned on. NOTE: The ignition must be in the "ON" position to turn on the headlights.
B340A01A-DAT COMBINATION TURN SIGNAL, HEADLIGHT AND HIGH-BEAMSWITCH Turn Signal Operation Pulling down on the lever causes the turn signals on the right side of the car to blink. Pushing upwards on the lever causes the turn signals on the left sideof the car to blink. As the turn is com- pleted, the lever will automatically re- turn to the centre position and turn offthe turn signals at the same time. If either turn signal indicator light blinks more rapidly than usual or goes on butdoes not blink, or does not go on at all, there is a malfunction in the system. Check for a burned-out fuse or bulb orsee your Hyundai dealer.
Page 118 of 191
3- 2 WHAT TO DO IN AN EMERGENCY
HTB165
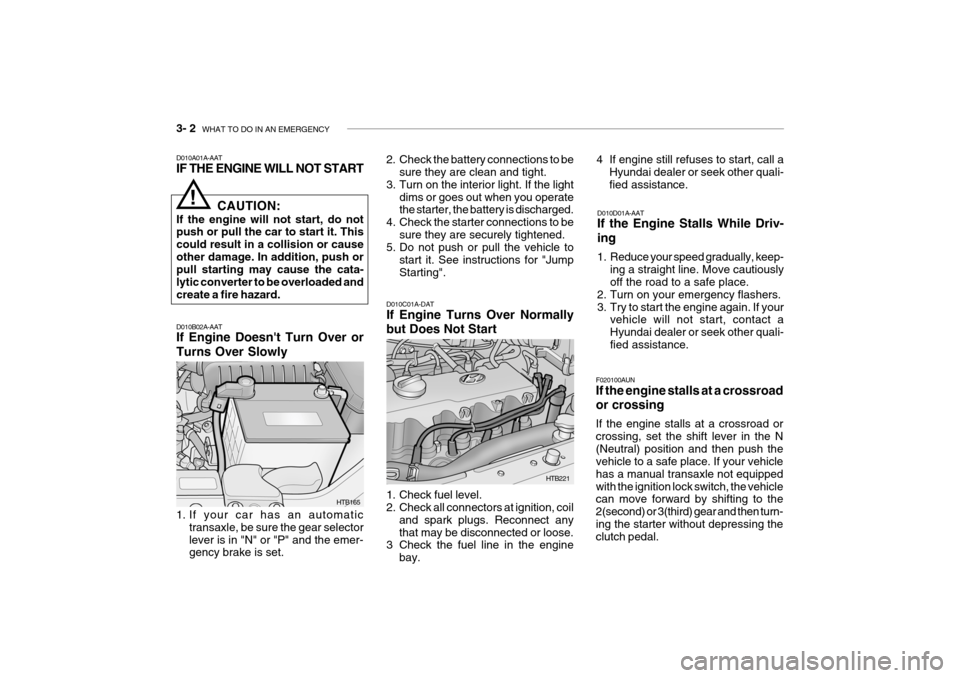
D010B02A-AAT If Engine Doesn't Turn Over or Turns Over Slowly 2. Check the battery connections to be
sure they are clean and tight.
3. Turn on the interior light. If the light dims or goes out when you operate the starter, the battery is discharged.
4. Check the starter connections to be sure they are securely tightened.
5. Do not push or pull the vehicle to
start it. See instructions for "Jump Starting".
D010C01A-DAT If Engine Turns Over Normally but Does Not Start 4 If engine still refuses to start, call a
Hyundai dealer or seek other quali- fied assistance.
D010D01A-AAT If the Engine Stalls While Driv- ing
1. Reduce your speed gradually, keep- ing a straight line. Move cautiously off the road to a safe place.
2. Turn on your emergency flashers.
3. Try to start the engine again. If your vehicle will not start, contact aHyundai dealer or seek other quali-fied assistance.
D010A01A-AAT IF THE ENGINE WILL NOT START
!
HTB221
CAUTION:
If the engine will not start, do not push or pull the car to start it. This could result in a collision or causeother damage. In addition, push or pull starting may cause the cata- lytic converter to be overloaded andcreate a fire hazard.
F020100AUN If the engine stalls at a crossroad or crossing If the engine stalls at a crossroad or crossing, set the shift lever in the N(Neutral) position and then push the vehicle to a safe place. If your vehicle has a manual transaxle not equippedwith the ignition lock switch, the vehicle can move forward by shifting to the 2(second) or 3(third) gear and then turn-ing the starter without depressing the clutch pedal.
1. If your car has an automatic
transaxle, be sure the gear selector lever is in "N" or "P" and the emer- gency brake is set. 1. Check fuel level.
2. Check all connectors at ignition, coil
and spark plugs. Reconnect any that may be disconnected or loose.
3 Check the fuel line in the engine
bay.
Page 143 of 191

6. Do-It-Yourself Maintenance
Engine compartment ........................................................................ 6-2
General checks ................................................................................ 6-3
Checking the engine oil .................................................................... 6-4
Checking the engine coolant ............................................................ 6-6
Changing the air cleaner filter ........................................................... 6-7
Filling the washer reservoir .............................................................. 6-9Checking the transaxle oil (manual)............................................... 6-10
Checking the transaxle fluid (Automatic)....................................... 6-11
Checking the brakes ...................................................................... 6-13
Air conditioning care ....................................................................... 6-14
Checking drive belts ...................................................................... 6-18
Checking and replacing fuses ........................................................ 6-18
Checking the battery ...................................................................... 6-20
Checking electric cooling fans ....................................................... 6-22
Power steering fluid level ............................................................... 6-22
Replacement of bulbs .................................................................... 6-24
Fuse panel description ................................................................... 6-30
6
Page 160 of 191
6- 18 DO-IT-YOURSELF MAINTENANCE
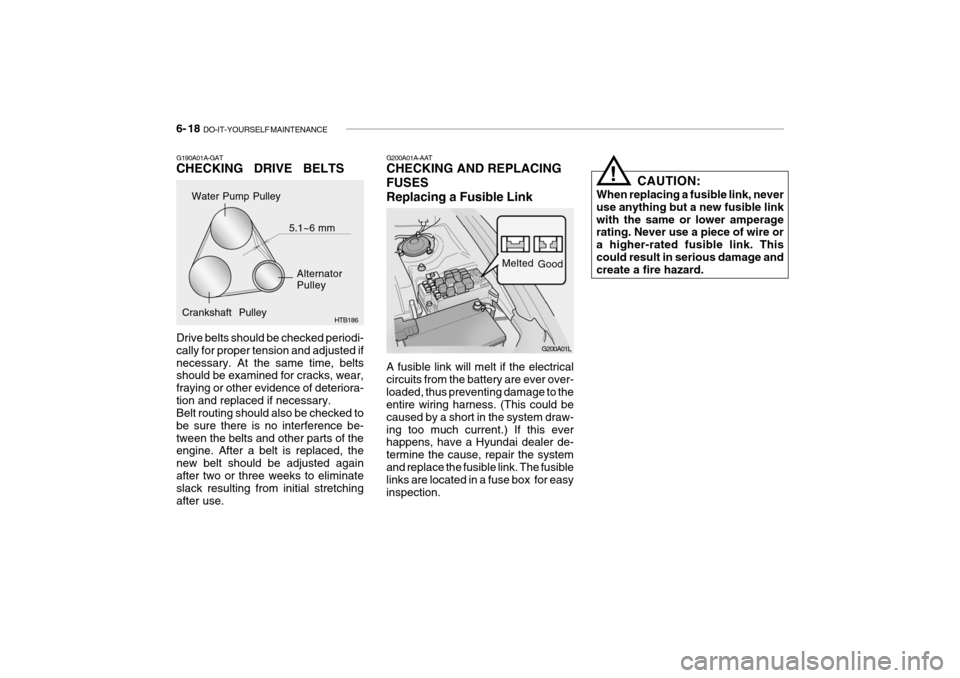
A fusible link will melt if the electrical circuits from the battery are ever over-loaded, thus preventing damage to the entire wiring harness. (This could be caused by a short in the system draw-ing too much current.) If this ever happens, have a Hyundai dealer de- termine the cause, repair the systemand replace the fusible link. The fusible links are located in a fuse box for easy inspection. CAUTION:
When replacing a fusible link, neveruse anything but a new fusible linkwith the same or lower amperage rating. Never use a piece of wire or a higher-rated fusible link. Thiscould result in serious damage and create a fire hazard.
!
G200A01A-AAT CHECKING AND REPLACING FUSESReplacing a Fusible Link
G200A01L
Melted
Good
Water Pump Pulley
Alternator Pulley
Crankshaft Pulley 5.1~6 mm
G190A01A-GAT CHECKING DRIVE BELTS Drive belts should be checked periodi- cally for proper tension and adjusted ifnecessary. At the same time, belts should be examined for cracks, wear, fraying or other evidence of deteriora-tion and replaced if necessary. Belt routing should also be checked to be sure there is no interference be-tween the belts and other parts of the engine. After a belt is replaced, the new belt should be adjusted againafter two or three weeks to eliminate slack resulting from initial stretching after use. HTB186
Page 161 of 191
DO-IT-YOURSELF MAINTENANCE 6- 19
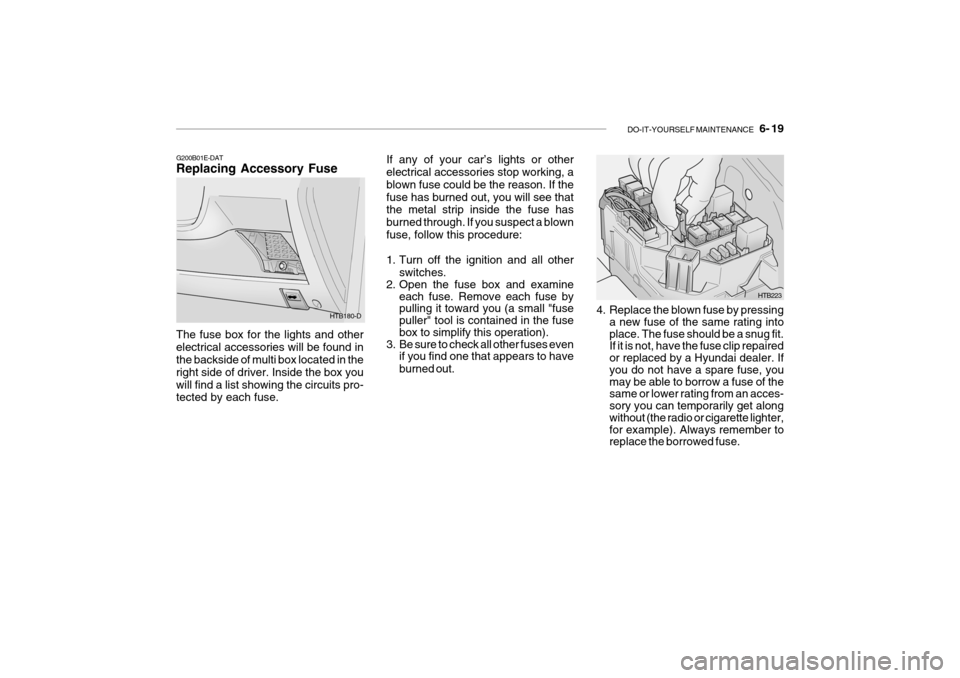
G200B01E-DAT Replacing Accessory Fuse The fuse box for the lights and other electrical accessories will be found in the backside of multi box located in the right side of driver. Inside the box youwill find a list showing the circuits pro- tected by each fuse. HTB180-D
HTB223
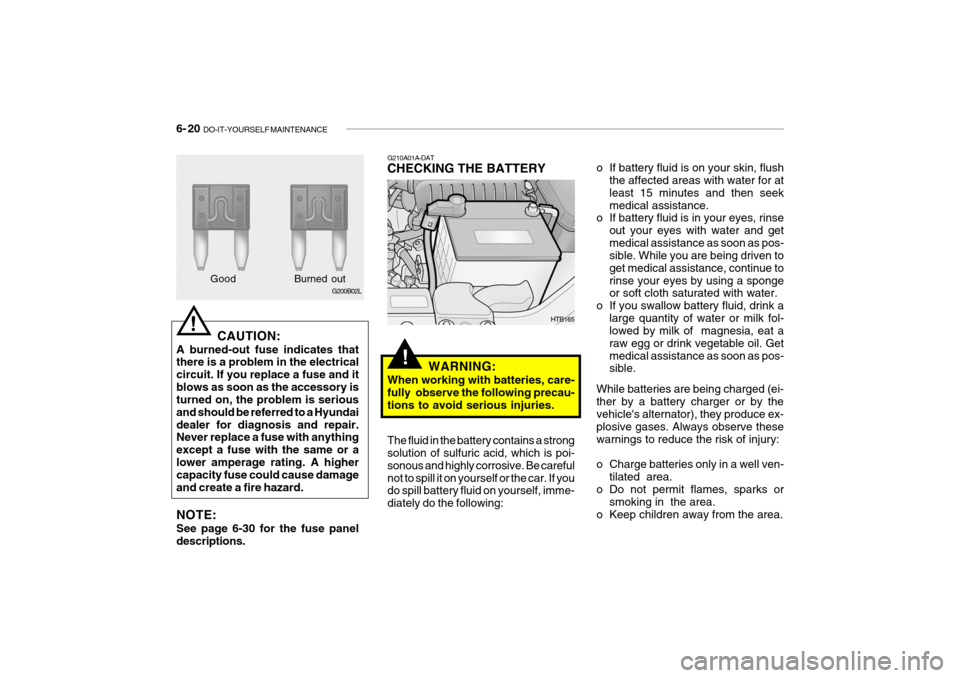
If any of your car’s lights or other electrical accessories stop working, a blown fuse could be the reason. If thefuse has burned out, you will see that the metal strip inside the fuse has burned through. If you suspect a blownfuse, follow this procedure:
1. Turn off the ignition and all other
switches.
2. Open the fuse box and examine each fuse. Remove each fuse by pulling it toward you (a small "fuse puller" tool is contained in the fuse box to simplify this operation).
3. Be sure to check all other fuses even if you find one that appears to have burned out. 4. Replace the blown fuse by pressing
a new fuse of the same rating into place. The fuse should be a snug fit. If it is not, have the fuse clip repaired or replaced by a Hyundai dealer. If you do not have a spare fuse, you may be able to borrow a fuse of the same or lower rating from an acces- sory you can temporarily get along without (the radio or cigarette lighter, for example). Always remember to replace the borrowed fuse.
Page 162 of 191
6- 20 DO-IT-YOURSELF MAINTENANCE
o If battery fluid is on your skin, flush
the affected areas with water for at least 15 minutes and then seekmedical assistance.
o If battery fluid is in your eyes, rinse
out your eyes with water and getmedical assistance as soon as pos- sible. While you are being driven to get medical assistance, continue torinse your eyes by using a sponge or soft cloth saturated with water.
o If you swallow battery fluid, drink a large quantity of water or milk fol-lowed by milk of magnesia, eat a raw egg or drink vegetable oil. Getmedical assistance as soon as pos- sible.
While batteries are being charged (ei- ther by a battery charger or by the vehicle's alternator), they produce ex- plosive gases. Always observe thesewarnings to reduce the risk of injury:
o Charge batteries only in a well ven- tilated area.
o Do not permit flames, sparks or
smoking in the area.
o Keep children away from the area.
!
G210A01A-DAT CHECKING THE BATTERY
WARNING:
When working with batteries, care- fully observe the following precau-tions to avoid serious injuries. HTB165
The fluid in the battery contains a strong solution of sulfuric acid, which is poi- sonous and highly corrosive. Be carefulnot to spill it on yourself or the car. If you do spill battery fluid on yourself, imme- diately do the following:
G200B02L
! CAUTION:
A burned-out fuse indicates that there is a problem in the electrical circuit. If you replace a fuse and itblows as soon as the accessory is turned on, the problem is serious and should be referred to a Hyundaidealer for diagnosis and repair. Never replace a fuse with anything except a fuse with the same or alower amperage rating. A higher capacity fuse could cause damage and create a fire hazard. NOTE: See page 6-30 for the fuse panel descriptions. Good B
urned out