Page 148 of 532

�µ�µ
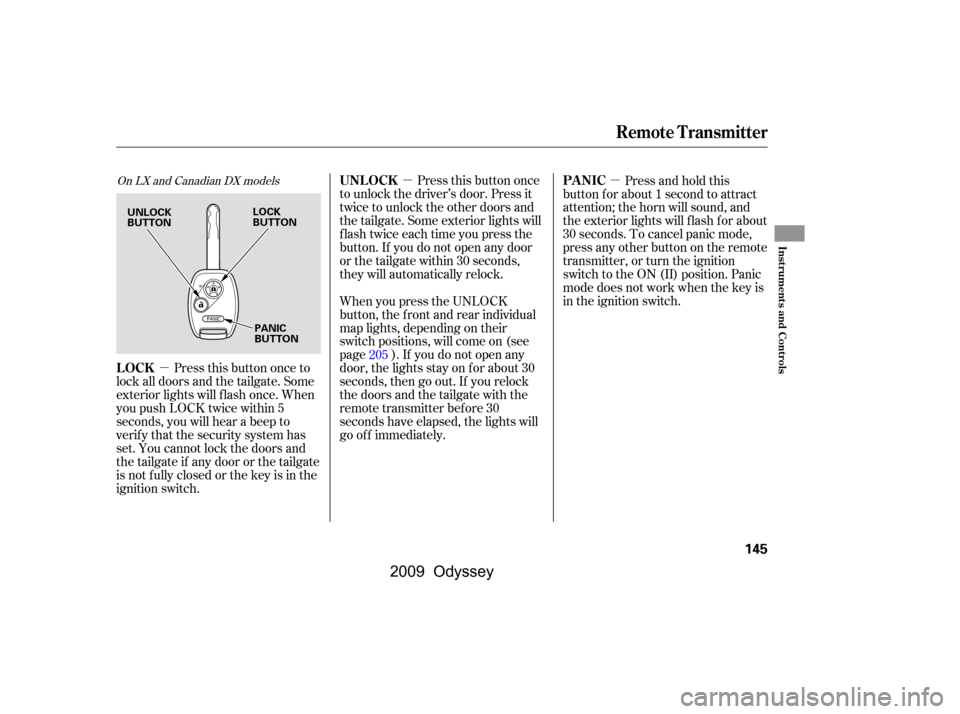
�µ Press this button once
to unlock the driver’s door. Press it
twice to unlock the other doors and
the tailgate. Some exterior lights will
f lash twice each time you press the
button. If you do not open any door
orthetailgatewithin30seconds,
they will automatically relock. Press and hold this
button for about 1 second to attract
attention; the horn will sound, and
the exterior lights will f lash f or about
30 seconds. To cancel panic mode,
press any other button on the remote
transmitter, or turn the ignition
switch to the ON (II) position. Panic
mode does not work when the key is
in the ignition switch.
Press this button once to
lock all doors and the tailgate. Some
exterior lights will f lash once. When
you push LOCK twice within 5
seconds, you will hear a beep to
verify that the security system has
set. You cannot lock the doors and
thetailgateif anydoororthetailgate
is not f ully closed or the key is in the
ignition switch. When you press the UNLOCK
button, the f ront and rear individual
map lights, depending on their
switch positions, will come on (see
page ). If you do not open any
door, the lights stay on f or about 30
seconds, then go out. If you relock
thedoorsandthetailgatewiththe
remote transmitter before 30
seconds have elapsed, the lights will
go of f immediately.
205On LX and Canadian DX modelsUNL OCK
PA NIC
LOCK
Remote Transmitter
Inst rument s and Cont rols
145
UNLOCK
BUTTON LOCK
BUTTON
PANIC
BUTTON
�\f���—�\f���—���
�y�
�
�����������y���
�(���������\f�y�\f�
���\f�y
2009 Odyssey
Page 150 of 532

�µ
�µ �µ
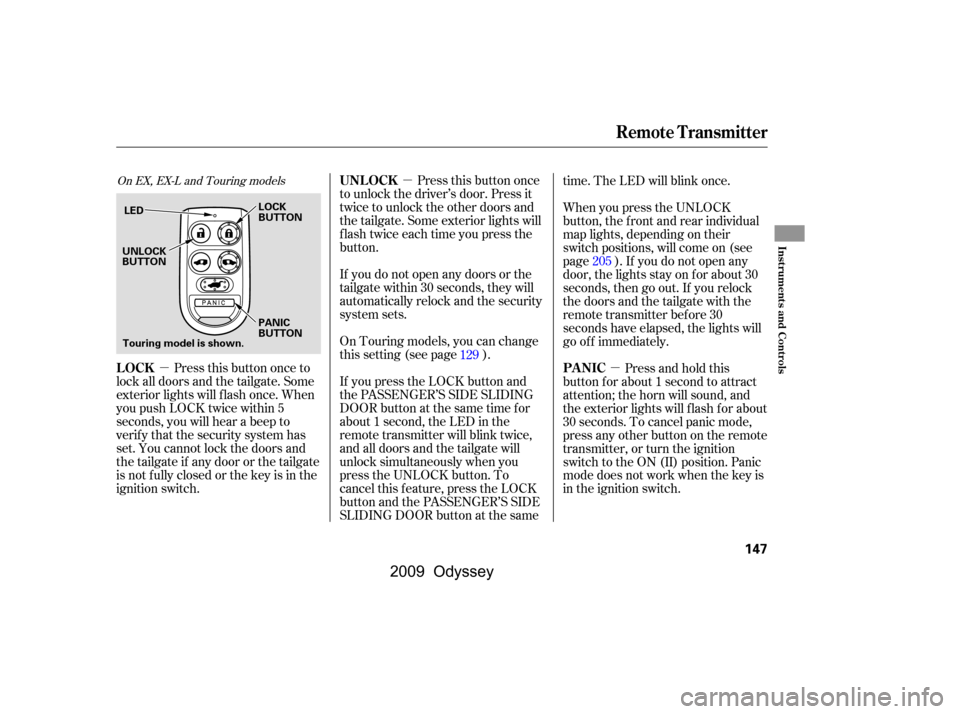
Press this button once
to unlock the driver’s door. Press it
twice to unlock the other doors and
the tailgate. Some exterior lights will
f lash twice each time you press the
button.
If you do not open any doors or the
tailgate within 30 seconds, they will
automatically relock and the security
system sets.
Press this button once to
lock all doors and the tailgate. Some
exterior lights will f lash once. When
you push LOCK twice within 5
seconds, you will hear a beep to
verify that the security system has
set. You cannot lock the doors and
thetailgateif anydoororthetailgate
is not f ully closed or the key is in the
ignition switch. On Touring models, you can change
this setting (see page ).
If you press the LOCK button and
the PASSENGER’S SIDE SLIDING
DOOR button at the same time f or
about 1 second, the LED in the
remote transmitter will blink twice,
and all doors and the tailgate will
unlock simultaneously when you
press the UNLOCK button. To
cancel this f eature, press the LOCK
button and the PASSENGER’S SIDE
SLIDING DOOR button at the sametime. The LED will blink once.
When you press the UNLOCK
button, the f ront and rear individual
map lights, depending on their
switch positions, will come on (see
page ). If you do not open any
door, the lights stay on f or about 30
seconds, then go out. If you relock
thedoorsandthetailgatewiththe
remote transmitter before 30
seconds have elapsed, the lights will
go of f immediately.
Press and hold this
button for about 1 second to attract
attention; the horn will sound, and
the exterior lights will f lash f or about
30 seconds. To cancel panic mode,
press any other button on the remote
transmitter, or turn the ignition
switch to the ON (II) position. Panic
mode does not work when the key is
in the ignition switch.
129
205On EX, EX-L and Touring modelsUNL OCK
LOCK PANIC
Remote Transmitter
Inst rument s and Cont rols
147
LED LOCK
BUTTON
PANIC
BUTTON
UNLOCK
BUTTON
Touring model is shown.
�\f���—�\f���—���
�y�
�
���������
�y���
�(���������\f�y�\f�
�����y
2009 Odyssey
Page 164 of 532

To open, pull the inside or outside
door handle, and slide the door back.
It will latch in the f ully open position.
When opening f rom the inside, the
childproof door lock must be
unlocked.
To close, pull either handle, and slide
the door closed. Make sure the door
is closed and latched securely bef ore
driving, and all passengers are clear
of the sliding doors bef ore closing
them.
When opening a sliding door, it stops
about halfway if the window is open
morethan3in(8cm).If thevehicle
is f acing downhill, the sliding door
will slam shut when you release the
door handle. Always close the
window f ully bef ore opening the
sliding door.
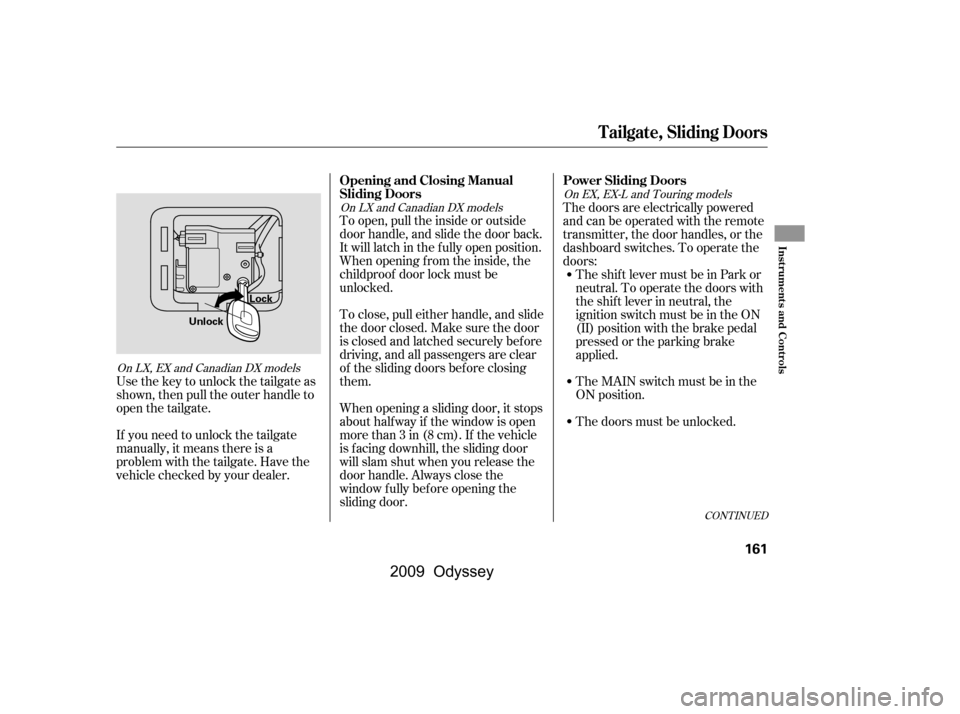
Usethekeytounlockthetailgateas
shown, then pull the outer handle to
open the tailgate.
If you need to unlock the tailgate
manually, it means there is a
problem with the tailgate. Have the
vehicle checked by your dealer. The doors are electrically powered
and can be operated with the remote
transmitter, the door handles, or the
dashboard switches. To operate the
doors:
The shift lever must be in Park or
neutral. To operate the doors with
the shift lever in neutral, the
ignition switch must be in the ON
(II) position with the brake pedal
pressed or the parking brake
applied.
TheMAINswitchmustbeinthe
ON position.
The doors must be unlocked.
CONT INUED
On LX and Canadian DX models
On LX, EX and Canadian DX models On EX, EX-L and Touring models
Power Sliding Doors
Opening and Closing Manual
Sliding Doors
T ailgate, Sliding Doors
Inst rument s and Cont rols
161
Unlock Lock
�\f���—�\f���—���
�y�
�
�����������y���
�(���������\f�y�\f�
�����y
2009 Odyssey
Page 175 of 532
To remove a head restraint f or
cleaning or repair, pull it up as f ar as
it will go. Push the release button,
then pull the restraint out of the seat-
back.
The f ront and rear head restraints
adjust f or height. You need both
hands to adjust the restraint. Do not
attempt to adjust it while driving. To
raise it, pull upward. To lower the
restraint, push the release button
and push the restraint down.
When reinstalling a head restraint,
put the legs back in place. Then
adjust it to the appropriate height
while pressing the release button.
Make sure the removed head
restraints are securely stored.
Removing t he Head Rest raintA djust ing t he Head Rest raint
Seats
172
RELEASE BUTTONLEGSEAT BACK
RELEASEBUTTON
CUSHION
Front and Second row seatThird row seat
Failure to reinstall the head
restraints can result in severe
injury during a crash.
Always replace the head
restraints before driving.
�����—�����—���
�y�
�
�����������y���
�(�����������y���
�����y
2009 Odyssey
Page 176 of 532

The driver’s and f ront passenger’s
seats have active head restraints. If
the vehicle is struck severely f rom
the rear, the occupant properly
secured with the seat belt will be
pushed against the seat-back and the
head restraint will automatically
move forward.For a head restraint system to work
properly:
Do not hang any items on the head
restraints, or f rom the restraint
legs.
Do not place any object between
an occupant and the seat-back.
Install each restraint in its proper
location.
Af ter a collision, the activated
restraint should return to its normal
position.
This reduces the distance between
the restraint and the occupant’s head.
It also helps protect the occupants
against whiplash and injuries to the
neck and upper spine.
If the restraints do not return to their
normal position, or in the event of a
severe collision, have the vehicle
inspected by a Honda dealer.
Only use genuine Honda
replacement head restraints.
A ct ive Head Rest raint s
Seats
Inst rument s and Cont rols
173
�\f���—�\f���—���
�y�
�
���������
�y���
�(���������\f�y�\f�
�����y
2009 Odyssey
Page 178 of 532
The second row bucket seat on the
passenger’s side can be moved to the
center to provide access to the third
row seat.Remove the passenger’s side
second row bucket seat (see page), then remove the cover.
If you have already set the floor
mat under the passenger’s side
bucket seat, make sure you
remove it bef ore moving the
bucket seat. Hook the f ront of the seat to the
f loor, then slide the seat toward
the center of the vehicle.
Push the back of the seat down
over the f loor hooks. Make sure
the seat is securely locked in place.
1. 2.
3.
177
CONT INUED
Moving the Second Row Bucket
Seat
Seats
Inst rument s and Cont rols
175
COVER HOOK
�����—�����—���
�y�
�
�����������y���
�(�����������y���
�����y
2009 Odyssey
Page 179 of 532
Whentheplus-oneseatisinthe
center position, store the f loor mat
under the passenger’s side bucket
seat as shown above.When the passenger’s side bucket
seat is in the outside position, and
theplus-oneseatisnotused,install
the f loor mat and the cover over the
f loor anchors.
Make sure the seats are securely
locked in place bef ore driving. A seat
thatisnotlockedinplacecouldfly
around and cause injury in a sudden
stop or crash.
To return the seat to the outside
position, remove the seat, reinstall
the cover, then reinstall the seat.
Seats and Floor Mats
Seats
176
�\f���—�\f���—���
�y�
�
�����������y���
�(���������\f�y�\f�
���
�y
2009 Odyssey
Page 181 of 532
To reinstall the seat, hook the f ront
of the seat to the f loor, then push the
rear of the seat-back until it locks in
place. Make sure the seat is securely
latched bef ore driving.
Unlock the seat f rom the f loor by
pulling the lock release lever
under the seat cushion’s f ront
edge and lif ting the rear of the
seat.
Unhook the f ront of the seat f rom
the f loor by pulling it back slightly,
then pivoting it upward. Your vehicle has a plus-one seat for
the second row center position.
You can remove the plus-one seat
when it is not used. Do not remove
the seat while driving.
2.
3.
Except U.S. LX and Canadian DX models
Removing the Second Row
Plus-One Seat
Seats
178
�\f���—�\f���—���
�y�
�
�������\f���y���
�(���������\f�y�\f�
�����y
2009 Odyssey