Page 169 of 532
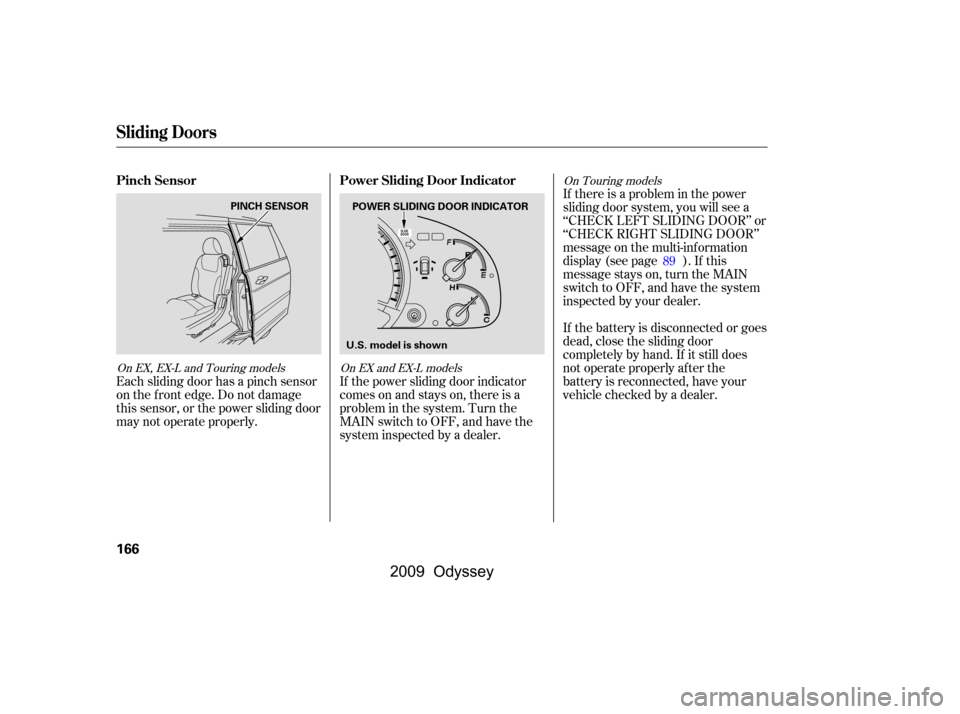
If the power sliding door indicator
comesonandstayson,thereisa
problem in the system. Turn the
MAIN switch to OFF, and have the
system inspected by a dealer.
Each sliding door has a pinch sensor
on the f ront edge. Do not damage
this sensor, or the power sliding door
may not operate properly. If there is a problem in the power
sliding door system, you will see a
‘‘CHECK LEFT SLIDING DOOR’’ or
‘‘CHECK RIGHT SLIDING DOOR’’
message on the multi-information
display (see page ). If this
message stays on, turn the MAIN
switch to OFF, and have the system
inspected by your dealer.
If the battery is disconnected or goes
dead, close the sliding door
completely by hand. If it still does
not operate properly af ter the
battery is reconnected, have your
vehicle checked by a dealer.
89
On EX and EX-L models On Touring models
On EX, EX-L and Touring models
Pinch Sensor Power Sliding Door Indicator
Sliding Doors
166
PINCH SENSOR
POWER SLIDING DOOR INDICATOR
U.S. model is shown
�\f���—�\f���—���
�y�
�
���������
�y���
�(���������\f�y�\f�
���
�y
2009 Odyssey
Page 186 of 532
If the engine is lef t idling f or an
extended period, do not use the
seat heaters, even on the LO
setting. It can weaken the battery,
causing hard starting.
Use the HI setting only to heat the
seats quickly, because it draws
large amounts of current f rom the
battery.
Follow these precautions when using
the seat heaters:
In the HI setting, the heater turns off
when the seat gets warm, and turns
back on after the seat’s temperature
drops.
In LO, the heater does not cycle with
temperature change.
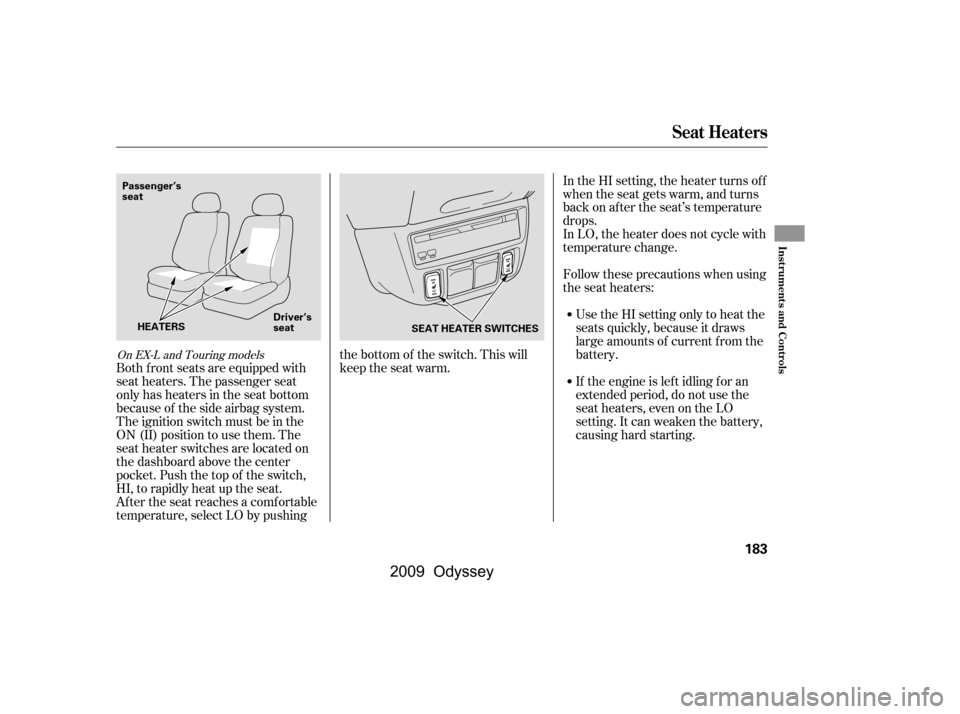
Both f ront seats are equipped with
seat heaters. The passenger seat
only has heaters in the seat bottom
because of the side airbag system.
The ignition switch must be in the
ON (II) position to use them. The
seat heater switches are located on
the dashboard above the center
pocket. Push the top of the switch,
HI, to rapidly heat up the seat.
After the seat reaches a comfortable
temperature, select LO by pushing the bottom of the switch. This will
keep the seat warm.
On EX-L and Touring models
Seat Heaters
Inst rument s and Cont rols
183
SEAT HEATER SWITCHES
Passenger’s
seat
Driver’s
seat
HEATERS
�\f���—�\f���—���
�y�
�
�����������y���
�(���������\f�y�\f�
�����y
2009 Odyssey
Page 188 of 532
Doing any of the f ollowing af ter
pressing the MEMO button will
cancel the storing procedure.Not press a memory button within
5 seconds.
To select a memorized position, do
this:
Pressing the MEMO button again
within 5 seconds.
Press the desired memory button
(1 or 2) until you hear a beep.
Readjust the seat position.
Readjusting the outside mirror
position.
All stored driving positions will be
lost if your vehicle’s battery goes
dead or is disconnected.
Each memory button stores only one
driving position. Storing a new
position erases the previous setting
stored in that button’s memory. If
you want to add a new position while
retaining the current one, use the
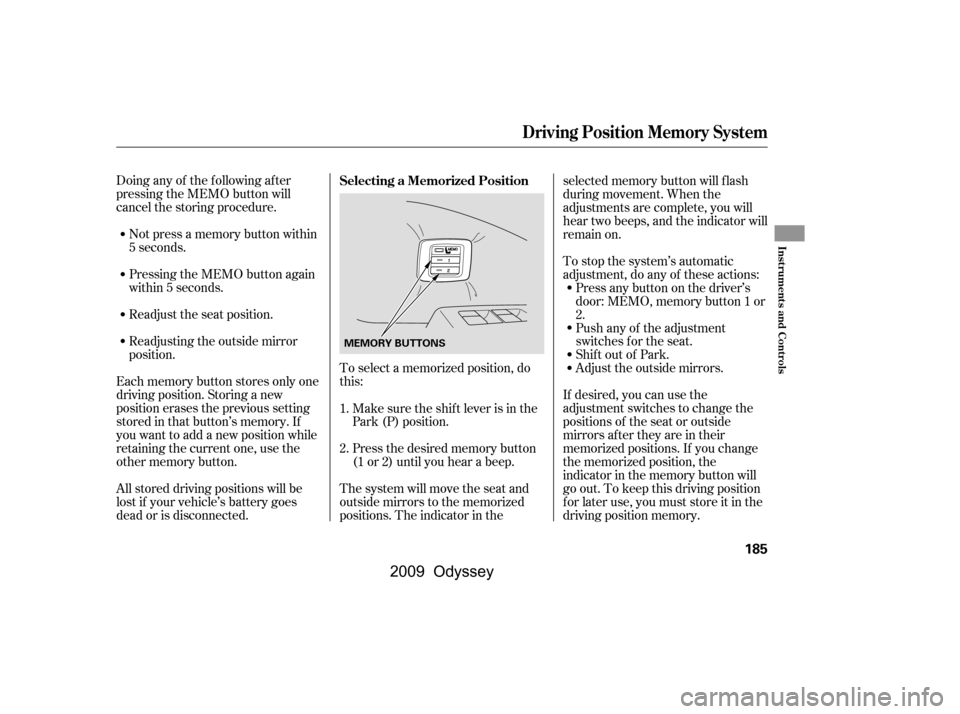
other memory button. The system will move the seat and
outside mirrors to the memorized
positions. The indicator in theselected memory button will f lash
during movement. When the
adjustments are complete, you will
hear two beeps, and the indicator will
remain on.
To stop the system’s automatic
adjustment, do any of these actions:
Press any button on the driver’s
door: MEMO, memory button 1 or
2.
Push any of the adjustment
switches f or the seat.
Shif t out of Park.
Adjust the outside mirrors.
If desired, you can use the
adjustment switches to change the
positions of the seat or outside
mirrors af ter they are in their
memorized positions. If you change
the memorized position, the
indicator in the memory button will
go out. To keep this driving position
f or later use, you must store it in the
driving position memory.
Make sure the shif t lever is in the
Park (P) position.
1.
2.
Selecting a Memorized Position
Driving Position Memory System
Inst rument s and Cont rols
185
MEMORY BUTTONS
�\f���—�\f���—���
�y�
�
�������\f���y���
�(���������\f�y�\f�
���\f�y
2009 Odyssey
Page 190 of 532
Press the UNLOCK button a
second time, and hold it. The
passenger’s doors unlock, and all
f our windows start to open. To
stop the windows, release the
button.
To open the windows f urther,
press the button again (within 10
seconds of step 1) and hold it. If
the windows stop bef ore the
desired position, repeat steps 1
and 2.
If your vehicle’s battery is
disconnected or goes dead, or the
driver’s window f use is removed, the
AUTO f unction may be disabled. If
the AUTO f unction is disabled, the
power window system will need to be
reset af ter reconnecting the battery
or installing the f use.
If the power windows do not operate
properly af ter resetting, have your
vehicle checked by your dealer.
Pull and hold the driver’s window
switch to close the window
completely, then hold the switch
f or about 2 seconds.
Start the engine. Push down and
hold the driver’s window switch
until the window is f ully open.
You cannot close the windows with
the remote transmitter.
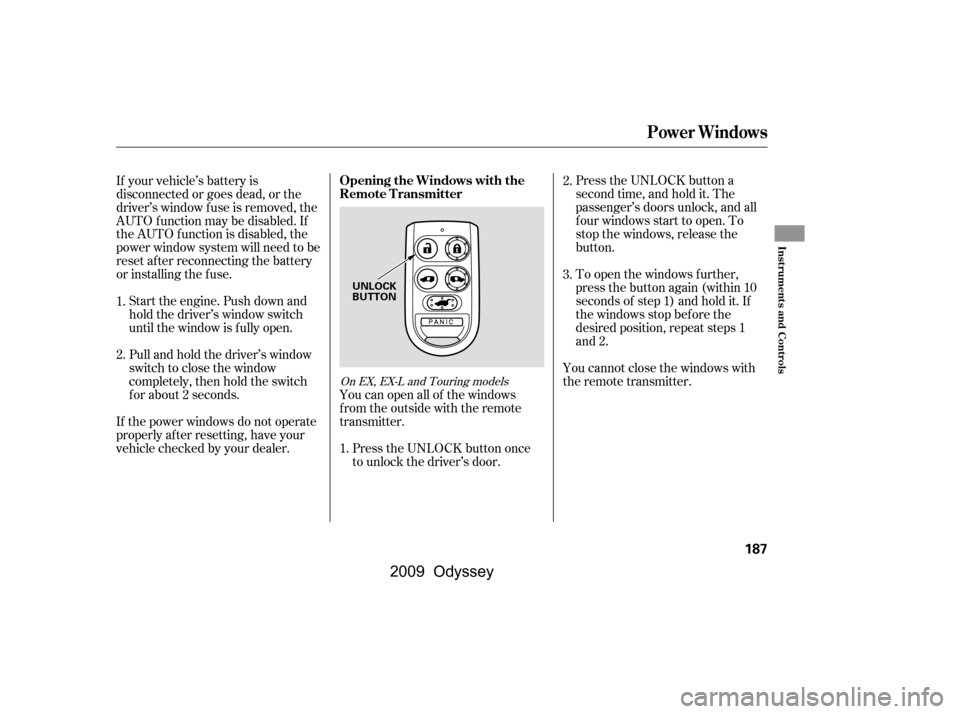
You can open all of the windows
from the outside with the remote
transmitter.
Press the UNLOCK button once
to unlock the driver’s door.
1.
2.
3.
1. 2.
On EX, EX-L and Touring models
Opening the Windows with the
Remote Transmitter
Power Windows
Inst rument s and Cont rols
187
UNLOCK
BUTTON
�\f���—�\f���—���
�y�
�
�����������y���
�(���������\f�y�\f�
�����y
2009 Odyssey
Page 284 of 532
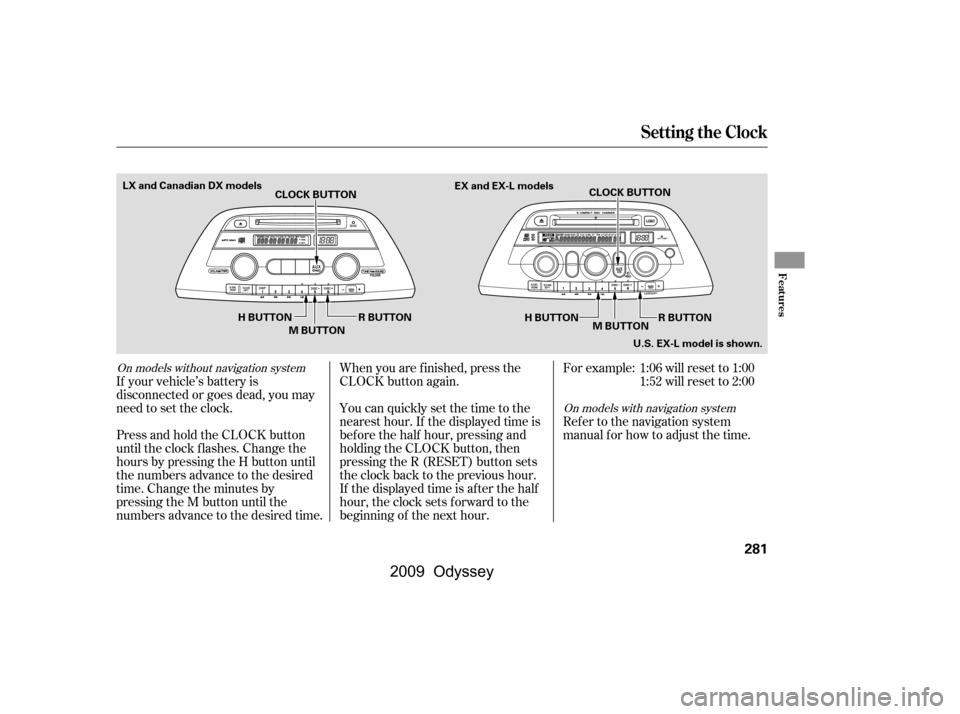
If your vehicle’s battery is
disconnected or goes dead, you may
need to set the clock.You can quickly set the time to the
nearest hour. If the displayed time is
bef ore the half hour, pressing and
holding the CLOCK button, then
pressing the R (RESET) button sets
the clock back to the previous hour.
If the displayed time is after the half
hour, the clock sets f orward to the
beginning of the next hour.
When you are f inished, press the
CLOCK button again.For example: 1:06 will reset to 1:00
1:52 will reset to 2:00
Press and hold the CLOCK button
until the clock f lashes. Change the
hours by pressing the H button until
the numbers advance to the desired
time. Change the minutes by
pressing the M button until the
numbers advance to the desired time. Refer to the navigation system
manual f or how to adjust the time.
On models without navigation system
On models with navigation system
Setting the Clock
Features
281
CLOCK BUTTON
R BUTTON
M BUTTON CLOCK BUTTON
H BUTTON R BUTTON
M BUTTON
EX and EX-L models
U.S. EX-L model is shown.
H BUTTON
LX and Canadian DX models
�\f���—�\f���—���
�y�
�
�������\f���y���
�(���������\f�y�\f�������y
2009 Odyssey
Page 287 of 532

Your vehicle’s audio system may
disable itself if it is disconnected
f rom electrical power f or any reason.
To make it work again, you must
enter a specif ic f ive-digit code with
the preset buttons. Because there
are hundreds of number
combinations possible f rom the f ive
digits, making the system work
without knowing the exact code is
nearly impossible.
Youshouldhavereceivedacardthat
lists your audio system code number
and serial number. It is best to store
this card in a saf e place at home. In
addition, you should write the audio
system’s serial number in this owner’s
manual.If you make a mistake entering the
code, do not start over; complete the
f ive-digit sequence, then enter the
correct code. You have ten tries to
enter the correct code. If you are
unsuccessful in ten attempts, you
must then leave the system on for 1
hour bef ore trying again.
If you lose the card, you must obtain
the code number f rom your dealer.
To do this, you will need the audio
system’s serial number.
If your vehicle’s battery is
disconnected or goes dead, or the
radio f use is removed, the audio
system will disable itself . If this
happens, you will see CODE in the
frequencydisplaythenexttimeyou
turn on the system. Use the preset
buttons to enter the five-digit code.
Thecodeisontheradiocodecard
included in your owner’s manual kit.
When it is entered correctly, the
radio will start playing.
On EX, EX-L and Touring models
Radio T hef t Protection
284
�\f���—�\f���—���
�y�
�
�����������y���
�(���������\f�y�\f�������y
2009 Odyssey
Page 315 of 532
If it takes several pushes on the
button to operate the rear
entertainment system, have your
dealer replace the batteries as soon
as possible.
The rear control panel can be
detached f rom the ceiling unit and
used as a remote control. To remove
it f rom the ceiling unit, press the
release button. The control panel will
swing down partway. Pivot it down
f urther past the detent until it
detaches f rom the hinge. To reinstall
it, reverse the procedure.
Battery type: BR3032An improperly disposed of battery
can hurt the environment.
Always conf irm local regulations f or
battery disposal.
Remote Control
Replacing the Remote Control
Batteries
Rear Entertainment System
312
COVER
RELEASE BUTTON
�\f���—�\f���—���
�y�
�
�����������y���
�(���������\f�y�\f���
���y
2009 Odyssey
Page 319 of 532
Auxiliary input jacks and headphone
connectors f or the rear
entertainment system are under the
third row seat armrest on the driver’s
side. To access these connectors,
open the cover by pulling up on the
lever.
Remove the battery. Install the new
battery in the earpiece as shown in
the diagram next to the battery slot.
Slide the cover back into place on the
earpiece, then press down on the
back edge to lock it in place.
An improperly disposed of battery
can hurt the environment.
Always conf irm local regulations f or
battery disposal.
Each headphone uses one AAA
battery. The battery is under the
cover on the lef t earpiece. To
remove the cover, insert a coin in the
slot and twist it slightly to pry the
cover away f rom the earpiece. Pull
the cover outward, and pivot it out of
the way.
Rear Entertainment System
Auxiliary Input JacksReplacing Bat t eries
316
COVER
BATTERY LEVER
ARMREST
COIN
�\f���—�\f���—���
�y�
�
�����������y���
�(���������\f�y�\f�����
�y
2009 Odyssey