Page 97 of 345
Keep the inside and outside mirrors
clean and adjusted for best visibility.
Be sure to adjust the mirrors before
you start driving.
The inside mirror has day and night
positions. The night position reduces
glare from headlights behind you.
Flip the tab on the bottom edge of
the mirror to select the day or night
position.Adjusting the Power Mirrors
1. Turn the ignition switch to the ON
(II) position.
2. Move the selector switch to L (driver's side) or R (passenger's
side). 3. Push the appropriate edge of the
adjustment switch to move the
mirror right, left, up, or down.
4. When you finish, move the selector switch to the center (off)
position. This turns the adjustment
switch off to keep your settings.
TAB
SELECTOR SWITCH
ADJUSTMENT SWITCH
Mirrors
93
Instruments and Controls
2009 Element
Page 98 of 345
Rear WindowsTo open a rear window, pull the lever
towards you, then push it out until it
locks. To close the rear window pull
the lever towards you, then push it
back. Make sure the window is fully
closed and locked.Parking Brake
To apply the parking brake, pull the lever
up fully. To release it, pull up slightly,
push the button, and lower the lever. The
parking brake indicator on the instrument
panel should go out when the parking
brake is fully released (see page58).
Driving the vehicle with the parking
brake applied can damage the rear
brakes and axles. A beeper will sound if
the vehicle is driven with the parking
brake on.
PARKING BRAKE LEVER
Rear Windows, Parking Brake94
2009 Element
Page 99 of 345

Light Control SwitchOn EX and SC modelsThe light control switch has three
positions: OFF, Door Activated, and
ON.When the switch is in the OFFposition:●The individual map lights can be
turned on and off by pressing the
lenses.●The ceiling light cannot be turned
on.
When the switch is in the door
activated position:●The individual map lights come on
when any door is opened, or when
the remote transmitter is used to
unlock the doors (see page77).
When the doors are closed, each
light can be turned on and off by
pushing the lens.
After all doors are closed tightly, the
lights dim slightly, then fade out in
about 30 seconds.
With any door left open, the lights stay
on about 3 minutes, then go out.
The lights also come on when the key
is removed from the ignition switch.When the light control switch is in the ON position:●All the individual map lights and
ceiling light come on and stay on as
long as the switch remains in the ON
position.
Individual Map LightsOn EX and SC modelsTurn on the individual map lights by
pushing the lens. Push the lens again
to turn it off.
OFF ON
DOOR ACTIVATED POSITION
Interior Lights
95
Instruments and Controls
2009 Element
Page 100 of 345
Courtesy LightOn vehicles with navigation systemThe courtesy light between the map
lights comes on when you turn the
parking lights on. To adjust its
brightness, turn the select/reset
knob on the instrument panel (see
page72).Ceiling Light
The ceiling light has a three-position
switch: ON, Door Activated, and OFF.
In the Door Activated (center)
position, the light comes on when you:●Open any door.●Remove the key from the ignition.
If you do not open a door, the light
fades out in about 30 seconds.●Unlock the doors with the key or
remote transmitter.
Cargo Area Light
The cargo area light has a three-
position switch. In the center
position, the light comes on when
you open the hatch.
Ignition Switch Light
The ignition switch light comes on
when you unlock the driver's door,
and fades out about 30 seconds after
you close the door.
COURTESY LIGHT
ON
OFF DOOR ACTIVATED
Interior Lights96
2009 Element
Page 104 of 345

Accessory Power Sockets
Your vehicle has one, two, or three
accessory power sockets, depending
on the model. All models have a front
accessory power socket on the
dashboard above the glove box.
EX and SC models have an accessory
power socket in the cargo area on
the passenger's side.
The SC model has one additional
socket in the center console.
These sockets are intended to supply
power for 12 volt DC accessories that
are rated 120 watts or less (10 amps).
None of the sockets will power an
automotive type cigarette lighter
element. When more than one
socket is being used, the combined
power rating of the accessories
should be 120 watts or less (10
amps).Glove Box
Open the glove box by pulling the
bottom of the handle. Close it with a
firm push. Lock or unlock the glove
box with the master key.
An open glove box can cause
serious injury to your passenger
in a crash, even if the
passenger is wearing the seat
belt.
Always keep the glove box
closed while driving.
Sun Visor
To use the sun visor, pull it down.
When using the sun visor for the
side window, remove the support rod
from the clip, and swing it out.
In this position, the sun visor can be
adjusted by moving it on its slider.
Do not use the extended sun visor
over the inside mirror.
Make sure you put the sun visor
back in place when you are getting
into or out of the vehicle.
Slide
Interior Convenience Items100
2009 Element
Page 135 of 345

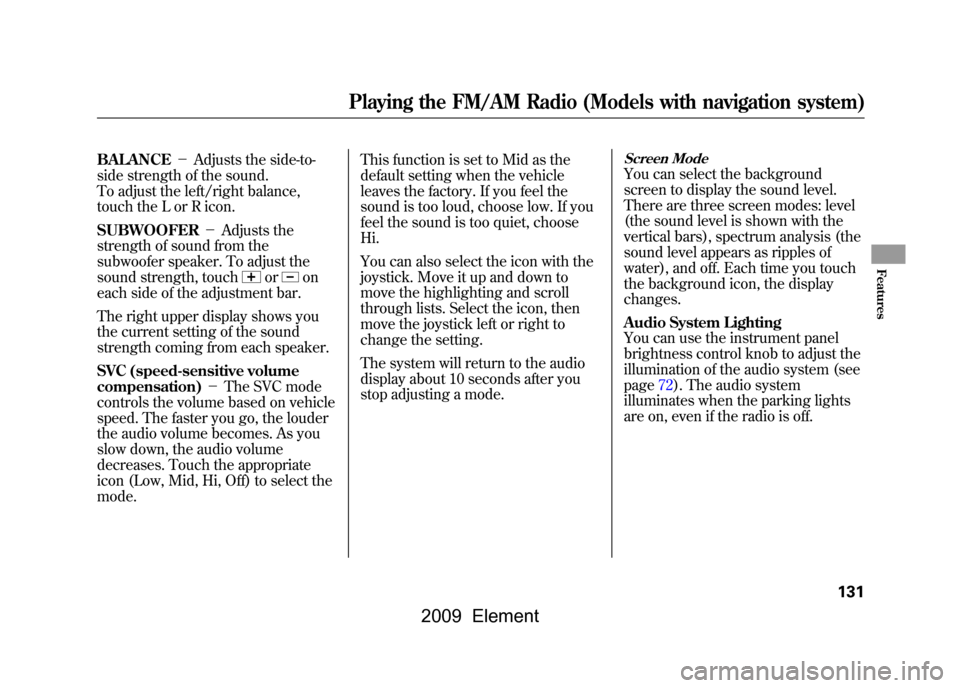
BALANCE-Adjusts the side-to-
side strength of the sound.
To adjust the left/right balance,
touch the L or R icon.
SUBWOOFER -Adjusts the
strength of sound from the
subwoofer speaker. To adjust the
sound strength, touch
or
on
each side of the adjustment bar.
The right upper display shows you
the current setting of the sound
strength coming from each speaker.
SVC (speed-sensitive volume
compensation) -The SVC mode
controls the volume based on vehicle
speed. The faster you go, the louder
the audio volume becomes. As you
slow down, the audio volume
decreases. Touch the appropriate
icon (Low, Mid, Hi, Off) to select the
mode. This function is set to Mid as the
default setting when the vehicle
leaves the factory. If you feel the
sound is too loud, choose low. If you
feel the sound is too quiet, choose
Hi.
You can also select the icon with the
joystick. Move it up and down to
move the highlighting and scroll
through lists. Select the icon, then
move the joystick left or right to
change the setting.
The system will return to the audio
display about 10 seconds after you
stop adjusting a mode.
Screen ModeYou can select the background
screen to display the sound level.
There are three screen modes: level
(the sound level is shown with the
vertical bars), spectrum analysis (the
sound level appears as ripples of
water), and off. Each time you touch
the background icon, the display
changes.
Audio System Lighting
You can use the instrument panel
brightness control knob to adjust the
illumination of the audio system (see
page72).The audio system
illuminates when the parking lights
are on, even if the radio is off.
Playing the FM/AM Radio (Models with navigation system)
131
Features
2009 Element
Page 147 of 345

Push the AUDIO button beside the
screen to show the audio display and
operate the disc player.
You can also operate the audio
system without using the control
icons on the audio screen. Press the
CD/XM button. The status bar
appears on the bottom of the screen.
On the navigation screen, you can
see the audio information whenever
you touch the AUDIO INFO icon on
the lower portion of the screen.
When playing a CD recorded with
text data, the track, album, and artist
name are shown on the audio
display. When playing a disc in MP3
or WMA, the folder number and
name, the file number and name, the
artist name, and the elapsed time are
shown. The system will continuously
play a disc until you change modes.
If the disc was not recorded with text
data, it will not be displayed.
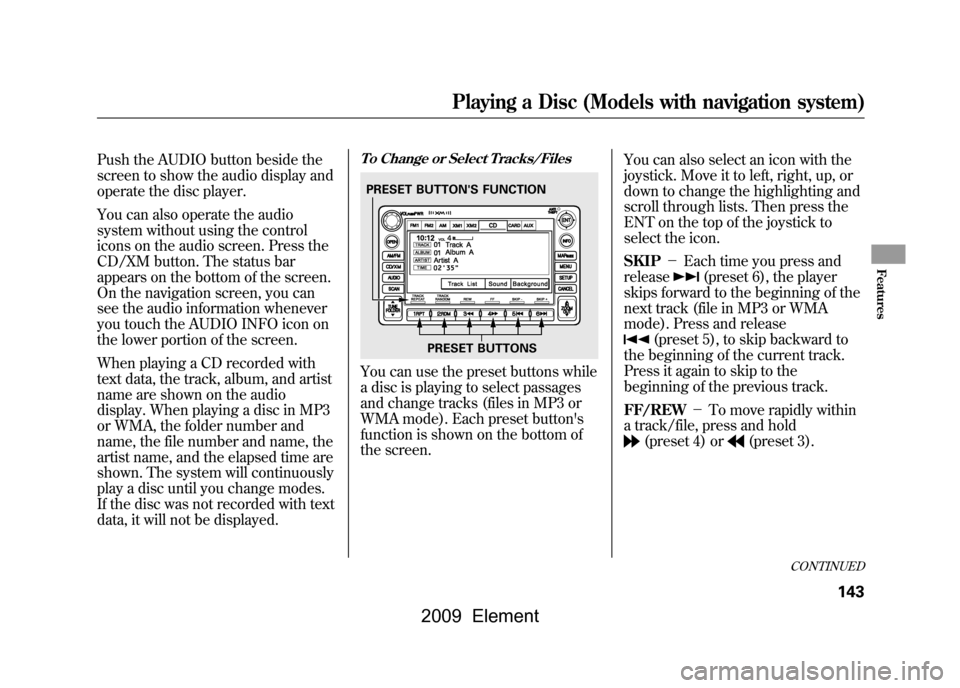
To Change or Select Tracks/FilesYou can use the preset buttons while
a disc is playing to select passages
and change tracks (files in MP3 or
WMA mode). Each preset button's
function is shown on the bottom of
the screen.You can also select an icon with the
joystick. Move it to left, right, up, or
down to change the highlighting and
scroll through lists. Then press the
ENT on the top of the joystick to
select the icon.
SKIP
-Each time you press and
release
(preset 6), the player
skips forward to the beginning of the
next track (file in MP3 or WMA
mode). Press and release
(preset 5), to skip backward to
the beginning of the current track.
Press it again to skip to the
beginning of the previous track.
FF/REW -To move rapidly within
a track/file, press and hold(preset 4) or
(preset 3).
PRESET BUTTON'S FUNCTION
PRESET BUTTONS
CONTINUED
Playing a Disc (Models with navigation system)
143
Features
2009 Element
Page 154 of 345

To Play a PC Card
You operate the PC card player with
the same controls used for the radio
and the disc player. To load or play a
card, the ignition switch must be in
the ACCESSORY (I) or ON (II)
position.
The PC card player reads and plays
cards in MP3 or WMA formats.
Depending on the format, the screen
will indicate‘‘MP3 ’’or ‘‘WMA ’’when
a card is playing. The card limit of
the player is 99 folders and 999
tracks. If the card has a complex
structure, it takes some time for the
system to begin playing it.
Based on PCMCIA 2.1/JEIDA 4.2,
the recommended PC cards for the
PC card reader are:
CompactFlash
Flash ATA
SD memory card Always use the recommended
memory card with the appropriate
adapter (if an adapter is needed).
Some memory cards will not work in
this unit.
NOTE:
●When you insert a PC card into the
slot, make sure you put it in
straight. If you cannot insert it,
remove it, and insert again.●Do not keep PC cards in the
vehicle. Direct sunlight and high
heat will damage them.●To avoid damaging the card
reader, do not insert hard disc
drive cards into the PC card slot.●You cannot close the screen (move
it to the upright position) until the
PC card is inserted all the way into
its slot or removed.
●Never insert foreign objects into
the PC card slot.
The specifications for compatible
MP3 files are: – Sampling frequency:
32/44.1/48 kHz (MPEG1)
16/22.05/24 kHz (MPEG2)
– Bitrate:
32/40/48/56/64/80/96/112/128/
160/192/224/256/320 kbps
(MPEG1)
8/16/24/32/40/48/56/64/80/96/
112/128/160 kbps (MPEG2)
– Compatible with variable bitrate
and multi-session
– Maximum layers
(including ROOT): 8 layers
Playing a PC Card (Models with navigation system)150
2009 Element