2009 GMC SIERRA 1500 fuel
[x] Cancel search: fuelPage 231 of 602

Light On Steady:An emission control system
malfunction has been detected on the vehicle.
Diagnosis and service might be required.
An emission system malfunction might be corrected by
doing the following:
Make sure the fuel cap is fully installed. SeeFilling
the Tank on page 5-11. The diagnostic system
can determine if the fuel cap has been left off or
improperly installed. A loose or missing fuel cap
allows fuel to evaporate into the atmosphere. A few
driving trips with the cap properly installed should
turn the light off.
If the vehicle has been driven through a deep puddle
of water, the vehicle’s electrical system might be wet.
The condition is usually corrected when the electrical
system dries out. A few driving trips should turn the
light off.
Make sure to fuel the vehicle with quality fuel. Poor
fuel quality causes the engine not to run as efficiently
as designed and can cause: stalling after start-up,
stalling when the vehicle is changed into gear,
misring, hesitation on acceleration, or stumbling on
acceleration. These conditions might go away once
the engine is warmed up.
If one or more of these conditions occurs, change the
fuel brand used. It will require at least one full tank of
the proper fuel to turn the light off.
SeeGasoline Octane on page 5-7.
If none of the above have made the light turn off, your
dealer/retailer can check the vehicle. The dealer/retailer
has the proper test equipment and diagnostic tools to
x any mechanical or electrical problems that might have
developed.
3-47
Page 235 of 602
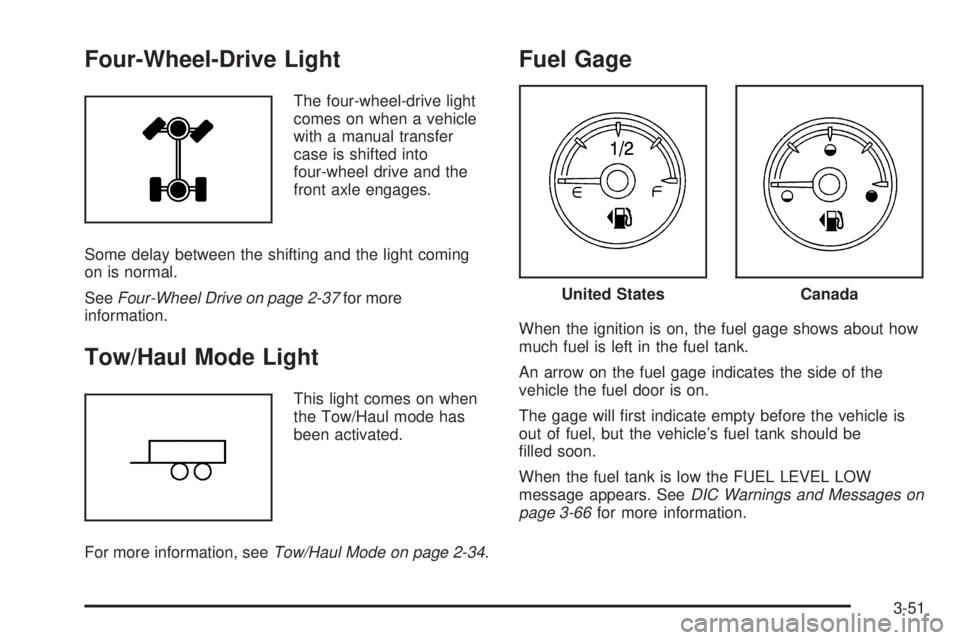
Four-Wheel-Drive Light
The four-wheel-drive light
comes on when a vehicle
with a manual transfer
case is shifted into
four-wheel drive and the
front axle engages.
Some delay between the shifting and the light coming
on is normal.
SeeFour-Wheel Drive on page 2-37for more
information.
Tow/Haul Mode Light
This light comes on when
the Tow/Haul mode has
been activated.
For more information, seeTow/Haul Mode on page 2-34.
Fuel Gage
When the ignition is on, the fuel gage shows about how
much fuel is left in the fuel tank.
An arrow on the fuel gage indicates the side of the
vehicle the fuel door is on.
The gage will rst indicate empty before the vehicle is
out of fuel, but the vehicle’s fuel tank should be
lled soon.
When the fuel tank is low the FUEL LEVEL LOW
message appears. SeeDIC Warnings and Messages on
page 3-66for more information.
United StatesCanada
3-51
Page 236 of 602
Here are some situations owners can experience with
the fuel gage. None of these indicate a problem with the
fuel gage.
At the gas station, the fuel pump shuts off before
the gage reads full.
It takes a little more or less fuel to ll up than the
fuel gage indicated. For example, the gage may
have indicated the tank was half full, but it actually
took a little more or less than half the fuel tank’s
capacity to ll it.
The gage goes back to empty when the ignition is
turned off.
For a diesel engine, see “Fuel Gage” in the Diesel
Engine Supplement.
Low Fuel Warning Light
This light, under the fuel
gage, comes on briey
while the engine is being
started.
This light and a chime comes on when the fuel tank is low
on fuel. The Driver Information Center also displays a
“FUEL LEVEL LOW” message. SeeDIC Warnings and
Messages on page 3-66for more information. When fuel
is added this light and message should go off. If it does
not, have the vehicle serviced by your dealer/retailer.
3-52
Page 237 of 602
Driver Information Center (DIC)
Your vehicle has a Driver Information Center (DIC).
The DIC displays information about your vehicle. It also
displays warning messages if a system problem is
detected.
All messages will appear in the DIC display located
below the tachometer in the instrument panel cluster.
The DIC comes on when the ignition is on. After a short
delay, the DIC will display the information that was last
displayed before the engine was turned off.
If your vehicle has DIC buttons, see “DIC Operation and
Displays (With DIC Buttons)” later in this section and
DIC Vehicle Customization (With DIC Buttons) on
page 3-75for the displays available.
If your vehicle does not have DIC buttons, see “DIC
Operation and Displays (Without DIC Buttons)” later in
this section for the displays available.
DIC Operation and Displays
(With DIC Buttons)
If your vehicle has DIC buttons, the information below
explains the operation of this system.
The DIC has different displays which can be accessed
by pressing the DIC buttons located on the instrument
panel, next to the steering wheel.
The DIC displays trip, fuel, and vehicle system
information, and warning messages if a system problem
is detected.
The DIC also allows some features to be customized.
SeeDIC Vehicle Customization (With DIC Buttons)
on page 3-75for more information.
If your vehicle has DIC buttons, you can also use the
trip odometer reset stem to view some of the DIC
displays. See “DIC Operation and Displays (Without DIC
Buttons)” later in this section.
3-53
Page 238 of 602
DIC Buttons
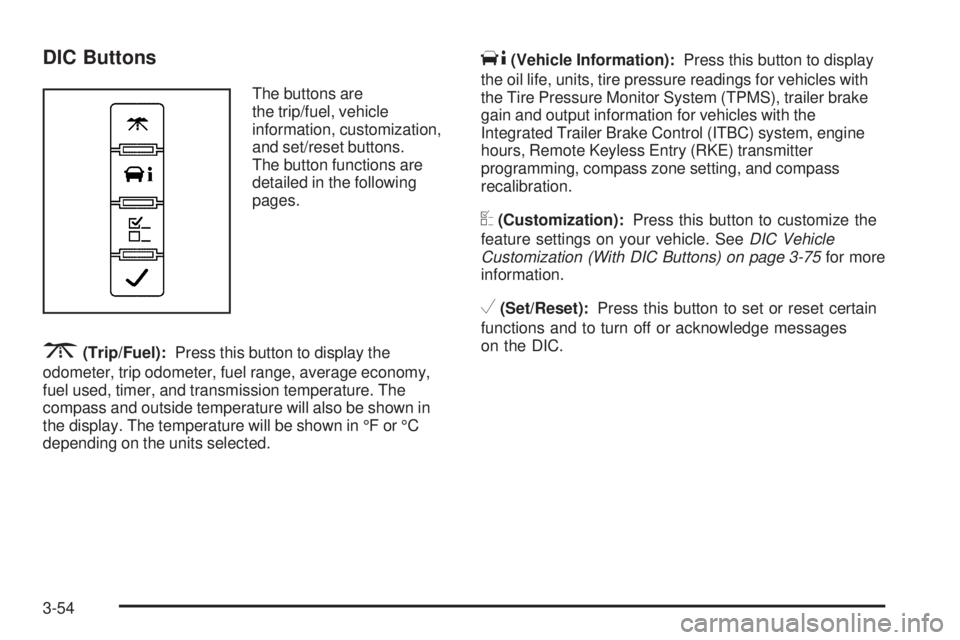
The buttons are
the trip/fuel, vehicle
information, customization,
and set/reset buttons.
The button functions are
detailed in the following
pages.
3(Trip/Fuel):Press this button to display the
odometer, trip odometer, fuel range, average economy,
fuel used, timer, and transmission temperature. The
compass and outside temperature will also be shown in
the display. The temperature will be shown in °F or °C
depending on the units selected.
T(Vehicle Information):Press this button to display
the oil life, units, tire pressure readings for vehicles with
the Tire Pressure Monitor System (TPMS), trailer brake
gain and output information for vehicles with the
Integrated Trailer Brake Control (ITBC) system, engine
hours, Remote Keyless Entry (RKE) transmitter
programming, compass zone setting, and compass
recalibration.
U(Customization):Press this button to customize the
feature settings on your vehicle. SeeDIC Vehicle
Customization (With DIC Buttons) on page 3-75for more
information.
V(Set/Reset):Press this button to set or reset certain
functions and to turn off or acknowledge messages
on the DIC.
3-54
Page 239 of 602
Trip/Fuel Menu Items
3
(Trip/Fuel):Press this button to scroll through the
following menu items:
Odometer
Press the trip/fuel button until ODOMETER displays. This
display shows the distance the vehicle has been driven in
either miles (mi) or kilometers (km). Pressing the trip
odometer reset stem will also display the odometer.
To switch between English and metric measurements,
see “Units” later in this section.
Trip Odometer
Press the trip/fuel button until TRIP displays. This display
shows the current distance traveled in either miles (mi) or
kilometers (km) since the last reset for the trip odometer.
Pressing the trip odometer reset stem will also display the
trip odometer.The trip odometer can be reset to zero by pressing the
set/reset button while the trip odometer is displayed. You
can also reset the trip odometer while it is displayed by
pressing and holding the trip odometer reset stem.
The trip odometer has a feature called the retro-active
reset. This can be used to set the trip odometer to
the number of miles (kilometers) driven since the ignition
was last turned on. This can be used if the trip
odometer is not reset at the beginning of the trip.
To use the retro-active reset feature, press and hold
the set/reset button for at least four seconds. The trip
odometer will display the number of miles (mi) or
kilometers (km) driven since the ignition was last turned
on and the vehicle was moving. Once the vehicle begins
moving, the trip odometer will accumulate mileage. For
example, if the vehicle was driven 5 miles (8 km) before it
is started again, and then the retro-active reset feature is
activated, the display will show 5 miles (8 km). As the
vehicle begins moving, the display will then increase to
5.1 miles (8.2 km), 5.2 miles (8.4 km), etc.
3-55
Page 240 of 602
Fuel Range
Press the trip/fuel button until FUEL RANGE displays.
This display shows the approximate number of remaining
miles (mi) or kilometers (km) the vehicle can be driven
without refueling. The display will show LOW if the fuel
level is low.
The fuel range estimate is based on an average of the
vehicle’s fuel economy over recent driving history and the
amount of fuel remaining in the fuel tank. This estimate
will change if driving conditions change. For example, if
driving in traffic and making frequent stops, this display
may read one number, but if the vehicle is driven on a
freeway, the number may change even though the same
amount of fuel is in the fuel tank. This is because different
driving conditions produce different fuel economies.
Generally, freeway driving produces better fuel economy
than city driving. Fuel range cannot be reset.
Average Economy
Press the trip/fuel button until AVG ECONOMY displays.
This display shows the approximate average miles per
gallon (mpg) or liters per 100 kilometers (L/100 km).
This number is calculated based on the number of mpg
(L/100 km) recorded since the last time this menu item
was reset. To reset AVG ECONOMY, press and hold the
set/reset button.
Fuel Used
Press the trip/fuel button until FUEL USED displays. This
display shows the number of gallons (gal) or liters (L) of
fuel used since the last reset of this menu item. To reset
the fuel used information, press and hold the set/reset
button while FUEL USED is displayed.
Timer
Press the trip/fuel button until TIMER displays. This
display can be used as a timer.
To start the timer, press the set/reset button while TIMER
is displayed. The display will show the amount of time
that has passed since the timer was last reset, not
including time the ignition is off. Time will continue to be
counted as long as the ignition is on, even if another
display is being shown on the DIC. The timer will record
up to 99 hours, 59 minutes and 59 seconds (99:59:59)
after which the display will return to zero.
To stop the timer, press the set/reset button briey while
TIMER is displayed.
To reset the timer to zero, press and hold the set/reset
button while TIMER is displayed.
3-56
Page 241 of 602

Transmission Temperature
Press the trip/fuel button until TRANS TEMP displays.
This display shows the temperature of the automatic
transmission uid in either degrees Fahrenheit (°F) or
degrees Celsius (°C).
Blank Display
This display shows no information.
Vehicle Information Menu Items
T
(Vehicle Information):Press this button to scroll
through the following menu items:
Oil Life
Press the vehicle information button until OIL LIFE
REMAINING displays. This display shows an estimate
of the oil’s remaining useful life. If you see 99% OIL LIFE
REMAINING on the display, that means 99% of the
current oil life remains. The engine oil life system
will alert you to change the oil on a schedule consistent
with your driving conditions.When the remaining oil life is low, the CHANGE
ENGINE OIL SOON message will appear on the display.
See “CHANGE ENGINE OIL SOON” underDIC
Warnings and Messages on page 3-66. You should
change the oil as soon as you can. SeeEngine Oil on
page 5-17. In addition to the engine oil life system
monitoring the oil life, additional maintenance is
recommended in the Maintenance Schedule in this
manual. SeeScheduled Maintenance (Gasoline Engine)
on page 6-4for more information.
Remember, you must reset the OIL LIFE display
yourself after each oil change. It will not reset itself.
Also, be careful not to reset the OIL LIFE display
accidentally at any time other than when the oil has just
been changed. It cannot be reset accurately until the
next oil change. To reset the engine oil life system, see
Engine Oil Life System on page 5-20.
Units
Press the vehicle information button until UNITS
displays. This display allows you to select between
English or Metric units of measurement. Once in this
display, press the set/reset button to select between
ENGLISH or METRIC units. All of the vehicle information
will then be displayed in the unit of measurement
selected.
3-57