Page 1 of 24

Congratulations on your purchase of a GMC Acadia. Please read this information and your Owner Manual to
ensure an outstanding ownership experience. Note that your vehicle may not include all the features described in
this booklet. Keep this booklet with your Owner Manual for easy reference.
DRIVER INFORMATIONInstrument Panel . . . . . . . . . . . . .2
Instrument Panel Cluster . . . . . . .3
Driver Information Center . . . . . . .4
Head-Up Display . . . . . . . . . . . . . .5
SAFETY & SECURITYRemote Keyless Entry . . . . . . . . .6
OnStar® . . . . . . . . . . . . . . . . . . . . . .6
Child Restraints (LATCH) . . . . . . .7
COMFORT Seat Adjustments . . . . . . . . . . . . .7
2nd-Row Seats . . . . . . . . . . . . . . .8
3rd-Row Seats . . . . . . . . . . . . . . . .9
Heated Seat Controls . . . . . . . . . .9
Heated and Cooled Seat
Controls . . . . . . . . . . . . . . . . . . . . .9
Memory Seat and Mirrors . . . . . . .9
Steering Wheel Adjustment . . . .10
Dual Automatic Climate
Controls . . . . . . . . . . . . . . . . . . . .10Manual Climate Controls . . . . . .11
Rear Seat Climate Controls . . . .12
ENTERTAINMENT Audio System Features . . . . . . .12
XM®Radio . . . . . . . . . . . . . . . . . .14
Navigation Entertainment
System . . . . . . . . . . . . . . . . . . . . .14
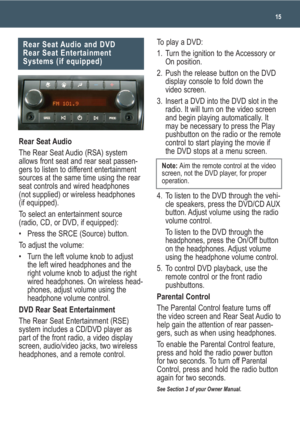
Rear Seat Audio and DVD
Rear Seat Entertainment
Systems . . . . . . . . . . . . . . . . . . . .15
Audio Steering Wheel Controls .16
Bluetooth
®System . . . . . . . . . . .16
CONVENIENCE Automatic Headlamp System . . .16
Interior Lighting Features . . . . . .17
Outside Power Foldaway
Mirrors . . . . . . . . . . . . . . . . . . . . .17
Power Windows . . . . . . . . . . . . . .17
Sunroof . . . . . . . . . . . . . . . . . . . . .18
Windshield Wipers and Washer .18Heated Washer Fluid . . . . . . . . . .19
Cruise Control . . . . . . . . . . . . . . .19
115-Volt Outlet . . . . . . . . . . . . . . .19
Center Console Features . . . . . .20
2nd-Row Console Features . . . .20
Ultrasonic Rear Park Assist . . . .20
Power Liftgate . . . . . . . . . . . . . . .21
Remote Vehicle Start . . . . . . . . .21
PERFORMANCE & MAINTENANCE Refueling the Vehicle . . . . . . . . .22
Automatic Transmission
Operation . . . . . . . . . . . . . . . . . . .22
StabiliTrak
® – Stability Control
System . . . . . . . . . . . . . . . . . . . . .22
Trailer Towing . . . . . . . . . . . . . . .22
Tire Pressure Monitor . . . . . . . . .23
Resetting the Oil Life System . .23
OWNER INFORMATIONRoadside Assistance . . . . . . . . .24
My GMLink . . . . . . . . . . . . . . . . . .24
Page 2 of 24
Getting to Know Your Acadia2
The main features of the instrument
panel include:
A. Air Outlets
B. Turn Signal/Windshield Wipers/
Multifunction Lever
C. Instrument Panel Cluster
D. Driver Information Center Buttons
(if equipped)
E. Audio System/Navigation System
(if equipped)
F. Hazard Warning Flashers Button
G. Passenger Airbag Status Indicator
H. Exterior Lamps Control
I. Instrument Panel Brightness Control
J. Hood ReleaseK. Cruise Control Buttons
L. Tilt and Telescopic Steering Wheel
Lever
M. Horn
N. Audio Steering Wheel Controls
(if equipped)
O. Climate Controls
P. Heated Seat Buttons (if equipped)
Q. Shift Lever
R. Traction Control Button
S. Tow/Haul Mode Button (if equipped)
T. Power Liftgate Button (if equipped)
U. Accessory Power Outlet
V. Glove Box
See Section 3 of your Owner Manual.
Instrument Panel
DRIVER INFORMATION
ABDEAFAGC
HIJKLMNOPVQRSPTU
Page 3 of 24
3
See Section 3 of your Owner Manual.
Your vehicle’s instrument panel is
equipped with this cluster or one very
similar to it. The instrument panel cluster
includes these key features:
A. Engine Coolant Temperature Gauge
B. Tachometer
C. Malfunction Indicator Lamp
(Check Engine Light)
D. Tire Pressure Warning Light
E. Driver Information Center
F. Fuel Gauge
G. Speedometer
H. Security LightI. Cruise Control Set Light
J. Antilock Brake System Warning Light
K. StabiliTrak Warning Light
L. Voltmeter
Note:The instrument panel cluster is
designed to let you know about many
important aspects of your vehicle’s opera-
tion. It is important to read your Owner
Manual and become familiar with the
information being relayed to you by the
lights, gauges and indicators, as well as
what action can be taken to ensure safety
and to prevent damage.
Instrument Panel Cluster
ABCDEFGHIKJL
Page 4 of 24
 provides vehicle information, vehi-
cle feature customization, and vehicle
warning messages. The DIC messages
will be shown on the instrument panel
clu")
Your vehicle’s Driver Information Center
(DIC) provides vehicle information, vehi-
cle feature customization, and vehicle
warning messages. The DIC messages
will be shown on the instrument panel
cluster display.
DIC Reset Stem
On vehicles with the base DIC, press
the reset stem located on the instru-
ment panel cluster while the vehicle is
parked to display the Odometer, Trip
Odometers, Oil Life, Park Assist (if
equipped), Tire Pressure System
Programming, Units and Display
Language.
DIC Buttons (if equipped)
The uplevel DIC includes the following
buttons located below the radio on the
instrument panel:
(Set/Reset):Press this button to set
or reset DIC information while it is dis-
played or to acknowledge a warning
message.
Getting to Know Your Acadia4
(Customization):Press this button
to scroll through the following custom-
ization settings:
• Display Language
• Auto Door Lock
• Auto Door Unlock
• Remote Door Lock
• Remote Door Unlock
• Delay Door Lock
• Exit Lighting
• Approach Lighting
• Chime Volume
• Park Tilt Mirrors (if equipped)
• Easy Exit Seat (if equipped)
• Memory Seat Recall (if equipped)
• Remote Start (if equipped)
• Factory Settings
(Vehicle Information):Press this
button to display the following vehicle
information:
• Oil Life
• Park Assist (if equipped)
• Units
• Tire Pressure
• Tire Pressure System Programming
• Remote Keyless Entry Programming
(Trip/Fuel):Press this button to
display the following trip and fuel
information:
• Odometer
• Trip Odometers
• Fuel Range
• Average Economy
• Timer
• Fuel Used
• Average SpeedDriver Information Center
Page 5 of 24

projects a
range of vehicle
information on
the windshield,
reducing the need to look away from the
road. The information appears as an
image toward the front of the vehicle.")
The Head-Up
Display (HUD)
projects a
range of vehicle
information on
the windshield,
reducing the need to look away from the
road. The information appears as an
image toward the front of the vehicle.
The information displayed by the HUD
may include the speedometer reading,
RPM reading, transmission position,
outside air temperature, high-beam
headlamps and turn signal indicators.
The following HUD controls are located
on the instrument panel to the right of
the steering wheel:
(Off): To turn off the HUD image,
rotate the dimming knob fully
counterclockwise.
Brightness: Rotate the dimming knob
clockwise to brighten and counterclock-
wise to dim the HUD image.
(Up) (Down):Press the up or
down arrow to adjust the position of the
HUD image on the windshield. (It cannot
be adjusted side-to-side.)
If you change your seat position, you
may have to readjust the HUD image for
proper viewing.
5
Head-Up Display (if equipped)
Customization Settings with DIC
Buttons
To customize features:
1. With the vehicle in Park, turn on the
ignition.
2. Press the (Customization) button
to enter the Feature Settings menu.
3. Press the button to scroll through
the available customization features.
4. With the desired feature displayed,
press the (Set/Reset) button to
access the settings.
5. Press the button to scroll through
the available settings.
6. With the desired setting displayed,
press the button to select it.
7. Press the button to scroll to the
next available customization feature.
8. To exit the Feature Settings menu,
press the button until FEATURE
SETTINGS EXIT is displayed, and
then press the button; or press
the button or the button.
Warnings and Messages
The DIC provides a variety of vehicle
warning messages (depending on
optional equipment) if a problem is
sensed in a vehicle system. To acknowl-
edge a message and clear it from the
display, press the DIC reset stem or any
DIC button. Some urgent messages
cannot be cleared from the DIC display.
If you have a current OnStar subscrip-
tion, and a warning message appears,
you can press the OnStar button and
speak to an OnStar Advisor. In many
vehicles, OnStar Advisors can access
certain diagnostic information and can
tell you how serious the problem is and
what you should do about it.
See Section 3 of your Owner Manual.
Note: Your vehicle’s warnings and mes-
sages provide critical information that
can prevent damage to your vehicle.
Review your Owner Manual to become
familiar with the information displayed
and the action required.
Page 6 of 24
:Press and hold this button to
change the display format. Release the
button when the desired display is
shown.
If the ignition is on and you cannot see
the HUD imag")
Getting to Know Your Acadia6
(Page):Press and hold this button to
change the display format. Release the
button when the desired display is
shown.
If the ignition is on and you cannot see
the HUD image, check to see whether:
• Something is covering the HUD lens
• The brightness is adjusted properly
• The HUD image is adjusted to the
proper height
• The windshield and HUD lens are
clean (do not spray glass cleaner
directly on the HUD lens)
• You are wearing polarized sunglass-
es, which could make the image
harder to see
• A fuse is blown (see your Owner
Manual)
See Section 3 of your Owner Manual.
(Unlock):Press this button to unlock
the driver’s door. Press it again within
five seconds to unlock all remaining
doors. RKE feedback (light flash) can be
programmed using the DIC.
(Power Liftgate)(if equipped):
Press and hold this button until the lift-
gate starts moving to open and close
the liftgate. The taillamps will flash and
a chime will sound when the liftgate is
moving.
(Vehicle Locator/Panic Alarm):
Press and release this button to locate
your vehicle. The turn signal lamps will
flash and the horn will sound three
times.
Press and hold the button to activate the
panic alarm. The turn signal lamps will
flash and the horn will sound for 30 sec-
onds. Press the button again or turn the
ignition to On to cancel the panic alarm.
See Section 2 of your Owner Manual.
Remote Keyless Entry
SAFETY & SECURITY
The Remote Keyless
Entry (RKE) transmitter
allows you to lock and
unlock your vehicle and
perform other functions
while up to approximately
195 feet away from the
vehicle. RKE functions include:
(Remote Vehicle Start)(if
equipped): This feature can be used to
start the engine from outside the vehicle.
(See Remote Vehicle Start.)
(Lock):Press this button to lock all
the doors. RKE feedback (light flash
and/or horn chirp) can be programmed
using the Driver Information Center (DIC).
OnStar®
Your vehicle features the uplevel OnStar
Directions & Connections Plan with one
year of OnStar Service from the date
you purchased your new vehicle. With
the help of OnStar Advisors, who are
available 24 hours a day, 7 days a
week, OnStar offers a wide variety of
safety and driver assistance capabilities,
including:
• Driving Directions and Turn-by-Turn
Navigation
• OnStar Vehicle Diagnostic email
• Automatic Notification of Airbag
Deployment
• Emergency Services
• Remote Door Unlock
Page 7 of 24

To increase
the amount of
lumbar support,
pull up")
7
outboard side of the seatback and move
the seatback to the desired position;
then release the lever.
Manual Lumbar Support Adjustment
(if equipped)
To increase
the amount of
lumbar support,
pull up the
lever located
on the inboard
side of the
seatback. To decrease support, push
down on the lever.
Power Seat Adjustment (if equipped)
Use the horizontal control (A) on the
outboard side of the seat cushion to
move the seat forward/rearward and —
on the driver’s seat only — up/down,
as well as to raise/lower the front or rear
of the seat cushion.
Power Seatback Recline Adjustment
(if equipped)
Use the vertical control (B) on the
outboard side of the seat cushion to
recline/raise the seatback.
Power Lumbar Support Adjustment
(if equipped)
Use the control pad (C) on the outboard
side of the seat cushion to increase/
decrease lumbar support.
See Section 1 of your Owner Manual.
Child Restraints (LATCH)
Your vehicle is equipped with LATCH
anchors, and may have top tethers for
use with a LATCH-compatible child re-
straint. The LATCH anchors are located
in the 2nd-row outboard seating posi-
tions. If your child restraint is not com-
patible with the LATCH system, you may
still use it by installing the child restraint
with the safety belt system. Choose a
child seat that is appropriate for the
child’s age and size (weight and height).
See Section 1 of your Owner Manual.
Seat Adjustments
Manual Seat Height Adjustment
To raise the
driver’s seat,
ratchet
up
repeatedly
the leverlocated on
the front outboard side of the seat cush-
ion. To lower the seat, ratchet the lever
down repeatedly.
Manual Seatback Recline Adjustment
Lift the
lever
located
on the
lower
COMFORT
C B A
Power Seat controls
• Stolen Vehicle Location Assistance
• Information & Connections services
For more information, refer to your
OnStar Owner’s Guide, call
1-888-4-ONSTAR (1-888-466-7827),
or visit onstar.com.
See Section 2 of your Owner Manual.
Page 8 of 24

Getting to Know Your Acadia8
Entering or Exiting the 3rd-Row Seats
The 2nd-row
SmartSlide
™
seats allow
for easy
access to the
3rd-row seats.
To enter or
exit the 3rd-
row seats:
1. Make sure nothing is on the 2nd-row
seat or the floor in front of the seat.
2. Before sliding the 60/40 split bench
seat, fold the center armrest into the
upright position in the seatback.
3. Rotate the
release lever
located on the
upper-outboard
side of the
seatback
forward.
4. Push the top of
the seatback
forward. The seat cushion will fold up
automatically and the entire seat will
slide forward.
To return the 2nd-row seat to the seating
position:
1. Make sure nothing is on the floor
behind the 2nd-row seat.
2. Push the top of the seatback rear-
ward until the seatback and floor
tracks lock.
3. Push down at the rear of the seat
cushion to lock it in place.
4. Pull on the seatback to be sure it is
locked in place.Sliding the Seats
To slide the 2nd-row seats for more leg
room in the 2nd or 3rd row:
1. Make sure nothing is on the floor in
front of or behind the 2nd-row seat.
2. Pull outward
on the handle
located on
the outboard
side of the
seat cushion
and slide the
seat forward or rearward.
3. Release the handle.
4. Pull on the seat to make sure it is
locked in place.
Folding the Seatbacks
To fold the seatbacks forward to create
a flat load floor:
1. Pull outward on the handle located on
the outboard side of the seat cushion
and slide the seat rearward.
2. Fold the armrest(s) into the upright
position.
3. Pull forward on the strap located on
the outboard side of the seatback and
fold down the seatback.
To return the
seatbacks
upright, pull up
the seatback
and push it
rearward until it
locks in place.
See Section 1 of your Owner Manual.
2nd-Row Seats
Note: The 2nd- and 3rd-row head
restraints are not height adjustable.