Page 18 of 418

Powertrain malfunction/Reduced
power/Electronic throttle
control (RTT):Displays when the
engine has defaulted to a
“limp-home” operation or when a
transmission problem has been
detected and shifting may be restricted. If the light remains on, have the
system serviced immediately by your authorized dealer.
Traction Control™ (RTT) (if
equipped):Displays when the
Traction Control™ system is active.
If the light remains on, have the
system serviced immediately by
your authorized dealer. Refer to
Traction Control™in theDrivingchapter for more information
Check fuel cap (RTT):Displays
when the fuel cap may not be
properly installed. Continued driving
with this light on may cause the
Service engine soon warning light to
come on. Refer toFuel filler capin
theMaintenance and Specificationschapter.
Engine coolant temperature
(RTT):Displays when the engine
coolant temperature is high. Stop
the vehicle as soon as safely
possible, switch off the engine and
let it cool. Refer toEngine coolant
in theMaintenance and Specificationschapter.
WARNING:Never remove the coolant reservoir cap while the
engine is running or hot.
Low fuel (RTT):Displays when
the fuel level in the fuel tank is at
or near empty (refer toFuel gauge
in this chapter).
2009 F-250/350/450/550(f23)
Owners Guide, 1st Printing
USA(fus)
Instrument Cluster
18
Page 20 of 418

If your vehicle is equipped with a diesel engine, it has some unique
warning lights; refer toInstrument Clusterin your6.0 and 6.4 Liter
Power Stroke Direct Injection Turbo Diesel Owner’s Guide
Supplementfor detailed information on their function.
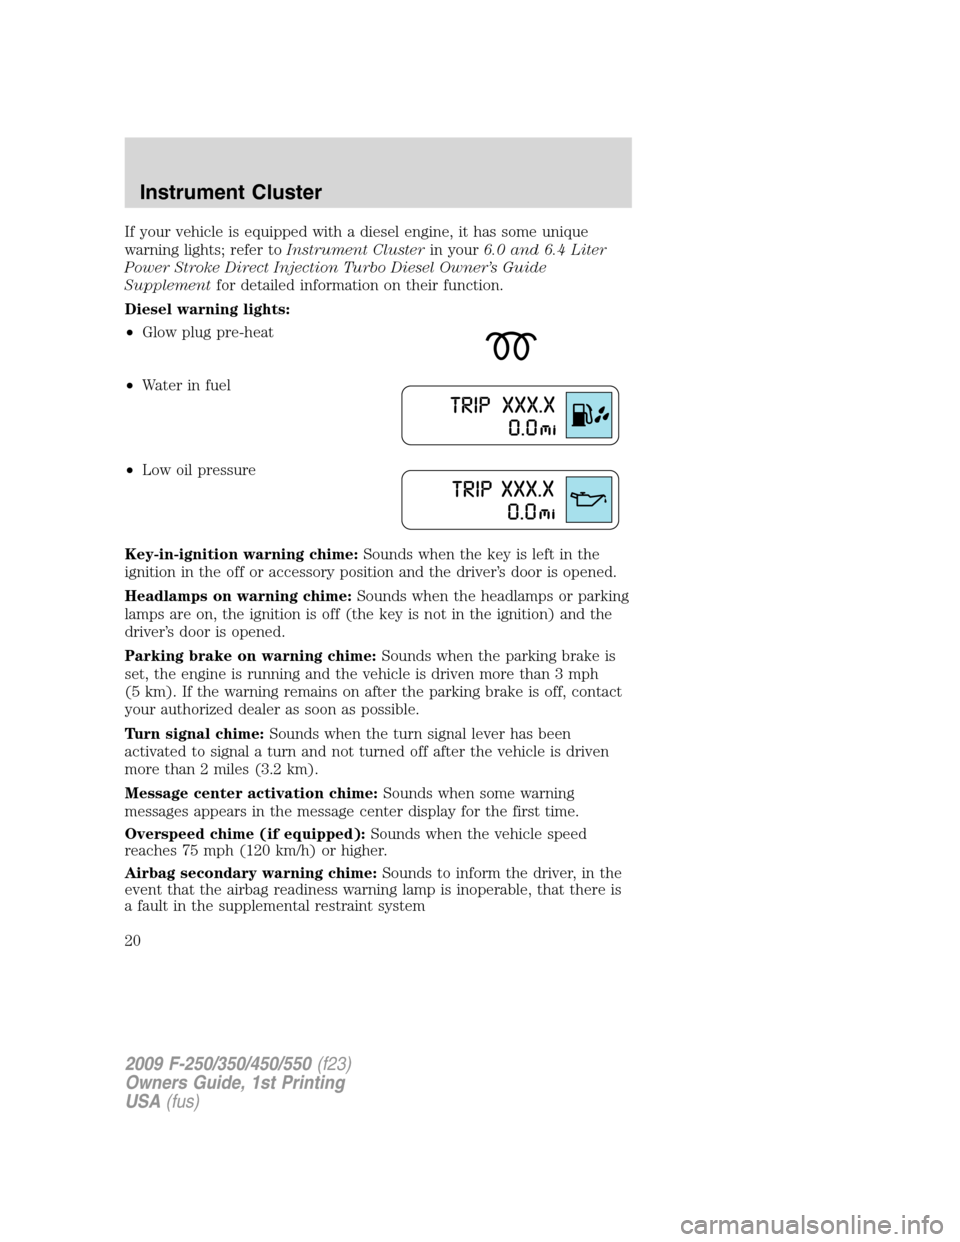
Diesel warning lights:
•Glow plug pre-heat
•Waterinfuel
•Low oil pressure
Key-in-ignition warning chime:Sounds when the key is left in the
ignition in the off or accessory position and the driver’s door is opened.
Headlamps on warning chime:Sounds when the headlamps or parking
lamps are on, the ignition is off (the key is not in the ignition) and the
driver’s door is opened.
Parking brake on warning chime:Sounds when the parking brake is
set, the engine is running and the vehicle is driven more than 3 mph
(5 km). If the warning remains on after the parking brake is off, contact
your authorized dealer as soon as possible.
Turn signal chime:Sounds when the turn signal lever has been
activated to signal a turn and not turned off after the vehicle is driven
more than 2 miles (3.2 km).
Message center activation chime:Sounds when some warning
messages appears in the message center display for the first time.
Overspeed chime (if equipped):Sounds when the vehicle speed
reaches 75 mph (120 km/h) or higher.
Airbag secondary warning chime:Sounds to inform the driver, in the
event that the airbag readiness warning lamp is inoperable, that there is
a fault in the supplemental restraint system
2009 F-250/350/450/550(f23)
Owners Guide, 1st Printing
USA(fus)
Instrument Cluster
20
Page 24 of 418

Fuel gauge:Indicates
approximately how much fuel is left
in the fuel tank (when the ignition
is in the on position). The fuel
gauge may vary slightly when the
vehicle is in motion or on a grade.
The FUEL icon and arrow indicates
which side of the vehicle the fuel
filler door is located.
Refer toFilling the tankin theMaintenance and Specifications
chapter for more information.
Battery voltage gauge (manual
transmission only):Indicates the
battery voltage when the ignition is
in the on position. If the pointer
moves and stays outside the normal
operating range, have the vehicle’s
electrical system checked as soon as
possible.
Transmission fluid temperature gauge (automatic transmission
only):If the gauge is in the:
Normal area(normal) - the
transmission fluid is within the
normal operating temperature
(between “H” and “C”).
Yellow area(warning) — the
transmission fluid is higher than
normal operating temperature. This
can be caused by special operation
conditions (i.e. snowplowing, towing
or off road use). Refer toSpecial
Operating Conditionsin the
scheduled maintenance
informationfor instructions. Operating the transmission for extended
periods of time with the gauge in the yellow area may cause internal
transmission damage.
2009 F-250/350/450/550(f23)
Owners Guide, 1st Printing
USA(fus)
Instrument Cluster
24
Page 54 of 418

•Black (4) — wired headphone output (wired headphones not
included)
1. Press the
headphone/speaker
/button
on the DVD player or press the 2
and 4 memory presets on the radio at the same time.
A green light will illuminate next to either the A or B Headphone Control
Button to indicate which channel is active (able to be controlled).
2. Press MEDIA to change the audio source of the active channel (A or
B). The audio source will be shown on the display. You may change the
active channel by pressing the A or B headphone control button.
Note:Channel A can access any possible media source (AM, FM1, FM2,
SAT (if equipped), CD, DVD, AUX). Channel B can only access DVD and
AUX sources.
Note:Refer toSingle play/Dual playfor more information.
Using the infrared (IR) wireless headphones:
1. Press the power control on the earpiece to turn the headphones ON.
2. Select Channel A or B for each set of wireless headphones by using
the A/B control on the ear piece.
3. Adjust the headphone volume using the rotary dial on the earpiece.
Using wired headphones (not included):
WARNING:Do not leave children unattended in the vehicle and
do not let children operate the system while unsupervised. If
wired headphones or auxiliary systems are used, children may become
entangled in the cords and seriously injure themselves.
1. Connect the wired headphones in to the headphone jacks on either
side of the DVD system. Each side is labeled
AorB. Headphones
plugged into jack A will listen to Channel A and headphones plugged into
jack B will listen to Channel B.
2009 F-250/350/450/550(f23)
Owners Guide, 1st Printing
USA(fus)
Entertainment Systems
54
Page 77 of 418

WARNING:The driver should not attempt to operate any
function of the DVD system while the vehicle is in motion. Give
full attention to driving and to the road. Pull off the road in a safe
place before inserting or extracting DVDs from the system. A remote
control is included in the system to allow the rear seat occupants to
operate the FES functions without distracting the driver.
Do not expose the liquid crystal display (LCD) flip-down screen
to direct sunlight or intensive ultraviolet rays for extensive
periods of time. Ultraviolet rays deteriorate the liquid crystal.
Be sure to review User Manuals for video games and video game
equipment when used as auxiliary inputs for your Family Entertainment
System (FES).
Do not operate video games or video equipment if the power cords
and/or cables are broken, split or damaged. Carefully place cords and/or
cables where they will not be stepped on or interfere with the operation
of seats and/or compartments.
Disconnect video games and video equipment power cords and/or cables
when not in use.
Avoid touching auxiliary input jacks with your fingers. Do not blow on
them or allow them to get wet or dirty.
Do not clean any part of the DVD player with benzene, paint thinner, or
any other solvent.
Federal Communication Commission (FCC) Compliance
Changes or modifications not approved by Ford Lincoln-Mercury could
void user’s authority to operate the equipment. This equipment has been
tested and found to comply with the limits for a Class B digital device,
pursuant to Part 15 of the FCC Rules. These limits are designed to
provide reasonable protection against harmful interference in a
residential installation. This equipment generates, uses and can radiate
radio frequency energy and, if not installed and used in accordance with
the instructions, may cause harmful interference and radio
communications.
However, there is no guarantee that interference will not occur in a
particular installation. If this equipment does cause harmful interference
to radio or television reception, which can be determined by turning the
equipment off and on, the user is encouraged to consult the dealer or an
experienced radio/TV technician for help.
2009 F-250/350/450/550(f23)
Owners Guide, 1st Printing
USA(fus)
Entertainment Systems
77
Page 90 of 418
Daytime running lamps (DRL) (if equipped)
Turns the headlamps on with a reduced output.
To activate:
•the ignition must be in the on position,
•the headlamp control is in the off or parking lamp position and
•the parking brake must be disengaged.
WARNING:Always remember to turn on your headlamps at
dusk or during inclement weather. The Daytime Running Lamp
(DRL) system does not activate the tail lamps and generally may not
provide adequate lighting during these conditions. Failure to activate
your headlamps under these conditions may result in a collision.
High beams
Push the lever toward the
instrument panel to activate. Pull
the lever towards you to deactivate.
Flash to pass
Pull toward you slightly to activate
and release to deactivate.
O
F
F
2009 F-250/350/450/550(f23)
Owners Guide, 1st Printing
USA(fus)
Lights
90
Page 97 of 418
Replacing headlamp bulbs (aerodynamic)
1. Make sure that the headlamps are off and open the hood.
2. Remove the four bolts from the
top, side and bottom front of the
headlamp assembly.
3. Pull the assembly straight out
disengaging two snap clips to
fender.
4. Disconnect the electrical
connector by squeezing the release
tab and pushing the connector
forward and then pulling it
rearward.
5. Remove the bulb assembly by
turning it counterclockwise and
pulling it straight out.
WARNING:Handle a halogen headlamp bulb carefully and keep
out of children’s reach. Grasp the bulb only by its plastic base
and do not touch the glass. The oil from your hand could cause the
bulb to break the next time the headlamps are operated.
Install the new bulb(s) in reverse order.
2009 F-250/350/450/550(f23)
Owners Guide, 1st Printing
USA(fus)
Lights
97
Page 104 of 418

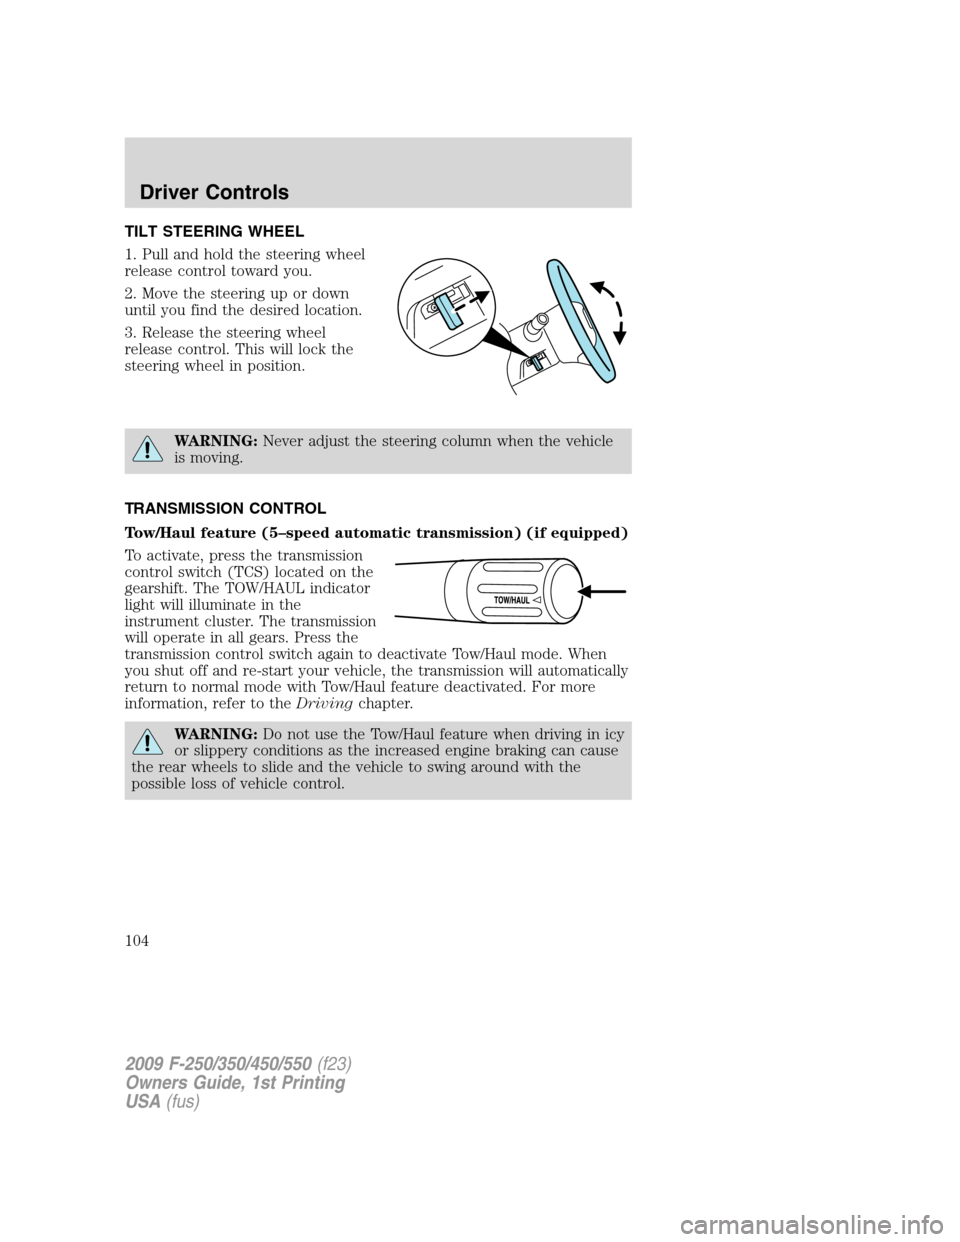
TILT STEERING WHEEL
1. Pull and hold the steering wheel
release control toward you.
2. Move the steering up or down
until you find the desired location.
3. Release the steering wheel
release control. This will lock the
steering wheel in position.
WARNING:Never adjust the steering column when the vehicle
is moving.
TRANSMISSION CONTROL
Tow/Haul feature (5–speed automatic transmission) (if equipped)
To activate, press the transmission
control switch (TCS) located on the
gearshift. The TOW/HAUL indicator
light will illuminate in the
instrument cluster. The transmission
will operate in all gears. Press the
transmission control switch again to deactivate Tow/Haul mode. When
you shut off and re-start your vehicle, the transmission will automatically
return to normal mode with Tow/Haul feature deactivated. For more
information, refer to theDrivingchapter.
WARNING:Do not use the Tow/Haul feature when driving in icy
or slippery conditions as the increased engine braking can cause
the rear wheels to slide and the vehicle to swing around with the
possible loss of vehicle control.
2009 F-250/350/450/550(f23)
Owners Guide, 1st Printing
USA(fus)
Driver Controls
104