2009 FORD ECONOLINE lock
[x] Cancel search: lockPage 104 of 320
How to disengage the automatic locking mode
Disconnect the combination lap/shoulder belt and allow it to retract
completely to disengage the automatic locking mode and activate the
vehicle sensitive (emergency) locking mode.
WARNING:After any vehicle collision, the safety belt systems
at all seating positions (except the driver position, which does
not have this feature) must be checked by an authorized dealer to
verify that the automatic locking retractor feature for child seats is still
functioning properly. In addition, all safety belts should be checked for
proper function.
WARNING:BELT AND RETRACTOR ASSEMBLY MUST BE
REPLACED if the safety belt assembly “automatic locking
retractor” feature or any other safety belt function is not operating
properly when checked by an authorized dealer. Failure to replace the
Belt and Retractor assembly could increase the risk of injury in
collisions.
Safety belt pretensioner
Your vehicle is equipped with safety belt pretensioners at the driver and
front outboard passenger seating positions.
The safety belt pretensioner tightens the safety belts firmly against the
occupant’s body at the start of the crash.
WARNING:The driver and front passenger safety belt system
(including retractors, buckles and height adjusters) must be
replaced if the vehicle is involved in a collision that results in
deployment of front airbags and safety belt pretensioners.
2009 Econoline(eco)
Owners Guide, 2nd Printing
USA(fus)
Seating and Safety Restraints
104
ProCarManuals.com
Page 105 of 320
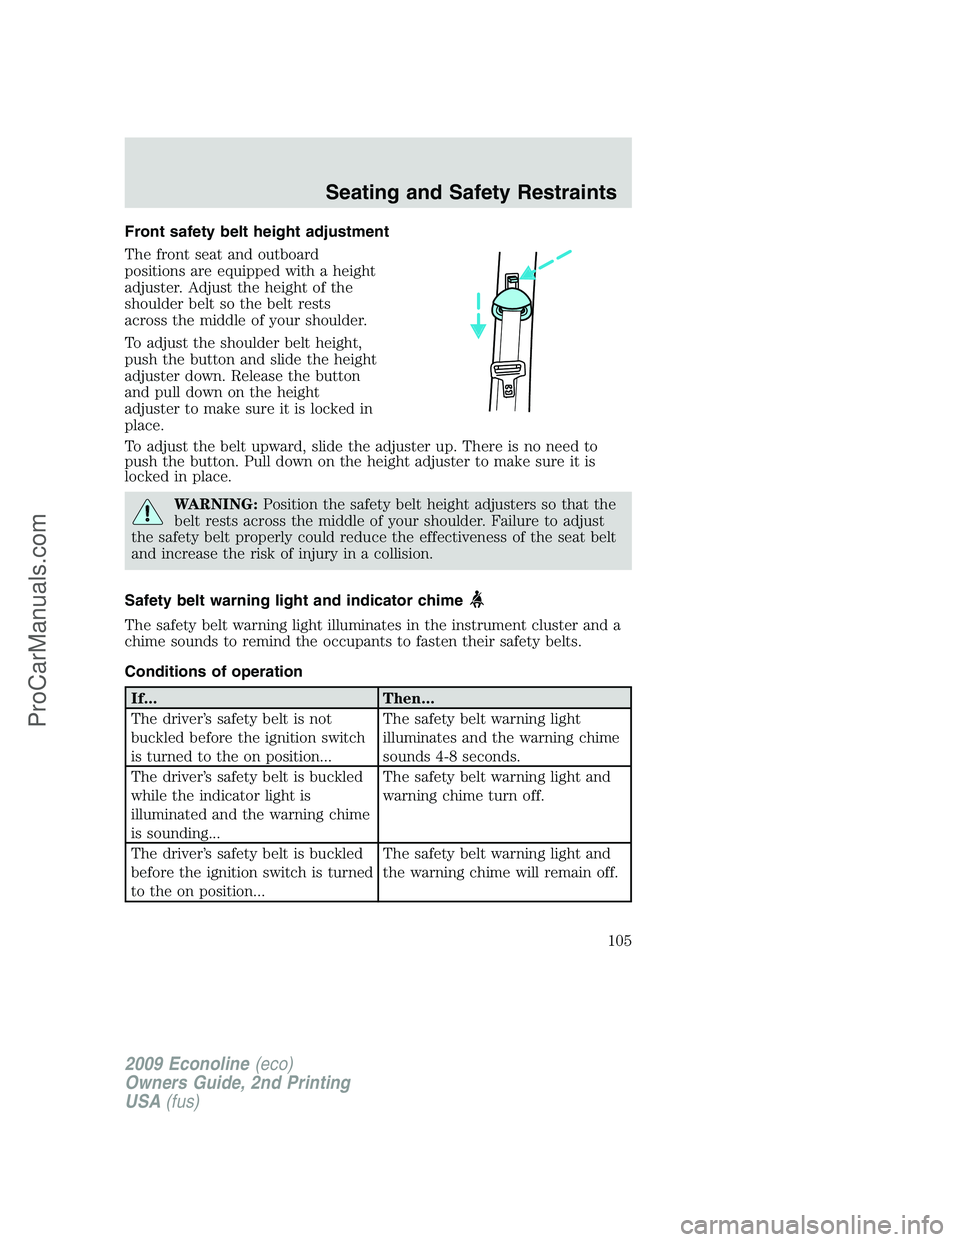
Front safety belt height adjustment
The front seat and outboard
positions are equipped with a height
adjuster. Adjust the height of the
shoulder belt so the belt rests
across the middle of your shoulder.
To adjust the shoulder belt height,
push the button and slide the height
adjuster down. Release the button
and pull down on the height
adjuster to make sure it is locked in
place.
To adjust the belt upward, slide the adjuster up. There is no need to
push the button. Pull down on the height adjuster to make sure it is
locked in place.
WARNING:Position the safety belt height adjusters so that the
belt rests across the middle of your shoulder. Failure to adjust
the safety belt properly could reduce the effectiveness of the seat belt
and increase the risk of injury in a collision.
Safety belt warning light and indicator chime
The safety belt warning light illuminates in the instrument cluster and a
chime sounds to remind the occupants to fasten their safety belts.
Conditions of operation
If... Then...
The driver’s safety belt is not
buckled before the ignition switch
is turned to the on position...The safety belt warning light
illuminates and the warning chime
sounds 4-8 seconds.
The driver’s safety belt is buckled
while the indicator light is
illuminated and the warning chime
is sounding...The safety belt warning light and
warning chime turn off.
The driver’s safety belt is buckled
before the ignition switch is turned
to the on position...The safety belt warning light and
the warning chime will remain off.
2009 Econoline(eco)
Owners Guide, 2nd Printing
USA(fus)
Seating and Safety Restraints
105
ProCarManuals.com
Page 125 of 320
Airbags can kill or injure a child in a child seat. NEVER place a
rear-facing child seat in front of an active airbag. If you must use a
forward-facing child seat in the front seat, move the vehicle seat all the
way back.
Children 12 and under should be properly restrained in a rear seating
position whenever possible. If all children cannot be seated and
restrained properly in a rear seating position, properly restrain the
largest child in the front seat.
Installing child safety seats with combination lap and shoulder
belts
Check to make sure the child seat is properly secured before each use.
Children 12 and under should be properly restrained in a rear seating
position whenever possible. If all children cannot be seated and
restrained properly in a rear seating position, properly restrain the
largest child in the front seat.
When installing a child safety seat with combination lap/shoulder belts:
•Use the correct safety belt buckle for that seating position.
•Insert the belt tongue into the proper buckle until you hear a snap
and feel it latch. Make sure the tongue is securely fastened in the
buckle.
•Keep the buckle release button pointing up and away from the safety
seat, with the tongue between the child seat and the release button,
to prevent accidental unbuckling.
•Place vehicle seat back in upright position.
•Put the safety belt in the automatic locking mode. Refer to step 5
below.
WARNING:Depending on where you secure a child restraint,
and depending on the child restraint design, you may block
access to certain safety belt buckle assemblies and/or LATCH lower
anchors, rendering those features potentially unusable. To avoid risk of
injury, occupants should only use seating positions where they are able
to be properly restrained.
Perform the following steps when installing the child seat with
combination lap/shoulder belts:
Note:Although the child seat illustrated is a forward facing child seat,
the steps are the same for installing a rear facing child seat.
2009 Econoline(eco)
Owners Guide, 2nd Printing
USA(fus)
Seating and Safety Restraints
125
ProCarManuals.com
Page 127 of 320
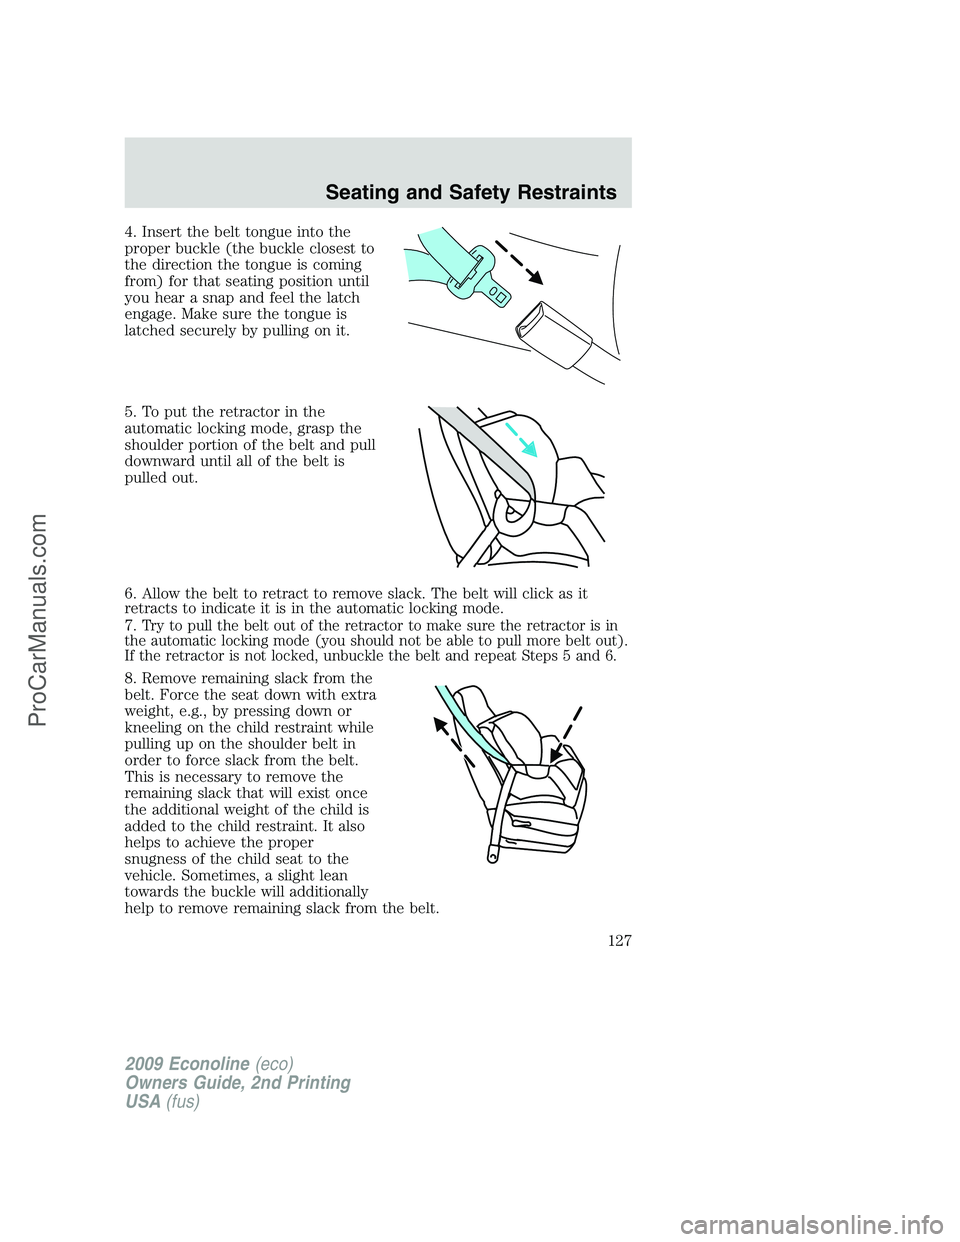
4. Insert the belt tongue into the
proper buckle (the buckle closest to
the direction the tongue is coming
from) for that seating position until
you hear a snap and feel the latch
engage. Make sure the tongue is
latched securely by pulling on it.
5. To put the retractor in the
automatic locking mode, grasp the
shoulder portion of the belt and pull
downward until all of the belt is
pulled out.
6. Allow the belt to retract to remove slack. The belt will click as it
retracts to indicate it is in the automatic locking mode.
7.
Try to pull the belt out of the retractor to make sure the retractor is in
the automatic locking mode (you should not be able to pull more belt out).
If the retractor is not locked, unbuckle the belt and repeat Steps 5 and 6.
8. Remove remaining slack from the
belt. Force the seat down with extra
weight, e.g., by pressing down or
kneeling on the child restraint while
pulling up on the shoulder belt in
order to force slack from the belt.
This is necessary to remove the
remaining slack that will exist once
the additional weight of the child is
added to the child restraint. It also
helps to achieve the proper
snugness of the child seat to the
vehicle. Sometimes, a slight lean
towards the buckle will additionally
help to remove remaining slack from the belt.
2009 Econoline(eco)
Owners Guide, 2nd Printing
USA(fus)
Seating and Safety Restraints
127
ProCarManuals.com
Page 167 of 320
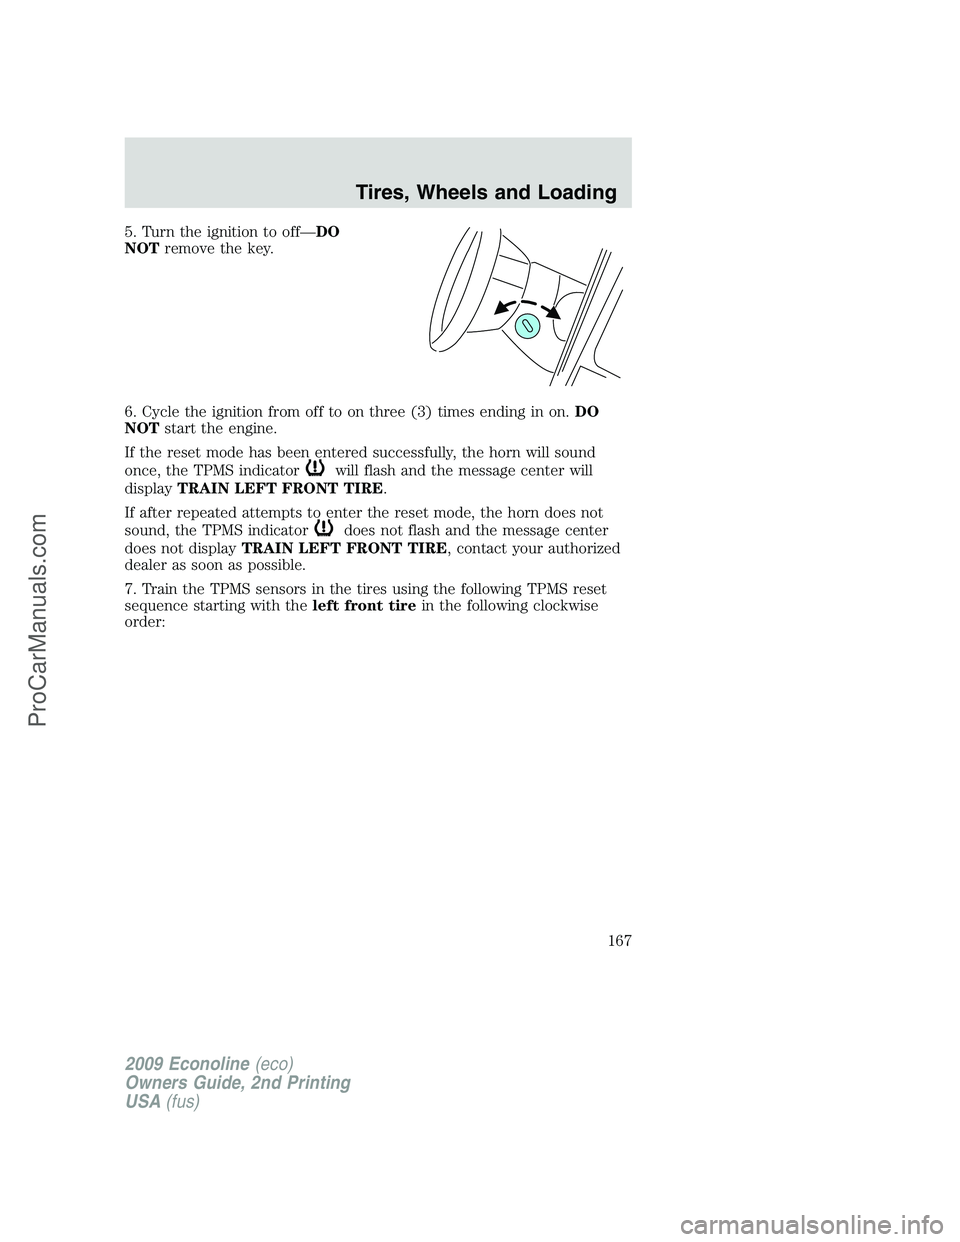
5. Turn the ignition to off—DO
NOTremove the key.
6. Cycle the ignition from off to on three (3) times ending in on.DO
NOTstart the engine.
If the reset mode has been entered successfully, the horn will sound
once, the TPMS indicator
will flash and the message center will
displayTRAIN LEFT FRONT TIRE.
If after repeated attempts to enter the reset mode, the horn does not
sound, the TPMS indicator
does not flash and the message center
does not displayTRAIN LEFT FRONT TIRE, contact your authorized
dealer as soon as possible.
7. Train the TPMS sensors in the tires using the following TPMS reset
sequence starting with theleft front tirein the following clockwise
order:
2009 Econoline(eco)
Owners Guide, 2nd Printing
USA(fus)
Tires, Wheels and Loading
167
ProCarManuals.com
Page 188 of 320

during manual activation without a trailer connected or when gain
adjustments are made with no trailer connected.
•TBC GAIN = XX.X OUTPUT = //////: When the vehicle’s brake pedal
is pushed, or when the manual control is activated, bar indicators will
illuminate in the instrument cluster message center to indicate the
amount of power going to the trailer brakes relative to the brake pedal
or manual control input. One bar indicates the least amount of output
with six bars indicating maximum output.
•TRAILER CONNECTED:This message is displayed when a correct
trailer wiring connection (a trailer with electric trailer brakes) has
been sensed during a given ignition cycle.
•TRAILER DISCONNECTED:This message is displayed and
accompanied by a single chime, when a trailer connection was
determined and then a disconnection, either intentionally or
unintentionally, has been sensed during a given ignition cycle. It is also
displayed if a truck or trailer wiring fault occurs causing the trailer to
appear disconnected. This message is also displayed during manual
activation without a trailer connected.
2.Manual control lever:Slide the control lever to the left to activate
power to the trailer’s electric brakes independent of the tow vehicle’s
brakes (see the followingProcedure for adjusting GAINsection for
instructions on proper use of this feature). If the manual control is
activated while the brake is also applied, the greater of the two inputs
determines the power sent to the trailer brakes.
•Stop Lamps:Activating the TBC manual control lever will illuminate
both the trailer brake lamps and the tow vehicle brake lamps except
the Center High-Mount Stop Lamp (presuming proper trailer electrical
connection). Pressing the vehicle brake pedal will also illuminate both
trailer and vehicle brake lamps.
Procedure for adjusting GAIN:
The GAIN setting is used to set the TBC for the specific towing
condition and should be changed as towing conditions change. Changes
to towing conditions include trailer load, vehicle load, road conditions
and weather.
The GAIN should be set to provide the maximum trailer braking
assistance while ensuring the trailer wheels do not lock when braking.
Locked trailer wheels may lead to trailer instability.
Note:This should only be performed in a traffic free environment at
speeds of approximately 20–25 mph (30–40 km/h).
2009 Econoline(eco)
Owners Guide, 2nd Printing
USA(fus)
Tires, Wheels and Loading
188
ProCarManuals.com
Page 189 of 320

1. Make sure the trailer brakes are in good working condition,
functioning normally, and properly adjusted. See your trailer dealer if
necessary.
2. Hook up the trailer and make the electrical connections according to
the trailer manufacturer’s instructions.
3. When a trailer with electric brakes is plugged in, theTRAILER
CONNECTEDmessage will display in the instrument cluster message
center.
4. Use the GAIN adjustment (+/-) buttons to increase or decrease the
GAIN setting to the desired starting point. A GAIN setting of 6.0 is a
good starting point for heavier loads.
5. In a traffic-free environment, tow the trailer on a dry, level surface at
a speed of 20–25 mph (30–40 km/h) and squeeze the manual control
lever completely.
6. If the trailer wheels lock-up (indicated by squealing tires), reduce the
GAIN setting; if the trailer wheels turn freely, increase the GAIN setting.
Repeat Steps 5 and 6 until the GAIN setting is at a point just below
trailer wheel lock-up. If towing a heavier trailer, trailer wheel lockup may
not be attainable even with the maximum GAIN setting of 10.
Explanation of instrument cluster warning messages:
The TBC interacts with the instrument cluster message center to display
the following messages:
TRAILER BRAKE MODULE FAULT: This message is displayed and
accompanied by a single chime, in response to faults sensed by the TBC.
In the event this message is seen, please contact your authorized dealer
as soon as possible for diagnosis and repair. The TBC may still function,
but performance may be degraded.
WIRING FAULT ON TRAILER: This message is displayed when a
Short circuit on the electric brake output wirehas occurred. If the
WIRING FAULT ON TRAILERmessage is displayed and accompanied
by a single chime, with no trailer connected, the problem is with the
vehicle wiring from the TBC to the 7–pin connector in the bumper. If the
message is only displayed with a trailer connected, the problem is related
to the trailer wiring; consult your trailer dealer for assistance. This can
be a short to ground (i.e., chaffed wire) or a short to voltage (i.e., pulled
pin on trailer emergency break-away battery) or trailer brakes drawing
too much current.
Note:Your TBC can be diagnosed by your authorized dealer to
determine exactly which trailer fault has occurred; however, if the fault
is with the trailer this diagnosis isnotcovered under your Ford
warranty.
2009 Econoline(eco)
Owners Guide, 2nd Printing
USA(fus)
Tires, Wheels and Loading
189
ProCarManuals.com
Page 190 of 320

Points to Remember:
•Remember to adjust gain setting before using the TBC for the first
time.
•Readjust GAIN setting on the TBC (according to procedure above)
whenever road, weather and trailer or vehicle loading conditions
change from those that existed when the gain was initially set.
•The sliding lever on the TBC should be used only for manual
activation of trailer brakes to assist with proper adjustment of the
GAIN. Misuse, such as application during trailer sway, could cause
instability of trailer and/or tow vehicle.
•Avoid towing in adverse weather conditions. The TBC does not
provide anti-lock control of the trailer wheels. Trailer wheels can
lock-up on slippery surfaces, resulting in reduced stability of trailer
and tow vehicle.
•The TBC interacts with the brake system of the vehicle, including
ABS, in order to reduce the likelihood of trailer wheel lockup.
Therefore, if these systems are not functioning properly the TBC may
not function at full performance.
•When the vehicle is turned off, the TBC Output is disabled and the
display is shut down. Reactivation of the ignition from OFF to ON will
awaken the TBC module.
•The TBC is only a factory or dealer installed item. Ford is not
responsible for warranty or performance of the TBC due to misuse or
customer installation.
•Do not attempt removal of the TBC without consulting the
Workshop Manual.Damage to the unit may result.
Trailer lamps
Trailer lamps are required on most towed vehicles. Make sure all running
lights, brake lights, turn signals and hazard lights are working. Contact
your authorized dealer or trailer rental agency for proper instructions
and equipment for hooking up trailer lamps.
Using a step bumper (if equipped)
The rear bumper is equipped with an integral hitch and only requires a
ball with a one inch (25.4 mm) shank diameter. The bumper has a
5,000 lb (2,270 kg) trailer weight and 500 lb (227 kg) tongue weight
capacity.
If it is necessary to relocate the trailer hitch ball position, a
frame-mounted trailer hitch must be installed.
2009 Econoline(eco)
Owners Guide, 2nd Printing
USA(fus)
Tires, Wheels and Loading
190
ProCarManuals.com