Page 227 of 532
the worldwide standard for time. This makes the sys-
tem’s clock very accurate once the appropriate time zone
and daylight savings information is set.
1. At theMain Menu screen, highlight “Clock Setup”
and press ENTER ORpress and hold the TIME button on
the unit’s faceplate for three seconds. The Clock Setup
screen appears. 2. To show the GPS clock, select “Displayed Clock: GPS
Clock” and press ENTER.
3. To adjust the time zone, Select “Time Zone” and press
ENTER. Select the appropriate time zone and press
ENTER.
4. To turn daylight savings on or off, select “Daylight
Savings” and press ENTER. Select “On” or “Off” and
press ENTER.
5. Select DONE to exit from the clock setting mode. Press
ENTER to save your changes. If you press CANCEL or
NAV then your changes will not be saved.
UNDERSTANDING YOUR INSTRUMENT PANEL 225
4
Page 228 of 532
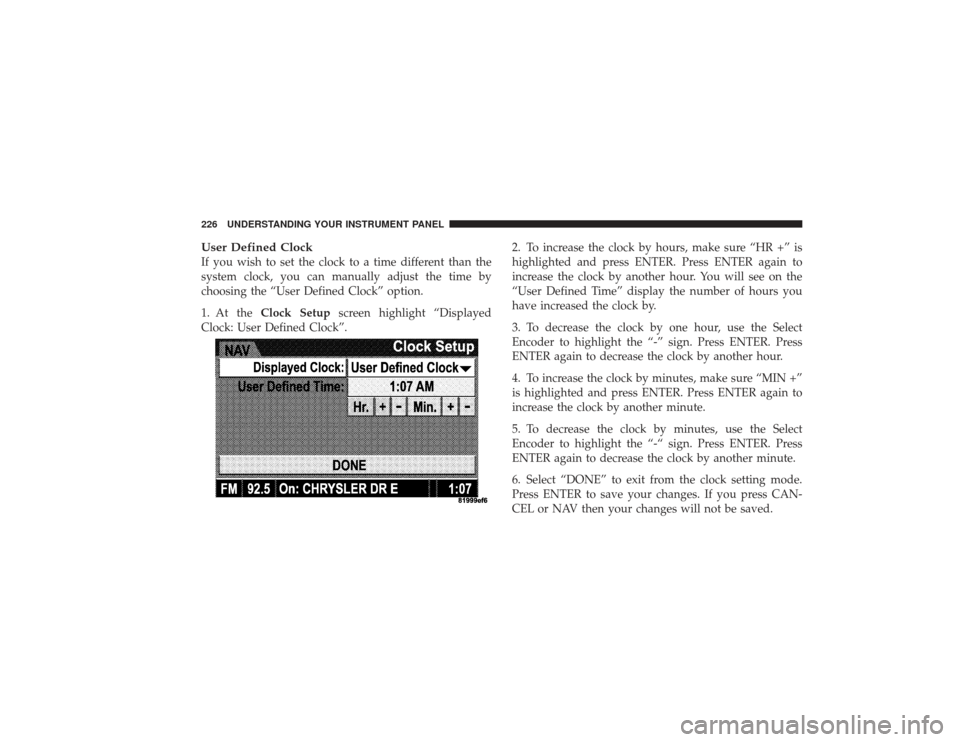
User Defined ClockIf you wish to set the clock to a time different than the
system clock, you can manually adjust the time by
choosing the “User Defined Clock” option.
1. At theClock Setup screen highlight “Displayed
Clock: User Defined Clock”. 2. To increase the clock by hours, make sure “HR +” is
highlighted and press ENTER. Press ENTER again to
increase the clock by another hour. You will see on the
“User Defined Time” display the number of hours you
have increased the clock by.
3. To decrease the clock by one hour, use the Select
Encoder to highlight the “-” sign. Press ENTER. Press
ENTER again to decrease the clock by another hour.
4. To increase the clock by minutes, make sure “MIN +”
is highlighted and press ENTER. Press ENTER again to
increase the clock by another minute.
5. To decrease the clock by minutes, use the Select
Encoder to highlight the “-“ sign. Press ENTER. Press
ENTER again to decrease the clock by another minute.
6. Select “DONE” to exit from the clock setting mode.
Press ENTER to save your changes. If you press CAN-
CEL or NAV then your changes will not be saved.226 UNDERSTANDING YOUR INSTRUMENT PANEL
Page 231 of 532
Selecting Satellite Mode — RAQ and RAK RadioPress the MODE button repeatedly until the word�SAT�
appears in the display.
These radios will also display the current station name
and program type. For more information, such as song
title and artist, press the MSG or INFO button.
A CD or tape may remain in the radio while in the
Satellite radio mode.Selecting A ChannelPress and release the SEEK or TUNE knob to search for
the next channel. Press the top of the button to search up
and the bottom of the button to search down. Holding the
TUNE button causes the radio to bypass channels until
the button is released.
Press and release the SCAN button (if equipped) to
automatically change channels every seven seconds. The
radio will pause on each channel for seven seconds before moving on to the next channel. The word
�SCAN�
will appear in the display between each channel change.
Press the SCAN button a second time to stop the search.
NOTE: Channels that may contain objectionable content
can be blocked. Contact Sirius Customer Care at 888-539-
7474 to discuss options for channel blocking or unblock-
ing. Please have your ESN/SID information available.
Storing And Selecting Preset ChannelsIn addition to the 12 AM and 12 FM preset stations, you
may also commit 12 satellite stations to pushbutton
memory. These satellite channel preset stations will not
erase any AM or FM preset memory stations. Follow the
memory preset procedures that apply to your radio.Using The PTY (Program Type) Button — If
EquippedFollow the PTY button instructions that apply to your
radio.
UNDERSTANDING YOUR INSTRUMENT PANEL 229
4
Page 232 of 532
PTY Button SCANWhen the desired program type is obtained, press the
SCAN button within five seconds. The radio will play
seven seconds of the selected channel before moving to
the next channel of the selected program type. Press the
SCAN button a second time to stop the search.
NOTE:Pressing the SEEK or SCAN button, while
performing a music-type scan, will change the channel by
one and stop the search. Pressing a preset memory button
during a music-type scan will call up the memory
channel and stop the search.PTY Button SEEKWhen the desired program is obtained, press the SEEK
button within five seconds. The channel will change to
the next channel that matches the program type selected.Satellite AntennaTo ensure optimum reception on vehicles available with
a luggage rack, do not place items on the roof around the rooftop antenna location. Metal objects placed within the
line of sight of the antenna will cause decreased perfor-
mance. Larger luggage items should be placed as far
forward as possible. Do not place items directly on or
above the antenna.
Reception QualitySatellite reception may be interrupted due to one of the
following reasons:•
The vehicle is parked in an underground parking
structure or under a physical obstacle.
•
Dense tree coverage may interrupt reception.
•
Driving under wide bridges or along tall buildings can
cause intermittent reception.
•
Placing objects over or too close to the antenna can
cause signal blockage.
230 UNDERSTANDING YOUR INSTRUMENT PANEL
Page 234 of 532
The right-hand control is a rocker type switch with a
button in the center. Pressing the top of the switch will
increase the volume, and pressing the bottom of the
switch will decrease the volume. The center button of the
right-hand control will allow you to change the mode.
The left-hand control is a rocker type switch with a push
button in the center. The function of the left-hand control
is different, depending on which mode you are in.
The following describes the left-hand control operation in
each mode.Radio OperationPressing the top of the left side switch will seek up for the
next listenable station and pressing the bottom of the
switch will seek down for the next listenable station.
The button located in the center of the left-hand control
will tune to the next pre-set station that you have
programmed in the radio pre-set push-buttons.
CD PlayerPressing the top of the switch once will go to the next
track on the CD. Pressing the bottom of the switch once
will go to the beginning of the current track or to the
beginning of the previous track if it is within one second
after the current track; begins to play.
If you press the switch up or down twice it plays the
second track, three times, it will play the third, etc.
The button in the center of the left-hand switch has no
function in this mode.CD/DVD MAINTENANCETo keep a CD/DVD in good condition, take the following
precautions:
1. Handle the disc by its edge; avoid touching the
surface.
2. If the disc is stained, clean the surface with a soft cloth,
wiping from center to edge.
232 UNDERSTANDING YOUR INSTRUMENT PANEL
Page 239 of 532
Air Conditioning and Heating — If EquippedAir Conditioning Operation
To turn on the Air Conditioning, set the fan
control at any speed and press the snowflake
button located at the right of the control panel.
Conditioned air will be directed through the
outlets selected by the mode control. A light in the
snowflake button shows that the air conditioning is on.
Press the button a second time to turn the air condition-
ing off.
Slight changes in engine speed or power may be noticed
when the air conditioning compressor is on. This is a
normal occurrence as the compressor will cycle on and
off to maintain comfort and increase fuel economy.
Air Conditioning And Heating
UNDERSTANDING YOUR INSTRUMENT PANEL 237
4
Page 245 of 532
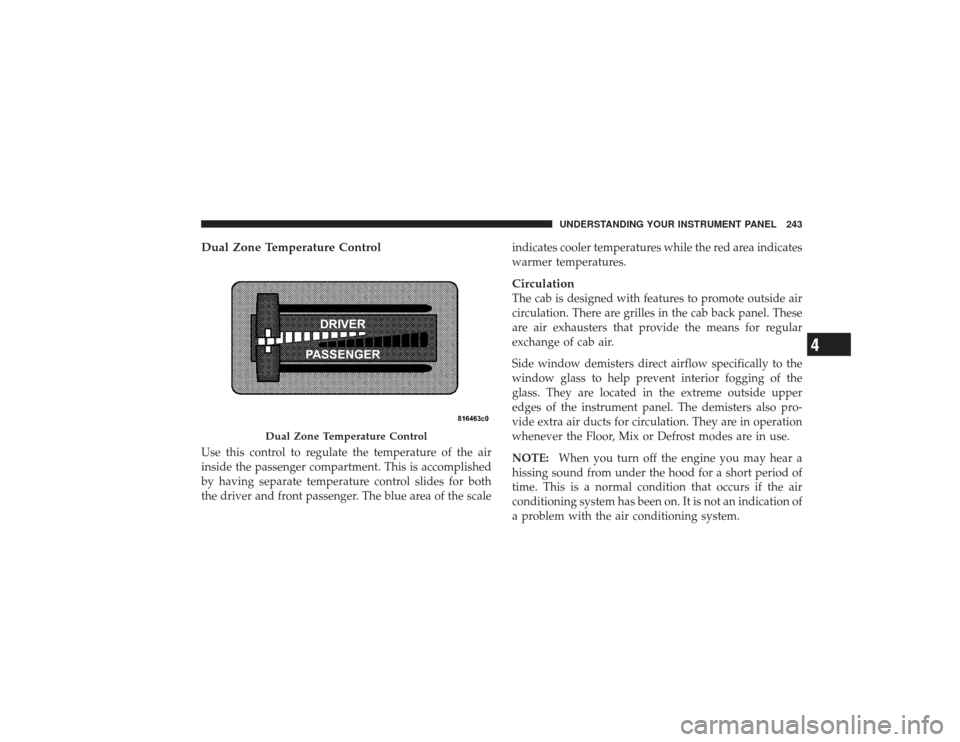
Dual Zone Temperature ControlUse this control to regulate the temperature of the air
inside the passenger compartment. This is accomplished
by having separate temperature control slides for both
the driver and front passenger. The blue area of the scaleindicates cooler temperatures while the red area indicates
warmer temperatures.
CirculationThe cab is designed with features to promote outside air
circulation. There are grilles in the cab back panel. These
are air exhausters that provide the means for regular
exchange of cab air.
Side window demisters direct airflow specifically to the
window glass to help prevent interior fogging of the
glass. They are located in the extreme outside upper
edges of the instrument panel. The demisters also pro-
vide extra air ducts for circulation. They are in operation
whenever the Floor, Mix or Defrost modes are in use.
NOTE:
When you turn off the engine you may hear a
hissing sound from under the hood for a short period of
time. This is a normal condition that occurs if the air
conditioning system has been on. It is not an indication of
a problem with the air conditioning system.
Dual Zone Temperature Control
UNDERSTANDING YOUR INSTRUMENT PANEL 243
4
Page 341 of 532
4. Press ESP button four times within twenty seconds.
The “ESP/TCS Indicator Light” should appear and dis-
appear four times.
5. Rotate the steering wheel 360° clockwise (180° clock-
wise from center).
6. Cycle ignition switch OFF then ON.
7. If the sequence was completed properly, the “ESP/
TCS Indicator Light” will blink several times to confirm
HSA is off.
Steps 1-7 must be completed within 90 seconds to turn off
HSA. Repeat steps 1-7 to re-enable HSA functionality.Electronic Roll Mitigation (ERM)The ERM system anticipates the potential for wheel lift
by monitoring the driver ’s steering wheel input and the
speed of the vehicle. When ERM determines that the rate
of change of the steering wheel angle and vehicle speed
are sufficient to potentially cause wheel lift, it applies theappropriate brake and may reduce engine power to
lessen the chance that wheel lift will occur. ERM will only
intervene during very severe or evasive driving maneu-
vers.
ERM can only reduce the chance of wheel lift occurring
during severe or evasive driving maneuvers. It cannot
prevent wheel lift due to other factors such as road
conditions, leaving the roadway or striking objects or
other vehicles.
WARNING!
Many factors, such as vehicle loading, road condi-
tions and driving conditions, influence the chance
that wheel lift or rollover may occur.
(Continued)
STARTING AND OPERATING 339
5