2009 DODGE DAKOTA engine
[x] Cancel search: enginePage 172 of 449
WARNING!
A hot engine cooling system is dangerous. You or
others could be badly burned by steam or boiling
coolant. You may want to call a service center if your
vehicle overheats. If you decide to look under the
hood yourself, see Section 7 of this manual. Follow
the warnings under the Cooling System Pressure Cap
paragraph.
8. Speedometer
The speedometer shows the vehicle's speed.
9. Charging System Light
This light shows the status of the electrical charg-
ing system. The light should come on when the
ignition switch is first turned ON and remain on briefly
as a bulb check. If the light stays on or comes on while
driving, turn off some of the vehicle's non-essential
electrical devices or increase engine speed (if at idle). Ifthe charging system light remains on, it means that the
vehicle is experiencing a problem with the charging
system. Obtain SERVICE IMMEDIATELY. See an autho-
rized dealer.
10. Vehicle Security Light
The vehicle security light will flash rapidly for approxi-
mately 15 seconds when the vehicle security alarm is
arming. The light will flash at a slower speed continu-
ously after the alarm is set. The security light will also
come on for about three seconds when the ignition is first
turned ON.
11. Anti-Lock Brake System (ABS)
This light monitors the Anti-Lock Brake System
(ABS). The light will illuminate when the igni-
tion switch is turned to the ON position and
may stay on for as long as four seconds.
If the ABS light remains on or turns on while driving, it
indicates that the Anti-Lock portion of the brake system
170 UNDERSTANDING YOUR INSTRUMENT PANEL
Page 173 of 449
is not functioning and that service is required. However,
the conventional brake system will continue to operate
normally if the BRAKE warning light is not on.
If the ABS light is on, the brake system should be serviced
as soon as possible to restore the benefits of Anti-Lock
brakes. If the ABS light does not illuminate when the
Ignition switch is turned to the ON position, have the
light inspected by an authorized dealer.
12. Oil Pressure Warning Light
The Oil Pressure Warning Light illuminates when
the engine oil pressure has become too low. For a
bulb check, this light will come on momentarily when the
ignition is turned ON. If the light turns on while driving,
stop the vehicle and shut off the engine as soon as
possible. Immediate service should be obtained.
13. Tachometer
The tachometer gauge measures engine revolutions-per-
minute (rpm x 1000).14. Shift Lever Indicator
The electronic shift lever indicator is self-contained
within the instrument cluster. It displays the position of
the automatic transmission shift lever, and the relation of
each position to all other positions. The display will place
a box around the selected transmission range (PRND21).
If the PRNDL displays only the characters PRND21 (no
boxes), have the system checked by an authorized dealer.
15. Trip Odometer
The trip odometer shows individual trip mileage. To
switch from odometer to trip odometer, press and release
the trip odometer button.
To reset a trip odometer, display the trip odometer then
push and hold the button until the display resets (ap-
proximately two seconds).
The odometer will also display messages such as: door
ajar, low wash, No-fuse, Lo Tire (display will toggle
between Lo and Tire for three cycles - if equipped),
UNDERSTANDING YOUR INSTRUMENT PANEL 171
4
Page 174 of 449
CHAngE OIL and the outside temperature on vehicles
that are not equipped with the Overhead Console with
Compass/Temperature Mini-Trip Computer.
If the vehicle diagnostic system determines that the fuel
filler cap is loose, improperly installed, or damaged,
ªGASCAPº will be displayed in the instrument cluster.
Tighten the fuel filler cap properly and press the odom-
eter RESET button to turn the ªGASCAPº message off. If
the problem continues, the message will appear the next
time the vehicle is started.
Change Oil Message
Your vehicle is equipped with an engine oil change
indicator system. The ªCHAngE OILº message will flash
in the instrument cluster odometer for approximately
12 seconds after a single chime has sounded, to indicate
the next scheduled oil change interval. The engine oil
change indicator system is duty cycle based, which
means the engine oil change interval may fluctuate
dependent upon your personal driving style.Unless reset, this message will continue to display each
time you turn the ignition switch to the ON/RUN
position. To turn off the message temporarily, press and
release the Trip Odometer button on the instrument
cluster. To reset the oil change indicator system (after
performing the scheduled maintenance) refer to the fol-
lowing procedure.
1. Turn the ignition switch to the ON position(do not
start the engine).
2. Fully depress the accelerator pedal slowly three
times within 10 seconds.
3. Turn the ignition switch to the OFF/LOCK position.
NOTE:If the indicator message illuminates when you
start the vehicle, the oil change indicator system did not
reset. If necessary, repeat this procedure.
172 UNDERSTANDING YOUR INSTRUMENT PANEL
Page 175 of 449
16. Odometer
The odometer shows the total distance the vehicle has
been driven.
U.S. federal regulations require that upon transfer of
vehicle ownership, the seller certify to the purchaser the
correct mileage that the vehicle has been driven. There-
fore, if the odometer reading is changed during repair or
replacement, be sure to keep a record of the reading
before and after the service so that the correct mileage can
be determined.
17. Fog Light Indicator Ð If Equipped
The fog light indicator shows when the fog lights
are ON.
18. Transmission Temperature Indicator
This light indicates that there is excessive trans-
mission fluid temperature, that might occur
with severe usage such as trailer towing. If thislight comes on, stop the vehicle and run the engine at idle
or faster, with the transmission in NEUTRAL, until the
light goes off.
19. Electronic Throttle Control (ETC) ± If Equipped
The Electronic Throttle Control (ETC) light
informs you of a problem with the ETC system.
If a problem is detected, the light will come on
while the engine is running. If the light remains
lit with the engine running, your vehicle will usually be
drivable, however, see an authorized dealer for service as
soon as possible. If the light is flashing when the engine
is running, immediate service is required and you may
experience reduced performance, an elevated/rough idle
or engine stall, and your vehicle may require towing. The
light will come on when the ignition is first turned ON
and remain on for 15 seconds as a bulb check. If the light
does not come on during starting, have the system
checked by an authorized dealer.
UNDERSTANDING YOUR INSTRUMENT PANEL 173
4
Page 177 of 449
WARNING!
Driving a vehicle with the red brake light on is
dangerous. Part of the brake system may have failed.
It will take longer to stop the vehicle. You could have
an accident. Have the vehicle checked immediately.
Vehicles equipped with the Anti-Lock Brake System
(ABS), are also equipped with Electronic Brake Force
Distribution (EBD). In the event of an EBD failure, the
Brake Warning Light will turn on along with the ABS
Light. Immediate repair to the ABS system is required.
Operation of the Brake Warning Light can be checked by
turning the ignition switch from the OFF position to the
ON position. The light should illuminate for approxi-
mately two seconds. The light should then turn off unless
the parking brake is applied or a brake fault is detected.
If the light does not illuminate, have the light inspected
by an authorized dealer.The light also will turn on when the parking brake is
applied with the ignition switch in the ON position.
NOTE:This light shows only that the parking brake is
applied. It does not show the degree of brake application.
21. Malfunction Indicator Light (MIL)
The Malfunction Indicator Light (MIL) is part of
an Onboard Diagnostic system (OBD II) that
monitors the emissions and engine control sys-
tem. If the vehicle is ready for emissions testing, the light
will come on when the ignition is first turned ON and
remain on, as a bulb check, until the engine is started. If
the vehicle is not ready for emissions testing, the light
will come on when the ignition is first turned ON and
remain on for 15 seconds, then blink for 5 seconds, and
remain on until the vehicle is started. If the bulb does not
come on during starting, have the condition investigated
promptly.
UNDERSTANDING YOUR INSTRUMENT PANEL 175
4
Page 178 of 449
If this light comes on and remains on while driving, it
suggests a potential engine control problem and the need
for system service.
Although your vehicle will usually be drivable and not
need towing, see an authorized dealer for service as soon
as possible.
CAUTION!
Prolonged driving with the MIL on could cause
damage to the engine control system. It also could
affect fuel economy and drivability.
If the MIL is flashing, severe catalytic converter
damage and power loss will soon occur. Immediate
service is required.22. Tire Pressure Monitoring Telltale Light Ð If
Equipped
Each tire, including the spare (if provided),
should be checked monthly, when cold and
inflated to the inflation pressure recommended
by the vehicle manufacturer on the vehicle
placard or tire inflation pressure label. (If your vehicle
has tires of a different size than the size indicated on the
vehicle placard or tire inflation pressure label, you should
determine the proper tire inflation pressure for those
tires.)
As an added safety feature, your vehicle has been
equipped with a Tire Pressure Monitoring System
(TPMS) that illuminates a low tire pressure telltale when
one or more of your tires is significantly under-inflated.
Accordingly, when the low tire pressure telltale illumi-
nates, you should stop and check your tires as soon as
possible, and inflate them to the proper pressure. Driving
on a significantly under-inflated tire causes the tire to
176 UNDERSTANDING YOUR INSTRUMENT PANEL
Page 197 of 449
Operating Instructions Ð Voice Recognition
System (VR) (If Equipped)
For the radio, refer to ªVoice Recognition System (VR)º in
Section 3.
For UConnecttªVoice Recognition System (VR),º refer to
ªHands-Free Communication (UConnectt)º in Section 3.
Operating Instructions - Hands-Free Phone
(UConnectt) (If Equipped)
Refer to ªHands-Free Communication (UConnectt)º in
Section 3.
Operating Instructions - Satellite Radio Mode (If
Equipped)
Refer to ªSatellite Radioº in this section.
Operating Instructions - Video Entertainment
System (VES)Ÿ (If Equipped)
Refer to separate ªVideo Entertainment System (VES)Ÿ
Guide.ºDolbyt
Manufactured under license from DolbytLaboratories.
9Dolbyt9and the double-D symbol are trademarks of
DolbytLaboratories.
Macrovision
This product incorporates copyright protection technol-
ogy that is protected by U.S. patents and other intellec-
tual property rights. Use of this copyright protection
technology must be authorized by Macrovision, and is
intended for home and other limited viewing uses only,
unless otherwise authorized by Macrovision. Reverse
engineering or disassembly is prohibited
DTSŸ
9DTSŸ9and9DTSŸ 2.09are trademarks of Digital The-
ater Systems, Inc.
UNDERSTANDING YOUR INSTRUMENT PANEL 195
4
Page 231 of 449
Air Conditioning And Heater
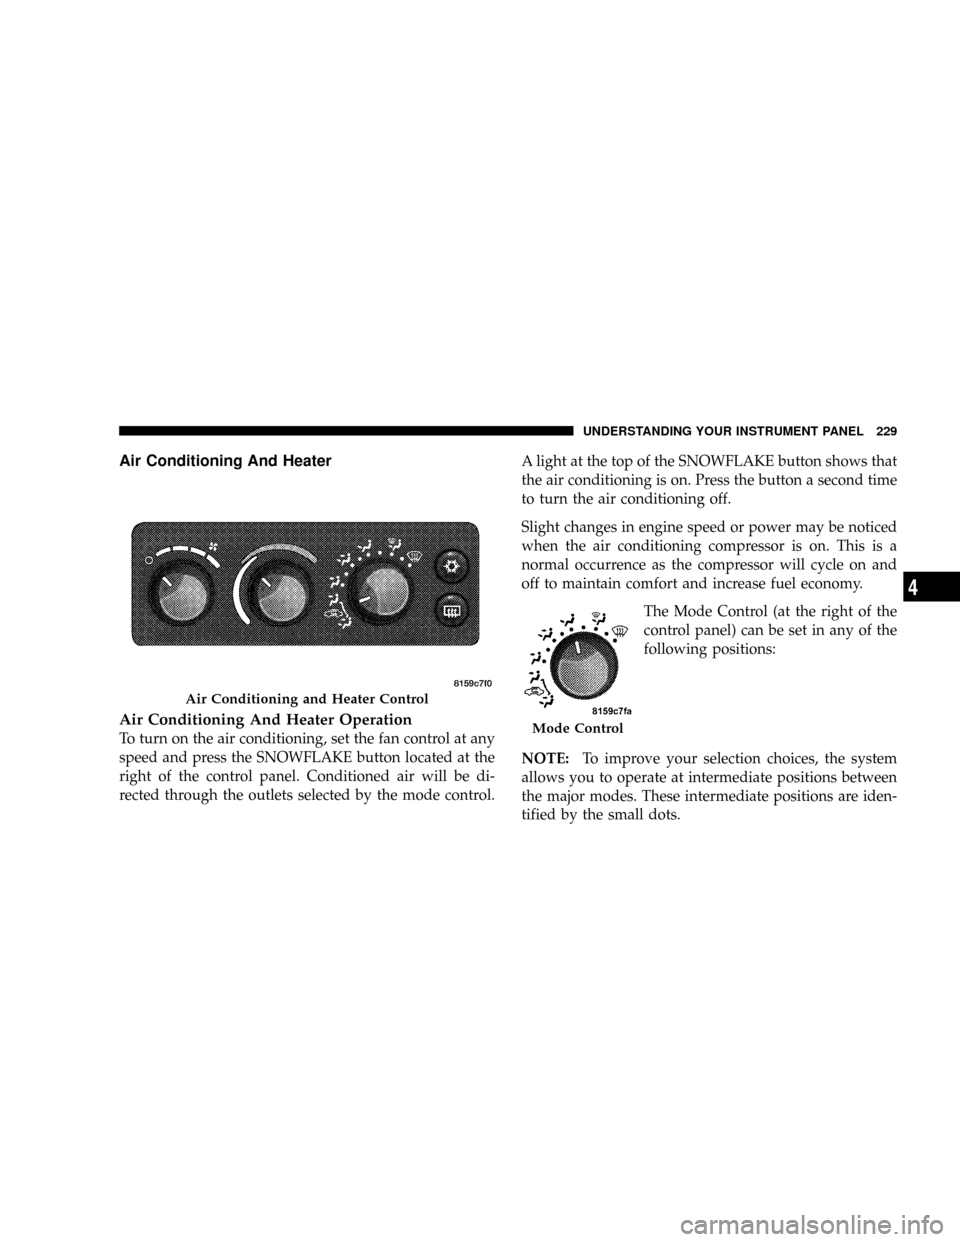
Air Conditioning And Heater Operation
To turn on the air conditioning, set the fan control at any
speed and press the SNOWFLAKE button located at the
right of the control panel. Conditioned air will be di-
rected through the outlets selected by the mode control.A light at the top of the SNOWFLAKE button shows that
the air conditioning is on. Press the button a second time
to turn the air conditioning off.
Slight changes in engine speed or power may be noticed
when the air conditioning compressor is on. This is a
normal occurrence as the compressor will cycle on and
off to maintain comfort and increase fuel economy.
The Mode Control (at the right of the
control panel) can be set in any of the
following positions:
NOTE:To improve your selection choices, the system
allows you to operate at intermediate positions between
the major modes. These intermediate positions are iden-
tified by the small dots.
Air Conditioning and Heater Control
Mode Control
UNDERSTANDING YOUR INSTRUMENT PANEL 229
4