Page 148 of 543
Commands
The Voice Recognition (VR) system understands two
types of commands. Universal commands are available at
all times. Local commands are available if the supported
radio mode is active.
Changing the Volume
1. Start a dialogue by pressing the VR button.
2. Say a command (e.g., “Help”).
3. Use the ON/OFF VOLUME rotary knob to adjust the
volume to a comfortable level while the Voice Recogni-
tion (VR) system is speaking. Please note the volume
setting for VR is different than the audio system.
Main Menu
Start a dialogue by pressing the VR button. You may say
“Main Menu” to switch to the main menu.
In this mode, you can say the following commands:
•“Radio” (to switch to the radio mode)
•“Disc” (to switch to the disc mode)
•“Memo” (to switch to the memo recorder)
•“System Setup” (to switch to system setup)
Radio AM (or Radio Long Wave or Radio Medium
Wave — If Equipped)
To switch to the AM band, say “AM” or “Radio AM”. In
this mode, you may say the following commands:
•“Frequency” (to change the frequency)
•“Next Station” (to select the next station)
•“Previous Station” (to select the previous station)
•“Radio Menu” (to switch to the radio menu)
•“Main Menu” (to switch to the main menu)
146 UNDERSTANDING THE FEATURES OF YOUR VEHICLE
Page 183 of 543
Halo Lights — If Equipped
Halo lights are strategically placed soft lighting that help
to illuminate specific areas to aid the occupants in
locating specific features while driving at night.To activate the Halo lights, push in the Halo
switch control knob. Pressing the switch con-
trol knob in a second time will turn the Halo
lights off.
Parking Lights
Turn the headlight switch knob to the first detent
to turn the parking lights on. This also turns on all
instrument panel lighting.
Headlights
Turn the headlight switch knob to the second
detent to turn the headlights and parking lights
on. This also turns on all instrument panel
lighting. To change the brightness of the instrument panel lights,
rotate the dimmer control up or down.
Automatic Headlights — If Equipped
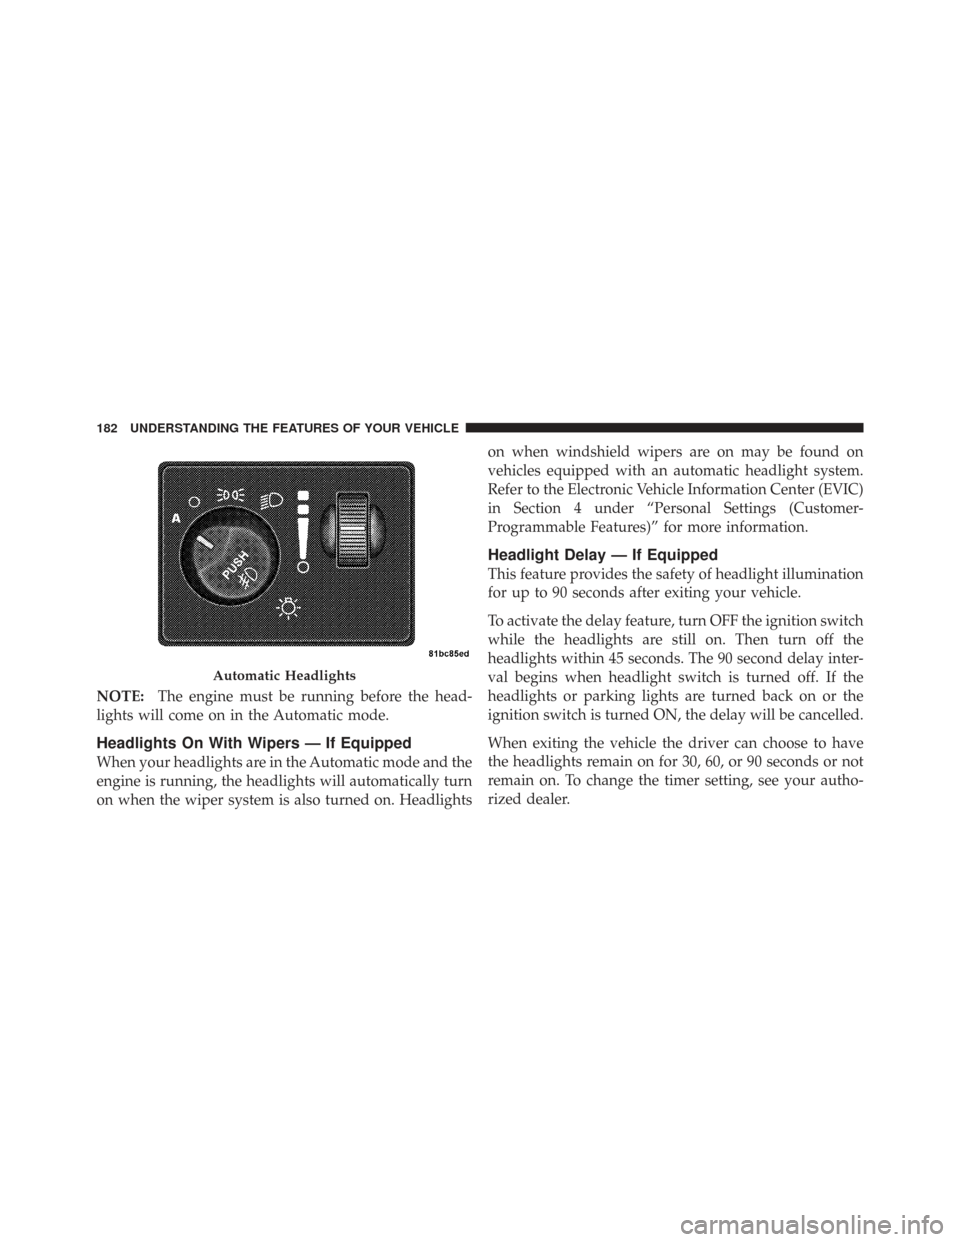
This system automatically turns your headlights on or off
based on ambient light levels. To turn the system on, turn
the headlight switch to the extreme counterclockwise
position aligning the indicator with the
“A”on the
headlight switch. When the system is on, the Headlight
Time Delay feature is also on. This means your headlights
will stay on for up to 90 seconds after you turn the
ignition switch OFF. To turn the Automatic System off,
turn the headlight switch clockwise to the “O”off
position.
3
UNDERSTANDING THE FEATURES OF YOUR VEHICLE 181
Page 184 of 543
NOTE:The engine must be running before the head-
lights will come on in the Automatic mode.
Headlights On With Wipers — If Equipped
When your headlights are in the Automatic mode and the
engine is running, the headlights will automatically turn
on when the wiper system is also turned on. Headlights on when windshield wipers are on may be found on
vehicles equipped with an automatic headlight system.
Refer to the Electronic Vehicle Information Center (EVIC)
in Section 4 under “Personal Settings (Customer-
Programmable Features)” for more information.
Headlight Delay — If Equipped
This feature provides the safety of headlight illumination
for up to 90 seconds after exiting your vehicle.
To activate the delay feature, turn OFF the ignition switch
while the headlights are still on. Then turn off the
headlights within 45 seconds. The 90 second delay inter-
val begins when headlight switch is turned off. If the
headlights or parking lights are turned back on or the
ignition switch is turned ON, the delay will be cancelled.
When exiting the vehicle the driver can choose to have
the headlights remain on for 30, 60, or 90 seconds or not
remain on. To change the timer setting, see your autho-
rized dealer.
Automatic Headlights
182 UNDERSTANDING THE FEATURES OF YOUR VEHICLE
Page 187 of 543
NOTE:If either light remains on and does not flash, or
there is a very fast flash rate, check for a defective outside
light bulb. If an indicator fails to light when the lever is
moved, it would suggest that the indicator bulb is
defective.
Lane Change Assist
Tap the lever up or down once, without moving beyond
the detent, and the turn signal (right or left) will flash
three times then automatically turn off.
Turn Signal Warning
If the vehicle electronics sense that the vehicle has
traveled at over 18 mph (29 km/h) for approximately
1 mile (1.6 km) with the turn signals on, a chime will
sound to alert the driver.
High Beam/Low Beam Select Switch
When the headlights are turned on, pushing the multi-
function lever toward the instrument panel will switch
from low beams to high beams. Pulling back to the
neutral position returns the headlights to the low beam
operation.
Turn Signals
3
UNDERSTANDING THE FEATURES OF YOUR VEHICLE 185
Page 197 of 543
speed memory. Pushing the ON/OFF button to the OFF
position or turning OFF the ignition erases the set speed
memory.
Resuming Speed
To resume a previously set speed, raise the Electronic
Speed Control lever (RESUME/ACCEL) upward, and
release. Resume can be used at any speed above 25 mph
(40 km/h).
Varying The Speed Setting
When the Electronic Speed Control is set, speed can be
increased by raising and holding the RESUME/ACCEL
lever upwards. When released, a new set speed will be
established.
Raising the RESUME/ACCEL lever upward, once, will
result in a 1 mph (1.6 km/h) speed increase. Each time
the lever is tapped upward speed increases, so tapping
the Electronic Speed Control lever three times will in-
crease speed by 3 mph (5 km/h), etc.To decrease speed while speed control is set, press the
SET/DECEL lever downward, and hold. Release the
Electronic Speed Control lever when the desired speed is
reached, and the new speed will be set.
Tapping the SET/DECEL lever downward, once, will
result in a 1 mph (1.6 km/h) speed decrease. Each time
the Electronic Speed Control lever is tapped downward,
speed decreases.
Accelerating To Pass
Press the accelerator as you normally would. When the
pedal is released, the vehicle will return to the set speed.
NOTE:
The Electronic Speed Control system maintains
speed up and down hills. A slight speed change on
moderate hills is normal.
3
UNDERSTANDING THE FEATURES OF YOUR VEHICLE 195
Page 258 of 543

NOTE:When this message is displayed, bring the
vehicle to a stop and idle the engine until the message
clears.
CHAngE OIL
Your vehicle is equipped with an engine oil change
indicator system. The CHAngE OILmessage will flash in
the instrument cluster odometer for approximately
12 seconds, after a single chime has sounded, to indicate
the next scheduled oil change interval. The engine oil
change indicator system is duty cycle-based, which
means the engine oil change interval may fluctuate
dependent upon your personal driving style.
Unless reset, this message will continue to display each
time you turn the ignition switch to the ON/RUN
position. To turn off the message temporarily, press and
release the Trip / Odometer Display reset button on the instrument cluster. To reset the oil change indicator
system (after performing the scheduled maintenance),
perform the following steps.
1. Turn the ignition switch to the ON position (do not
start the engine).
2. Fully depress the accelerator pedal, slowly, three times
within 10 seconds.
3. Turn the ignition switch to the OFF/LOCK position.
NOTE:
If the indicator message illuminates when you
start the engine, the oil change indicator system did not
reset. If necessary, repeat these steps.
25. Odometer
The odometer shows the total distance the vehicle has
been driven.
U.S. federal regulations require that upon transfer of
vehicle ownership, the seller certify to the purchaser the
256 UNDERSTANDING YOUR INSTRUMENT PANEL
Page 259 of 543
correct mileage that the vehicle has been driven. There-
fore, if the odometer reading is changed during repair or
replacement, be sure to keep a record of the reading
before and after the service, so that the correct mileage
can be determined.
26. Compass Mini-Trip Computer (CMTC) or Electronic
Vehicle Information Center (EVIC) Display— If
Equipped
Compass Mini-Trip Computer (CMTC) Display — If
Equipped
On vehicles equipped with Compass Mini-Trip Com-
puter (CMTC), the display provides the outside tempera-
ture, one of eight compass headings to indicate the
direction the vehicle is facing, and the current radio
station. For more information refer to “Compass Mini-
Trip Computer” in this section.Electronic Vehicle Information Center (EVIC) Display
— If Equipped
The Electronic Vehicle Information Center (EVIC) fea-
tures a driver-interactive display that is located in the
instrument cluster. For more information refer to “Elec-
tronic Vehicle Information (EVIC)” in this section.
27. Compass Mini-Trip Computer (CMTC) Display
Button
Press the left reset button to scroll through sub-menus
(i.e., Outside Temperature, Trip Functions: AVG Fuel
Economy, DTE, Elapsed Time, and Units). Press and hold
the reset button for approximately two seconds, to reset
the display shown.
28. Fuel Door Reminder
The arrow in this symbol is a reminder that the
Fuel Filler Door is located on the left side of the
vehicle.
4
UNDERSTANDING YOUR INSTRUMENT PANEL 257
Page 264 of 543
•Vehicle information warning message displays
•Tire Pressure Monitor System
•Personal Settings (Customer-Programmable Features)
•Compass display
•Outside temperature display
•Trip computer functions
•Audio Modes displayEVIC Menu / Step Control Button, as
it appears on the left side of the steer-
ing column. Press and release the MENU button, and the
mode displayed will change between
Compass/Temperature, Trip, System Status,
and Personal Settings.
Press the STEP button to scroll through sub
menus (i.e., Trip Functions, Avg. Fuel Economy,
DTE, Elapsed Time, and Units).
Steering Wheel EVIC Compass/Temp
Control Button, as it appears on the
right side of the steering column.
Press and release the Compass/Temperature
button to for instant access to the Compass/
Temperature screens.
262 UNDERSTANDING YOUR INSTRUMENT PANEL