Page 148 of 543
Commands
The Voice Recognition (VR) system understands two
types of commands. Universal commands are available at
all times. Local commands are available if the supported
radio mode is active.
Changing the Volume
1. Start a dialogue by pressing the VR button.
2. Say a command (e.g., “Help”).
3. Use the ON/OFF VOLUME rotary knob to adjust the
volume to a comfortable level while the Voice Recogni-
tion (VR) system is speaking. Please note the volume
setting for VR is different than the audio system.
Main Menu
Start a dialogue by pressing the VR button. You may say
“Main Menu” to switch to the main menu.
In this mode, you can say the following commands:
•“Radio” (to switch to the radio mode)
•“Disc” (to switch to the disc mode)
•“Memo” (to switch to the memo recorder)
•“System Setup” (to switch to system setup)
Radio AM (or Radio Long Wave or Radio Medium
Wave — If Equipped)
To switch to the AM band, say “AM” or “Radio AM”. In
this mode, you may say the following commands:
•“Frequency” (to change the frequency)
•“Next Station” (to select the next station)
•“Previous Station” (to select the previous station)
•“Radio Menu” (to switch to the radio menu)
•“Main Menu” (to switch to the main menu)
146 UNDERSTANDING THE FEATURES OF YOUR VEHICLE
Page 150 of 543
Memo
To switch to the voice recorder mode, say “Memo”. In
this mode, you may say the following commands:
•“New Memo” (to record a new memo) — During the
recording, you may press the VR button to stop
recording. You proceed by saying one of the following
commands:
�“Save” (to save the memo)
�“Continue” (to continue recording)
�“Delete” (to delete the recording)
•“Play Memos” (to play previously recorded memos)
— During the playback you may press the VR button
to stop playing memos. You proceed by saying one of
the following commands:
�“Repeat” (to repeat a memo)
�“Next” (to play the next memo)
�“Previous” (to play the previous memo)
�“Delete” (to delete a memo)
•“Delete All” (to delete all memos)
System Setup
To switch to system setup, say “Setup”. In this mode, you
may say the following commands:
•“Language German”
•“Language Dutch”
•“Language Italian”
•“Language English”
•“Language French”
•“Language Spanish”
•“Tutorial”
•“Voice Training”
148 UNDERSTANDING THE FEATURES OF YOUR VEHICLE
Page 170 of 543
To reinstall the seat, align the seat into the detent posi-
tions on the floor. Squeeze the release handle and rotate
upward until the lock indicator button returns into the
handle.
WARNING!
If not properly latched, the bench seats could become
loose. Personal injuries could result. After reinstall-
ing these seats, be sure the red indicator button on
the release handles return into the handles.
Third Row Power Seat — If Equipped
The third row power seat offers the following features:
•The seatbacks can be folded forward for additional
cargo space if needed.
•Head restraints can be stowed with the seat.
•Tailgate mode flips the seat rearward to face out the
tailgate.
Release Handles
168 UNDERSTANDING THE FEATURES OF YOUR VEHICLE
Page 177 of 543
To recall the memory setting for driver two, press
MEMORY button 2 on the driver’s door or the UNLOCK
button on the RKE transmitter linked to Memory Position
2.
A recall can be cancelled by pressing any of the
MEMORY buttons on the driver’s door during a recall (S,
1, or 2). When a recall is cancelled, the driver’s seat,
driver’s mirror, and the pedals stop moving. A delay of
one second will occur before another recall can be
selected.
To Disable RKE Transmitter Linked to Memory
1. Turn the ignition switch to the OFF position and
remove the key.
2. Press and release MEMORY button 1. The system will
recall any memory settings stored in position 1. Wait for
the system to complete the memory recall before continu-
ing to Step 3.3. Press and release the memory SET (S) button located
on the driver’s door. A chime will sound signaling that
you are in the memory set mode.
4. Within five seconds, press and release MEMORY
button 1 on the driver’s door. A chime will sound
signaling to you that the driver memory has been set.
5. Within five seconds, press and release the UNLOCK
button on the RKE transmitter. A chime will sound
signaling to you that the RKE transmitter link has been
successfully disabled.
To disable another RKE transmitter linked to either
Memory Position, repeat Steps 1 to 5 for each RKE
transmitter.
NOTE:
Once programmed, all RKE transmitters linked
to memory can be easily enabled or disabled at one time.
3
UNDERSTANDING THE FEATURES OF YOUR VEHICLE 175
Page 182 of 543
Dome Light Positions
Rotate the dimmer control completely
upward to the second detent (extreme
top position) to turn on the interior
lights. The interior lights will remain
on when the dimmer control is in this
position.
Interior Lighting Defeat (Off)
Rotate the dimmer control to the off
position (extreme bottom). The inte-
rior lights will remain off when the
doors or liftgate are open.
Parade Mode (Daytime Brightness Feature)
Rotate the dimmer control to the first
detent. This feature brightens the
odometer, radio and overhead dis-
plays when the parking lights or head-
lights are on.
Dimmer Control
With the parking lights or headlights
on, rotating the dimmer control for the
interior lights on the instrument panel
upward will increase the brightness of
the instrument panel lights.
180 UNDERSTANDING THE FEATURES OF YOUR VEHICLE
Page 184 of 543
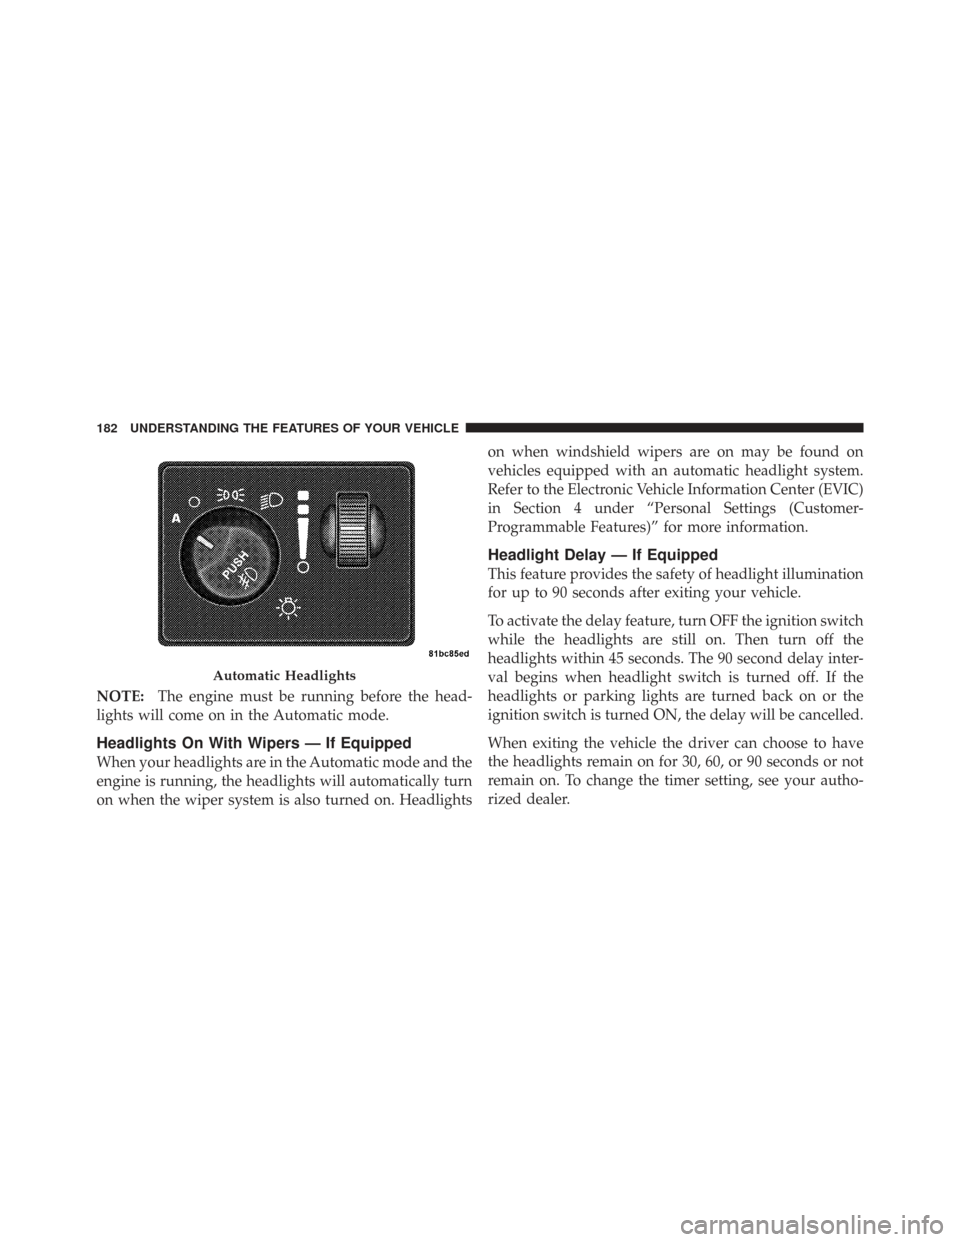
NOTE:The engine must be running before the head-
lights will come on in the Automatic mode.
Headlights On With Wipers — If Equipped
When your headlights are in the Automatic mode and the
engine is running, the headlights will automatically turn
on when the wiper system is also turned on. Headlights on when windshield wipers are on may be found on
vehicles equipped with an automatic headlight system.
Refer to the Electronic Vehicle Information Center (EVIC)
in Section 4 under “Personal Settings (Customer-
Programmable Features)” for more information.
Headlight Delay — If Equipped
This feature provides the safety of headlight illumination
for up to 90 seconds after exiting your vehicle.
To activate the delay feature, turn OFF the ignition switch
while the headlights are still on. Then turn off the
headlights within 45 seconds. The 90 second delay inter-
val begins when headlight switch is turned off. If the
headlights or parking lights are turned back on or the
ignition switch is turned ON, the delay will be cancelled.
When exiting the vehicle the driver can choose to have
the headlights remain on for 30, 60, or 90 seconds or not
remain on. To change the timer setting, see your autho-
rized dealer.
Automatic Headlights
182 UNDERSTANDING THE FEATURES OF YOUR VEHICLE
Page 192 of 543
•The rain sense feature can be turned on and off
through the EVIC (if equipped). Refer to “Personal
Settings (Customer Programmable Features)” under
“Electronic Vehicle Information Center (EVIC)” in
Section 4.
The rain sensing system has protective features for the
wiper blades and arms. It will not operate under the
following conditions:
•Low Temperature Wipe Inhibit — The rain sensing
feature will not operate when the ignition is first
switched ON, and the vehicle is stationary, and the
outside temperature is below 32°F (0°C), unless the
wiper control on the multifunction lever is moved, or
the vehicle speed becomes greater than 0 mph
(0 km/h), or the outside temperature rises above
freezing.
•Neutral Wipe Inhibit — The rain sensing feature will
not operate when the ignition is ON, and the trans-
mission shift lever is in the NEUTRAL position, and
the vehicle speed is less than 5 mph (8 km/h), unless
the wiper control on the multifunction lever is moved
or the shift lever is moved out of the NEUTRAL
position.
•Remote Start Mode Inhibit — On vehicles equipped
with remote starting system, rain sensing wipers are
not operational when the vehicle is in the remote start
mode. Once the operator is in the vehicle and has
placed the ignition switch in the RUN position, rain
sensing wiper operation can resume, if it has been
selected, and no other inhibit conditions (mentioned
previously) exist.
190 UNDERSTANDING THE FEATURES OF YOUR VEHICLE
Page 205 of 543
4. Enable or disable the rear camera feature by selecting
�enable rear camera in reverse�soft key.
5. Press the “save” soft key.
6. When the vehicle is shifted into REVERSE, an image of
the rear of the vehicle will appear with a caution note to
�check entire surroundings� displayed across the top of
the screen. After five seconds this note will disappear.
7. When the vehicle is shifted out of REVERSE, the rear
camera mode is exited and the navigation or audio screen
appears again.
Turning the Rear Camera On or Off — Without
Navigation Radio
1. Press the �menu�hard key.
2. Select �system setup� soft key. 3. Enable or disable the rear camera feature by selecting
�enable rear camera in reverse�
soft key.
4. When the vehicle is shifted into REVERSE, an image of
the rear of the vehicle will appear with a caution note to
�check entire surroundings� displayed across the top of
the screen. After five seconds this note will disappear.
5. When the vehicle is shifted out of REVERSE, the rear
camera mode is exited and the audio screen appears
again.
3
UNDERSTANDING THE FEATURES OF YOUR VEHICLE 203