Page 12 of 526

▫Using The Panic Alarm................. 24
▫Programming Additional Transmitters...... 25
▫Transmitter Battery Service.............. 25
▫General Information................... 26
�Remote Starting System — If Equipped....... 26
▫How To Use Remote Start............... 26
�Door Locks........................... 28
▫Manual Door Locks................... 28
▫Power Door Locks.................... 30
▫Child Protection Door Lock.............. 32
�Windows............................ 35
▫Power Windows...................... 35
▫Wind Buffeting....................... 39�Trunk Lock And Release................. 39
�Trunk Safety Warning................... 40
▫Trunk Emergency Release............... 40
�Occupant Restraints..................... 41
▫Lap/Shoulder Belts.................... 42
▫Lap/Shoulder Belt Untwisting Procedure.... 47
▫Seat Belt Pretensioners................. 48
▫Enhanced Seat Belt Use Reminder System
(BeltAlert�) ......................... 48
▫Automatic Locking Mode — If Equipped.... 49
▫Seat Belts And Pregnant Women.......... 50
▫Seat Belt Extender..................... 50
▫Driver And Front Passenger Supplemental
Restraint System (SRS) - Airbag........... 51
10 THINGS TO KNOW BEFORE STARTING YOUR VEHICLE
Page 26 of 526
1. Press the LOCK button on a programmed RKE trans-
mitter for at least four seconds, but no longer than
10 seconds. Then, press the PANIC button while still
holding the LOCK button.
2. Release both buttons at the same time.
3. Test the feature while outside of the vehicle by press-
ing the LOCK button on the RKE transmitter with the
ignition switch in the LOCK position and the key re-
moved.
4. Repeat these steps if you want to return this feature to
its previous setting.
NOTE:Pressing the LOCK button on the RKE transmit-
ter while you are in the vehicle will activate the security
alarm. Opening a door with the security alarm activated
will cause the alarm to sound. Press the UNLOCK button
to deactivate the security alarm.To Unlatch the Trunk
Press the TRUNK button on the RKE transmitter two
times within five seconds to unlatch the trunk.
Using the Panic Alarm
To turn the Panic Alarm feature on or off, press and hold
the PANIC button on the RKE transmitter for at least one
second and release. When the Panic Alarm is on, the
headlights and park lights will flash, the horn will pulse
on and off, and the interior lights will turn on.
The Panic Alarm will stay on for three minutes unless
you turn it off by either pressing the PANIC button a
second time or drive the vehicle at a speed of 15 mph
(24 km/h) or greater.
NOTE:
•The interior lights will turn off if you turn the ignition
switch to the ACC or ON position while the Panic
Alarm is activated. However, the exterior lights and
horn will remain on.
24 THINGS TO KNOW BEFORE STARTING YOUR VEHICLE
Page 29 of 526
•Doors closed
•Hood closed
•Trunk closed
•Hazard switch off
•Brake switch inactive (brake pedal not pressed)
•Ignition key removed from ignition switch
•Battery at an acceptable charge level
•RKE PANIC button not pressed
To Enter Remote Start Mode
Press and release the REMOTE START button
on the RKE transmitter twice, within five sec-
onds. The parking lights will flash and the horn
will chirp twice (if programmed). Then, the
engine will start and the vehicle will remain in the
Remote Start mode for a 15-minute cycle.NOTE:
•The park lamps will turn on and remain on during
Remote Start mode.
•For security, power window and power sunroof op-
eration (if equipped) are disabled when the vehicle is
in the Remote Start mode.
•The engine can be started two consecutive times (two
15-minute cycles) with the RKE transmitter. However,
the ignition switch must be cycled to the ON position
before you can repeat the start sequence for a third
cycle.
To Exit Remote Start Mode without Driving the
Vehicle
Press and release the REMOTE START button one time,
or allow the engine to run for the entire 15-minute cycle.
THINGS TO KNOW BEFORE STARTING YOUR VEHICLE 27
2
Page 41 of 526
1. Pull the window switch up to close window com-
pletely and continue to hold the switch up for an
additional two seconds after the window is closed.
Wind Buffeting
Wind buffeting can be described as the perception of
pressure on the ears or a helicopter type sound in the
ears. Your vehicle may exhibit wind buffeting with the
windows down, or the sunroof (if equipped) in certain
open or partially open positions. This is a normal occur-
rence and can be minimized. If the buffeting occurs with
the rear windows open, then open the front and rear
windows together to minimize the buffeting. If the
buffeting occurs with the sunroof open, then adjust the
sunroof opening to minimize the buffeting.
TRUNK LOCK AND RELEASE
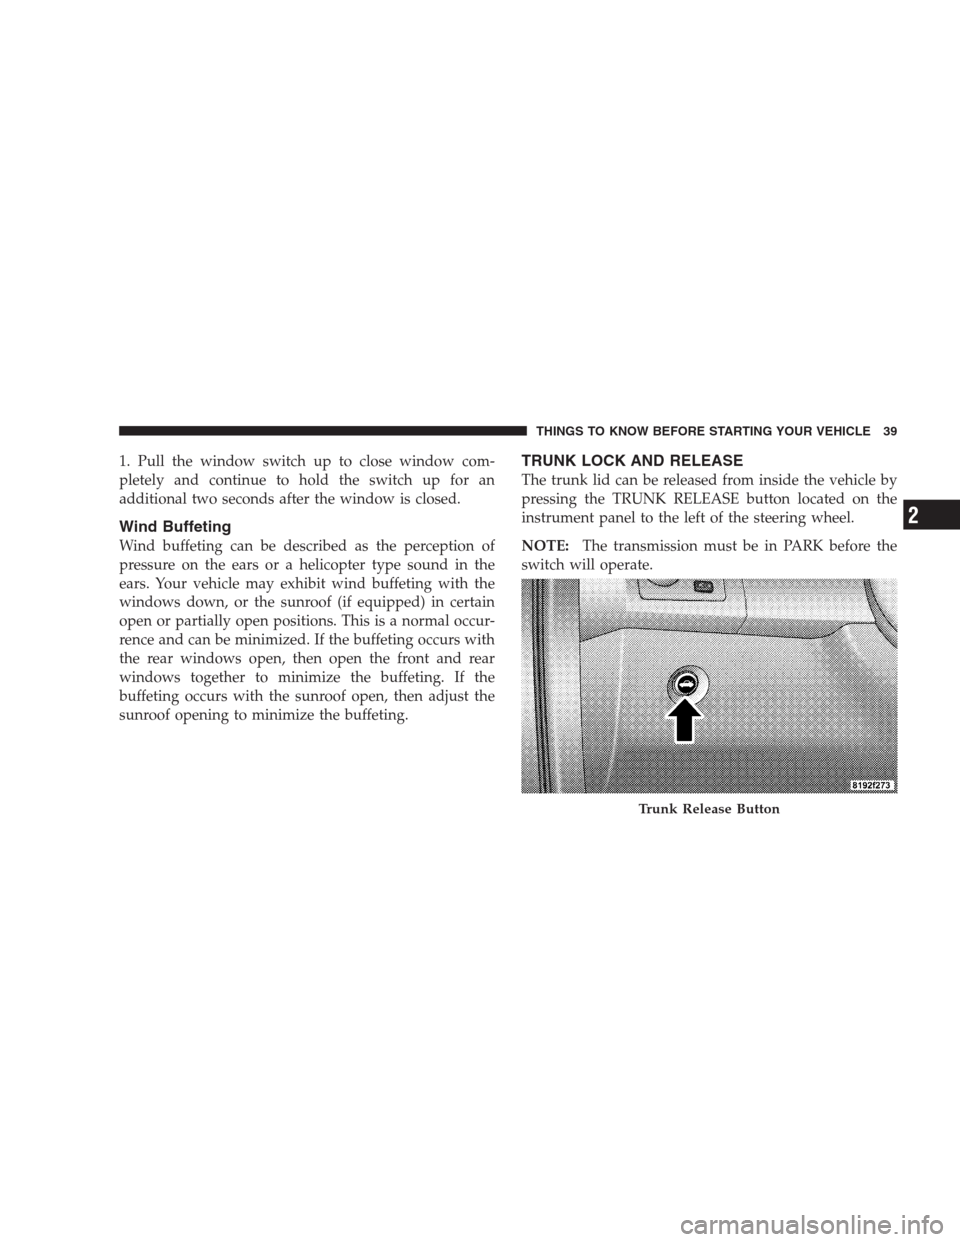
The trunk lid can be released from inside the vehicle by
pressing the TRUNK RELEASE button located on the
instrument panel to the left of the steering wheel.
NOTE:The transmission must be in PARK before the
switch will operate.
Trunk Release Button
THINGS TO KNOW BEFORE STARTING YOUR VEHICLE 39
2
Page 42 of 526
The trunk lid can be released from outside the vehicle by
pressing the TRUNK button on the Remote Keyless Entry
(RKE) transmitter twice within five seconds.
With the ignition switch in the ON position, the Trunk
Open symbol will display in the instrument cluster
indicating that the trunk is open. The odometer display
will reappear once the trunk is closed.
With the ignition switch in the LOCK position or the key
removed from the ignition switch, the Trunk Open sym-
bol will display until the trunk is closed.TRUNK SAFETY WARNING
WARNING!
Do not allow children to have access to the trunk,
either by climbing into the trunk from outside, or
through the inside of the vehicle. Always close the
trunk lid when your vehicle is unattended. Once in
the trunk, young children may not be able to escape,
even if they entered through the rear seat. If trapped
in the trunk, children can die from suffocation or
heat stroke.
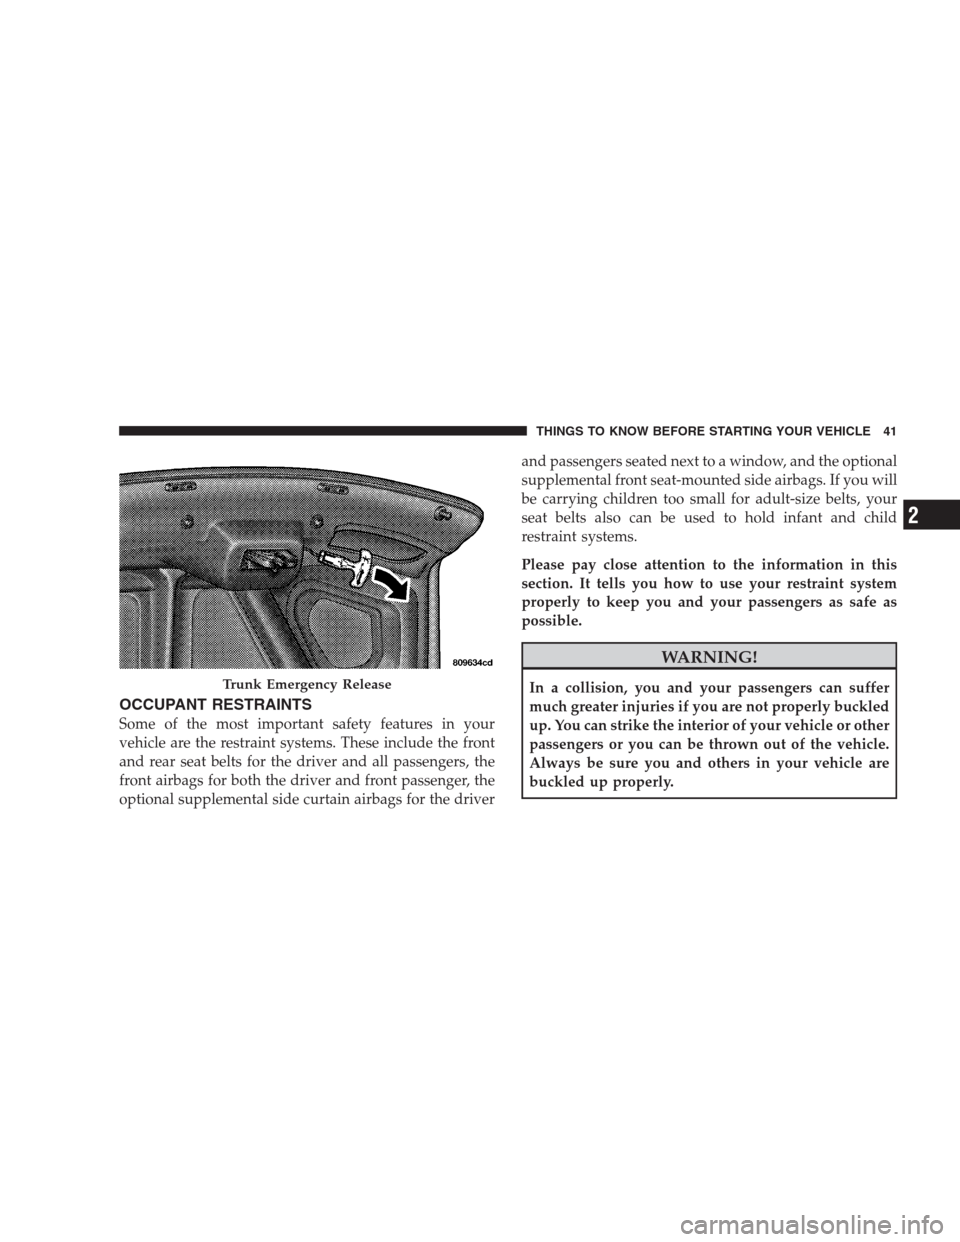
Trunk Emergency Release
The trunk of your vehicle is equipped with an emergency
release handle. It is located on the inside of the trunk lid,
near the latch, and is coated so that it glows in a darkened
trunk. Pull on the handle to open the trunk.
40 THINGS TO KNOW BEFORE STARTING YOUR VEHICLE
Page 43 of 526
OCCUPANT RESTRAINTS
Some of the most important safety features in your
vehicle are the restraint systems. These include the front
and rear seat belts for the driver and all passengers, the
front airbags for both the driver and front passenger, the
optional supplemental side curtain airbags for the driverand passengers seated next to a window, and the optional
supplemental front seat-mounted side airbags. If you will
be carrying children too small for adult-size belts, your
seat belts also can be used to hold infant and child
restraint systems.
Please pay close attention to the information in this
section. It tells you how to use your restraint system
properly to keep you and your passengers as safe as
possible.
WARNING!
In a collision, you and your passengers can suffer
much greater injuries if you are not properly buckled
up. You can strike the interior of your vehicle or other
passengers or you can be thrown out of the vehicle.
Always be sure you and others in your vehicle are
buckled up properly.Trunk Emergency Release
THINGS TO KNOW BEFORE STARTING YOUR VEHICLE 41
2
Page 207 of 526
INSTRUMENT PANEL FEATURES
1 - Air Outlet 7 - Radio 13 - Ignition Switch
2 - Instrument Cluster 8 - Climate Control 14 - Hood Release
3 - Hazard Switch 9 - Heated Seat Switch* 15 - Trunk Release Switch
4 - Analog Clock 10 - Power Outlet 16 - Headlight Switch
5 - Electronic Stability Program Off Button*
/ Traction Control System Off Button*11 - Ash Tray* * If Equipped
6 - Glove Compartment 12 - Storage Compartment*UNDERSTANDING YOUR INSTRUMENT PANEL 205
4
Page 285 of 526
selected. Press the TUNE/SCROLL control knob and the
Sirius ID number will display. The Sirius ID number
display will time out in two minutes. Press any button on
the radio to exit this screen.
ESN/SID Access With REN/RER Radios
While in SAT mode, press the MENU button on the radio
faceplate.
Next, touch the SUBSCRIPTION tab on the touch screen.
All the ESNs that apply to your vehicle will display.
ESN/SID Access With REU Radio
While in SAT mode, press the MENU button on the radio
faceplate.
Next, turn the knob surrounding the joystick in the center
of the radio to scroll to Subscription, and then press and
release the joystick. All of the ESNs that apply to your
vehicle will display.
Selecting uconnect�studios (Satellite) Mode
Press the SAT button until�SAT�appears in the display. A
CD may remain in the radio while in the Satellite radio
mode.
Satellite Antenna
To ensure optimum reception, do not place items on the
roof around the rooftop antenna location or strap items to
the trunk lid around the trunk lid antenna (if equipped).
Metal objects placed within the line of sight of the
antenna will cause decreased performance. Larger lug-
gage items such as bikes should be placed as far rearward
as possible, within the loading design of the rack. Do not
place items directly on or above the antenna.
Reception Quality
Satellite reception may be interrupted due to one of the
following reasons:
•The vehicle is parked in an underground parking
structure or under a physical obstacle.
UNDERSTANDING YOUR INSTRUMENT PANEL 283
4