2009 CHRYSLER 300 child seat
[x] Cancel search: child seatPage 73 of 526
Again, carefully follow the installation instructions that
are provided with the child restraint system.
The rear seat lower anchorages are round bars
located at the rear of the seat cushion where it
meets the seatback and are just visible when
you lean into the rear seat to install the child
restraint. You will easily feel them if you run your finger
along the intersection of the seatback and seat cushion
surfaces.
In addition, there are tether strap anchorages
behind each rear seating position located in the
panel between the rear seatback and the rear
window. These tether strap anchorages are
under a plastic cover with this symbol on it.
Many, but not all restraint systems will be equipped with
separate straps on each side, with each having a hook or
connector for attachment to the lower anchorage and ameans of adjusting the tension in the strap. Forward-
facing toddler restraints and some rear-facing infant
restraints will also be equipped with a tether strap, a
hook for attachment to the tether strap anchorage and a
means of adjusting the tension of the strap.
You will first loosen the adjusters on the lower straps and
on the tether strap so that you can more easily attach the
hooks or connectors to the vehicle anchorages. Next,
attach the lower hooks or connectors over the top of the
seat cover material. Then rotate the tether anchorage
cover directly behind the seat where you are placing the
child restraint and attach the tether strap to the anchor-
age, being careful to route the tether strap to provide the
most direct path between the anchor and the child
restraint. Finally, tighten all three straps as you push the
child restraint rearward and downward into the seat,
removing slack in the straps according to the child
restraint manufacturer’s instructions.
THINGS TO KNOW BEFORE STARTING YOUR VEHICLE 71
2
Page 74 of 526
NOTE:
•Ensure that the tether strap does not slip into the
opening between the seatbacks as you remove slack in
the strap.
•When using the LATCH attaching system to install a
child restraint, please ensure that all seat belts not
being used for occupant restraints are stowed and out
of reach of children. It is recommended that before
installing the child restraint, buckle the seat belt so the
seat belt is tucked behind the child restraint and out of
reach. If the buckled seat belt interferes with the child
restraint installation, instead of tucking the seat belt
behind the child restraint, route the seat belt through
the child restraint belt path and then buckle it. This
should stow the seat belt out of the reach of an
inquisitive child. Remind all children in the vehicle
that the seat belts are not toys and should not be
played with, and never leave your child unattended in
the vehicle.
WARNING!
Improper installation of a child restraint to the
LATCH anchorages can lead to failure of an infant or
child restraint. The child could be badly injured or
killed. Follow the manufacturer’s directions exactly
when installing an infant or child restraint.
Installing Child Restraints Using the Vehicle Seat
Belts
The passenger seat belts are equipped with either cinch-
ing latch plates or Automatic Locking Retractors (ALRs),
which are designed to keep the lap portion tight around
the child restraint so that it is not necessary to use a
locking clip. Pulling up on the shoulder portion of the
lap/shoulder belt will tighten the belt. The cinching latch
plate will keep the belt tight; however, any seat belt
system will loosen with time, so check the belt occasion-
ally and pull it tight if necessary.
72 THINGS TO KNOW BEFORE STARTING YOUR VEHICLE
Page 75 of 526
Seat belts with an automatic locking retractor have a
distinctive label on the seat belt webbing. The seat belt
must be in the Automatic Locking mode in order to
enable a child restraint to be tightly installed. Refer to
“Automatic Locking Mode” in this section. A locking clip
should not be necessary once the automatic locking
feature is enabled. Position the shoulder and lap belt on
the child restraint. The automatic locking retractor is
activated by first attaching the child seat, then pulling all
of the webbing out of the retractor, then allowing the
webbing to retract back into the retractor. Tighten web-
bing. To release, simply unbuckle the seat belt by de-
pressing the button, allowing the webbing to retract into
the retractor.In the rear seat, you may have trouble tightening the
lap/shoulder belt on the child restraint because the
buckle or latch plate is too close to the belt path opening
on the restraint. Disconnect the latch plate from the
buckle and twist the short buckle end belt several times
to shorten it. Insert the latch plate into the buckle with the
release button facing out.
If the belt still can’t be tightened, or if pulling and
pushing on the restraint loosens the belt, you may need
to do something more. Disconnect the latch plate from
the buckle, turn the buckle around, and insert the latch
plate into the buckle again. If you still can’t make the
child restraint secure, try a different seating position.
THINGS TO KNOW BEFORE STARTING YOUR VEHICLE 73
2
Page 76 of 526
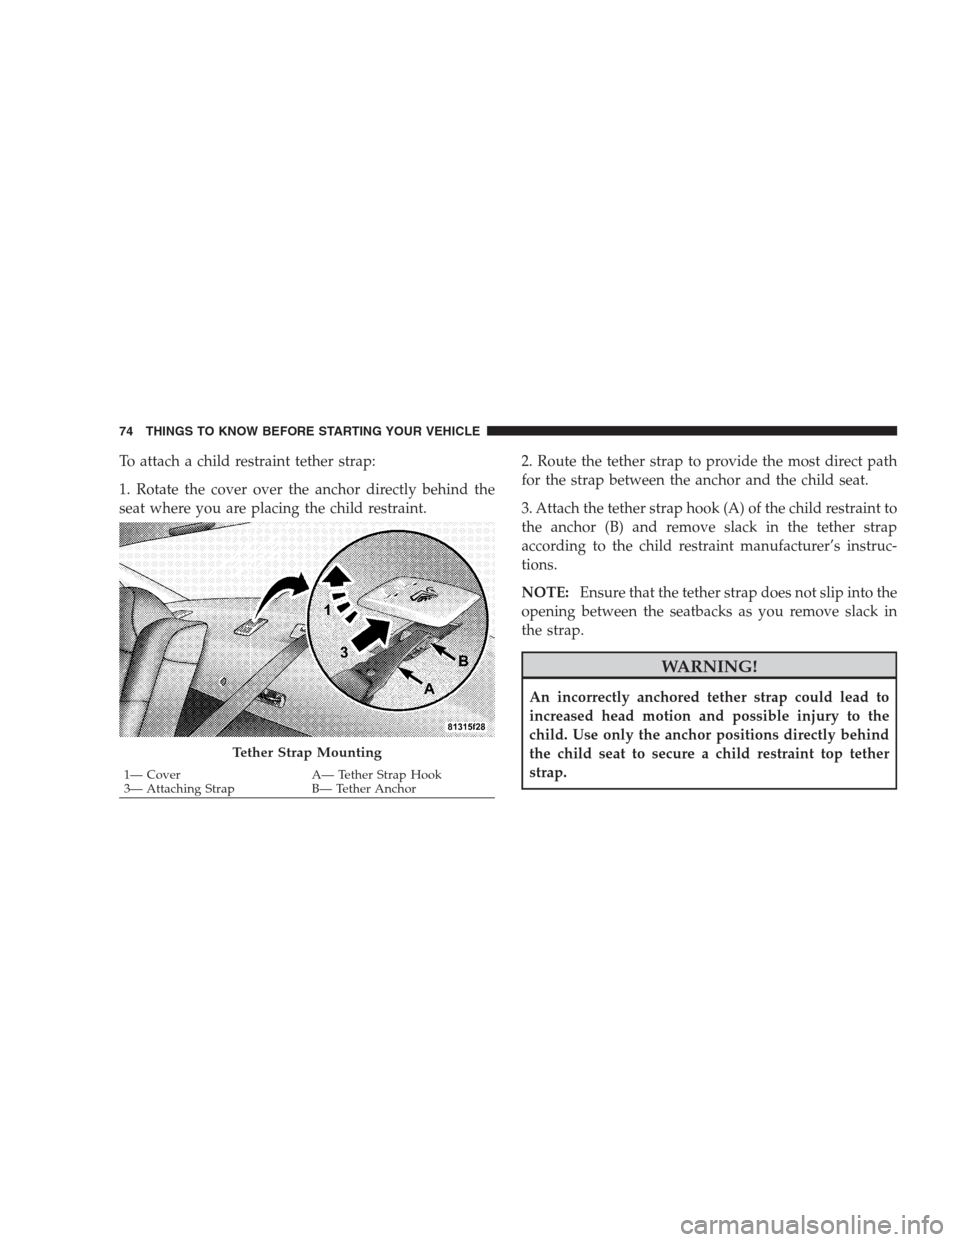
To attach a child restraint tether strap:
1. Rotate the cover over the anchor directly behind the
seat where you are placing the child restraint.2. Route the tether strap to provide the most direct path
for the strap between the anchor and the child seat.
3. Attach the tether strap hook (A) of the child restraint to
the anchor (B) and remove slack in the tether strap
according to the child restraint manufacturer’s instruc-
tions.
NOTE:Ensure that the tether strap does not slip into the
opening between the seatbacks as you remove slack in
the strap.
WARNING!
An incorrectly anchored tether strap could lead to
increased head motion and possible injury to the
child. Use only the anchor positions directly behind
the child seat to secure a child restraint top tether
strap.
Tether Strap Mounting
1— Cover A— Tether Strap Hook
3— Attaching Strap B— Tether Anchor 74 THINGS TO KNOW BEFORE STARTING YOUR VEHICLE
Page 132 of 526
WARNING!
•Be certain that the seatback is securely locked into
position. If the seatback is not securely locked into
position, the seat will not provide the proper
stability for child seats and/or passengers. An
improperly latched seat could cause serious injury.
•The cargo area in the rear of the vehicle (with the
rear seatbacks in the locked-up or folded down
position) should not be used as a play area by
children when the vehicle is in motion. They could
be seriously injured in an accident. Children
should be seated and using the proper restraint
system.
DRIVER MEMORY SEAT — IF EQUIPPED
This feature allows the driver to store up to two different
memory profiles for easy recall through a memory
switch. Each memory profile contains desired positionsettings for the driver seat, side mirrors, adjustable
pedals (if equipped), and power tilt and telescopic steer-
ing column (if equipped) and a set of desired radio
station presets. Your Remote Keyless Entry (RKE) trans-
mitter can also be programmed to recall the same posi-
tions when the unlock button is pressed.
NOTE:Only one RKE transmitter can be linked to each
of the memory positions.
The memory switch is located on the driver’s door trim
panel. The switch contains an (S) button to activate the
memory save function. It also contains a rocker switch
labeled with the number (1) and the number (2). The
rocker switch allows the driver to recall either of two
pre-programmed memory profiles by pressing the appro-
priate side of the switch.
130 UNDERSTANDING THE FEATURES OF YOUR VEHICLE
Page 190 of 526
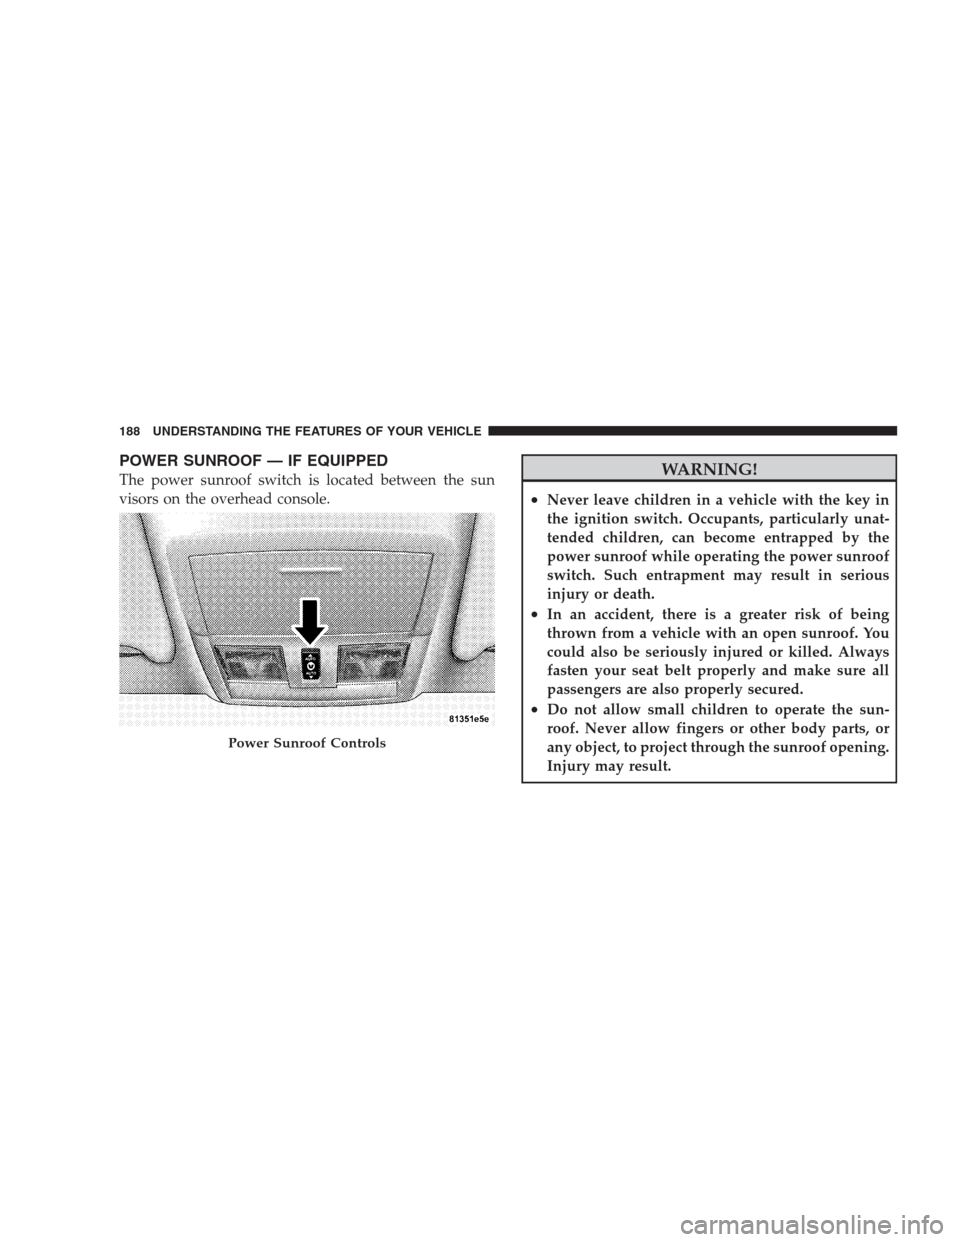
POWER SUNROOF — IF EQUIPPED
The power sunroof switch is located between the sun
visors on the overhead console.WARNING!
•Never leave children in a vehicle with the key in
the ignition switch. Occupants, particularly unat-
tended children, can become entrapped by the
power sunroof while operating the power sunroof
switch. Such entrapment may result in serious
injury or death.
•In an accident, there is a greater risk of being
thrown from a vehicle with an open sunroof. You
could also be seriously injured or killed. Always
fasten your seat belt properly and make sure all
passengers are also properly secured.
•Do not allow small children to operate the sun-
roof. Never allow fingers or other body parts, or
any object, to project through the sunroof opening.
Injury may result.
Power Sunroof Controls
188 UNDERSTANDING THE FEATURES OF YOUR VEHICLE
Page 199 of 526
WARNING! (Continued)
•Always place cargo evenly on the cargo floor. Put
heavier objects as low and as far forward as
possible.
•Place as much cargo as possible in front of the rear
axle. Too much weight or improperly placed
weight over or behind the rear axle can cause the
rear of the vehicle to sway.
•Do not pile luggage or cargo higher than the top of
the seatback. This could impair visibility or be-
come a dangerous projectile in a sudden stop or
collision.
When the seatback is folded to the upright position, make
sure it is latched by strongly pulling on the top of the
seatback above the seat strap.
WARNING!
•Be certain that the seatback is securely locked into
position. If the seatback in not securely locked
into position, the seat will not provide the proper
stability for child seats and/or passengers. An
improperly latched seat could cause serious injury.
•The cargo area in the rear of the vehicle (with the
rear seatbacks in the locked-up or folded down
position) should not be used as a play area by
children when the vehicle is in motion. They could
be seriously injured in an accident. Children
should be seated and using the proper restraint
system.
(Continued)
UNDERSTANDING THE FEATURES OF YOUR VEHICLE 197
3
Page 311 of 526
STARTING PROCEDURES
Before starting your vehicle, adjust your seat, adjust the
inside and outside mirrors, fasten your seat belt, and if
present, instruct all other occupants to buckle their seat
belts.
WARNING!
•Never leave children alone in a vehicle. Leaving
unattended children in a vehicle is dangerous for a
number of reasons. A child or others could be
seriously or fatally injured. Do not leave the key in
the ignition. A child could operate power win-
dows, other controls, or move the vehicle.
•Do not leave animals or children inside parked
vehicles in hot weather; interior heat buildup may
cause serious injury or death.
(Continued)
WARNING! (Continued)
•Be sure to turn OFF the engine and remove the key
from the ignition switch if you want to rest or
sleep in your car. Accidents can be caused by
inadvertently moving the shift lever. Accidents
can also be caused by pressing the accelerator
pedal. This may cause excessive heat in the ex-
haust system, resulting in overheating and vehicle
fire, which may cause serious or fatal injuries.
Automatic Transmission
The shift lever must be in the NEUTRAL or PARK
position before you can start the engine. Apply the brakes
before shifting into any driving gear.
STARTING AND OPERATING 309
5