2009 CHEVROLET UPLANDER light
[x] Cancel search: lightPage 151 of 464

If the Universal Home Remote indicator light blinks
rapidly for two seconds and then turns to a
constant light, continue with the programming
Steps 6 through 8.
It may be helpful to have another person assist with
the remaining steps.
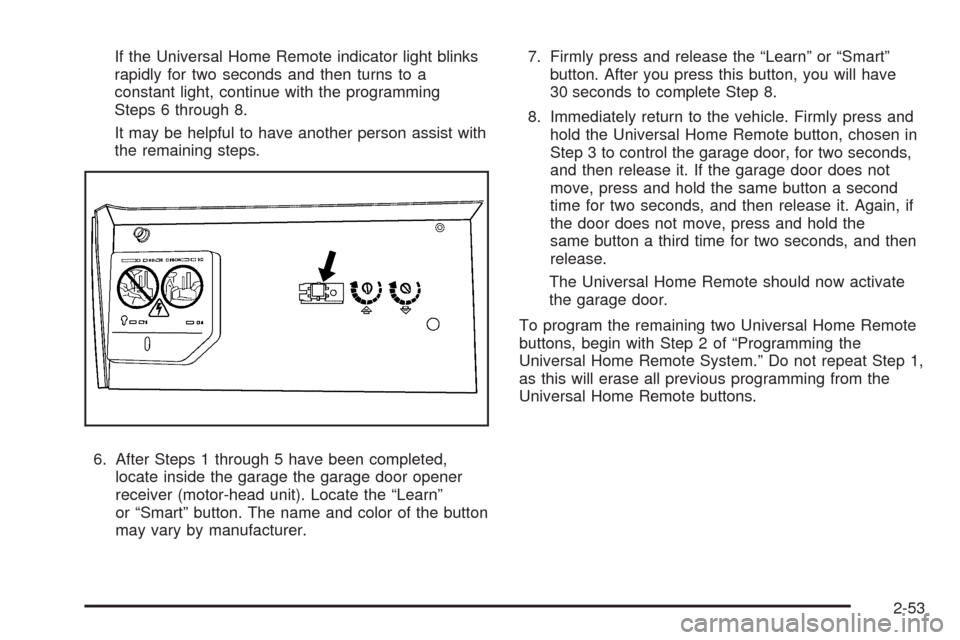
6. After Steps 1 through 5 have been completed,
locate inside the garage the garage door opener
receiver (motor-head unit). Locate the “Learn”
or “Smart” button. The name and color of the button
may vary by manufacturer.7. Firmly press and release the “Learn” or “Smart”
button. After you press this button, you will have
30 seconds to complete Step 8.
8. Immediately return to the vehicle. Firmly press and
hold the Universal Home Remote button, chosen in
Step 3 to control the garage door, for two seconds,
and then release it. If the garage door does not
move, press and hold the same button a second
time for two seconds, and then release it. Again, if
the door does not move, press and hold the
same button a third time for two seconds, and then
release.
The Universal Home Remote should now activate
the garage door.
To program the remaining two Universal Home Remote
buttons, begin with Step 2 of “Programming the
Universal Home Remote System.” Do not repeat Step 1,
as this will erase all previous programming from the
Universal Home Remote buttons.
2-53
Page 152 of 464

Gate Operator and Canadian
Programming
If you have questions or need help programming the
Universal Home Remote System, call 1-800-355-3515
or go to www.homelink.com.
Canadian radio-frequency laws require transmitter
signals to time out or quit after several seconds of
transmission. This may not be long enough for Universal
Home Remote to pick up the signal during programming.
Similarly, some U.S. gate operators are manufactured
to time out in the same manner.
If you live in Canada, or you are having difficulty
programming a gate operator or garage door opener
by using the “Programming Universal Home Remote”
procedures, regardless of where you live, replace Step 3
under “Programming Universal Home Remote” with
the following:
Continue to press and hold the Universal Home Remote
button while you press and release every two seconds
(cycle) the hand-held transmitter button until the
frequency signal has been successfully accepted by the
Universal Home Remote. The Universal Home Remote
indicator light will �ash slowly at �rst and then rapidly.
Proceed with Step 4 under “Programming Universal
Home Remote” to complete.
Using Universal Home Remote
Press and hold the appropriate Universal Home Remote
button for at least half of a second. The indicator light
will come on while the signal is being transmitted.
Erasing Universal Home Remote
Buttons
The programmed buttons should be erased when the
vehicle is sold or the lease ends.
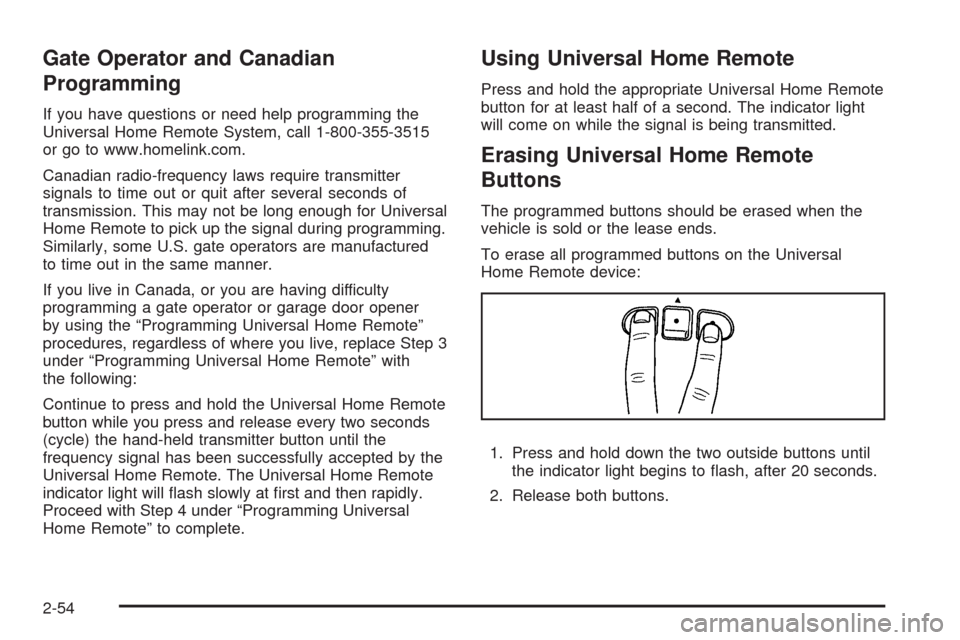
To erase all programmed buttons on the Universal
Home Remote device:
1. Press and hold down the two outside buttons until
the indicator light begins to �ash, after 20 seconds.
2. Release both buttons.
2-54
Page 153 of 464

Reprogramming a Single Universal
Home Remote Button
To reprogram any of the three Universal Home Remote
buttons, repeat the programming instructions earlier
in this section, beginning with Step 2.
For help or information on the Universal Home Remote
System, call the customer assistance phone number
underCustomer Assistance Offices on page 7-6.
Storage Areas
Your vehicle’s large carrying capacity can store many
items. If the vehicle has an extended wheelbase, it can
carry even larger items. The �oor pins that are used
to attach the seats, can be used to secure larger loads.
Glove Box
Lift the glovebox handle up to open it. Use the key to
lock and unlock the glovebox.
Cupholders
There are cupholders located below the center
instrument panel switchbank. The cupholders have a
rubber liner that can be removed, so that larger cups can
�t into the cupholders. You can also remove the liner
to clean it.
To use the cupholders, pull the tray out. Push the tray
back when not in use.
Your vehicle may be equipped with cupholders in the
second row.
Overhead Console (Without Rail)
If your vehicle has an overhead console without the rail
system, it has two reading lights, a courtesy light,
and a switchbank. SeeOverhead Console Switchbank
on page 3-19for more information.
2-55
Page 161 of 464

Instrument Panel Overview...............................3-4
Hazard Warning Flashers................................3-6
Other Warning Devices...................................3-6
Horn .............................................................3-6
Tilt Wheel.....................................................3-6
Turn Signal/Multifunction Lever.........................3-7
Turn and Lane-Change Signals........................3-7
Headlamp High/Low-Beam Changer..................3-8
Flash-to-Pass.................................................3-8
Windshield Wipers..........................................3-8
Windshield Washer.........................................3-9
Rear Window Wiper/Washer.............................3-9
Cruise Control..............................................3-10
Exterior Lamps.............................................3-13
Wiper Activated Headlamps............................3-14
Daytime Running Lamps (DRL)/
Automatic Headlamp System.......................3-14
Instrument Panel Brightness...........................3-15
Interior Lamps Control...................................3-15
Dome Lamp .................................................3-16
Entry Lighting...............................................3-16
Delayed Lighting...........................................3-16
Exit Lighting.................................................3-17
Front Reading Lamps....................................3-17
Rear Reading Lamps....................................3-17
Cargo Lamp.................................................3-17Electric Power Management...........................3-18
Battery Run-Down Protection..........................3-19
Overhead Console Switchbank.......................3-19
Accessory Power Outlet(s).............................3-20
Power Outlet 115 Volt Alternating Current........3-21
Cigarette Lighter...........................................3-22
Climate Controls............................................3-22
Climate Control System.................................3-22
Dual Climate Control System..........................3-25
Outlet Adjustment.........................................3-27
Rear Climate Control System.........................3-28
Passenger Compartment Air Filter...................3-29
Warning Lights, Gages, and Indicators............3-30
Instrument Panel Cluster................................3-31
Speedometer and Odometer...........................3-32
Trip Odometer..............................................3-32
Tachometer.................................................3-32
Safety Belt Reminders...................................3-32
Airbag Readiness Light..................................3-33
Passenger Airbag Status Indicator...................3-34
Charging System Light..................................3-35
Brake System Warning Light..........................3-35
Antilock Brake System (ABS) Warning Light.....3-36
Traction Control System (TCS) Warning Light. . . .3-37
Engine Coolant Temperature Gage..................3-37
Section 3 Instrument Panel
3-1
Page 162 of 464

Tire Pressure Light.......................................3-38
Malfunction Indicator Lamp.............................3-38
Oil Pressure Light.........................................3-41
Security Light...............................................3-41
Cruise Control Light......................................3-42
Highbeam On Light.......................................3-42
Fuel Gage...................................................3-42
Low Fuel Warning Light.................................3-43
Driver Information Center (DIC).......................3-43
DIC Operation and Displays...........................3-44
DIC Compass (Uplevel Only)..........................3-49
DIC Warnings and Messages.........................3-51
DIC Vehicle Personalization (Uplevel Only).......3-68Audio System(s).............................................3-76
Setting the Clock..........................................3-77
Radio(s) (MP3).............................................3-77
Using an MP3..............................................3-89
XM Radio Messages.....................................3-92
Rear Seat Entertainment (RSE) System...........3-93
Rear Seat Audio (RSA)................................3-108
Theft-Deterrent Feature................................3-110
Audio Steering Wheel Controls......................3-111
Radio Reception.........................................3-112
Fixed Mast Antenna....................................3-113
XM™ Satellite Radio Antenna System............3-113
Chime Level Adjustment...............................3-113
Section 3 Instrument Panel
3-2
Page 168 of 464

Turn Signal On Chime
If either turn signal is left on for more than 3/4 mile
(1.2 km), a chime sounds to let the driver know to turn it
off. If the signal needs to be left on for more than 3/4 mile
(1.2 km), turn the signal off and then turn it back on.
Headlamp High/Low-Beam Changer
The headlamps must be on for this feature to work.
Push the turn signal lever away from you to turn the high
beams on.
This instrument panel cluster light
3comes on while
the high beam headlamps are on.
Pull the lever towards you to return to low beams.
Flash-to-Pass
This feature is used to signal the vehicle ahead that you
want to pass. When the headlamps are off, pull the
lever toward you to momentarily turn on the high beams.
Release the lever, to turn the high beams off.
Windshield Wipers
The windshield wiper/washer switch is on the
multifunction lever located on the left side of the
steering column.
Turn the band with
Non it to control the wipers.
8(Mist):Turn to mist, for a single wiping cycle and
then release. The wipers stop after one wipe. Hold
longer for additional wipes.
9(Off):Move the band to this position to turn the
wipers off.
N(Delay):Turn the band to choose the delay time
between wipes. Turn towards the top or bottom of
the lever, for a shorter or longer delay.
6(Low Speed):Use for steady wiping at low
speed.
1(High Speed):Use for steady wiping at high
speed.
Be sure to clear ice and snow from the wiper blades
before using them. If they are frozen to the windshield,
carefully loosen or thaw them. If your blades do become
worn or damaged, get new blades or blade inserts.
3-8
Page 172 of 464

Reducing Speed While Using Cruise
Control
There are two ways to reduce the vehicle’s speed while
using cruise control:
Push the lever toward theRSET —until a lower
speed is reached, then release it.
To slow down in very small amounts, push the lever
toward
RSET —brie�y. Each time this is done,
the vehicle goes about 1 mph (1.6 km/h) slower.
Passing Another Vehicle While Using
Cruise Control
Use the accelerator pedal to increase the vehicle speed.
When you take your foot off the pedal, the vehicle
slows down to the cruise control speed set earlier.
Using Cruise Control on Hills
The cruise control performance will vary depending
upon the vehicle speed, load, and the steepness of the
hills. When going up steep hills, you might have to
step on the accelerator pedal to maintain the vehicle
speed. When going downhill, you might have to brake or
shift to a lower gear to keep the vehicle speed down.
This turns off the cruise control.
Ending Cruise Control
Pull the cruise control lever forward or step lightly on
the brake pedal, to disengage the cruise control. The set
speed will be retained in memory.
Push
Iat the end of the lever to turn the cruise
control system off.
Erasing Speed Memory
The cruise control set speed memory is erased when
the cruise control or the ignition is turned off.
3-12
Page 173 of 464

Exterior Lamps
The exterior lamps control is located on the instrument
panel to the left of the steering wheel.
9(Off):Turns all the lamps off. This is a momentary
control that springs back to AUTO when released.
The automatic headlamps and/or the Daytime Running
Lamps can be turned on and off for U.S. vehicles.
For vehicles �rst sold in Canada, the transmission
must be in the P (Park) position.AUTO (Automatic):Turns the exterior lamps on and
off automatically.
The automatic lights can be disabled even if the control
is in the AUTO position.
;(Parking Lamps):Turns on the parking lamps
together with the following:
Taillamps
Instrument Panel Lights
5(Headlamps):Turns on the headlamps together
with the following:
Parking Lamps
Taillamps
Instrument Panel Lights
Headlamps on Reminder
A warning chime sounds if the driver door is opened
while the ignition is turned to LOCK/OFF and the
exterior lamps are on.
3-13