2009 CHEVROLET TRAIL BLAZER turn signal
[x] Cancel search: turn signalPage 85 of 484

Programming Delayed Locking
To turn the delayed locking feature on or off, do the
following:
1. Press and hold the power door lock switch on the
driver’s door in the lock position.
2. Press the remote keyless entry transmitter unlock
button twice.
If the delayed locking feature was on, it will now be off.
If the feature was off, it will now be on.
Programmable Automatic Door
Locks
Your vehicle is equipped with an automatic lock/unlock
feature which enables you to program your vehicle’s
power door locks. You can program this feature through
the Driver Information Center (DIC), or by the following
method. SeeDIC Vehicle Customization on page 3-56.
Programmable Locking Feature
Following are the two locking modes that can be
programmed:
Mode 1:All doors lock when the transmission is shifted
out of (P) Park.
Mode 2:All doors lock when the vehicle speed is
greater than 8 mph (13 km/h).
The automatic door locks were pre-programmed at the
factory to lock all the doors when the transmission
is shifted into gear. The following instructions detail how
to program your door locks differently than the factory
setting. Choose one of the two programming options
listed previously before entering the program mode.
To enter the program mode, do the following:
1. Begin with the ignition off. Then pull the turn
signal/multifunction lever toward you and hold
it there while you perform the next step.
2. Turn the key to ON/RUN and LOCK/OFF twice.
Then, with the key in LOCK/OFF, release the
turn signal/multifunction lever. Once you do this,
you will hear the lock switch lock and unlock,
the horn will chirp twice, and a 30-second program
timer will begin.
2-9
Page 87 of 484

To enter the program mode you need to do the following:
1. Begin with the ignition off. Then pull the turn signal/
multifunction lever toward you and hold it there while
you perform the next step.
2. Turn the key to ON/RUN and LOCK/OFF twice.
Then, with the key in LOCK/OFF, release the turn
signal/multifunction lever. Once you do this, you will
hear the lock switch lock and unlock, the horn will
chirp twice, and a 30-second program timer will
begin.
3. You are now ready to program the automatic door
locks. Select one of the four programming options
listed above, and press the unlock side of the power
door lock switch to cycle through the unlocking
options. You will have 30 seconds to beginprogramming. If you exceed the 30-second limit,
the locks will automatically lock and unlock and the
horn will chirp twice to indicate that you have left
the program mode. If this occurs, repeat the
procedure beginning with Step 1 to re-enter the
programming mode.
You can exit the program mode any time by turning the
ignition to ON/RUN. The locks will automatically lock and
unlock and the horn will chirp twice to indicate that you
are leaving the program mode. If the lock/unlock switches
are not pressed while in the programming mode, the
current auto lock/unlock setting will not be modi�ed.
See your dealer for more information.
2-11
Page 121 of 484

OnStar®System
OnStar uses several innovative technologies and live
advisors to provide a wide range of safety, security,
information, and convenience services. If the airbags
deploy, the system is designed to make an automatic
call to OnStar Emergency advisors who can request
emergency services be sent to your location. If the
keys are locked in the vehicle, call OnStar at
1-888-4-ONSTAR to have a signal sent to unlock
the doors. OnStar Hands-Free Calling, including
30 trial minutes good for 60 days, is available on most
vehicles. OnStar Turn-by-Turn Navigation service,
with one trial route, is available on most vehicles.
Press the OnStar button to have an OnStar advisor
contact Roadside Service.OnStar service is provided subject to the OnStar Terms
and Conditions included in the OnStar Subscriber
glove box literature.
Some services such as Remote Door Unlock or
Stolen Vehicle Location Assistance may not be available
until the owner of the vehicle registers with OnStar.
After the �rst prepaid year, contact OnStar to select a
monthly or annual subscription payment plan. If a
payment plan is not selected, the OnStar system and all
services, including airbag noti�cation and emergency
services, may be deactivated and no longer available.
For more information visit onstar.com (U.S.) or onstar.ca
(Canada), or press the OnStar button to speak with
an advisor.
Not all OnStar services are available on all vehicles.
To check if this vehicle is able to provide the services
described below, or for a full description of OnStar
services and system limitations, see the OnStar Owner’s
Guide in the glove box or visit onstar.com (U.S.) or
onstar.ca (Canada), contact OnStar at 1-888-4-ONSTAR
(1-888-466-7827) or TTY 1-877-248-2080, or press
the OnStar button to speak with an OnStar advisor
24 hours a day, 7 days a week.
2-45
Page 128 of 484

8. Immediately return to the vehicle. Firmly press and
hold the Universal Home Remote button, chosen in
Step 3 to control the garage door, for two seconds,
and then release it. If the garage door does not
move, press and hold the same button a second time
for two seconds, and then release it. Again, if the
door does not move, press and hold the same button
a third time for two seconds, and then release.
The Universal Home Remote should now activate
the garage door.
To program the remaining two Universal Home Remote
buttons, begin with Step 2 of “Programming the
Universal Home Remote System.” Do not repeat Step 1,
as this will erase all previous programming from the
Universal Home Remote buttons.Gate Operator and Canadian
Programming
If you have questions or need help programming the
Universal Home Remote System, call 1-800-355-3515 or
go to www.homelink.com.
Canadian radio-frequency laws require transmitter
signals to time out or quit after several seconds of
transmission. This may not be long enough for Universal
Home Remote to pick up the signal during programming.
Similarly, some U.S. gate operators are manufactured
to time out in the same manner.
If you live in Canada, or you are having difficulty
programming a gate operator or garage door opener by
using the “Programming Universal Home Remote”
procedures, regardless of where you live, replace
Step 3 under “Programming Universal Home Remote”
with the following:
Continue to press and hold the Universal Home Remote
button while you press and release every two seconds
(cycle) the hand-held transmitter button until the
frequency signal has been successfully accepted by the
Universal Home Remote. The Universal Home Remote
indicator light will �ash slowly at �rst and then rapidly.
Proceed with Step 4 under “Programming Universal
Home Remote” to complete.
2-52
Page 135 of 484

Instrument Panel Overview...............................3-4
Hazard Warning Flashers................................3-6
Horn .............................................................3-6
Tilt Wheel.....................................................3-6
Turn Signal/Multifunction Lever.........................3-7
Turn and Lane-Change Signals........................3-7
Headlamp High/Low-Beam Changer..................3-8
Flash-to-Pass.................................................3-8
Windshield Wipers..........................................3-9
Windshield Washer.........................................3-9
Rear Window Wiper/Washer...........................3-10
Cruise Control..............................................3-10
Headlamps..................................................3-13
Headlamps on Reminder................................3-14
Daytime Running Lamps (DRL).......................3-14
Automatic Headlamp System..........................3-15
Fog Lamps ..................................................3-16
Instrument Panel Brightness...........................3-16
Dome Lamps ...............................................3-17
Dome Lamp Override....................................3-17
Entry Lighting...............................................3-17
Exit Lighting.................................................3-17
Reading Lamps............................................3-17
Electric Power Management...........................3-18
Battery Run-Down Protection..........................3-18
Accessory Power Outlet(s).............................3-19
Ashtray(s) and Cigarette Lighter......................3-19Climate Controls............................................3-20
Dual Climate Control System..........................3-20
Dual Automatic Climate Control System...........3-22
Outlet Adjustment.........................................3-26
Rear Climate Control System.........................3-27
Warning Lights, Gages, and Indicators............3-28
Instrument Panel Cluster................................3-29
Speedometer and Odometer..........................
.3-30
Trip Odometer..............................................3-30
Tachometer.................................................3-30
Safety Belt Reminders...................................3-31
Airbag Readiness Light..................................3-32
Passenger Airbag Status Indicator...................3-33
Charging System Light..................................3-34
Voltmeter Gage............................................3-35
Brake System Warning Light..........................3-36
Antilock Brake System (ABS) Warning Light.....3-37
StabiliTrak
®Service Light...............................3-37
StabiliTrak®Indicator Light.............................3-38
Engine Coolant Temperature Gage..................3-38
Tire Pressure Light.......................................3-39
Malfunction Indicator Lamp.............................3-39
Oil Pressure Gage........................................3-42
Change Engine Oil Light................................3-43
Section 3 Instrument Panel
3-1
Page 139 of 484

The main components of the instrument panel are the following:
A.Headlamps on page 3-13.
B. Air Outlets. SeeOutlet Adjustment on page 3-26.
C.Turn Signal/Multifunction Lever on page 3-7.
D. OnStar
®andAudio Steering Wheel Controls on
page 3-109(If Equipped).
E.Instrument Panel Cluster on page 3-29.
F.Ignition Positions on page 2-22.
G.Audio Steering Wheel Controls on page 3-109
(If Equipped).
H. Transfer Case Controls. See “Automatic Transfer
Case” underFour-Wheel Drive on page 2-30.
I. Rear Window Washer/Wiper. SeeWindshield
Washer on page 3-9.
J.Audio System(s) on page 3-62.
K.Dual Climate Control System on page 3-20.
L.Dome Lamp Override on page 3-17.
M.Fog Lamps on page 3-16(If Equipped).
Instrument Panel Brightness on page 3-16.N.Hood Release on page 5-11.
O. Driver Information Center (DIC) Steering Wheel
Controls (If Equipped). SeeDriver Information
Center (DIC) on page 3-47.
P. Ashtray. SeeAshtray(s) and Cigarette Lighter on
page 3-19.
Q. Shift Lever and StabiliTrak
®Button. SeeShifting
Into Park on page 2-35andStabiliTrak®System
on page 4-6.
R. Lighter. SeeAshtray(s) and Cigarette Lighter on
page 3-19.
S.Accessory Power Outlet(s) on page 3-19.
T. Rear Window Defogger. See “Rear Window
Defogger” underDual Climate Control System on
page 3-20andDual Automatic Climate Control
System on page 3-22.
U.Glove Box on page 2-53.
3-5
Page 140 of 484

Hazard Warning Flashers
|(Hazard Warning Flasher):Press this button
located on top of the steering column, to make the front
and rear turn signal lamps �ash on and off. This warns
others that you are having trouble. Press again to turn
the �ashers off.
When the hazard warning �ashers are on, the vehicle’s
turn signals will not work.
Horn
To sound the horn, press the horn symbols on the
steering wheel pad.
Tilt Wheel
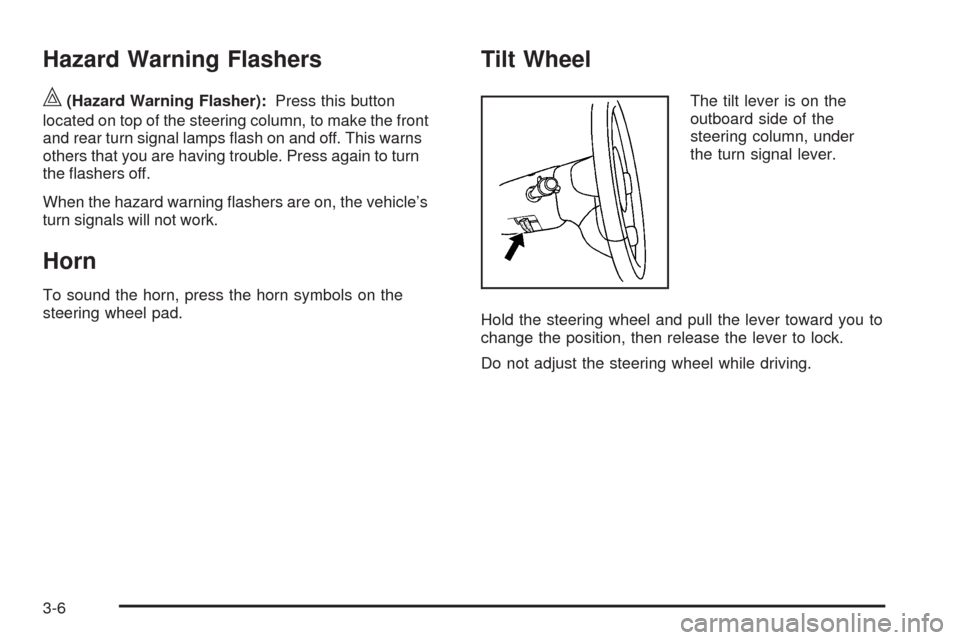
The tilt lever is on the
outboard side of the
steering column, under
the turn signal lever.
Hold the steering wheel and pull the lever toward you to
change the position, then release the lever to lock.
Do not adjust the steering wheel while driving.
3-6
Page 141 of 484

Turn Signal/Multifunction Lever
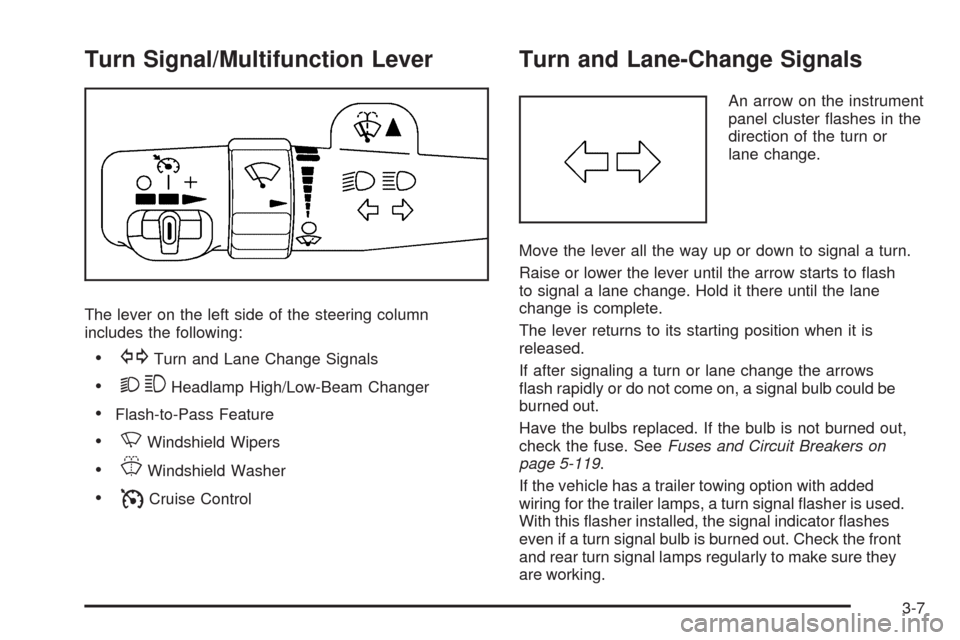
The lever on the left side of the steering column
includes the following:
GTurn and Lane Change Signals
23Headlamp High/Low-Beam Changer
Flash-to-Pass Feature
NWindshield Wipers
JWindshield Washer
ICruise Control
Turn and Lane-Change Signals
An arrow on the instrument
panel cluster �ashes in the
direction of the turn or
lane change.
Move the lever all the way up or down to signal a turn.
Raise or lower the lever until the arrow starts to �ash
to signal a lane change. Hold it there until the lane
change is complete.
The lever returns to its starting position when it is
released.
If after signaling a turn or lane change the arrows
�ash rapidly or do not come on, a signal bulb could be
burned out.
Have the bulbs replaced. If the bulb is not burned out,
check the fuse. SeeFuses and Circuit Breakers on
page 5-119.
If the vehicle has a trailer towing option with added
wiring for the trailer lamps, a turn signal �asher is used.
With this �asher installed, the signal indicator �ashes
even if a turn signal bulb is burned out. Check the front
and rear turn signal lamps regularly to make sure they
are working.
3-7