2009 CHEVROLET TAHOE tow bar
[x] Cancel search: tow barPage 20 of 574

Rear Seats
Heated Seats
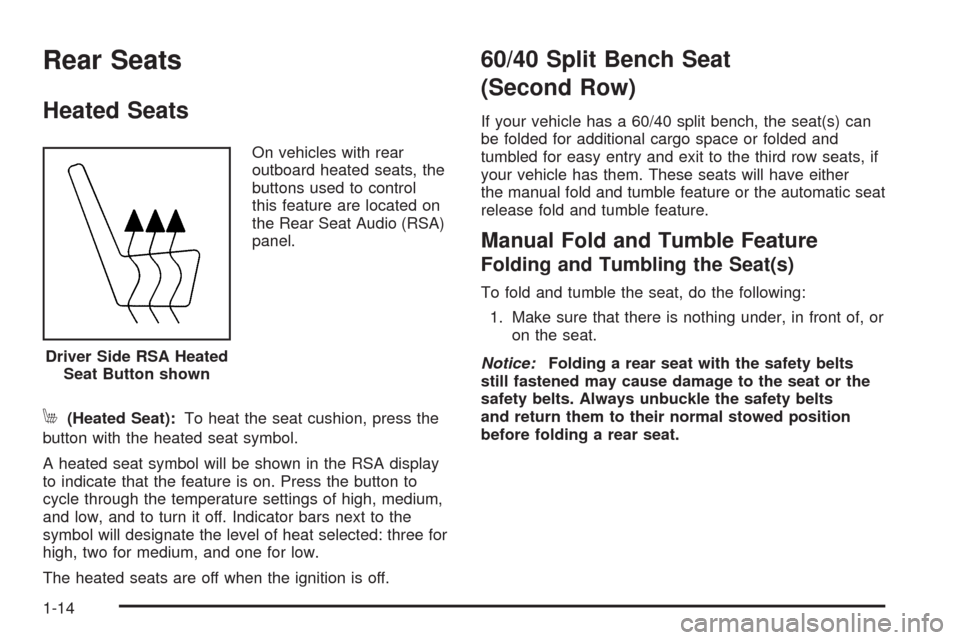
On vehicles with rear
outboard heated seats, the
buttons used to control
this feature are located on
the Rear Seat Audio (RSA)
panel.
M(Heated Seat):To heat the seat cushion, press the
button with the heated seat symbol.
A heated seat symbol will be shown in the RSA display
to indicate that the feature is on. Press the button to
cycle through the temperature settings of high, medium,
and low, and to turn it off. Indicator bars next to the
symbol will designate the level of heat selected: three for
high, two for medium, and one for low.
The heated seats are off when the ignition is off.
60/40 Split Bench Seat
(Second Row)
If your vehicle has a 60/40 split bench, the seat(s) can
be folded for additional cargo space or folded and
tumbled for easy entry and exit to the third row seats, if
your vehicle has them. These seats will have either
the manual fold and tumble feature or the automatic seat
release fold and tumble feature.
Manual Fold and Tumble Feature
Folding and Tumbling the Seat(s)
To fold and tumble the seat, do the following:
1. Make sure that there is nothing under, in front of, or
on the seat.
Notice:Folding a rear seat with the safety belts
still fastened may cause damage to the seat or the
safety belts. Always unbuckle the safety belts
and return them to their normal stowed position
before folding a rear seat. Driver Side RSA Heated
Seat Button shown
1-14
Page 164 of 574

The system can be
disabled by pressing the
rear park aid disable button
located next to the radio.
The indicator light will come on and PARK ASSIST OFF
displays on the Driver Information Center (DIC) to
indicate that URPA is off, seeDIC Warnings and
Messages on page 3-64for information about clearing
the message.
When the System Does Not Seem to
Work Properly
If the URPA system will not activate due to a temporary
condition, the message PARK ASSIST OFF will be
displayed on the DIC and a red light will be shown on
the rear URPA display when the shift lever is moved into
R (Reverse). This occurs under the following conditions:
The driver disables the system.
The ultrasonic sensors are not clean. Keep the
vehicle’s rear bumper free of mud, dirt, snow,
ice and slush. For cleaning instructions, see
Washing Your Vehicle on page 5-109.
A trailer was attached to the vehicle, or a bicycle or
an object was hanging out of the liftgate during the
last drive cycle, the red light may illuminate in
the rear display. Once the attached object is
removed, URPA will return to normal operation.
A tow bar is attached to the vehicle.
The vehicle’s bumper is damaged. Take the vehicle
to your dealer/retailer to repair the system.
Other conditions may affect system performance,
such as vibrations from a jackhammer or the
compression of air brakes on a very large truck.
If the system is still disabled, after driving forward at
least 15 mph (25 km/h), take the vehicle to your
dealer/retailer.
Side Blind Zone Alert (SBZA)
The vehicle may have a Side Blind Zone Alert (SBZA)
system. Read this entire section before using the
system.
The SBZA system operates on a radio frequency
subject to Federal Communications Commission (FCC)
Rules and with Industry Canada.
2-58
Page 245 of 574

Trailer Gain and Output
On vehicles with the Integrated Trailer Brake Control
(ITBC) system, the trailer brake display appears in the
DIC. Press the vehicle information button until
TRAILER GAIN and OUTPUT display.
TRAILER GAIN shows the trailer gain setting. This
setting can be adjusted from 0.0 to 10.0 with either a
trailer connected or disconnected. To adjust this setting,
see “Integrated Trailer Brake Control System” under
Towing a Trailer on page 4-50for more information.
OUTPUT shows the power output to the trailer anytime
a trailer with electric brakes is connected. Output is
displayed in 0 to 10 bars. Dashes may appear in
the OUTPUT display. See “Integrated Trailer Brake
Control System” underTowing a Trailer on page 4-50
for more information.
Engine Hours
Press the vehicle information button until ENGINE
HOURS displays. This display shows the total number
of hours the engine has run.
Relearn Remote Key
This display allows you to match Remote Keyless Entry
(RKE) transmitters to your vehicle. To match an RKE
transmitter to your vehicle:
1. Press the vehicle information button until
PRESS
VTO RELEARN REMOTE KEY displays.
2. Press the set/reset button until REMOTE KEY
LEARNING ACTIVE is displayed.
3. Press and hold the lock and unlock buttons on the
�rst transmitter at the same time for about
15 seconds.
On vehicles with memory recall seats, the �rst
transmitter learned will match driver 1 and
the second will match driver 2.
A chime will sound indicating that the transmitter is
matched.
4. To match additional transmitters at this time, repeat
Step 3.
Each vehicle can have a maximum of eight
transmitters matched to it.
5. To exit the programming mode, you must cycle the
key to LOCK/OFF.
3-57
Page 247 of 574

Trip Odometer
Press the trip odometer reset stem until TRIP displays.
This display shows the current distance traveled in
either miles (mi) or kilometers (km) since the last reset
for the trip odometer.
The trip odometer can be reset to zero by pressing and
holding the trip odometer reset stem while the trip
odometer is displayed.
The trip odometer has a feature called the retro-active
reset. This can be used to set the trip odometer to
the number of miles (kilometers) driven since the ignition
was last turned on. This can be used if the trip
odometer is not reset at the beginning of the trip.
To use the retro-active reset feature, press and hold the
trip odometer reset stem for at least four seconds.
The trip odometer will display the number of miles (mi)
or kilometers (km) driven since the ignition was last
turned on and the vehicle was moving. Once the vehicle
begins moving, the trip odometer will accumulate
mileage. For example, if the vehicle was driven 5 miles
(8 km) before it is started again, and then the
retro-active reset feature is activated, the display will
show 5 miles (8 km). As the vehicle begins moving, the
display will then increase to 5.1 miles (8.2 km),
5.2 miles (8.4 km), etc.
Transmission Temperature
Press the trip odometer reset stem until TRANS TEMP
displays. This display shows the temperature of the
automatic transmission �uid in either degrees
Fahrenheit (°F) or degrees Celsius (°C).
Trailer Gain and Output
On vehicles with the Integrated Trailer Brake Control
(ITBC) system, the trailer brake display appears in the
DIC. Press the trip odometer reset stem until TRAILER
GAIN and OUTPUT display.
TRAILER GAIN shows the trailer gain setting. This
setting can be adjusted from 0.0 to 10.0 with either a
trailer connected or disconnected. To adjust this setting,
see “Integrated Trailer Brake Control System” under
Towing a Trailer on page 4-50for more information.
OUTPUT shows the power output to the trailer anytime
a trailer with electric brakes is connected. Output is
displayed in 0 to 10 bars. Dashes may appear in
the OUTPUT display. See “Integrated Trailer Brake
Control System” underTowing a Trailer on page 4-50
for more information.
3-59
Page 399 of 574

*The fuses for these two circuits are installed in the
underhood electrical center, but the wires are not
connected. They should be connected by your
dealer/retailer or a quali�ed service center.
If charging a remote (non-vehicle) battery, press the
Tow/Haul mode button, if equipped, located at the end
of the shift lever. This will boost the vehicle system
voltage and properly charge the battery. If the trailer is
too light for Tow/Haul mode, or the vehicle is not
equipped with Tow/Haul, turn on the headlamps as a
second way to boost the vehicle system and charge the
battery.
Electric Brake Control Wiring
Provisions
These wiring provisions are included with the vehicle as
part of the trailer wiring package. These provisions
are for an electric brake controller. The instrument panel
contains blunt cut wires near the data link connector
for the trailer brake controller. The harness contains the
following wires:
Dark Blue: Brake Signal to Trailer Connector
Red/Black: Battery
Light Blue/White: Brake Switch
White: GroundIt should be installed by your dealer/retailer or a
quali�ed service center.
If the vehicle is equipped with an ITBC, the blunt cuts
exist, but are not connected further in the harness. If an
aftermarket trailer brake controller is installed, the
ITBC must be disconnected. Do not power both ITBC
and aftermarket controllers to control the trailer brakes at
the same time.
Trailer Recommendations
Subtract the hitch loads from the Cargo Weight Rating
(CWR). CWR is the maximum weight of the load
the vehicle can carry. It does not include the weight of
the people inside, but you can �gure about 150 lbs.
(68 kg) for each passenger. The total cargo load must
not be more than the vehicles CWR.
Weigh the vehicle with the trailer attached, so the
GVWR or GAWR are not exceeded. If using a
weight-distributing hitch, weigh the vehicle without the
spring bars in place.
The best performance is obtained by correctly spreading
out the weight of the load and choosing the correct
hitch and trailer brakes.
For more information seeTowing a Trailer on page 4-50.
4-71
Page 507 of 574

Fabric/Carpet
Use a vacuum cleaner with a soft brush attachment
frequently to remove dust and loose dirt. A canister
vacuum with a beater bar in the nozzle may only be used
on �oor carpet and carpeted �oor mats. For any soil,
always try to remove it �rst with plain water or club soda.
Before cleaning, gently remove as much of the soil as
possible using one of the following techniques:
For liquids: gently blot the remaining soil with a paper
towel. Allow the soil to absorb into the paper towel
until no more can be removed.
For solid dry soils: remove as much as possible and
then vacuum.
To clean:
1. Saturate a lint-free, clean white cloth with water or
club soda.
2. Wring the cloth to remove excess moisture.
3. Start on the outside edge of the soil and gently rub
toward the center. Continue cleaning, using a clean
area of the cloth each time it becomes soiled.
4. Continue to gently rub the soiled area until the
cleaning cloth remains clean.
5. If the soil is not completely removed, use a mild
soap solution and repeat the cleaning process
that was used with plain water.If any of the soil remains, a commercial fabric cleaner
or spot lifter may be necessary. When a commercial
upholstery cleaner or spot lifter is to be used, test a small
hidden area for colorfastness �rst. If the locally cleaned
area gives any impression that a ring formation may
result, clean the entire surface.
After the cleaning process has been completed, a paper
towel can be used to blot excess moisture from the fabric
or carpet.
Leather
A soft cloth dampened with water can be used to remove
dust. If a more thorough cleaning is necessary, a soft
cloth dampened with a mild soap solution can be used.
Allow the leather to dry naturally. Do not use heat to dry.
Never use steam to clean leather. Never use spot lifters
or spot removers on leather. Many commercial leather
cleaners and coatings that are sold to preserve and
protect leather may permanently change the appearance
and feel of the leather and are not recommended. Do not
use silicone or wax-based products, or those containing
organic solvents to clean the vehicle’s interior because
they can alter the appearance by increasing the gloss in a
non-uniform manner. Never use shoe polish on leather.
5-107
Page 568 of 574

Lights
Exterior Lamps............................................3-14
Flash-to-Pass............................................... 3-8
High/Low Beam Changer................................ 3-8
On Reminder..............................................3-15
Loading Your Vehicle.......................................4-33
Locking Rear Axle............................................ 4-9
Lockout Protection..........................................2-12
Locks
Delayed Locking..........................................2-11
Door ..........................................................2-10
Lockout Protection.......................................2-12
Power Door ................................................2-10
Programmable Automatic Door Locks.............2-11
Rear Door Security Locks.............................2-11
Loss of Control...............................................4-11
Low Fuel Warning Light...................................3-51
Lower Anchors and Tethers for Children.............1-65
Luggage Carrier..............................................2-79
Lumbar
Manual Controls............................................ 1-5
Power Controls............................................. 1-6
M
Maintenance Schedule
Additional Required Services........................... 6-6
At Each Fuel Fill.........................................6-10
At Least Once a Month................................6-10
At Least Once a Year..................................6-11Maintenance Schedule (cont.)
Introduction.................................................. 6-2
Maintenance Footnotes.................................. 6-8
Maintenance Record....................................6-17
Maintenance Replacement Parts....................6-15
Maintenance Requirements............................. 6-2
Owner Checks and Services.........................6-10
Recommended Fluids and Lubricants.............6-13
Scheduled Maintenance................................. 6-4
Using.......................................................... 6-2
Your Vehicle and the Environment................... 6-2
Malfunction Indicator Lamp...............................3-43
Manual Lumbar Controls.................................... 1-5
Manual Seats................................................... 1-3
Memory Seat, Mirrors, and Pedals...................... 1-8
Message
DIC Warnings and Messages........................3-64
Mirrors
Automatic Dimming Rearview........................2-52
Manual Rearview Mirror................................2-52
Outside Automatic Dimming Mirror.................2-55
Outside Convex Mirror.................................2-55
Outside Heated Mirrors................................2-55
Outside Manual Mirrors................................2-52
Outside Power Foldaway Mirrors....................2-54
Outside Power Mirrors..................................2-53
Outside Towing Mirrors.................................2-53
Park Tilt.....................................................2-55
MP3 ..................................................3-104, 3-108
MyGMLink.com................................................ 7-5
8
Page 570 of 574

Power
Door Locks.................................................2-10
Electrical System.......................................5-114
Liftgate......................................................2-15
Lumbar Controls........................................... 1-6
Retained Accessory.....................................2-28
Seat ............................................................ 1-4
Steering Fluid.............................................5-37
Windows....................................................2-20
Power Assist Steps.........................................2-18
Privacy..........................................................7-16
Event Data Recorders..................................7-17
Navigation System.......................................7-18
OnStar .......................................................7-18
Radio Frequency Identi�cation.......................7-18
Programmable Automatic Door Locks.................2-11
R
Radio Frequency Identi�cation (RFID), Privacy....7-18
Radio(s)........................................................3-85
Radios
Navigation/Radio System, see Navigation
Manual.................................................3-114
Rear Seat Audio........................................3-135
Reception.................................................3-138
Setting the Clock.........................................3-83
Theft-Deterrent..........................................3-137
Rainsense™ II Wipers....................................... 3-9Reading Lamps..............................................3-19
Rear Air Conditioning and Heating System.........3-31
Rear Air Conditioning and Heating System
and Electronic Climate Controls.....................3-32
Rear Axle......................................................5-50
Locking........................................................ 4-9
Rear Door Security Locks................................2-11
Rear Heated Seats.........................................1-14
Rear Seat Armrest..........................................2-80
Rear Seat Audio (RSA)..................................3-135
Rear Seat Entertainment System.....................3-125
Rear Side Window Antenna............................3-139
Rear Storage Area..........................................2-79
Rear Vision Camera........................................2-62
Rear Windshield Washer/Wiper.........................3-11
Rearview Mirror, Automatic Dimming..................2-52
Rearview Mirrors.............................................2-52
Reclining Seatbacks........................................1-10
Recommended Fluids and Lubricants.................6-13
Recovery Hooks.............................................4-32
Recreational Vehicle Towing.............................4-44
Remote Keyless Entry (RKE) System.................. 2-4
Remote Keyless Entry (RKE) System, Operation . . . 2-4
Remote Vehicle Start........................................ 2-7
Removing the Flat Tire and Installing the
Spare Tire..................................................5-92
Removing the Spare Tire and Tools...................5-87
Replacement Bulbs.........................................5-59
Replacement Parts, Maintenance......................
6-15
10