2009 CHEVROLET TAHOE cruise control
[x] Cancel search: cruise controlPage 5 of 574

Vehicle Symbol Chart
Here are some additional symbols that may be found on
the vehicle and what they mean. For more information
on the symbol, refer to the index.
0:Adjustable Pedals
9:Airbag Readiness Light
#:Air Conditioning
!:Antilock Brake System (ABS)
g:Audio Steering Wheel Controls or OnStar®
$:Brake System Warning Light
":Charging System
I:Cruise Control
B:Engine Coolant Temperature
O:Exterior Lamps
#:Fog Lamps
.:Fuel Gage
+:Fuses
i:Headlamp High/Low-Beam Changer
j:LATCH System Child Restraints
*:Malfunction Indicator Lamp
::Oil Pressure
g:Outside Power Foldaway Mirrors
}:Power
/:Remote Vehicle Start
>:Safety Belt Reminders
7:Tire Pressure Monitor
_:Tow/Haul Mode
F:Traction Control
M:Windshield Washer Fluid
v
Page 136 of 574

Adjustable Throttle and Brake Pedal
On vehicles with this feature, you can change the
position of the throttle and brake pedals.
No adjustment to the pedals can be made when the
vehicle is in R (Reverse) or while using the cruise
control.
The switch used to adjust
the pedals is located on
the instrument panel below
the climate control
system.
Press the arrow at the bottom of the switch to move
the pedals closer to your body. Press the arrow at the
top of the switch to move the pedals away from
your body.
Before you start driving, fully press the brake pedal to
con�rm the adjustment is right for you. While driving,
make only small adjustments.The vehicle may have a memory function which lets
pedal settings be saved and recalled. SeeMemory Seat,
Mirrors, and Pedals on page 1-8for more information.
Engine Coolant Heater
The engine coolant heater can provide easier starting
and better fuel economy during engine warm-up in cold
weather conditions at or below 0°F (−18°C). Vehicles
with an engine heater should be plugged in at least
four hours before starting. An internal thermostat in the
plug-end of the cord may exist which will prevent
engine coolant heater operation at temperatures
above 0°F (−18°C).
To Use the Engine Coolant Heater
1. Turn off the engine.
2. Open the hood and unwrap the electrical cord. The
cord is located on the driver’s side of the engine
compartment, near the power steering �uid
reservoir.
3. Plug the cord into a normal, grounded 110-volt
AC outlet.
2-30
Page 143 of 574

To use this feature, do the following:
1. Move the shift lever to M (Manual Mode).
2. Press the plus/minus buttons, located on the
steering column shift lever, to select the desired
range of gears for the current driving conditions.
When M (Manual Mode) is selected a number displays
next to the M, indicating the current gear.
This number is the highest gear that can be used.
However, the vehicle can automatically shift to lower
gears as it adjusts to driving conditions. This means
that all gears below that number are available. When
5 (Fifth) is selected, 1 (First) through 5 (Fifth) gears
are automatically shifted by the vehicle, but 6 (Sixth)
cannot be used until the plus/minus button located
on the steering column lever is used to change to
the gear.
Grade Braking is not available when Range Selection
Mode is active. SeeTow/Haul Mode on page 2-38.While using Range Selection Mode, cruise control and
the Tow/Haul mode can be used.
Notice:Spinning the tires or holding the vehicle
in one place on a hill using only the accelerator
pedal may damage the transmission. The repair
will not be covered by the vehicle warranty. If you
are stuck, do not spin the tires. When stopping on a
hill, use the brakes to hold the vehicle in place.
Low Traction Mode
If the vehicle has the Hydra-Matic®6-Speed Automatic
Transmission, it has a Low Traction Mode that assists
in vehicle acceleration when road conditions are
slippery, such as with ice or snow. While the vehicle is
at a stop, select the second gear range using Range
Selection Mode. This will limit torque to the wheels after
it detects wheel slip, preventing the tires from spinning.
2-37
Page 145 of 574

Grade Braking (Hydra-Matic®6-Speed
Automatic Transmission)
The Grade Braking shift modes can be activated by
pressing the button on the end of the shift control lever.
While in Range Selection Mode, Grade Braking is
deactivated allowing the driver to select a desired range
of gears.
Grade Braking is only active while the Tow/Haul Mode
is selected and you are not in the Range Selection
Mode. See “Tow/Haul Mode listed previously and
Automatic Transmission Operation on page 2-32for
more information on the Range Selection Mode. Grade
Braking assists in maintaining desired vehicle speeds
when driving on downhill grades by automatically
implementing a shift schedule that utilizes the engine
and transmission to slow the vehicle. This reduces wear
on the braking system and increases control of the
vehicle. Grade Braking monitors vehicle speed,
acceleration, engine torque and brake pedal usage.
Using this information, it detects when the truck is on a
downhill grade and the driver desires to slow the
vehicle by pressing the brake.
Also seeTowing a Trailer on page 4-50for more
information.
Cruise Grade Braking (Hydra-Matic®
6-Speed Automatic Transmission)
Cruise Grade Braking assists when driving on a
downhill grade. It maintains vehicle speed by
automatically implementing a shift schedule that uses
the engine and the transmission to slow the vehicle.
Cruise Grade Braking operates while Cruise Control is
engaged in Tow/Haul mode to assist in maintaining
vehicle speed under loaded vehicle conditions. It utilizes
vehicle acceleration and deviation from desired speed
to determine the correct gear for the operating condition.
If vehicle speed is above the desired speed the
transmission will downshift to slow the vehicle. If vehicle
speed is near or below desired speed the trans will
upshift, allowing vehicle speed to increase.
While in the Range Select Mode (RSM) mode, Cruise
Grade Braking is not available.
SeeAutomatic Transmission Operation on page 2-32.
2-39
Page 189 of 574

Instrument Panel Overview...............................3-4
Hazard Warning Flashers................................3-6
Horn .............................................................3-6
Tilt Wheel.....................................................3-6
Turn Signal/Multifunction Lever.........................3-7
Turn and Lane-Change Signals........................3-7
Headlamp High/Low-Beam Changer..................3-8
Flash-to-Pass.................................................3-8
Windshield Wipers..........................................3-9
Rainsense™ II Wipers.....................................3-9
Windshield Washer.......................................3-10
Rear Window Wiper/Washer...........................3-11
Cruise Control..............................................3-12
Exterior Lamps.............................................3-14
Headlamps on Reminder................................3-15
Daytime Running Lamps (DRL).......................3-16
Automatic Headlamp System..........................3-16
Fog Lamps ..................................................3-17
Auxiliary Roof Mounted Lamp.........................3-18
Instrument Panel Brightness...........................3-18
Dome Lamps ...............................................3-18
Dome Lamp Override....................................3-19
Entry Lighting...............................................3-19
Exit Lighting.................................................3-19
Reading Lamps............................................3-19
Electric Power Management...........................3-19
Battery Run-Down Protection..........................3-20Accessory Power Outlet(s).............................3-20
Ashtray(s) and Cigarette Lighter......................3-21
Climate Controls............................................3-22
Climate Control System.................................3-22
Dual Automatic Climate Control System...........3-24
Outlet Adjustment.........................................3-30
Rear Air Conditioning and Heating System.......3-31
Rear Air Conditioning and Heating System
and Electronic Climate Controls
...................3-32
Warning Lights, Gages, and Indicators............3-34
Instrument Panel Cluster................................3-35
Speedometer and Odometer...........................3-36
Trip Odometer..............................................3-36
Tachometer.................................................3-36
Safety Belt Reminders...................................3-36
Airbag Readiness Light..................................3-37
Passenger Airbag Status Indicator...................3-38
Charging System Light..................................3-39
Voltmeter Gage............................................3-39
Brake System Warning Light..........................3-40
Antilock Brake System (ABS) Warning Light.....3-41
StabiliTrak
®Indicator Light.............................3-42
Engine Coolant Temperature Gage..................3-42
Tire Pressure Light.......................................3-43
Malfunction Indicator Lamp.............................3-43
Oil Pressure Gage........................................3-46
Section 3 Instrument Panel
3-1
Page 190 of 574

Oil Pressure Light.........................................3-48
Security Light...............................................3-48
Fog Lamp Light............................................3-49
Cruise Control Light......................................3-49
Highbeam On Light.......................................3-49
Tow/Haul Mode Light....................................3-49
Fuel Gage...................................................3-50
Low Fuel Warning Light.................................3-51
Driver Information Center (DIC).......................3-51
DIC Operation and Displays
(With DIC Buttons)....................................3-52
DIC Operation and Displays
(Without DIC Buttons)................................3-58
DIC Compass..............................................3-61
DIC Warnings and Messages.........................3-64
DIC Vehicle Customization
(With DIC Buttons)....................................3-74Audio System(s).............................................3-82
Setting the Clock..........................................3-83
Radio(s)......................................................3-85
Using an MP3 (Radio with CD or
Six-Disc CD Player).................................3-104
Using an MP3 (Radio with CD and
DVD Player)...........................................3-108
XM Radio Messages...................................3-113
Navigation/Radio System..............................3-114
Bluetooth
®.................................................3-115
Rear Seat Entertainment (RSE) System.........3-125
Rear Seat Audio (RSA)................................3-135
Theft-Deterrent Feature................................3-137
Audio Steering Wheel Controls......................3-137
Radio Reception.........................................3-138
Rear Side Window Antenna..........................3-139
XM™ Satellite Radio Antenna System............3-139
Section 3 Instrument Panel
3-2
Page 193 of 574

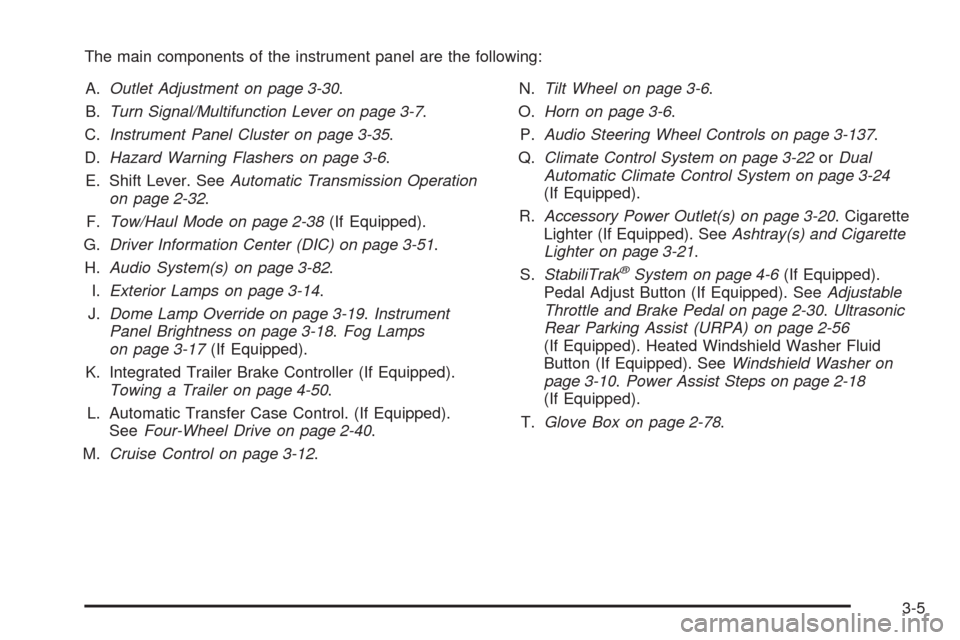
The main components of the instrument panel are the following:
A.Outlet Adjustment on page 3-30.
B.Turn Signal/Multifunction Lever on page 3-7.
C.Instrument Panel Cluster on page 3-35.
D.Hazard Warning Flashers on page 3-6.
E. Shift Lever. SeeAutomatic Transmission Operation
on page 2-32.
F.Tow/Haul Mode on page 2-38(If Equipped).
G.Driver Information Center (DIC) on page 3-51.
H.Audio System(s) on page 3-82.
I.Exterior Lamps on page 3-14.
J.Dome Lamp Override on page 3-19.Instrument
Panel Brightness on page 3-18.Fog Lamps
on page 3-17(If Equipped).
K. Integrated Trailer Brake Controller (If Equipped).
Towing a Trailer on page 4-50.
L. Automatic Transfer Case Control. (If Equipped).
SeeFour-Wheel Drive on page 2-40.
M.Cruise Control on page 3-12.N.Tilt Wheel on page 3-6.
O.Horn on page 3-6.
P.Audio Steering Wheel Controls on page 3-137.
Q.Climate Control System on page 3-22orDual
Automatic Climate Control System on page 3-24
(If Equipped).
R.Accessory Power Outlet(s) on page 3-20. Cigarette
Lighter (If Equipped). SeeAshtray(s) and Cigarette
Lighter on page 3-21.
S.StabiliTrak
®System on page 4-6(If Equipped).
Pedal Adjust Button (If Equipped). SeeAdjustable
Throttle and Brake Pedal on page 2-30.Ultrasonic
Rear Parking Assist (URPA) on page 2-56
(If Equipped). Heated Windshield Washer Fluid
Button (If Equipped). SeeWindshield Washer on
page 3-10.Power Assist Steps on page 2-18
(If Equipped).
T.Glove Box on page 2-78.
3-5
Page 200 of 574

Cruise Control
{CAUTION:
Cruise control can be dangerous where you
cannot drive safely at a steady speed. So, do not
use the cruise control on winding roads or in
heavy traffic.
Cruise control can be dangerous on slippery
roads. On such roads, fast changes in tire traction
can cause excessive wheel slip, and you could
lose control. Do not use cruise control on slippery
roads.
With cruise control, a speed of about 25 mph (40 km/h)
or more can be maintained without keeping your foot
on the accelerator. Cruise control does not work
at speeds below about 25 mph (40 km/h).
When the brakes are applied, cruise control is turned off.
If the vehicle has StabiliTrak
®, and the system begins to
limit wheel spin, cruise control will automatically
disengage. SeeStabiliTrak
®System on page 4-6. When
road conditions allow the cruise control to be safely
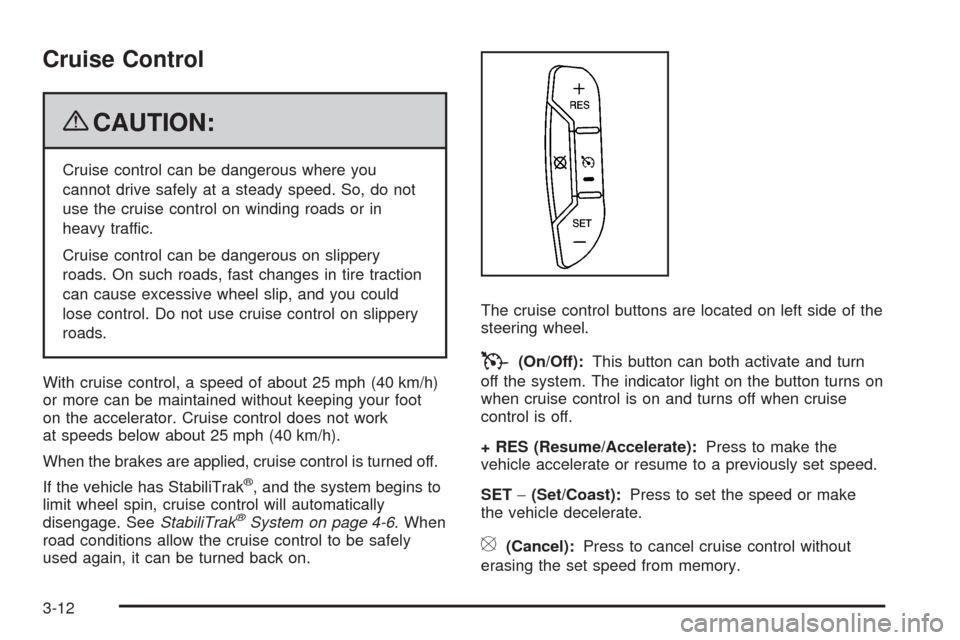
used again, it can be turned back on.The cruise control buttons are located on left side of the
steering wheel.
T(On/Off):This button can both activate and turn
off the system. The indicator light on the button turns on
when cruise control is on and turns off when cruise
control is off.
+ RES (Resume/Accelerate):Press to make the
vehicle accelerate or resume to a previously set speed.
SET−(Set/Coast):Press to set the speed or make
the vehicle decelerate.
[(Cancel):Press to cancel cruise control without
erasing the set speed from memory.
3-12