2009 CHEVROLET MALIBU ECO mode
[x] Cancel search: ECO modePage 95 of 420
Express Window Anti-Pinch Feature
If any object is in the path of the window when
the express-up is active, the window stops at the
obstruction and auto-reverse to a preset factory position.
Weather conditions such as severe icing may also
cause the window to auto-reverse. The window returns
to normal operation once the obstruction or condition
is removed.
Express Window Anti-Pinch Override
{CAUTION:
If express override is activated, the window will
not reverse automatically. You or others could be
injured and the window could be damaged. Before
you use express override, make sure that all people
and obstructions are clear of the window path.
In an emergency, the anti-pinch feature can be
overridden in a supervised mode. Hold the window
switch all the way up to the second position. The window
rises for as long as the switch is held. Once the switch
is released, the express mode is re-activated.
In this mode, the window can still close on an object in
its path. Use care when using the override mode.
Window Lockout
The driver power window controls also include a lockout
button.
o(Window Lockout):Press the lockout button to stop
the rear passengers from using their window switches.
The driver and front passenger can still operate all the
windows with the lock on. When the red part of the switch
is visible, you have returned to normal window operation.
Sun Visors
To block out glare, you can swing down the visors.
You can also remove them from the center mount and
swing them to the side, to block out glare from the side.
Your vehicle may have lighted visor vanity mirrors
located on the passenger and driver’s side visor.
When you lift the cover, the light will turn on.
2-17
Page 108 of 420
N (Neutral):In this position, the engine does not
connect with the wheels. To restart the engine when
the vehicle is already moving, use N (Neutral) only.
Also, use N (Neutral) when the vehicle is being towed.
{CAUTION:
Shifting into a drive gear while the engine is
running at high speed is dangerous. Unless your
foot is �rmly on the brake pedal, the vehicle could
move very rapidly. You could lose control and hit
people or objects. Do not shift into a drive gear
while the engine is running at high speed.
Notice:Shifting out of P (Park) or N (Neutral) with
the engine running at high speed may damage the
transmission. The repairs would not be covered
by the vehicle warranty. Be sure the engine is not
running at high speed when shifting the vehicle.D (Drive):This position is for normal driving. It provides
the best fuel economy. If you need more power for
passing, and you are:
Going less than 35 mph (56 km/h), push the
accelerator pedal about halfway down.
Going about 35 mph (56 km/h) or more, push the
accelerator all the way down.
M (Manual Mode):This position, allows you to change
gears similar to a manual transmission. If the vehicle
has this feature, see Driver Shift Control (DSC).
Driver Shift Control (DSC)
To use this feature, do the following:
1. Move the shift lever from D (Drive) rearward to
M (Manual).
While driving in manual mode, the transmission will
remain in the driver selected gear. When coming
to a stop in the manual position, the vehicle
will automatically shift into 1 (First) gear.
2-30
Page 109 of 420
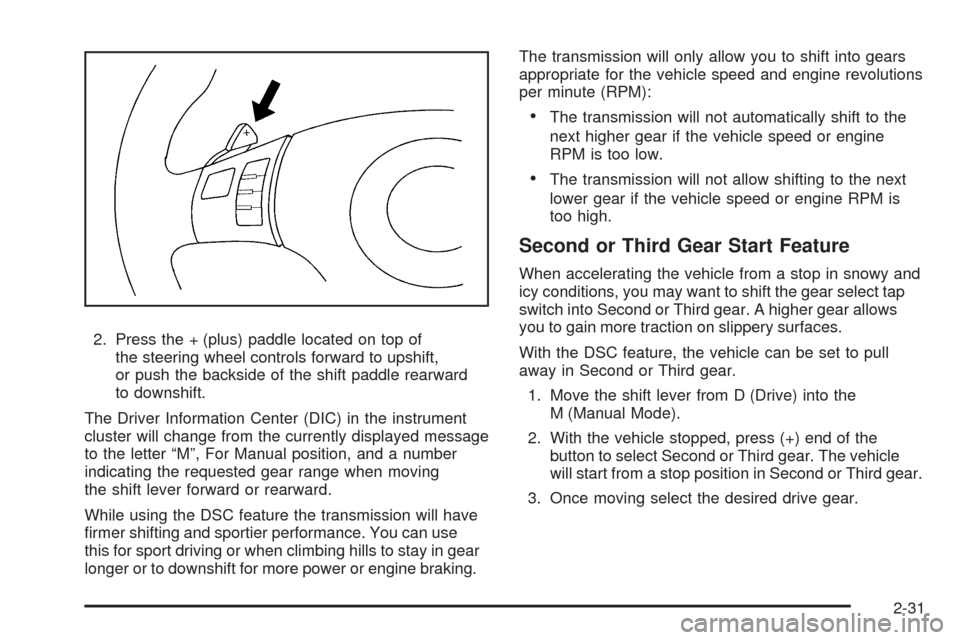
2. Press the + (plus) paddle located on top of
the steering wheel controls forward to upshift,
or push the backside of the shift paddle rearward
to downshift.
The Driver Information Center (DIC) in the instrument
cluster will change from the currently displayed message
to the letter “M”, For Manual position, and a number
indicating the requested gear range when moving
the shift lever forward or rearward.
While using the DSC feature the transmission will have
�rmer shifting and sportier performance. You can use
this for sport driving or when climbing hills to stay in gear
longer or to downshift for more power or engine braking.The transmission will only allow you to shift into gears
appropriate for the vehicle speed and engine revolutions
per minute (RPM):
The transmission will not automatically shift to the
next higher gear if the vehicle speed or engine
RPM is too low.
The transmission will not allow shifting to the next
lower gear if the vehicle speed or engine RPM is
too high.
Second or Third Gear Start Feature
When accelerating the vehicle from a stop in snowy and
icy conditions, you may want to shift the gear select tap
switch into Second or Third gear. A higher gear allows
you to gain more traction on slippery surfaces.
With the DSC feature, the vehicle can be set to pull
away in Second or Third gear.
1. Move the shift lever from D (Drive) into the
M (Manual Mode).
2. With the vehicle stopped, press (+) end of the
button to select Second or Third gear. The vehicle
will start from a stop position in Second or Third gear.
3. Once moving select the desired drive gear.
2-31
Page 126 of 420
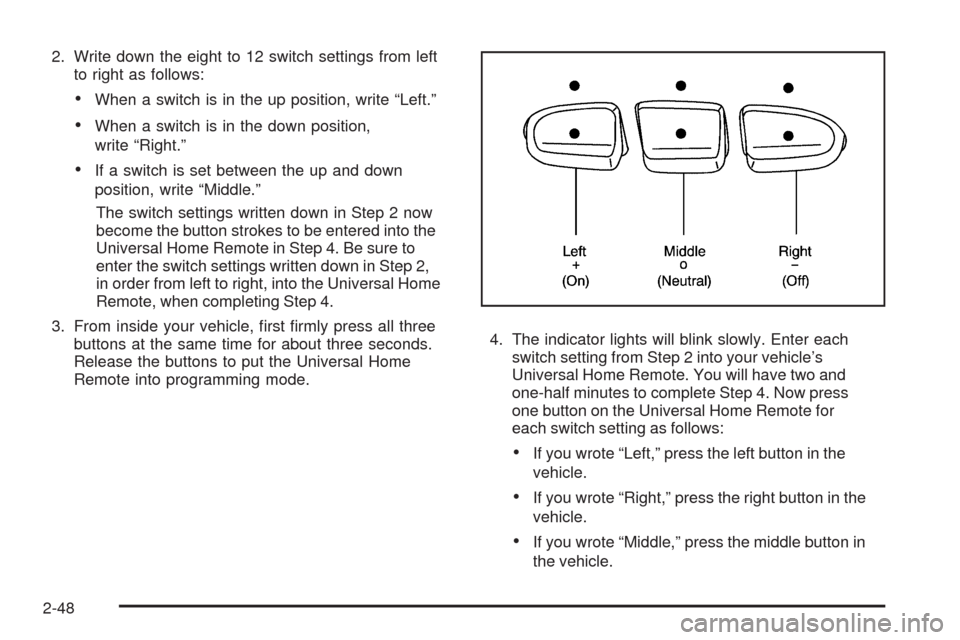
2. Write down the eight to 12 switch settings from left
to right as follows:
When a switch is in the up position, write “Left.”
When a switch is in the down position,
write “Right.”
If a switch is set between the up and down
position, write “Middle.”
The switch settings written down in Step 2 now
become the button strokes to be entered into the
Universal Home Remote in Step 4. Be sure to
enter the switch settings written down in Step 2,
in order from left to right, into the Universal Home
Remote, when completing Step 4.
3. From inside your vehicle, �rst �rmly press all three
buttons at the same time for about three seconds.
Release the buttons to put the Universal Home
Remote into programming mode.4. The indicator lights will blink slowly. Enter each
switch setting from Step 2 into your vehicle’s
Universal Home Remote. You will have two and
one-half minutes to complete Step 4. Now press
one button on the Universal Home Remote for
each switch setting as follows:
If you wrote “Left,” press the left button in the
vehicle.
If you wrote “Right,” press the right button in the
vehicle.
If you wrote “Middle,” press the middle button in
the vehicle.
2-48
Page 146 of 420
Instrument Panel Brightness
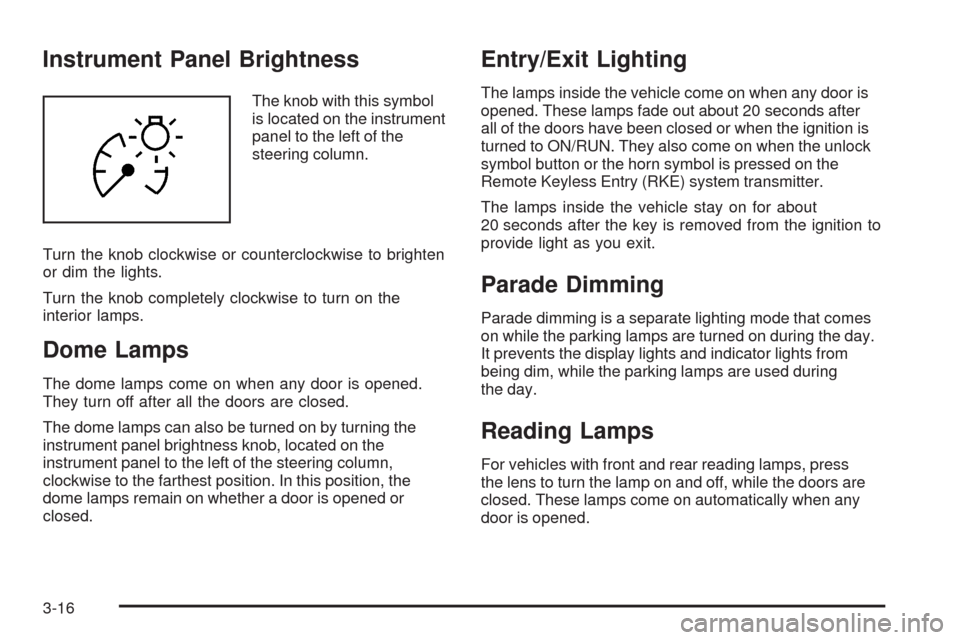
The knob with this symbol
is located on the instrument
panel to the left of the
steering column.
Turn the knob clockwise or counterclockwise to brighten
or dim the lights.
Turn the knob completely clockwise to turn on the
interior lamps.
Dome Lamps
The dome lamps come on when any door is opened.
They turn off after all the doors are closed.
The dome lamps can also be turned on by turning the
instrument panel brightness knob, located on the
instrument panel to the left of the steering column,
clockwise to the farthest position. In this position, the
dome lamps remain on whether a door is opened or
closed.
Entry/Exit Lighting
The lamps inside the vehicle come on when any door is
opened. These lamps fade out about 20 seconds after
all of the doors have been closed or when the ignition is
turned to ON/RUN. They also come on when the unlock
symbol button or the horn symbol is pressed on the
Remote Keyless Entry (RKE) system transmitter.
The lamps inside the vehicle stay on for about
20 seconds after the key is removed from the ignition to
provide light as you exit.
Parade Dimming
Parade dimming is a separate lighting mode that comes
on while the parking lamps are turned on during the day.
It prevents the display lights and indicator lights from
being dim, while the parking lamps are used during
the day.
Reading Lamps
For vehicles with front and rear reading lamps, press
the lens to turn the lamp on and off, while the doors are
closed. These lamps come on automatically when any
door is opened.
3-16
Page 152 of 420
To help clear the windshield quickly, do the following:
1. Select
0.
2. Select the highest temperature.
3. Select the highest fan speed.
#(Air Conditioning):Press to turn the air conditioning
system on or off. An indicator light comes on to show
it is on.
The air-conditioning system removes moisture from the
air, so a small amount of water might drip under the
vehicle while it is idling or after the engine is turned off
is normal.
Maximum Air Conditioning
On hot days, open the windows to let hot inside air
escape; then close them. This helps reduce the time it
takes for the vehicle to cool down. It also helps the
air conditioning system operate more efficiently.
For quick cool down on hot days, do the following:
1. Select the
Cvent mode.
2. Select the highest fan speed.
3. Select
#air conditioning.
4. Select the
?recirculation mode.
5. Select the coolest temperature.Using these settings together for long periods of time can
cause the air inside of the vehicle to become too dry.
To prevent this from happening, after the air in the vehicle
has cooled, turn the recirculation mode off.
:(Outside Air):Press to turn the outside air mode
on. An indicator light comes on to show that it is on.
Air from outside the vehicle will circulate throughout
the vehicle. The outside air mode can be used with all
modes, but it cannot be used with the recirculation
mode. Press
:to cancel the recirculation mode.
?(Recirculation):Press to turn the recirculation
mode on. An indicator light comes on to show that it is
on. This mode recirculates and helps to quickly cool
the air inside the vehicle. It can be used to prevent
outside air and odors from entering the vehicle. The
recirculation indicator light blinks three times if you try to
use recirculation in a mode in which it cannot function.
Pressing this button cancels the outside air mode. When
switching to the defog or defrost modes the system
automatically moves from recirculation to outside air.
When the vehicle or fan is turned off and back on, the
system defaults to outside air automatically. Only use
recirculation mode when it is needed for comfort, since
window fogging can occur.
3-22
Page 154 of 420
Automatic Climate Control System
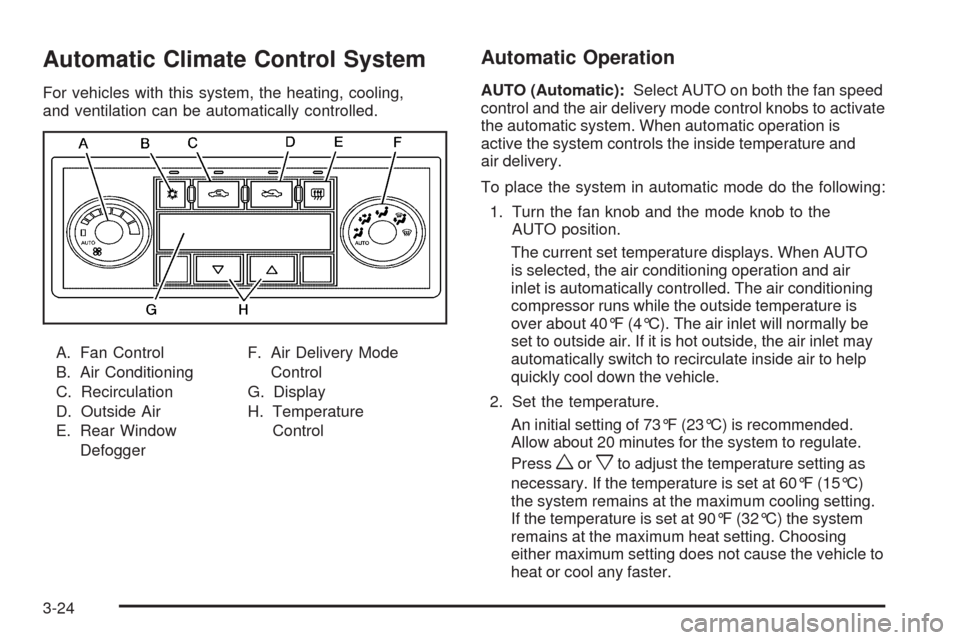
For vehicles with this system, the heating, cooling,
and ventilation can be automatically controlled.
A. Fan Control
B. Air Conditioning
C. Recirculation
D. Outside Air
E. Rear Window
DefoggerF. Air Delivery Mode
Control
G. Display
H. Temperature
Control
Automatic Operation
AUTO (Automatic):Select AUTO on both the fan speed
control and the air delivery mode control knobs to activate
the automatic system. When automatic operation is
active the system controls the inside temperature and
air delivery.
To place the system in automatic mode do the following:
1. Turn the fan knob and the mode knob to the
AUTO position.
The current set temperature displays. When AUTO
is selected, the air conditioning operation and air
inlet is automatically controlled. The air conditioning
compressor runs while the outside temperature is
over about 40°F (4°C). The air inlet will normally be
set to outside air. If it is hot outside, the air inlet may
automatically switch to recirculate inside air to help
quickly cool down the vehicle.
2. Set the temperature.
An initial setting of 73°F (23°C) is recommended.
Allow about 20 minutes for the system to regulate.
Press
worxto adjust the temperature setting as
necessary. If the temperature is set at 60°F (15°C)
the system remains at the maximum cooling setting.
If the temperature is set at 90°F (32°C) the system
remains at the maximum heat setting. Choosing
either maximum setting does not cause the vehicle to
heat or cool any faster.
3-24
Page 158 of 420
Operation Tips
Clear away any ice, snow, or leaves from the air
inlets at the base of the windshield that may
block the �ow of air into the vehicle.
Do not use non-GM approved hood de�ectors as
they could adversely affect the performance of
the system.
Keep the path under the front seats clear of objects
to help circulate the air inside of the vehicle more
effectively.
When an objectionable odor outside the vehicle is
encountered, use the recirculation mode, with the
temperature knob at a comfortable setting to prevent
the odor from entering the vehicle through the
ventilation system. This can be helpful when driving
through a long tunnel with poor ventilation. However,
extended usage of this mode in cold or cool weather
can cause window fogging.
Warning Lights, Gages, and
Indicators
Warning lights and gages can signal that something is
wrong before it becomes serious enough to cause an
expensive repair or replacement. Paying attention to the
warning lights and gages could prevent injury.
Warning lights come on when there may be or is a
problem with one of the vehicle’s functions. Some
warning lights come on brie�y when the engine is
started to indicate they are working.
Gages can indicate when there may be or is a problem
with one of the vehicle’s functions. Often gages and
warning lights work together to indicate a problem with
the vehicle.
When one of the warning lights comes on and stays on
while driving, or when one of the gages shows there may
be a problem, check the section that explains what to do.
Follow this manual’s advice. Waiting to do repairs can be
costly and even dangerous.
3-28