2009 CHEVROLET IMPALA lights
[x] Cancel search: lightsPage 1 of 406

Seats and Restraint System............................. 1-1
Head Restraints
......................................... 1-2
Front Seats
............................................... 1-4
Rear Seats
..............................................1-10
Safety Belts
.............................................1-13
Child Restraints
.......................................1-34
Airbag System
.........................................1-57
Restraint System Check
............................1-73
Features and Controls..................................... 2-1
Keys
........................................................ 2-3
Doors and Locks
....................................... 2-9
Windows
.................................................2-14
Theft-Deterrent Systems
............................2-16
Starting and Operating Your Vehicle
...........2-19
Mirrors
....................................................2-32
OnStar
®System
......................................2-33
Universal Home Remote System
................2-36
Storage Areas
.........................................2-43
Sunroof
..................................................2-44
Instrument Panel............................................. 3-1
Instrument Panel Overview
.......................... 3-4
Climate Controls
......................................3-20
Warning Lights, Gages, and Indicators
........3-24Driver Information Center (DIC)
..................3-42
Audio System(s)
.......................................3-63
Driving Your Vehicle....................................... 4-1
Your Driving, the Road, and the Vehicle
....... 4-2
Towing
...................................................4-26
Service and Appearance Care.......................... 5-1
Service
..................................................... 5-3
Fuel
......................................................... 5-5
Checking Things Under the Hood
...............5-12
Headlamp Aiming
.....................................5-45
Bulb Replacement
....................................5-45
Windshield Wiper Blade Replacement
.........5-51
Tires
......................................................5-53
Appearance Care
.....................................5-89
Vehicle Identi�cation
.................................5-96
Electrical System
......................................5-96
Capacities and Speci�cations
...................5-101
Maintenance Schedule..................................... 6-1
Maintenance Schedule
................................ 6-2
Customer Assistance Information.................... 7-1
Customer Assistance and Information
........... 7-2
Reporting Safety Defects
...........................7-16
Vehicle Data Recording and Privacy
...........7-18
Index................................................................ 1
2009 Chevrolet Impala Owner ManualM
Page 10 of 406
Manual Lumbar
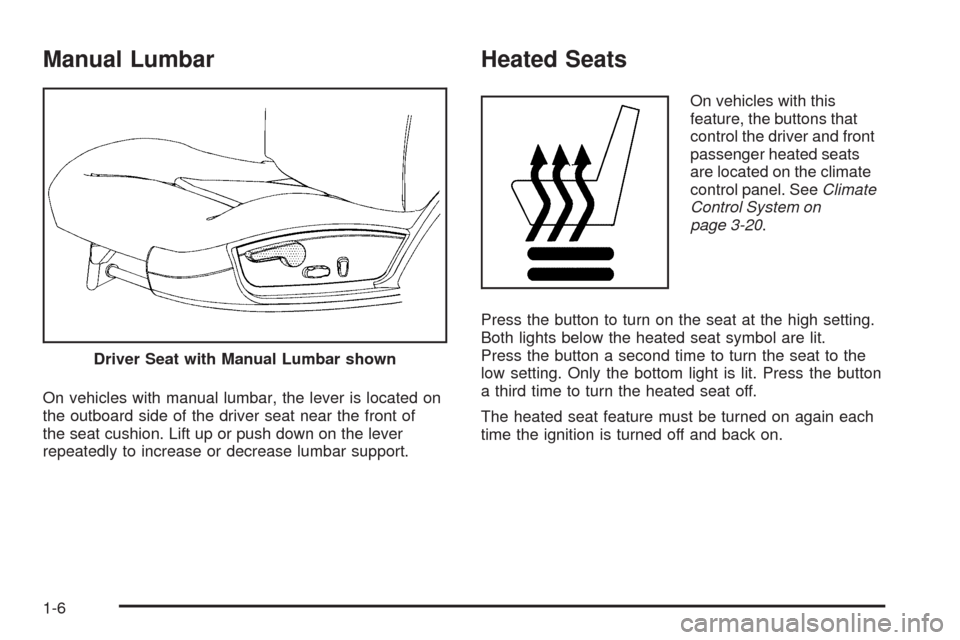
On vehicles with manual lumbar, the lever is located on
the outboard side of the driver seat near the front of
the seat cushion. Lift up or push down on the lever
repeatedly to increase or decrease lumbar support.
Heated Seats
On vehicles with this
feature, the buttons that
control the driver and front
passenger heated seats
are located on the climate
control panel. SeeClimate
Control System on
page 3-20.
Press the button to turn on the seat at the high setting.
Both lights below the heated seat symbol are lit.
Press the button a second time to turn the seat to the
low setting. Only the bottom light is lit. Press the button
a third time to turn the heated seat off.
The heated seat feature must be turned on again each
time the ignition is turned off and back on. Driver Seat with Manual Lumbar shown
1-6
Page 98 of 406
Ignition Positions
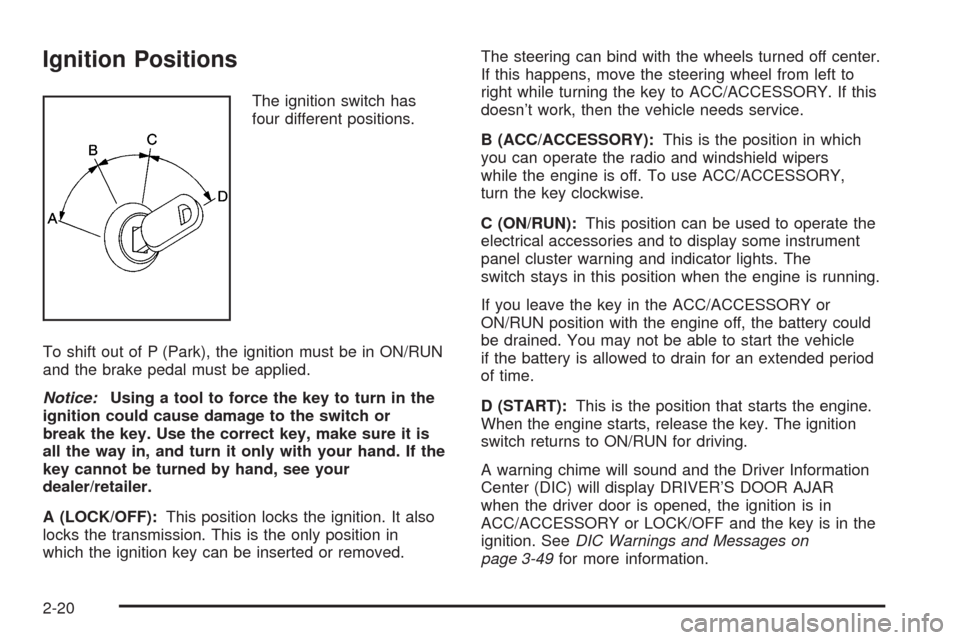
The ignition switch has
four different positions.
To shift out of P (Park), the ignition must be in ON/RUN
and the brake pedal must be applied.
Notice:Using a tool to force the key to turn in the
ignition could cause damage to the switch or
break the key. Use the correct key, make sure it is
all the way in, and turn it only with your hand. If the
key cannot be turned by hand, see your
dealer/retailer.
A (LOCK/OFF):This position locks the ignition. It also
locks the transmission. This is the only position in
which the ignition key can be inserted or removed.The steering can bind with the wheels turned off center.
If this happens, move the steering wheel from left to
right while turning the key to ACC/ACCESSORY. If this
doesn’t work, then the vehicle needs service.
B (ACC/ACCESSORY):This is the position in which
you can operate the radio and windshield wipers
while the engine is off. To use ACC/ACCESSORY,
turn the key clockwise.
C (ON/RUN):This position can be used to operate the
electrical accessories and to display some instrument
panel cluster warning and indicator lights. The
switch stays in this position when the engine is running.
If you leave the key in the ACC/ACCESSORY or
ON/RUN position with the engine off, the battery could
be drained. You may not be able to start the vehicle
if the battery is allowed to drain for an extended period
of time.
D (START):This is the position that starts the engine.
When the engine starts, release the key. The ignition
switch returns to ON/RUN for driving.
A warning chime will sound and the Driver Information
Center (DIC) will display DRIVER’S DOOR AJAR
when the driver door is opened, the ignition is in
ACC/ACCESSORY or LOCK/OFF and the key is in the
ignition. SeeDIC Warnings and Messages on
page 3-49for more information.
2-20
Page 115 of 406
This device complies with RSS-210 of Industry Canada.
Operation is subject to the following two conditions:
1. This device may not cause interference.
2. This device must accept any interference received,
including interference that may cause undesired
operation of the device.
Changes or modi�cations to this system by other than
an authorized service facility could void authorization to
use this equipment.
Universal Home Remote System
Operation (With Three Round LED)
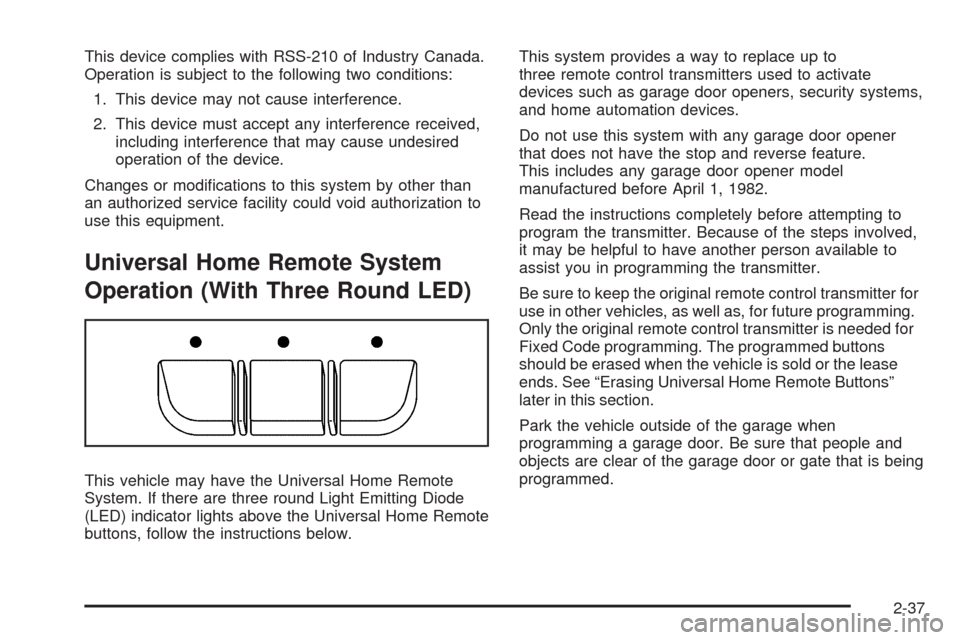
This vehicle may have the Universal Home Remote
System. If there are three round Light Emitting Diode
(LED) indicator lights above the Universal Home Remote
buttons, follow the instructions below.This system provides a way to replace up to
three remote control transmitters used to activate
devices such as garage door openers, security systems,
and home automation devices.
Do not use this system with any garage door opener
that does not have the stop and reverse feature.
This includes any garage door opener model
manufactured before April 1, 1982.
Read the instructions completely before attempting to
program the transmitter. Because of the steps involved,
it may be helpful to have another person available to
assist you in programming the transmitter.
Be sure to keep the original remote control transmitter for
use in other vehicles, as well as, for future programming.
Only the original remote control transmitter is needed for
Fixed Code programming. The programmed buttons
should be erased when the vehicle is sold or the lease
ends. See “Erasing Universal Home Remote Buttons”
later in this section.
Park the vehicle outside of the garage when
programming a garage door. Be sure that people and
objects are clear of the garage door or gate that is being
programmed.
2-37
Page 119 of 406
2. Write down the eight to 12 switch settings from left
to right as follows:
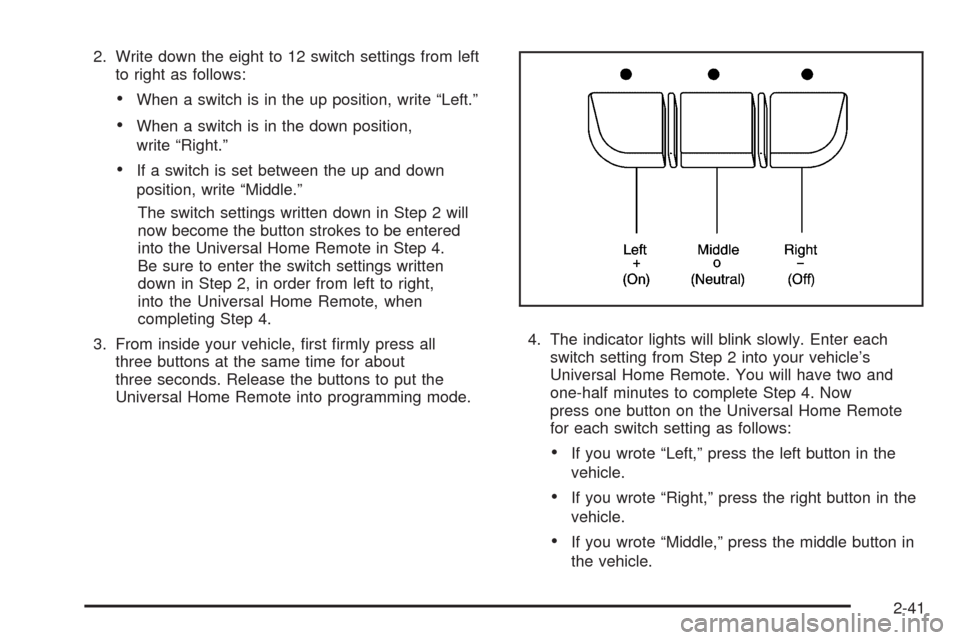
When a switch is in the up position, write “Left.”
When a switch is in the down position,
write “Right.”
If a switch is set between the up and down
position, write “Middle.”
The switch settings written down in Step 2 will
now become the button strokes to be entered
into the Universal Home Remote in Step 4.
Be sure to enter the switch settings written
down in Step 2, in order from left to right,
into the Universal Home Remote, when
completing Step 4.
3. From inside your vehicle, �rst �rmly press all
three buttons at the same time for about
three seconds. Release the buttons to put the
Universal Home Remote into programming mode.4. The indicator lights will blink slowly. Enter each
switch setting from Step 2 into your vehicle’s
Universal Home Remote. You will have two and
one-half minutes to complete Step 4. Now
press one button on the Universal Home Remote
for each switch setting as follows:
If you wrote “Left,” press the left button in the
vehicle.
If you wrote “Right,” press the right button in the
vehicle.
If you wrote “Middle,” press the middle button in
the vehicle.
2-41
Page 120 of 406

5. After entering all of the switch positions, again,
�rmly press and release all three buttons at the
same time. The indicator lights will turn on.
6. Press and hold the button that will be used to
control the garage door until the garage door
moves. The indicator light above the selected
button should slowly blink. This button may need to
be held for up to 55 seconds.
7. Immediately release the button when the garage
door moves. The indicator light will blink rapidly
until programming is complete.
8. Press and release the same button again. The
garage door should move, con�rming that
programming is successful and complete.
To program another Fixed Code device such as an
additional garage door opener, a security device,
or home automation device, repeat Steps 1-8, choosing
a different button in Step 6 than what was used for
the garage door opener.
Using Universal Home Remote
Press and hold the appropriate button for at least half of
a second. The indicator light will come on while the
signal is being transmitted.
Reprogramming Universal Home
Remote Buttons
Any of the three buttons can be reprogrammed by
repeating the instructions.
Erasing Universal Home Remote
Buttons
The programmed buttons should be erased when the
vehicle is sold or the lease ends.
To erase either Rolling Code or Fixed Code on the
Universal Home Remote device:
1. Press and hold the two outside buttons at the same
time for approximately 20 seconds, until the
indicator lights, located directly above the buttons,
begin to blink rapidly.
2. Once the indicator lights begin to blink, release both
buttons. The codes from all buttons will be erased.
For help or information on the Universal Home Remote
System, call the customer assistance phone number
underCustomer Assistance Offices on page 7-6.
2-42
Page 123 of 406
Instrument Panel Overview...............................3-4
Hazard Warning Flashers................................3-6
Horn .............................................................3-6
Tilt Wheel.....................................................3-6
Turn Signal/Multifunction Lever.........................3-7
Turn and Lane-Change Signals........................3-7
Headlamp High/Low-Beam Changer..................3-8
Flash-to-Pass.................................................3-8
Windshield Wipers..........................................3-8
Windshield Washer.........................................3-9
Cruise Control................................................3-9
Exterior Lamps.............................................3-12
Daytime Running Lamps (DRL)/Automatic
Headlamp System......................................3-14
Fog Lamps ..................................................3-14
Instrument Panel Brightness...........................3-15
Courtesy Lamps...........................................3-15
Dome Lamp .................................................3-15
Entry Lighting...............................................3-15
Delayed Entry Lighting...................................3-16
Delayed Exit Lighting.....................................3-16
Parade Dimming...........................................3-16
Reading Lamps............................................3-17
Mirror Reading Lamps...................................3-17
Electric Power Management...........................3-17Battery Run-Down Protection..........................3-18
Accessory Power Outlet(s).............................3-18
Ashtray(s) and Cigarette Lighter......................3-19
Climate Controls............................................3-20
Climate Control System.................................3-20
Outlet Adjustment.........................................3-23
Passenger Compartment Air Filter...................3-23
Warning Lights, Gages, and Indicators............3-24
Instrument Panel Cluster................................3-25
Speedometer and Odometer...........................3-26
Tachometer
.................................................3-26
Safety Belt Reminders...................................3-27
Airbag Readiness Light..................................3-28
Passenger Airbag Status Indicator...................3-29
Charging System Light..................................3-30
Brake System Warning Light..........................3-30
Antilock Brake System (ABS) Warning Light.....3-31
Traction Control System (TCS) Warning
Light........................................................3-32
Electronic Stability Control Indicator Light.........3-33
Engine Coolant Temperature Warning Light......3-34
Engine Coolant Temperature Gage..................3-34
Tire Pressure Light.......................................3-35
Malfunction Indicator Lamp.............................3-36
Section 3 Instrument Panel
3-1
Page 134 of 406
Using Cruise Control on Hills
How well the cruise control will work on hills depends
upon the vehicle speed, load and the steepness of
the hills. When going up steep hills, you might have to
step on the accelerator pedal to maintain your speed.
When going downhill, you might have to brake or shift to
a lower gear to keep your speed down. If the brakes
are applied the cruise control will turn off.
Ending Cruise Control
There are three ways to end cruise control:
Step lightly on the brake pedal.
Press the[button on the steering wheel.
Press theTbutton on the steering wheel.
Erasing Speed Memory
The cruise control set speed memory is erased by
turning off the cruise control or the ignition.
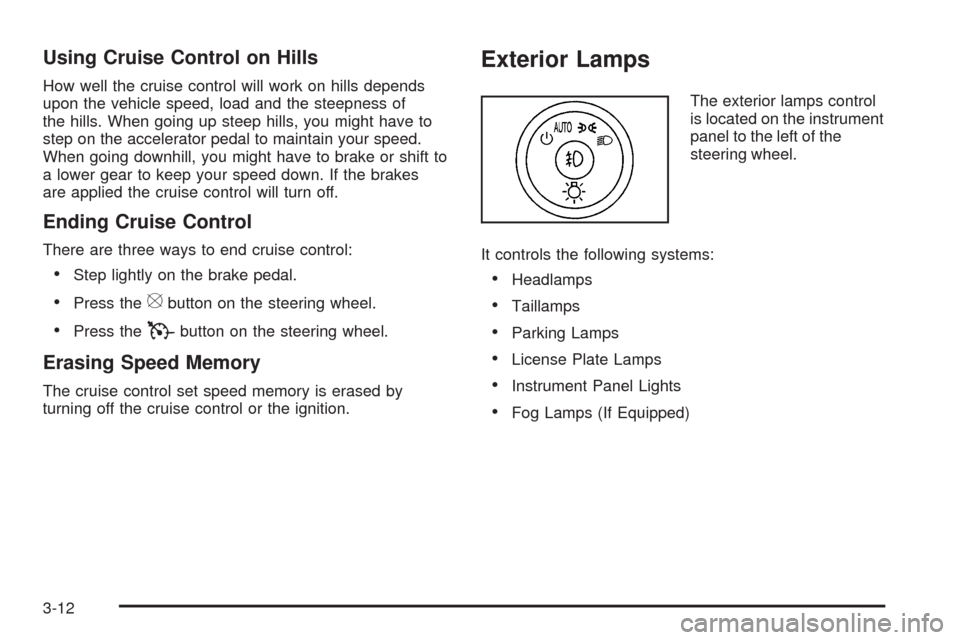
Exterior Lamps
The exterior lamps control
is located on the instrument
panel to the left of the
steering wheel.
It controls the following systems:
Headlamps
Taillamps
Parking Lamps
License Plate Lamps
Instrument Panel Lights
Fog Lamps (If Equipped)
3-12