2009 CHEVROLET HHR air conditioning
[x] Cancel search: air conditioningPage 4 of 450
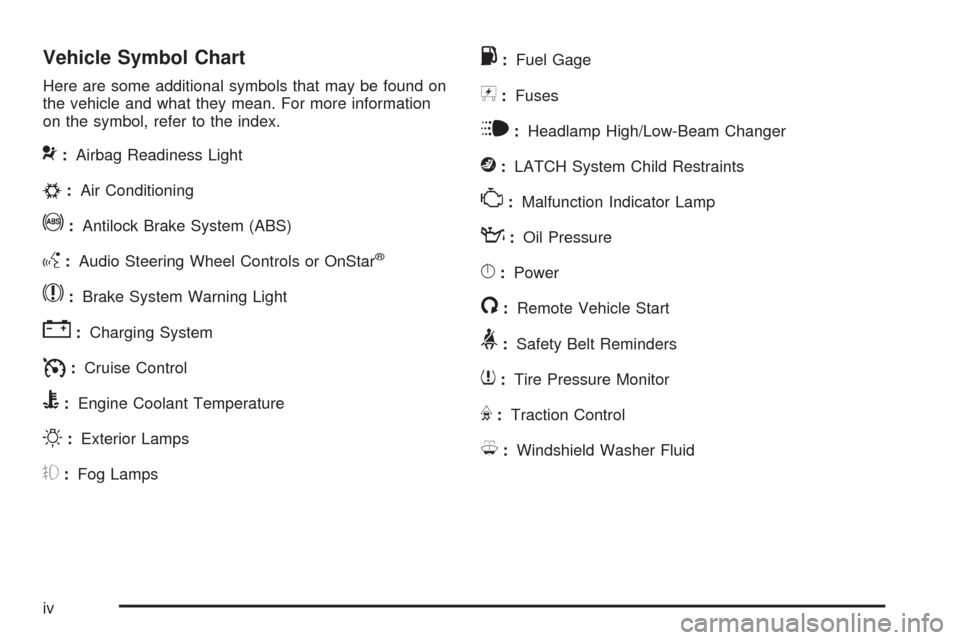
Vehicle Symbol Chart
Here are some additional symbols that may be found on
the vehicle and what they mean. For more information
on the symbol, refer to the index.
9:Airbag Readiness Light
#:Air Conditioning
!:Antilock Brake System (ABS)
g:Audio Steering Wheel Controls or OnStar®
$:Brake System Warning Light
":Charging System
I:Cruise Control
B:Engine Coolant Temperature
O:Exterior Lamps
#:Fog Lamps
.:Fuel Gage
+:Fuses
i:Headlamp High/Low-Beam Changer
j:LATCH System Child Restraints
*:Malfunction Indicator Lamp
::Oil Pressure
}:Power
/:Remote Vehicle Start
>:Safety Belt Reminders
7:Tire Pressure Monitor
F:Traction Control
M:Windshield Washer Fluid
iv
Page 91 of 450
Remote Vehicle Start
Your vehicle may have a remote start feature.
This feature allows you to start the engine from
outside the vehicle. It may also start the vehicle’s
heating or air conditioning systems. SeeClimate
Control System on page 3-21for additional information.
Laws in some local communities may restrict the use
of remote starters. For example, some laws may require
a person using remote start to have the vehicle in
view when doing so. Check local regulations for
any requirements on remote starting of vehicles.
Do not use the remote start feature if your vehicle is low
on fuel. Your vehicle may run out of fuel.
If your vehicle has the remote start feature, the RKE
transmitter functions will have an increased range
of operation. However, the range may be less while
the vehicle is running.
There are other conditions which can affect the
performance of the transmitter, seeRemote Keyless
Entry (RKE) System on page 2-4for additional
information.
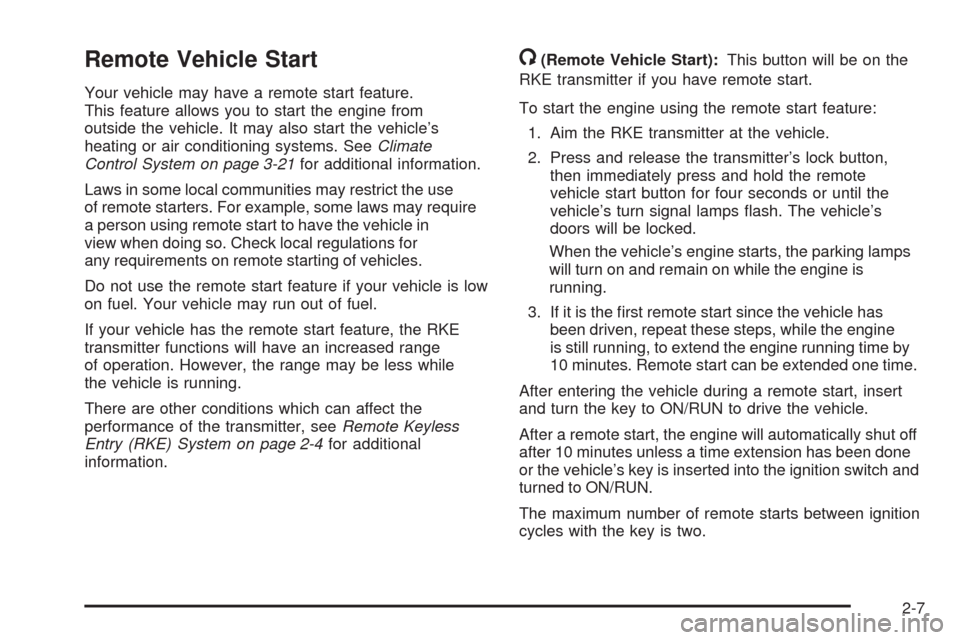
/(Remote Vehicle Start):This button will be on the
RKE transmitter if you have remote start.
To start the engine using the remote start feature:
1. Aim the RKE transmitter at the vehicle.
2. Press and release the transmitter’s lock button,
then immediately press and hold the remote
vehicle start button for four seconds or until the
vehicle’s turn signal lamps �ash. The vehicle’s
doors will be locked.
When the vehicle’s engine starts, the parking lamps
will turn on and remain on while the engine is
running.
3. If it is the �rst remote start since the vehicle has
been driven, repeat these steps, while the engine
is still running, to extend the engine running time by
10 minutes. Remote start can be extended one time.
After entering the vehicle during a remote start, insert
and turn the key to ON/RUN to drive the vehicle.
After a remote start, the engine will automatically shut off
after 10 minutes unless a time extension has been done
or the vehicle’s key is inserted into the ignition switch and
turned to ON/RUN.
The maximum number of remote starts between ignition
cycles with the key is two.
2-7
Page 161 of 450
Ashtray(s) and Cigarette Lighter
The vehicle may have an ashtray and cigarette lighter.
To use the lighter, located on the instrument panel below
the climate controls, push it in all the way and let go.
When it is ready, it will pop back out by itself.
Notice:Holding a cigarette lighter in while it is
heating will not allow the lighter to back away from
the heating element when it is hot. Damage from
overheating may occur to the lighter or heating
element, or a fuse could be blown. Do not hold a
cigarette lighter in while it is heating. Do not use
equipment exceeding maximum amperage rating of
15 amperes.
To clean the center console ashtray, remove the entire
ashtray and empty it.
Notice:If papers, pins, or other �ammable items are
put in the ashtray, hot cigarettes or other smoking
materials could ignite them and possibly damage the
vehicle. Never put �ammable items in the ashtray.
Climate Controls
Climate Control System
The heating, cooling, and ventilation for the vehicle can
be controlled with this system.
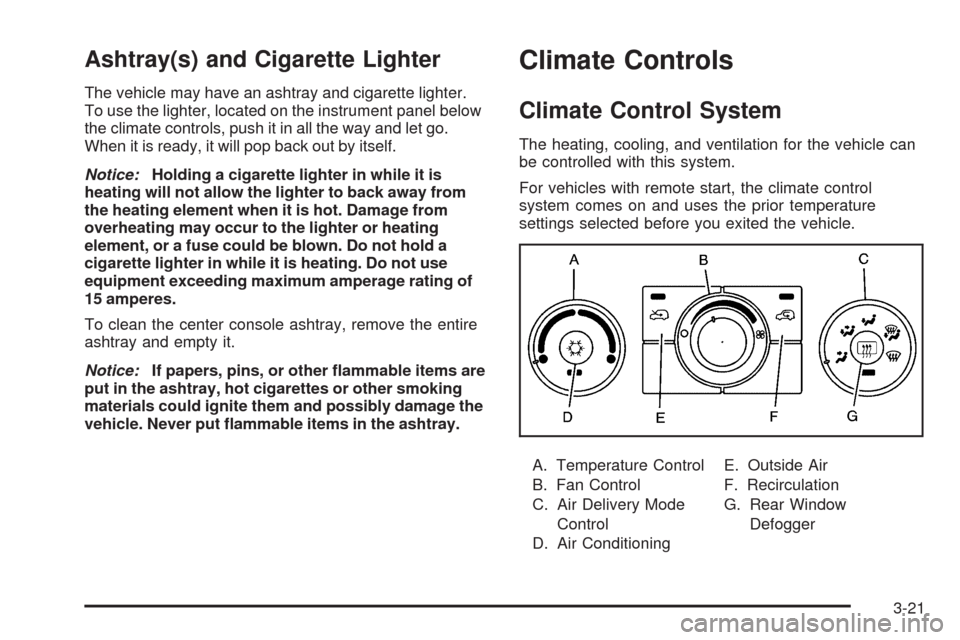
For vehicles with remote start, the climate control
system comes on and uses the prior temperature
settings selected before you exited the vehicle.
A. Temperature Control
B. Fan Control
C. Air Delivery Mode
Control
D. Air ConditioningE. Outside Air
F. Recirculation
G. Rear Window
Defogger
3-21
Page 162 of 450
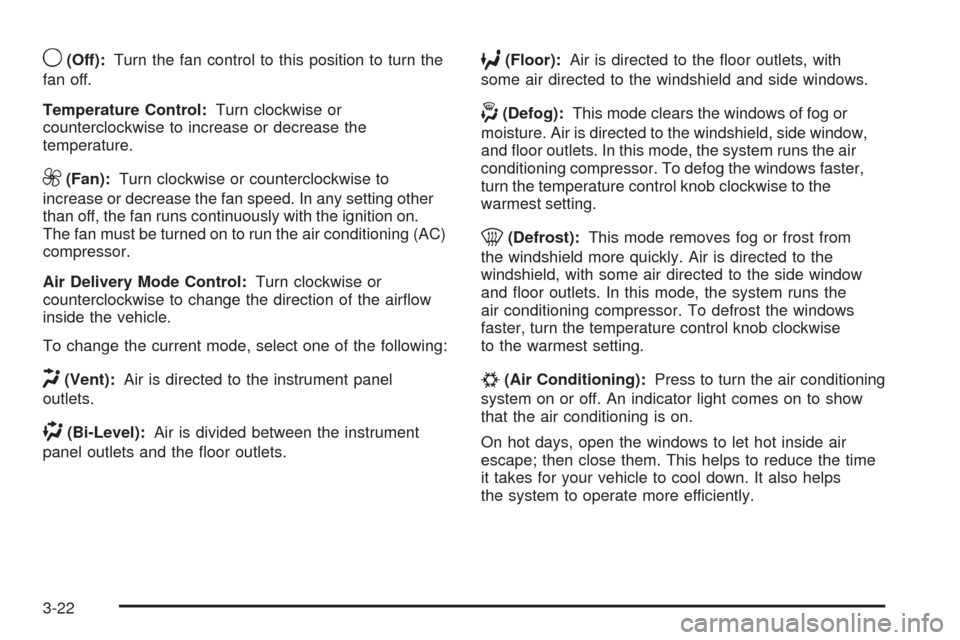
9(Off):Turn the fan control to this position to turn the
fan off.
Temperature Control:Turn clockwise or
counterclockwise to increase or decrease the
temperature.
9(Fan):Turn clockwise or counterclockwise to
increase or decrease the fan speed. In any setting other
than off, the fan runs continuously with the ignition on.
The fan must be turned on to run the air conditioning (AC)
compressor.
Air Delivery Mode Control:Turn clockwise or
counterclockwise to change the direction of the air�ow
inside the vehicle.
To change the current mode, select one of the following:
H(Vent):Air is directed to the instrument panel
outlets.
)(Bi-Level):Air is divided between the instrument
panel outlets and the �oor outlets.
6(Floor):Air is directed to the �oor outlets, with
some air directed to the windshield and side windows.
-(Defog):This mode clears the windows of fog or
moisture. Air is directed to the windshield, side window,
and �oor outlets. In this mode, the system runs the air
conditioning compressor. To defog the windows faster,
turn the temperature control knob clockwise to the
warmest setting.
0(Defrost):This mode removes fog or frost from
the windshield more quickly. Air is directed to the
windshield, with some air directed to the side window
and �oor outlets. In this mode, the system runs the
air conditioning compressor. To defrost the windows
faster, turn the temperature control knob clockwise
to the warmest setting.
#(Air Conditioning):Press to turn the air conditioning
system on or off. An indicator light comes on to show
that the air conditioning is on.
On hot days, open the windows to let hot inside air
escape; then close them. This helps to reduce the time
it takes for your vehicle to cool down. It also helps
the system to operate more efficiently.
3-22
Page 163 of 450
For quick cool down on hot days:
1. Select
H.
2. Select
@.
3. Select
#.
4. Select the coolest temperature.
5. Select the highest fan speed.
Using these settings together for long periods of time
may cause the air inside of the vehicle to become
too dry. To prevent this from happening, after the air in
the vehicle has cooled, turn off the recirculation by
pressing the outside air button.
The air conditioning system removes moisture from
the air, so a small amount of water might drip under
the vehicle while idling or after turning off the engine.
This is normal.
The air conditioning compressor cannot be turned on
when the fan is off.
@(Recirculation):Press to turn the recirculation
mode on. An indicator light comes on to show that
recirculation is on.
This mode recirculates and helps to quickly cool the air
inside the vehicle. It can be used to help prevent outside
air and odors from entering the vehicle.The air conditioning compressor also comes on.
Recirculation is not available in �oor, defog and defrost
modes. If the recirculation button is pressed, the indicator
light �ashes �ve times and outside air will be delivered.
Operation in this mode during periods of high humidity
and cool outside temperatures may result in increased
window fogging. If window fogging is experienced, select
the defrost mode.
;(Outside Air):Press to allow outside air to circulate
through the vehicle. An indicator light comes on to show
that outside air is on.
Rear Window Defogger
The rear window defogger uses a warming grid to
remove fog from the rear window.
The rear window defogger only works when the ignition
is in ON/RUN.
<(Rear):Press to turn the rear window defogger on or
off. Be sure to clear as much snow from the rear window
as possible. An indicator light comes on to show that the
rear window defogger is on.
The rear window defogger turns off approximately
15 minutes after the button is pressed. If turned
on again, the defogger only runs for approximately
seven minutes before turning off.
3-23
Page 184 of 450
Region A Gage and Speedometer
Displays
Change the information displayed in Region A by
turning the knob either clockwise or counterclockwise.
The available gages are:
BOOST:Displays positive boost pressure as
determined by the manifold air pressure (MAP) sensor.
AIR/FUEL RATIO:Displays the mass ratio of air
to fuel.
CAM PHASER ANGLES:Displays orientation of the
intake and exhaust cam shafts relative to their park
positions as commanded by the engine control module.
OVERLAP represents the total distance the intake and
exhaust cam shafts have phased.
SPARK ADVANCE/ KNOCK RETARD:The spark
advance gage displays ignition timing. Knock retard
indicates the amount of ignition delay to reduce spark
knock.
ENGINE POWER & TORQUE:Displayed engine power
and torque are engine �ywheel output values calculated
by the engine control module. These values are
approximate and may change with the air conditioning
load, generator output, air temperature, air pressure, and
fuel octane.SPEEDOMETER&GFORCE:The G FORCE meter
displays lateral acceleration. While turning right, G forces
are felt on the left, and vice versa. PEAK values are
stored inde�nitely, and can be reset with a press and hold
of the RPD knob while viewing the G FORCE meter.
SETUP MENU:Press the RPD knob to enter this menu.
The vehicle should be stopped while con�guring the
setup menu selections.
SCREEN OFF:Turns the screen off.
Region B Readout Displays
Press the RPD knob to highlight Region B. The
information displayed can be changed by turning
the RPD knob either clockwise or counterclockwise.
Press the RPD knob again, to store the selection.
The selection will also be stored after a few seconds
of no activity. Available modes are:
Readouts #1
SHIFT LIGHTS/GEAR INDICATION:The shift lights
provide visual identi�cation of engine speed for a
transmission gear. Shift light minimum and maximum
RPM settings can be viewed and con�gured in the
SETUP screen.
3-44
Page 276 of 450
Driving on Grades
Notice:Do not tow on steep continuous grades
exceeding 6 miles (9.6 km). Extended, higher than
normal engine and transmission temperatures may
result and damage the vehicle. Frequent stops are
very important to allow the engine and transmission
to cool.
When towing under severe conditions such as hot
ambient temperatures or steep grades, the vehicle may
experience more transmission shifting. A COOLING
MODE ON message may also appear in the DIC.
This alerts the driver that the shifting mode is in progress
and is aiding engine cooling. SeeDIC Warnings and
Messages on page 3-50DIC Warnings and Messages
for more information.
Reduce speed and shift to a lower gearbeforestarting
down a long or steep downgrade. If the transmission is
not shifted down, the brakes might have to be used so
much that they would get hot and no longer work well.
Pay attention to the engine coolant gage. If the indicator
is in the red area, turn off the air conditioning to reduce
engine load. SeeEngine Overheating on page 5-32.
Parking on Hills
{CAUTION:
Parking the vehicle on a hill with the trailer
attached can be dangerous. If something goes
wrong, the rig could start to move. People can be
injured, and both the vehicle and the trailer can be
damaged. When possible, always park the rig on a
�at surface.
If parking the rig on a hill:
1. Press the brake pedal, but do not shift into P (Park)
yet. Turn the wheels into the curb if facing downhill
or into traffic if facing uphill.
2. Have someone place chocks under the trailer
wheels.
3. When the wheel chocks are in place, release the
brake pedal until the chocks absorb the load.
4. Reapply the brake pedal. Then apply the parking
brake and shift into P (Park).
5. Release the brake pedal.
4-40
Page 336 of 450
Tire Terminology and De�nitions
Air Pressure:The amount of air inside the
tire pressing outward on each square inch of the
tire. Air pressure is expressed in pounds per
square inch (psi) or kilopascal (kPa).
Accessory Weight
:This means the combined
weight of optional accessories. Some examples of
optional accessories are, automatic transmission,
power steering, power brakes, power windows,
power seats, and air conditioning.
Aspect Ratio
:The relationship of a tire’s height
to its width.
Belt
:A rubber coated layer of cords that is located
between the plies and the tread. Cords may be
made from steel or other reinforcing materials.
Bead
:The tire bead contains steel wires wrapped
by steel cords that hold the tire onto the rim.
Bias Ply Tire
:A pneumatic tire in which the plies
are laid at alternate angles less than 90 degrees
to the centerline of the tread.Cold Tire Pressure
:The amount of air pressure in
a tire, measured in pounds per square inch (psi) or
kilopascals (kPa) before a tire has built up heat
from driving. SeeInflation - Tire Pressure on
page 5-61.
Curb Weight
:The weight of a motor vehicle with
standard and optional equipment including the
maximum capacity of fuel, oil, and coolant,
but without passengers and cargo.
DOT Markings
:A code molded into the sidewall
of a tire signifying that the tire is in compliance
with the U.S. Department of Transportation (DOT)
motor vehicle safety standards. The DOT code
includes the Tire Identi�cation Number (TIN),
an alphanumeric designator which can also identify
the tire manufacturer, production plant, brand,
and date of production.
GVWR
:Gross Vehicle Weight Rating.
SeeLoading the Vehicle on page 4-25.
GAWR FRT
:Gross Axle Weight Rating for the
front axle. SeeLoading the Vehicle on page 4-25.
5-58