2009 CHEVROLET EXPRESS CARGO VAN tow
[x] Cancel search: towPage 1 of 408

Seats and Restraint System............................. 1-1
Front Seats
............................................... 1-2
Rear Seats
............................................... 1-6
Safety Belts
.............................................1-10
Child Restraints
.......................................1-30
Airbag System
.........................................1-58
Restraint System Check
............................1-78
Features and Controls..................................... 2-1
Keys
........................................................ 2-2
Doors and Locks
....................................... 2-6
Windows
.................................................2-13
Theft-Deterrent Systems
............................2-16
Starting and Operating Your Vehicle
...........2-19
Mirrors
....................................................2-32
Storage Areas
.........................................2-34
Instrument Panel............................................. 3-1
Instrument Panel Overview
.......................... 3-4
Climate Controls
......................................3-19
Warning Lights, Gages, and Indicators
........3-23
Driver Information Center (DIC)
..................3-41
Audio System(s)
.......................................3-63
Driving Your Vehicle....................................... 4-1
Your Driving, the Road, and the Vehicle
....... 4-2
Towing
...................................................4-25Service and Appearance Care.......................... 5-1
Service
..................................................... 5-3
Fuel
......................................................... 5-5
Checking Things Under the Hood
...............5-12
All-Wheel Drive
........................................5-44
Rear Axle
...............................................5-45
Front Axle
...............................................5-46
Noise Control System
...............................5-47
Bulb Replacement
....................................5-48
Windshield Wiper Blade Replacement
.........5-53
Tires
......................................................5-54
Appearance Care
.....................................5-97
Vehicle Identification
...............................5-104
Electrical System
....................................5-105
Capacities and Specifications
...................5-111
Maintenance Schedule..................................... 6-1
Maintenance Schedule
................................ 6-2
Customer Assistance Information.................... 7-1
Customer Assistance and Information
........... 7-2
Reporting Safety Defects
...........................7-15
Vehicle Data Recording and Privacy
...........7-18
Index................................................................ 1
2009 Chevrolet Express Owner ManualM
Page 4 of 408

Vehicle Symbols
The vehicle has components and labels that use
symbols instead of text. Symbols are shown along with
the text describing the operation or information
relating to a specific component, control, message,
gage, or indicator.
M:This symbol is shown when you need to see your
owner manual for additional instructions or information.
*:This symbol is shown when you need to see a
service manual for additional instructions or information.
Vehicle Symbol Chart
Here are some additional symbols that may be found on
the vehicle and what they mean. For more information
on the symbol, refer to the index.
9:Airbag Readiness Light
#:Air Conditioning
!:Antilock Brake System (ABS)
g:Audio Steering Wheel Controls or OnStar®
$:Brake System Warning Light
":Charging System
I:Cruise Control
B:Engine Coolant Temperature
O:Exterior Lamps
#:Fog Lamps
.:Fuel Gage
+:Fuses
i:Headlamp High/Low-Beam Changer
j:LATCH System Child Restraints
*:Malfunction Indicator Lamp
::Oil Pressure
}:Power
/:Remote Vehicle Start
>:Safety Belt Reminders
7:Tire Pressure Monitor
_:Tow/Haul Mode
F:Traction Control
M:Windshield Washer Fluid
iv
Page 7 of 408

Power Seat
If the vehicle has front power seat(s), the controls are
located at the front center of the seat cushion.
To raise or lower the seat, move the center knob up or
down. To move the seat forward or rearward, move
the center knob toward the right or left.
To raise or lower the front of the seat cushion, move the
right lever up or down. To raise or lower the rear of
the seat cushion, move the left lever up or down.
Reclining Seatbacks
{CAUTION:
You can lose control of the vehicle if you try to
adjust a manual driver’s seat while the vehicle is
moving. The sudden movement could startle and
confuse you, or make you push a pedal when you
do not want to. Adjust the driver’s seat only when
the vehicle is not moving.
{CAUTION:
If the seatback is not locked, it could move
forward in a sudden stop or crash. That could
cause injury to the person sitting there. Always
push and pull on the seatback to be sure it is
locked.
The seats have manual reclining seatbacks. The lever
used to operate them is located on the inboard side
of the seats.
1-3
Page 11 of 408
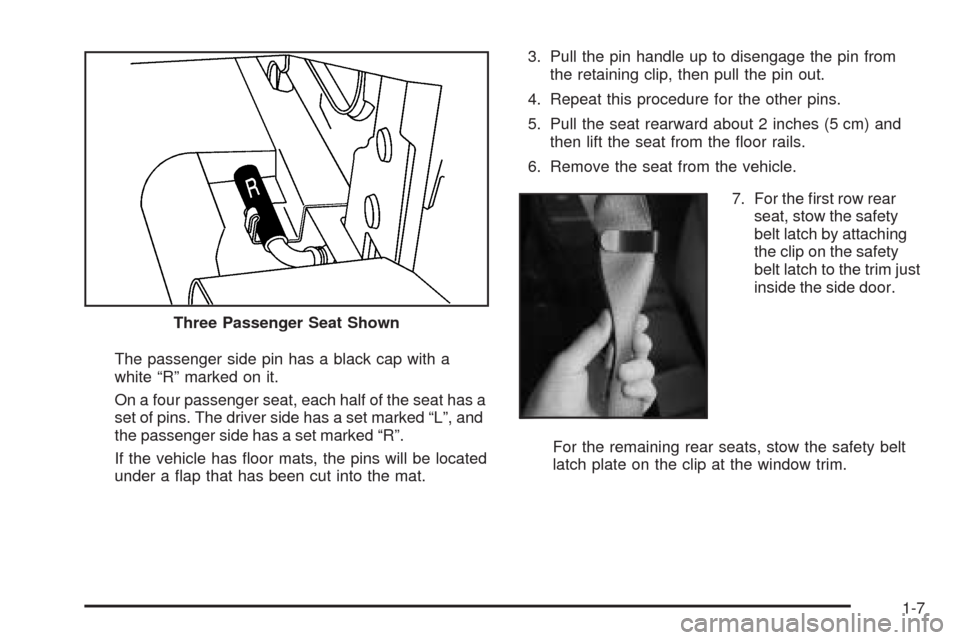
The passenger side pin has a black cap with a
white “R” marked on it.
On a four passenger seat, each half of the seat has a
set of pins. The driver side has a set marked “L”, and
the passenger side has a set marked “R”.
If the vehicle has floor mats, the pins will be located
under a flap that has been cut into the mat.3. Pull the pin handle up to disengage the pin from
the retaining clip, then pull the pin out.
4. Repeat this procedure for the other pins.
5. Pull the seat rearward about 2 inches (5 cm) and
then lift the seat from the floor rails.
6. Remove the seat from the vehicle.
7. For the first row rear
seat, stow the safety
belt latch by attaching
the clip on the safety
belt latch to the trim just
inside the side door.
For the remaining rear seats, stow the safety belt
latch plate on the clip at the window trim. Three Passenger Seat Shown
1-7
Page 29 of 408
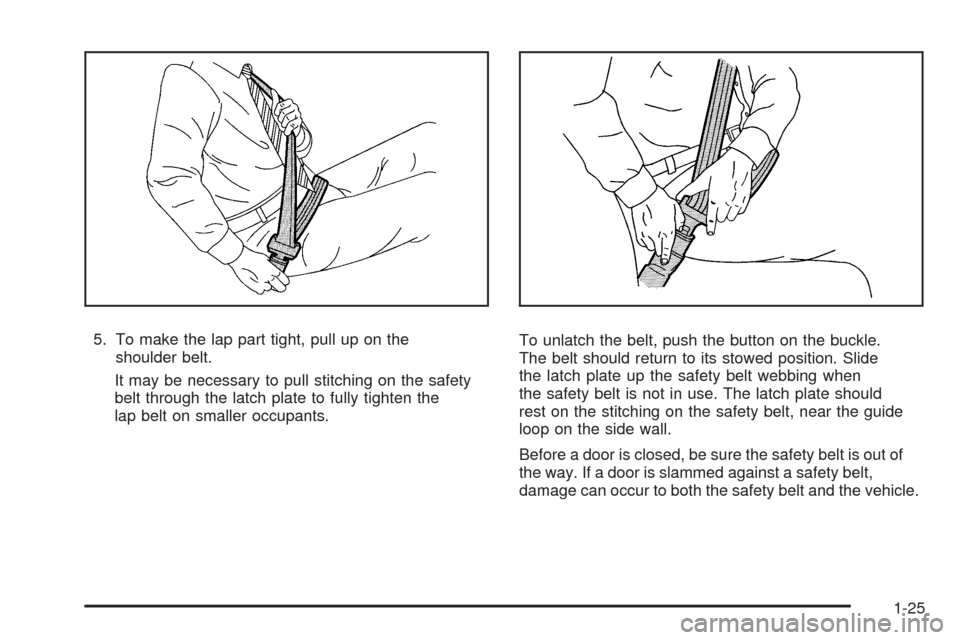
5. To make the lap part tight, pull up on the
shoulder belt.
It may be necessary to pull stitching on the safety
belt through the latch plate to fully tighten the
lap belt on smaller occupants.To unlatch the belt, push the button on the buckle.
The belt should return to its stowed position. Slide
the latch plate up the safety belt webbing when
the safety belt is not in use. The latch plate should
rest on the stitching on the safety belt, near the guide
loop on the side wall.
Before a door is closed, be sure the safety belt is out of
the way. If a door is slammed against a safety belt,
damage can occur to both the safety belt and the vehicle.
1-25
Page 50 of 408
{CAUTION:
Children can be seriously injured or strangled if a
shoulder belt is wrapped around their neck and
the safety belt continues to tighten. Buckle any
unused safety belts behind the child restraint so
children cannot reach them. Pull the shoulder belt
all the way out of the retractor to set the lock, if
your vehicle has one, after the child restraint has
been installed.
Notice:Do not let the LATCH attachments rub
against the vehicle’s safety belts. This may damage
these parts. If necessary, move buckled safety
belts to avoid rubbing the LATCH attachments.
Do not fold the empty rear seat with a safety belt
buckled. This could damage the safety belt or
the seat. Unbuckle and return the safety belt to its
stowed position.
1. Attach and tighten the lower attachments to the
lower anchors. If the child restraint does not have
lower attachments or the desired seating position
does not have lower anchors, secure the childrestraint with the top tether and the safety belts.
Refer to your child restraint manufacturer
instructions and the instructions in this manual.
1.1. Find the lower anchors for the desired
seating position.
1.2. Put the child restraint on the seat.
1.3. Attach and tighten the lower attachments on
the child restraint to the lower anchors.
2. If the child restraint manufacturer recommends that
the top tether be attached, attach and tighten the
top tether to the top tether anchor, if equipped.
Refer to the child restraint instructions and
the following steps:
2.1. Find the top tether anchor.
2.2. For the second, third and fourth row with three
passenger seats only, in the rear driver side
seating positions, use anchor point (A). For
the rear passenger side seating positions,
use anchor point (B). For the center seating
positions, use anchor point (B). Never install
two top tethers using the same top tether
anchor.
1-46
Page 54 of 408
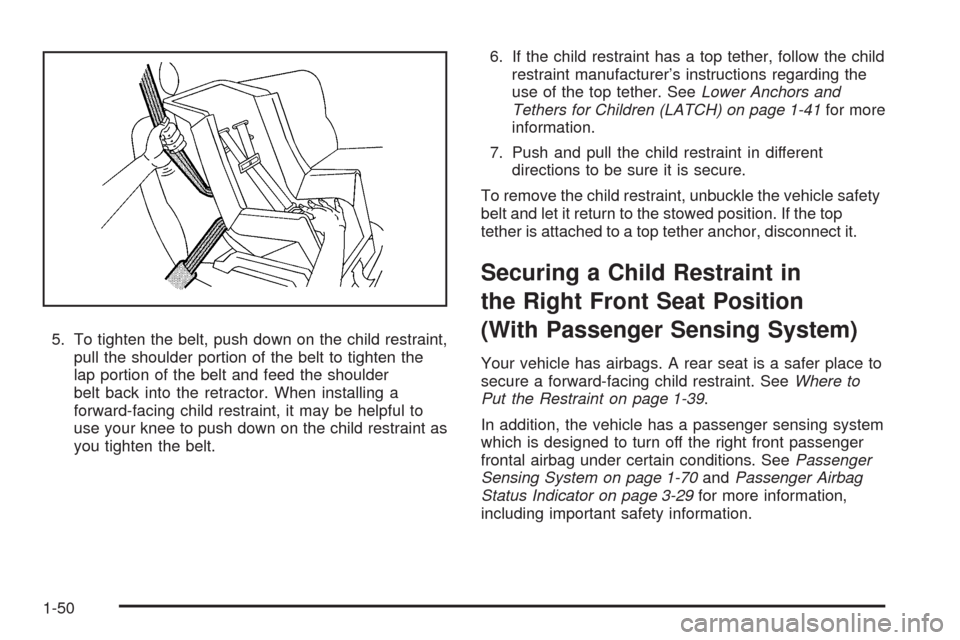
5. To tighten the belt, push down on the child restraint,
pull the shoulder portion of the belt to tighten the
lap portion of the belt and feed the shoulder
belt back into the retractor. When installing a
forward-facing child restraint, it may be helpful to
use your knee to push down on the child restraint as
you tighten the belt.6. If the child restraint has a top tether, follow the child
restraint manufacturer’s instructions regarding the
use of the top tether. SeeLower Anchors and
Tethers for Children (LATCH) on page 1-41for more
information.
7. Push and pull the child restraint in different
directions to be sure it is secure.
To remove the child restraint, unbuckle the vehicle safety
belt and let it return to the stowed position. If the top
tether is attached to a top tether anchor, disconnect it.
Securing a Child Restraint in
the Right Front Seat Position
(With Passenger Sensing System)
Your vehicle has airbags. A rear seat is a safer place to
secure a forward-facing child restraint. SeeWhere to
Put the Restraint on page 1-39.
In addition, the vehicle has a passenger sensing system
which is designed to turn off the right front passenger
frontal airbag under certain conditions. SeePassenger
Sensing System on page 1-70andPassenger Airbag
Status Indicator on page 3-29for more information,
including important safety information.
1-50
Page 58 of 408
7. If the vehicle does not have a rear seat and the child
restraint has a top tether, follow the child restraint
manufacturer’s instructions regarding the use of
the top tether. SeeLower Anchors and Tethers
for Children (LATCH) on page 1-41for more
information.
8. Push and pull the child restraint in different directions
to be sure it is secure.
If the airbag is off, the off indicator in the passenger
airbag status indicator will come on and stay on when
the vehicle is started.
To remove the child restraint, unbuckle the vehicle
safety belt and let it return to the stowed position.
Securing a Child Restraint in
the Right Front Seat Position
(With Airbag On-Off Switch)
The vehicle has airbags. A rear seat is a safer place to
secure a forward-facing child restraint. SeeWhere to
Put the Restraint on page 1-39.
There is a switch on the instrument panel that you can
use to turn off the right front passenger’s frontal
airbag. SeeAirbag Off Switch on page 1-67for more
information, including important safety information.A label on the sun visor says, “Never put a rear-facing
child seat in the front.” This is because the risk to
the rear-facing child is so great, if the airbag deploys.
{CAUTION:
A child in a rear-facing child restraint can be
seriously injured or killed if the right front
passenger airbag inflates. This is because the
back of the rear-facing child restraint would be
very close to the inflating airbag. A child in a
forward-facing child restraint can be seriously
injured or killed if the right front passenger airbag
inflates and the passenger seat is in a forward
position.
Even if the airbag switch has turned off the right
front passenger frontal airbag, no system is
fail-safe. No one can guarantee that an airbag will
not deploy under some unusual circumstance,
even though it is turned off.
CAUTION: (Continued)
1-54