2009 CHEVROLET EXPRESS CARGO VAN cooling
[x] Cancel search: coolingPage 135 of 408
Electric Power Management
The vehicle has Electric Power Management (EPM) that
estimates the battery’s temperature and state of charge.
It then adjusts the voltage for best performance and
extended life of the battery.
When the battery’s state of charge is low, the voltage is
raised slightly to quickly put the charge back in. When the
state of charge is high, the voltage is lowered slightly to
prevent overcharging. If the vehicle has a voltmeter gage
or voltage display on the Driver Information Center (DIC),
you may see the voltage move up or down. This is
normal. If there is a problem, an alert will be displayed.
The battery can be discharged at idle if the electrical
loads are very high. This is true for all vehicles.
This is because the generator (alternator) may not
be spinning fast enough at idle to produce all the
power that is needed for very high electrical loads.A high electrical load occurs when several of the
following loads are on: headlamps, high beams, rear
window defogger, climate control fan at high speed,
engine cooling fans, trailer loads, and loads plugged
into accessory power outlets.
EPM works to prevent excessive discharge of the
battery. It does this by balancing the generator’s output
and the vehicle’s electrical needs. It can increase
engine idle speed to generate more power, whenever
needed.
Battery Run-Down Protection
This feature shuts off the dome lamps if they are left
on for more than 10 minutes when the ignition is
in LOCK/OFF. This helps to prevent the battery
from running down.
3-17
Page 137 of 408
Climate Controls
Climate Control System
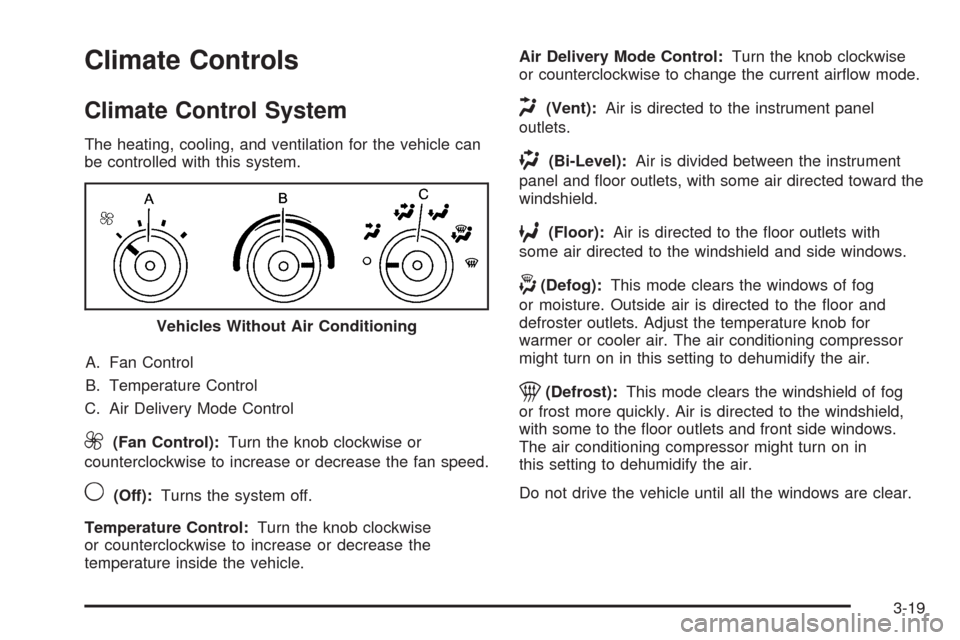
The heating, cooling, and ventilation for the vehicle can
be controlled with this system.
A. Fan Control
B. Temperature Control
C. Air Delivery Mode Control
9(Fan Control):Turn the knob clockwise or
counterclockwise to increase or decrease the fan speed.
9(Off):Turns the system off.
Temperature Control:Turn the knob clockwise
or counterclockwise to increase or decrease the
temperature inside the vehicle.Air Delivery Mode Control:Turn the knob clockwise
or counterclockwise to change the current airflow mode.
H(Vent):Air is directed to the instrument panel
outlets.
)(Bi-Level):Air is divided between the instrument
panel and floor outlets, with some air directed toward the
windshield.
6(Floor):Air is directed to the floor outlets with
some air directed to the windshield and side windows.
-(Defog):This mode clears the windows of fog
or moisture. Outside air is directed to the floor and
defroster outlets. Adjust the temperature knob for
warmer or cooler air. The air conditioning compressor
might turn on in this setting to dehumidify the air.
1(Defrost):This mode clears the windshield of fog
or frost more quickly. Air is directed to the windshield,
with some to the floor outlets and front side windows.
The air conditioning compressor might turn on in
this setting to dehumidify the air.
Do not drive the vehicle until all the windows are clear. Vehicles Without Air Conditioning
3-19
Page 151 of 408
StabiliTrak®Indicator Light
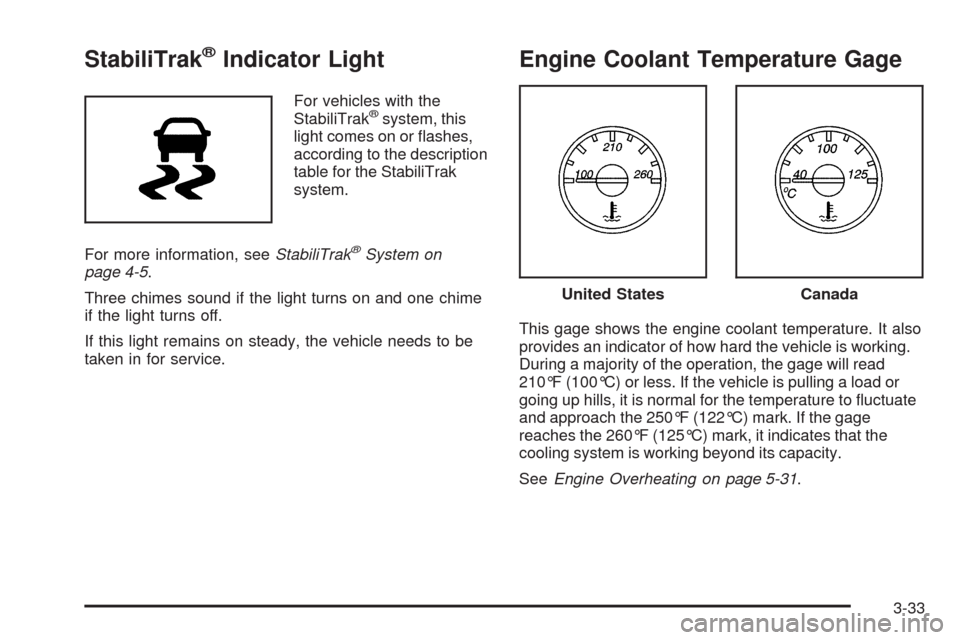
For vehicles with the
StabiliTrak®system, this
light comes on or flashes,
according to the description
table for the StabiliTrak
system.
For more information, seeStabiliTrak
®System on
page 4-5.
Three chimes sound if the light turns on and one chime
if the light turns off.
If this light remains on steady, the vehicle needs to be
taken in for service.
Engine Coolant Temperature Gage
This gage shows the engine coolant temperature. It also
provides an indicator of how hard the vehicle is working.
During a majority of the operation, the gage will read
210°F (100°C) or less. If the vehicle is pulling a load or
going up hills, it is normal for the temperature to fluctuate
and approach the 250°F (122°C) mark. If the gage
reaches the 260°F (125°C) mark, it indicates that the
cooling system is working beyond its capacity.
SeeEngine Overheating on page 5-31.
United StatesCanada
3-33
Page 169 of 408
ENGINE OVERHEATED STOP ENGINE
Notice:If you drive your vehicle while the engine
is overheating, severe engine damage may occur.
If an overheat warning appears on the instrument
panel cluster and/or DIC, stop the vehicle as soon
as possible. SeeEngine Overheating on page 5-31
for more information.
This message displays and a chime sounds if the
engine cooling system reaches unsafe temperatures for
operation. Stop and turn off the vehicle as soon as it
is safe to do so to avoid severe damage. This message
clears when the engine has cooled to a safe operating
temperature.
ENGINE POWER IS REDUCED
This message displays and a chime sounds when the
cooling system temperature gets too hot and the engine
further enters the engine coolant protection mode.
SeeEngine Overheating on page 5-31for further
information.
This message also displays when the vehicle’s engine
power is reduced. Reduced engine power can affect
the vehicle’s ability to accelerate. If this message is on,
but there is no reduction in performance, proceed toyour destination. The performance may be reduced
the next time the vehicle is driven. The vehicle may be
driven at a reduced speed while this message is on,
but acceleration and speed may be reduced. Anytime
this message stays on, the vehicle should be taken
to your dealer/retailer for service as soon as possible.
FUEL LEVEL LOW
This message displays if the fuel level is low. Refuel as
soon as possible. SeeFuel Gage on page 3-40and
Fuel on page 5-5for more information.
ICE POSSIBLE DRIVE WITH CARE
This message displays when the outside air temperature
is cold enough to create icy road conditions. Adjust
your driving accordingly.
LEFT REAR DOOR OPEN
On some vehicles, this message displays and a chime
sounds if the driver side rear door is not fully closed
and the vehicle is in a drive gear. Stop and turn off the
vehicle, check the door for obstructions, and close
the door again. Check to see if the message still
appears on the DIC.
3-51
Page 217 of 408
Hill and Mountain Roads
Driving on steep hills or through mountains is different
than driving on flat or rolling terrain. Tips for driving
in these conditions include:
•Keep the vehicle serviced and in good shape.
•Check all fluid levels and brakes, tires, cooling
system, and transmission.
•Going down steep or long hills, shift to a
lower gear.
{CAUTION:
If you do not shift down, the brakes could get so
hot that they would not work well. You would then
have poor braking or even none going down a hill.
You could crash. Shift down to let the engine
assist the brakes on a steep downhill slope.
{CAUTION:
Coasting downhill in N (Neutral) or with the ignition
off is dangerous. The brakes will have to do all the
work of slowing down and they could get so hot
that they would not work well. You would then
have poor braking or even none going down a hill.
You could crash. Always have the engine running
and the vehicle in gear when going downhill.
•Stay in your own lane. Do not swing wide or cut
across the center of the road. Drive at speeds
that let you stay in your own lane.
•Top of hills: Be alert — something could be in your
lane (stalled car, accident).
•Pay attention to special road signs (falling rocks
area, winding roads, long grades, passing or
no-passing zones) and take appropriate action.
4-15
Page 242 of 408
Leaving After Parking on a Hill
1. Apply and hold the brake pedal while you:
•start the engine,
•shift into a gear, and
•release the parking brake.
2. Let up on the brake pedal.
3. Drive slowly until the trailer is clear of the chocks.
4. Stop and have someone pick up and store the
chocks.
Maintenance When Trailer Towing
The vehicle needs service more often when pulling a
trailer. See this manual’s Maintenance Schedule
or Index for more information. Things that are especially
important in trailer operation are automatic transmission
fluid, engine oil, axle lubricant, belts, cooling system
and brake system. It is a good idea to inspect
these before and during the trip.
Check periodically to see that all hitch nuts and bolts
are tight.
Trailer Wiring Harness
The optional heavy-duty trailer wiring package includes
a wiring harness, with a seven-pin connector at the
rear of the vehicle and a four-wire harness assembly
under the driver side of the instrument panel. The
four-wire harness assembly comes without a connector.
If the vehicle does not have a trailer hitch, the
seven-wire harness assembly with connector is taped
together and located in a frame pocket at the driver side
rear left corner of the frame.
If the vehicle has a trailer hitch, the seven-wire harness
assembly with connector is attached to a bracket on
the hitch platform. In both cases, the seven-wire harness
has a connector and includes a 30-amp feed wire.
4-40
Page 245 of 408
Service............................................................5-3
Accessories and Modifications..........................5-3
California Proposition 65 Warning.....................5-4
California Perchlorate Materials Requirements.....5-4
Doing Your Own Service Work.........................5-4
Adding Equipment to the Outside of the
Vehicle......................................................5-5
Fuel................................................................5-5
Gasoline Octane............................................5-6
Gasoline Specifications....................................5-6
California Fuel...............................................5-6
Additives.......................................................5-7
Fuel E85 (85% Ethanol)..................................5-8
Fuels in Foreign Countries...............................5-9
Filling the Tank............................................5-10
Filling a Portable Fuel Container.....................5-12
Checking Things Under the Hood....................5-12
Hood Release..............................................5-13
Engine Compartment Overview.......................5-14
Engine Oil...................................................5-15
Engine Oil Life System..................................5-18
Engine Air Cleaner/Filter................................5-20
Automatic Transmission Fluid.........................5-21
Cooling System............................................5-24
Engine Coolant.............................................5-25Radiator Pressure Cap..................................5-31
Engine Overheating.......................................5-31
Engine Fan Noise.........................................5-33
Power Steering Fluid.....................................5-34
Windshield Washer Fluid................................5-35
Brakes........................................................5-36
Battery........................................................5-39
Jump Starting...............................................5-40
All-Wheel Drive..............................................5-44
Rear Axle
.......................................................5-45
Front Axle......................................................5-46
Noise Control System.....................................5-47
Tampering with Noise Control System
Prohibited.................................................5-47
Bulb Replacement..........................................5-48
Halogen Bulbs..............................................5-48
Headlamps..................................................5-48
Front Turn Signal, Sidemarker and
Parking Lamps..........................................5-50
Center High-Mounted Stoplamp (CHMSL).........5-51
Taillamps.....................................................5-51
Replacement Bulbs.......................................5-52
Windshield Wiper Blade Replacement..............5-53
Section 5 Service and Appearance Care
5-1
Page 259 of 408
A. Battery. SeeBattery on page 5-39.
B. Radiator Pressure Cap. SeeRadiator Pressure Cap
on page 5-31.
C. Coolant Recovery Tank. SeeCooling System on
page 5-24.
D. Automatic Transmission Fluid Dipstick.
See “Checking the Fluid Level” underAutomatic
Transmission Fluid on page 5-21.
E. Engine Oil Fill Cap. See “When to Add Engine Oil”
underEngine Oil on page 5-15.
F. Engine Oil Dipstick. See “Checking Engine Oil”
underEngine Oil on page 5-15.
G. Engine Air Cleaner/Filter. SeeEngine Air
Cleaner/Filter on page 5-20.
H. Power Steering Fluid Reservoir. SeePower Steering
Fluid on page 5-34.
I. Brake Master Cylinder Reservoir. See “Brake Fluid”
underBrakes on page 5-36.
J. Windshield Washer Fluid Reservoir. See “Adding
Washer Fluid” underWindshield Washer Fluid
on page 5-35.Engine Oil
For diesel engine vehicles, see “Engine Oil” in the
DURAMAX®Diesel manual.
Checking Engine Oil
It is a good idea to check the engine oil every time you
get fuel. In order to get an accurate reading, the oil
must be warm and the vehicle must be on level ground.
The engine oil dipstick handle is a yellow loop.
SeeEngine Compartment Overview on page 5-14
for the location of the engine oil dipstick.
1. Turn off the engine and give the oil several minutes
to drain back into the oil pan. If you do not do this,
the oil dipstick might not show the actual level.
2. Pull out the dipstick and clean it with a paper towel
or cloth, then push it back in all the way. Remove it
again, keeping the tip down, and check the level.
5-15