2009 CHEVROLET EXPRESS CARGO VAN ECO mode
[x] Cancel search: ECO modePage 68 of 408

In addition, the vehicle may have dual-stage frontal
airbags. Dual-stage airbags adjust the restraint
according to crash severity. The vehicle has electronic
frontal sensors, which help the sensing system
distinguish between a moderate frontal impact and a
more severe frontal impact. For moderate frontal
impacts, dual-stage airbags inflate at a level less than
full deployment. For more severe frontal impacts,
full deployment occurs.
The vehicle may or may not have roof-rail airbags.
SeeAirbag System on page 1-58. Roof-rail airbags are
intended to inflate in moderate to severe side crashes.
In addition, these roof-rail airbags are intended to inflate
during a rollover. Roof-rail airbags will inflate if the
crash severity is above the system’s designed threshold
level. The threshold level can vary with specific
vehicle design.
Roof-rail airbags are not intended to inflate in frontal
impacts, near-frontal impacts, or rear impacts. All roof-rail
airbags will deploy when either side of the vehicle is
struck.In any particular crash, no one can say whether an
airbag should have inflated simply because of the
damage to a vehicle or because of what the repair costs
were. For frontal airbags, inflation is determined by what
the vehicle hits, the angle of the impact, and how quickly
the vehicle slows down. For roof-rail airbags, deployment
is determined by the location and severity of the side
impact.
What Makes an Airbag In�ate?
In a deployment event, the sensing system sends an
electrical signal triggering a release of gas from the
inflator. Gas from the inflator fills the airbag causing the
bag to break out of the cover and deploy. The inflator, the
airbag, and related hardware are all part of the airbag
module.
Frontal airbag modules are located inside the steering
wheel and instrument panel. For vehicles with roof-rail
airbags, there are airbag modules in the ceiling of the
vehicle, near the side windows for the first, second, and
third rows (if equipped). SeeWhere Are the Airbags? on
page 1-60for more information.
1-64
Page 69 of 408

How Does an Airbag Restrain?
In moderate to severe frontal or near frontal collisions,
even belted occupants can contact the steering wheel
or the instrument panel. In moderate to severe side
collisions, even belted occupants can contact the inside
of the vehicle.
Airbags supplement the protection provided by safety
belts. Frontal airbags distribute the force of the
impact more evenly over the occupant’s upper body,
stopping the occupant more gradually. Roof-rail airbags
distribute the force of the impact more evenly over
the occupant’s upper body.
Rollover capable roof-rail airbags are designed to
help contain the head and chest of occupants in the
outboard seating positions in the first, second, and
third rows, if equipped. The rollover capable roof-rail
airbags are designed to help reduce the risk of full
or partial ejection in rollover events, although no system
can prevent all such ejections.But airbags would not help in many types of collisions,
primarily because the occupant’s motion is not
toward those airbags. SeeWhen Should an Airbag
Inflate? on page 1-63for more information.
Airbags should never be regarded as anything more
than a supplement to safety belts.
What Will You See After an Airbag
In�ates?
After the frontal airbags inflate, they quickly deflate,
so quickly that some people may not even realize an
airbag inflated. Roof-rail airbags may still be at least
partially inflated for some time after they deploy.
Some components of the airbag module may be hot
for several minutes. For location of the airbag modules,
seeWhat Makes an Airbag Inflate? on page 1-64.
1-65
Page 109 of 408

2 (Second):This position reduces vehicle speed even
more than 3 (Third) without using the brakes. You
can use 2 (Second) on hills. It can help control vehicle
speed as you go down steep mountain roads, but
then you would also want to use the brakes off and on.
You may use this feature for reducing torque to the
rear wheels when you are trying to start the vehicle from
a stop on slippery road surfaces.
1 (First):This position reduces vehicle speed even
more than 2 (Second) without using the brakes. You can
use it on very steep hills, or in deep snow or mud.
If the shift lever is put in 1 (First) while the vehicle is
moving forward, the transmission will not shift into first
gear until the vehicle is going slowly enough.
Notice:Spinning the tires or holding the vehicle
in one place on a hill using only the accelerator
pedal may damage the transmission. The repair will
not be covered by the vehicle warranty. If you
are stuck, do not spin the tires. When stopping on a
hill, use the brakes to hold the vehicle in place.Tow/Haul Mode
Tow/haul is designed to assist while the vehicle is
pulling a large or heavy load or trailer. Tow/haul is
most useful while pulling such a load in rolling terrain,
in stop-and-go traffic, or when you need improved
low-speed control, such as when parking. The purpose
of the tow/haul mode is to:
•Reduce the frequency and improve the predictability
of transmission shifts,
•provide the same solid shift feel when pulling a heavy
load as when the vehicle is unloaded,
•improve control of vehicle speed while requiring less
throttle pedal activity.
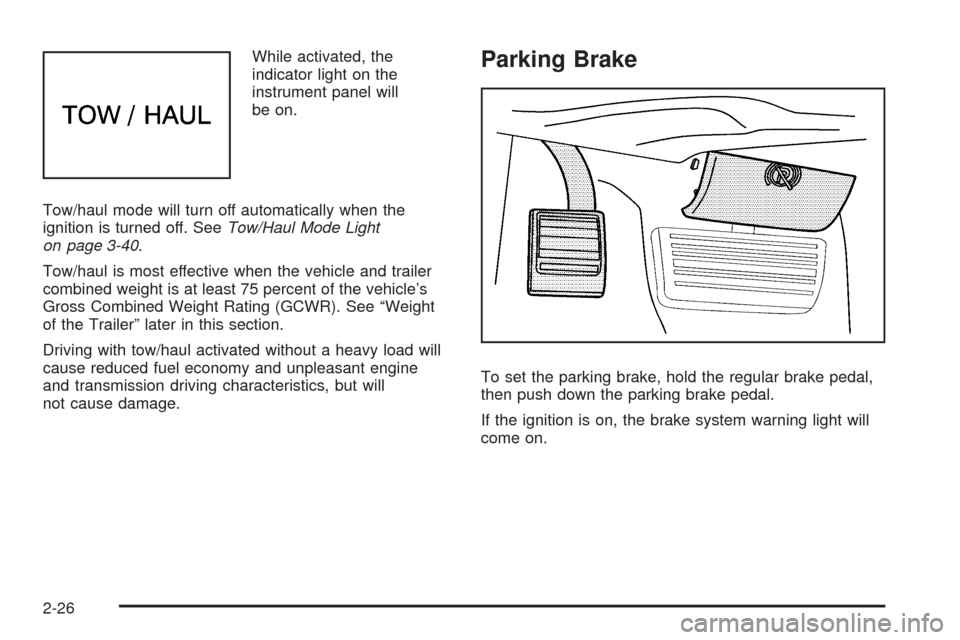
Press this button located
to the right of the steering
wheel on the instrument
panel to turn tow/haul
mode on and off.
2-25
Page 110 of 408

While activated, the
indicator light on the
instrument panel will
be on.
Tow/haul mode will turn off automatically when the
ignition is turned off. SeeTow/Haul Mode Light
on page 3-40.
Tow/haul is most effective when the vehicle and trailer
combined weight is at least 75 percent of the vehicle’s
Gross Combined Weight Rating (GCWR). See “Weight
of the Trailer” later in this section.
Driving with tow/haul activated without a heavy load will
cause reduced fuel economy and unpleasant engine
and transmission driving characteristics, but will
not cause damage.Parking Brake
To set the parking brake, hold the regular brake pedal,
then push down the parking brake pedal.
If the ignition is on, the brake system warning light will
come on.
2-26
Page 125 of 408

Turn Signal/Multifunction Lever
The lever on the left side of the steering column
includes the following:
G:Turn and Lane Change Signals.
53:Headlamp High/Low-Beam Changer.
N:Windshield Wipers.
L:Windshield Washer.
Flash-to-Pass Feature.
Information for these features is on the pages following.
Turn and Lane-Change Signals
G:An arrow on the instrument panel cluster flashes
in the direction of the turn or lane change.
To signal a turn, move the lever all the way up or down.
To signal a lane change, raise or lower the lever until
the arrow starts to flash. The turn signal automatically
flashes three times and if the tow-haul mode is active
it flashes six times. Holding the turn signal lever for
more than one second causes the turn signals to
flash continually until the lever is released.
The lever returns to its starting position when released.
If after signaling a turn or lane change the arrow
flashes rapidly or does not come on, a signal bulb
may be burned out.
Have the bulbs replaced. If the bulb is not burned out,
check the fuse. SeeFuses and Circuit Breakers on
page 5-105.
Turn Signal On Chime
If the turn signal is left on for more than 3/4 of a mile
(1.2 km), a chime sounds at each flash of the turn signal
and the message TURN SIGNAL ON also appears in
the Driver Information Center (DIC). SeeDIC Warnings
and Messages on page 3-48. To turn off the chime
and message, move the turn signal lever to the
off position.
3-7
Page 140 of 408

R(Low):This position supplies the least amount of
heat to the rear-seating area.
9(Off):Turns the rear heating system off.
Rear Air Conditioning and Heating
System
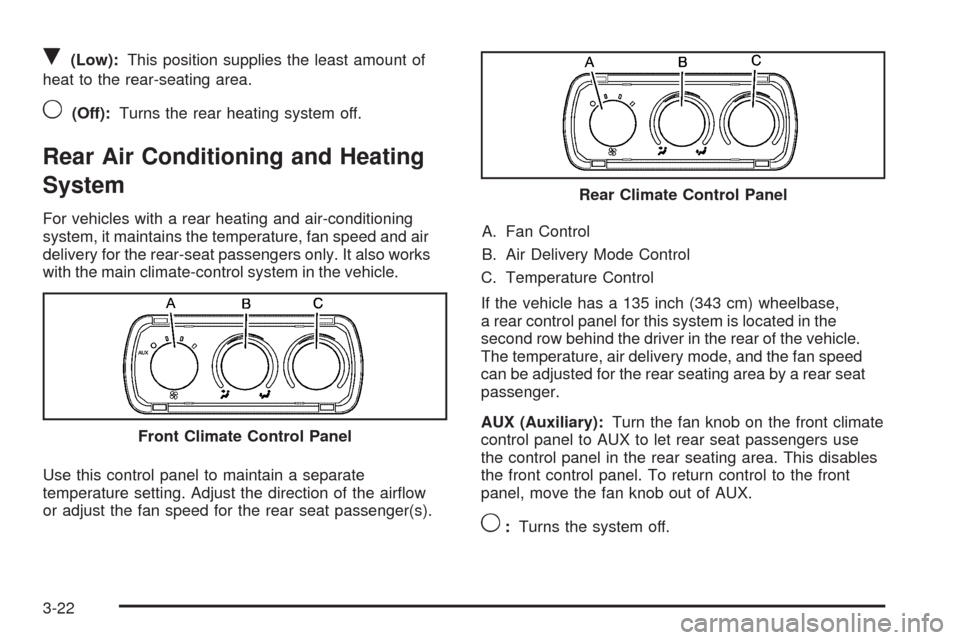
For vehicles with a rear heating and air-conditioning
system, it maintains the temperature, fan speed and air
delivery for the rear-seat passengers only. It also works
with the main climate-control system in the vehicle.
Use this control panel to maintain a separate
temperature setting. Adjust the direction of the airflow
or adjust the fan speed for the rear seat passenger(s).A. Fan Control
B. Air Delivery Mode Control
C. Temperature Control
If the vehicle has a 135 inch (343 cm) wheelbase,
a rear control panel for this system is located in the
second row behind the driver in the rear of the vehicle.
The temperature, air delivery mode, and the fan speed
can be adjusted for the rear seating area by a rear seat
passenger.
AUX (Auxiliary):Turn the fan knob on the front climate
control panel to AUX to let rear seat passengers use
the control panel in the rear seating area. This disables
the front control panel. To return control to the front
panel, move the fan knob out of AUX.
9:Turns the system off. Front Climate Control Panel
Rear Climate Control Panel
3-22
Page 141 of 408

9(Fan Control):Turn clockwise or counterclockwise
to increase or decrease the fan speed in the
rear-seating area.
Temperature Control:Turn clockwise or
counterclockwise to increase or decrease the
temperature in the rear-seating area.
The air-conditioning system on the main climate control
panel must be turned on to direct cooled air to the
rear of the vehicle. If it is not on, then the temperature
in the rear of the vehicle remains at cabin temperature.
Air Delivery Mode Control:Turn clockwise or
counterclockwise to change the direction of the airflow
in the rear seating area.
To change the current mode, select one of the following:
H(Vent):Air is directed to the upper outlets, with
some directed to the floor outlets.
2(Floor):Air is directed to the floor outlets.
Be sure to keep the area under the front seats clear of
any objects so that the air inside of the vehicle can
circulate effectively.
For information on how to use the main climate control
system, seeClimate Control System on page 3-19.
For information on ventilation, seeOutlet Adjustment
on page 3-21.
Warning Lights, Gages, and
Indicators
Warning lights and gages can signal that something is
wrong before it becomes serious enough to cause an
expensive repair or replacement. Paying attention to
the warning lights and gages could prevent injury.
Warning lights come on when there may be or is a
problem with one of the vehicle’s functions. Some
warning lights come on briefly when the engine is
started to indicate they are working.
Gages can indicate when there may be or is a problem
with one of the vehicle’s functions. Often gages and
warning lights work together to indicate a problem with
the vehicle.
When one of the warning lights comes on and stays on
while driving, or when one of the gages shows there may
be a problem, check the section that explains what to do.
Follow this manual’s advice. Waiting to do repairs can be
costly and even dangerous.
3-23
Page 164 of 408

Relearn Remote Key
To access this display, the vehicle must be in P (Park).
This display allows you to match Remote Keyless
Entry (RKE) transmitters to your vehicle. To match an
RKE transmitter to your vehicle:
1. Press the vehicle information button until
PRESS
VTO RELEARN REMOTE KEY displays.
2. Press the set/reset button until REMOTE KEY
LEARNING ACTIVE is displayed.
3. Press and hold the lock and unlock buttons on
the first transmitter at the same time for about
15 seconds.
A chime will sound indicating that the transmitter is
matched.
4. To match additional transmitters at this time, repeat
Step 3.
Each vehicle can have a maximum of four
transmitters matched to it.
5. To exit the programming mode, you must cycle the
key to LOCK/OFF.
Blank Display
This display shows no information.
DIC Compass
Your vehicle may have a compass in the Driver
Information Center (DIC).
Compass Zone
Your dealer/retailer will set the correct zone for your
location.
Under certain circumstances, such as during a long
distance cross-country trip or moving to a new state
or province, it will be necessary to compensate for
compass variance by resetting the zone through the
DIC if the zone is not set correctly.
Compass variance is the difference between the earth’s
magnetic north and true geographic north. If the compass
is not set to the zone where you live, the compass may
give false readings. The compass must be set to the
variance zone in which the vehicle is traveling.
3-46