2009 CHEVROLET EXPRESS CARGO VAN ECO mode
[x] Cancel search: ECO modePage 187 of 408
Speed Compensated Volume (SCV):Radios with
Speed Compensated Volume (SCV) automatically
adjusts the radio volume to compensate for road and
wind noise as you speed up or slow down while driving.
That way, the volume level should sound about the
same as you drive.
To activate SCV:
1. Set the radio volume to the desired level.
2. Press the MENU button to display the radio
setup menu.
3. Press the pushbutton under the AUTO VOLUM
label on the radio display.
4. Press the pushbutton under the desired Speed
Compensated Volume setting (OFF, Low, Med,
or High) to select the level of radio volume
compensation. The display times out after
approximately 10 seconds. Each higher setting
allows for more radio volume compensation at
faster vehicle speeds.Finding a Station
BAND:Press to switch between FM1 and FM2 and
AM. The selection displays.
f(Tune):Turn clockwise or counterclockwise to
increase or decrease the station frequency.
©SEEK¨:Press the arrows to go to the previous
or to the next station and stay there.
To scan stations, press and hold either arrow for
two seconds until a beep sounds. The radio goes to a
station, plays for a few seconds, then goes to the next
station. For AM-FM Radio and Radio with CD (Base), the
station frequency flashes while the radio is in the scan
mode. Press either arrow again to stop scanning.
The radio seeks and scans stations only with a strong
signal that are in the selected band.
For AM-FM Radio and Radio with CD (Base), scan
presets within the current selected band by pressing and
holding either SEEK arrow for four seconds until a double
beep sounds. The radio goes to a stored preset, plays for
a few seconds if a strong signal is present, then goes to
the next stored preset. The station frequency flashes
while the radio is in the scan mode.
3-69
Page 190 of 408
Adjusting the Speakers (Balance/Fade)
(AM-FM Radio and Radio with
CD (Base))
`
(Balance/Fade):To adjust the balance or fade,
press the
`button or thefknob until the desired
speaker control label displays. Turn the
fknob
clockwise or counterclockwise to adjust the setting.
Adjusting the Speakers (Balance/Fade)
BAL/FADE (Balance/Fade):To adjust balance or
fade, press the
fknob until the speaker control labels
display. Continue pressing to highlight the desired
label, or press the pushbutton positioned under
the desired label. Turn the
fknob clockwise or
counterclockwise to adjust the highlighted setting.
To quickly adjust balance or fade to the middle position,
press the pushbutton positioned under the BAL or
FADE label for more than two seconds. A beep sounds
and the level adjusts to the middle position.
To quickly adjust all speaker and tone controls to the
middle position, press the
fknob for more than
two seconds until a beep sounds.
Finding a Category (CAT) Station
CAT (Category):The CAT button is used to find XM™
stations while the radio is in the XM™ mode.
XM™ is a satellite radio service that is based in the
United States and Canada only.
For this vehicle, the XM™ function is not available.
Radio Messages
Calibration Error:The audio system has been
calibrated for the vehicle from the factory. If Calibration
Error displays, it means that the radio has not been
configured properly for the vehicle and it must be
returned to your dealer/retailer for service.
Locked or Loc:One of these messages will display
when the THEFTLOCK
®system has locked up the
radio. Take the vehicle to your dealer/retailer for service.
If any error occurs repeatedly or if an error cannot be
corrected, contact your dealer/retailer.
Playing a CD (Single CD Player)
Insert a CD partway into the slot, label side up.
The player pulls it in and the CD should begin playing.
3-72
Page 197 of 408
Root Directory
The root directory of the CD-R or CD-RW is treated as
a folder. If the root directory has compressed audio files,
the directory displays as the CD label. All files contained
directly under the root directory are accessed prior to any
root directory folders. However, playlists (Px) are always
accessed before root folders or files.
If a disc contains both uncompressed CD audio (.CDA)
and MP3 files, a folder under the root directory called
CD accesses all of the CD audio tracks on the disc.
Empty Directory or Folder
If a root directory or a folder exists somewhere in the file
structure that contains only folders/subfolders and no
compressed files directly beneath them, the player
advances to the next folder in the file structure that
contains compressed audio files. The empty folder
does not display.
No Folder
When the CD contains only compressed files, the files
are located under the root folder. The next and previous
folder function does not display on a CD that was
recorded without folders or playlists.
When the CD contains only playlists and compressed
audio files, but no folders, all files are located under the
root folder. The folder down and up buttons search
playlists (Px) first and then goes to the root folder.
Order of Play
Tracks recorded to the CD-R or CD-RW are played in
the following order:
•Play begins from the first track in the first playlist
and continues sequentially through all tracks in
each playlist. When the last track of the last playlist
has played, play continues from the first track of
the first playlist.
•Play begins from the first track in the first folder and
continues sequentially through all tracks in each
folder. When the last track of the last folder has
played, play continues from the first track of the
first folder.
When play enters a new folder, the display does
not automatically show the new folder name unless you
have chosen the folder mode as the default display.
The new track name displays.
File System and Naming
The song name that displays is the song name that is
contained in the ID3 tag. If the song name is not present
in the ID3 tag, then the radio displays the file name
without the extension (such as .mp3) as the track name.
Track names longer than 32 characters or four pages
are shortened. Parts of words on the last page of
text and the extension of the filename does not display.
3-79
Page 200 of 408
To change from playback by artist to playback by album,
press the pushbutton located below the Sort By label.
From the sort screen, push one of the buttons below the
album button. Press the pushbutton below the back label
to return to the main music navigator screen. Now the
album name is displayed on the second line between the
arrows and songs from the current album begins to play.
Once all songs from that album are played, the player
moves to the next album in alphabetical order on the
CD-R/CD-RW and begins playing MP3 files from that
album.
To exit music navigator mode, press the pushbutton
below the Back label to return to normal MP3 playback.
BAND:Press this button to listen to the radio when a
CD is playing. The inactive CD remains inside the radio
for future listening.
CD/AUX (CD/Auxiliary):Press this button to play a CD
when listening to the radio. The CD icon and a message
showing disc and/or track number displays when a CD
is in the player. Press this button again and the system
automatically searches for an auxiliary input device such
as a portable audio player. If a portable audio player is
not connected, “No Input Device Found” displays.Theft-Deterrent Feature
Non-RDS Radios
THEFTLOCK®is designed to discourage theft of your
vehicle’s radio. The feature works automatically by
learning a portion of the Vehicle Identification Number
(VIN). If the radio is moved to a different vehicle, it does
not operate and LOC displays.
With THEFTLOCK
®activated, the radio does not
operate if stolen.
RDS Radios
THEFTLOCK®is designed to discourage theft of your
vehicle’s radio. The feature works automatically by
learning a portion of the Vehicle Identification Number
(VIN). If the radio is moved to a different vehicle, it does
not operate and LOCKED displays.
When the radio and vehicle are turned off, the blinking
red light indicates that THEFTLOCK
®is armed.
With THEFTLOCK
®activated, the radio does not
operate if stolen.
3-82
Page 237 of 408
If a step-bumper hitch will be used, the bumper could be
damaged in sharp turns. Make sure there is ample room
when turning to avoid contact between the trailer and the
bumper.
If the loaded trailer being pulled will weigh more than
5,000 lbs (2 270 kg), be sure to use a properly mounted
weight-distributing hitch and sway control of the proper
size. This equipment is very important for proper vehicle
loading and good handling when driving. Always use a
sway control if the trailer will weigh more than these
limits. Ask a hitch dealer about sway controls.
Will any holes need to be made in the body of the
vehicle when a trailer hitch is installed?
If using the wiring provided with the factory-installed
trailering package, no holes need to be made in
the body of the vehicle. However, if an aftermarket hitch
is installed, holes may need to be made in the body.
If holes are made in the body, then be sure to seal the
holes later when the hitch is removed. If the holes
are not sealed, deadly carbon monoxide (CO) from the
engine’s exhaust can get into the vehicle as well as
dirt and water. See “Carbon Monoxide” underEngine
Exhaust on page 2-30.Safety Chains
Always attach chains between the vehicle and the
trailer. Cross the safety chains under the tongue of
the trailer to help prevent the tongue from contacting
the road if it becomes separated from the hitch. Always
leave just enough slack so the rig can turn. Never
allow safety chains to drag on the ground.
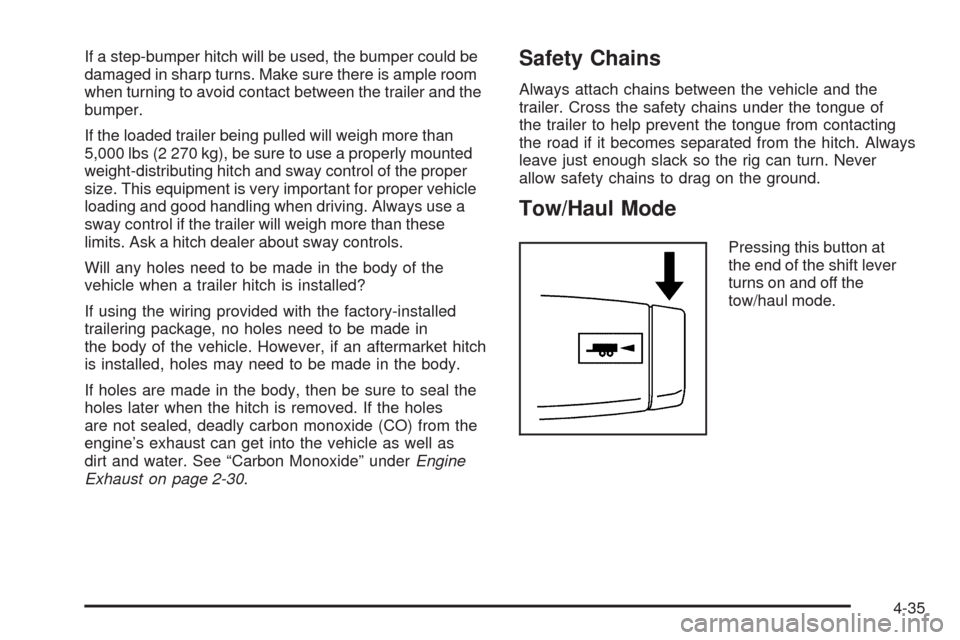
Tow/Haul Mode
Pressing this button at
the end of the shift lever
turns on and off the
tow/haul mode.
4-35
Page 238 of 408
This indicator light on the
instrument panel cluster
comes on when the
tow/haul mode is on.
Tow/Haul is a feature that assists when pulling a heavy
trailer or a large or heavy load. SeeTow/Haul Mode
on page 2-25for more information.
Tow/Haul is designed to be most effective when the
vehicle and trailer combined weight is at least 75 percent
of the vehicle’s Gross Combined Weight Rating
(GCWR). See “Weight of the Trailer” later in the section.
Tow/Haul is most useful under the following driving
conditions:
•When pulling a heavy trailer or a large or heavy
load through rolling terrain.
•When pulling a heavy trailer or a large or heavy
load in stop and go traffic.
•When pulling a heavy trailer or a large or heavy
load in busy parking lots where improved low
speed control of the vehicle is desired.Operating the vehicle in Tow/Haul when lightly loaded
or with no trailer at all will not cause damage. However,
there is no benefit to the selection of Tow/Haul when
the vehicle is unloaded. Such a selection when unloaded
may result in unpleasant engine and transmission
driving characteristics and reduced fuel economy.
Tow/Haul is recommended only when pulling a heavy
trailer or a large or heavy load.
Trailer Brakes
A loaded trailer that weighs more than 1,500 lbs
(680 kg) needs to have its own brake system that is
adequate for the weight of the trailer. Be sure to read
and follow the instructions for the trailer brakes so
they are installed, adjusted and maintained properly.
4-36
Page 268 of 408
How to Add Automatic Transmission
Fluid
Refer to the Maintenance Schedule to determine what
kind of transmission fluid to use. SeeRecommended
Fluids and Lubricants on page 6-13.
Using a funnel, add fluid down the transmission dipstick
tube only after checking the transmission fluid while
it is hot. A cold check is used only as a reference. If the
fluid level is low, add only enough of the proper fluid
to bring the level up to the HOT area for a hot check.
It does not take much fluid, generally less than
one pint (0.5 L). Do not overfill.
Notice:Use of the incorrect automatic transmission
�uid may damage the vehicle, and the damages
may not be covered by the vehicle’s warranty.
Always use the automatic transmission �uid listed in
Recommended Fluids and Lubricants on page 6-13.
•After adding fluid, recheck the fluid level as described
under “How to Check Automatic Transmission Fluid,”
earlier in this section.
•When the correct fluid level is obtained, push the
dipstick back in all the way; then flip the handle down
to lock the dipstick in place.
Cooling System
If your vehicle has a diesel engine, see “Van Models”
under “Cooling System” in the DURAMAX®Diesel
Supplement.
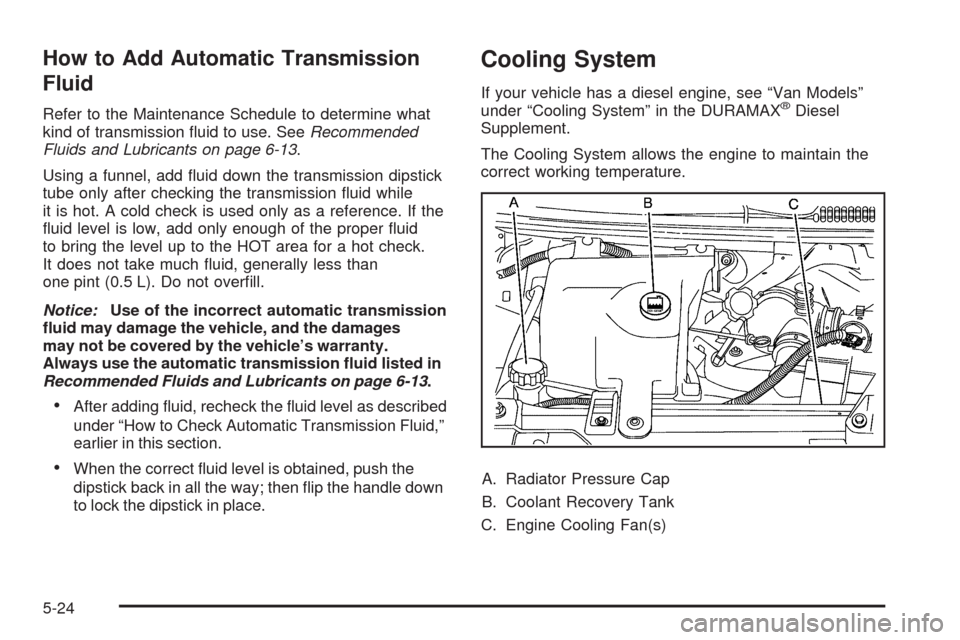
The Cooling System allows the engine to maintain the
correct working temperature.
A. Radiator Pressure Cap
B. Coolant Recovery Tank
C. Engine Cooling Fan(s)
5-24
Page 271 of 408
Checking Coolant
The vehicle must be on a level surface when checking
the coolant level.
Check to see if coolant is visible in the coolant recovery
tank. If the coolant inside the coolant recovery tank is
boiling, do not do anything else until it cools down.
If coolant is visible but the coolant level is not at
or above the COLD FILL mark, add a 50/50 mixture
of clean, drinkable water and DEX-COOL
®coolant at the
coolant recovery tank, but be sure the cooling system
is cool before this is done. See for more information
When the engine is cold, the coolant level should be at
or above the COLD FILL mark. If it is not, there could
be a leak in the cooling system.
If the coolant is low, add the coolant or take the vehicle
to a dealer/retailer for service.
How to Add Coolant to the Recovery
Tank for Gasoline Engines
If your vehicle has a diesel engine, see “How to
Add Coolant to the Coolant Recovery Tank” under
“Van Models” in the Cooling System section of the
DURAMAX
®Diesel Supplement for the proper coolant
fill procedure.
{CAUTION:
You can be burned if you spill coolant on hot
engine parts. Coolant contains ethylene glycol
and it will burn if the engine parts are hot enough.
Do not spill coolant on a hot engine.
Notice:This vehicle has a speci�c coolant �ll
procedure. Failure to follow this procedure could
cause the engine to overheat and be severely
damaged.
If coolant is needed, add the proper DEX-COOL
®
coolant mixture at the coolant recovery tank.
5-27