2009 CHEVROLET EXPRESS CARGO VAN lock
[x] Cancel search: lockPage 207 of 408
ABS can change the brake pressure to each wheel, as
required, faster than any driver could. This can help
you steer around the obstacle while braking hard.
As you brake, the computer keeps receiving updates on
wheel speed and controls braking pressure accordingly.
Remember: ABS does not change the time you need to
get your foot up to the brake pedal or always decrease
stopping distance. If you get too close to the vehicle in
front of you, you will not have time to apply the brakes if
that vehicle suddenly slows or stops. Always leave
enough room up ahead to stop, even though you
have ABS.
Using ABS
Do not pump the brakes. Just hold the brake pedal down
firmly and let antilock work for you. You might feel the
brakes vibrate or notice some noise, but this is normal.
Braking in Emergencies
With ABS, you can steer and brake at the same time.
In many emergencies, steering can help you more than
even the very best braking.
StabiliTrak®System
The vehicle may have a vehicle stability enhancement
system called StabiliTrak. It is an advanced computer
controlled system that assists the driver with directional
control of the vehicle in difficult driving conditions.
StabiliTrak activates when the computer senses a
discrepancy between the intended path and the direction
the vehicle is actually traveling. StabiliTrak selectively
applies braking pressure at any one of the vehicle’s
brakes to assist the driver with keeping the vehicle on
the intended path.
When the vehicle is started and begins to move, the
system performs several diagnostic checks to insure
there are no problems. The system may be heard or felt
while it is working. This is normal and does not mean
there is a problem with the vehicle. The system should
initialize before the vehicle reaches 20 mph (32 km/h). In
some cases, it may take approximately 2 miles (3.2 km)
of driving before the system initializes.
4-5
Page 210 of 408
Locking Rear Axle
Vehicles with a locking rear axle can give more traction
on snow, mud, ice, sand or gravel. It works like a
standard axle most of the time, but when traction is low,
this feature will allow the rear wheel with the most traction
to move the vehicle.
All-Wheel Drive (AWD) System
If the vehicle has this feature, engine power is sent to all
four wheels when extra traction is needed. This is like
four-wheel drive, but there is no separate lever or switch
to engage or disengage the front axle. It is fully automatic,
and adjusts itself as needed for road conditions.
Steering
Power Steering
If you lose power steering assist because the engine
stops or the system is not functioning, you can steer but
it will take much more effort.
Steering Tips
It is important to take curves at a reasonable speed.
Traction in a curve depends on the condition of the tires
and the road surface, the angle at which the curve is
banked, and your speed. While in a curve, speed is the
one factor you can control.
If you need to reduce speed, do it before you enter the
curve, while the front wheels are straight ahead.
Try to adjust the speed so you can drive through the
curve. Maintain a reasonable, steady speed. Wait
to accelerate until you are out of the curve, and then
accelerate gently into the straightaway.
4-8
Page 211 of 408
Steering in Emergencies
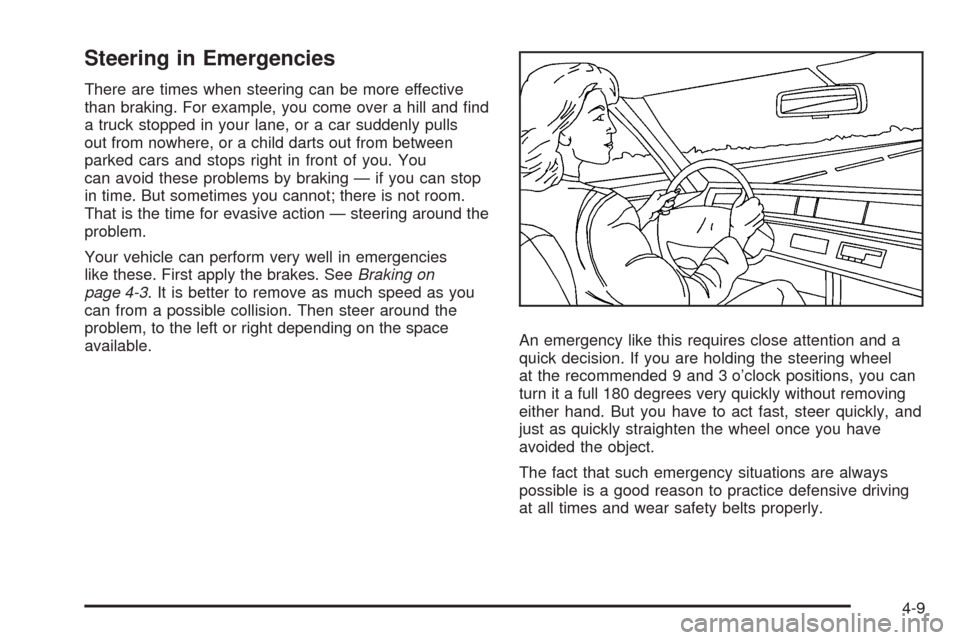
There are times when steering can be more effective
than braking. For example, you come over a hill and find
a truck stopped in your lane, or a car suddenly pulls
out from nowhere, or a child darts out from between
parked cars and stops right in front of you. You
can avoid these problems by braking — if you can stop
in time. But sometimes you cannot; there is not room.
That is the time for evasive action — steering around the
problem.
Your vehicle can perform very well in emergencies
like these. First apply the brakes. SeeBraking on
page 4-3. It is better to remove as much speed as you
can from a possible collision. Then steer around the
problem, to the left or right depending on the space
available.An emergency like this requires close attention and a
quick decision. If you are holding the steering wheel
at the recommended 9 and 3 o’clock positions, you can
turn it a full 180 degrees very quickly without removing
either hand. But you have to act fast, steer quickly, and
just as quickly straighten the wheel once you have
avoided the object.
The fact that such emergency situations are always
possible is a good reason to practice defensive driving
at all times and wear safety belts properly.
4-9
Page 213 of 408
Loss of Control
Let us review what driving experts say about what
happens when the three control systems — brakes,
steering, and acceleration — do not have enough friction
where the tires meet the road to do what the driver has
asked.
In any emergency, do not give up. Keep trying to steer
and constantly seek an escape route or area of less
danger.
Skidding
In a skid, a driver can lose control of the vehicle.
Defensive drivers avoid most skids by taking reasonable
care suited to existing conditions, and by not overdriving
those conditions. But skids are always possible.
The three types of skids correspond to your vehicle’s
three control systems. In the braking skid, the wheels
are not rolling. In the steering or cornering skid, too
much speed or steering in a curve causes tires to slip
and lose cornering force. And in the acceleration
skid, too much throttle causes the driving wheels
to spin.If your vehicle starts to slide, ease your foot off the
accelerator pedal and quickly steer the way you want
the vehicle to go. If you start steering quickly enough,
your vehicle may straighten out. Always be ready
for a second skid if it occurs.
Of course, traction is reduced when water, snow, ice,
gravel, or other material is on the road. For safety, you
want to slow down and adjust your driving to these
conditions. It is important to slow down on slippery
surfaces because stopping distance is longer and
vehicle control more limited.
While driving on a surface with reduced traction, try your
best to avoid sudden steering, acceleration, or braking,
including reducing vehicle speed by shifting to a lower
gear. Any sudden changes could cause the tires to
slide. You might not realize the surface is slippery until
your vehicle is skidding. Learn to recognize warning
clues — such as enough water, ice, or packed snow on
the road to make a mirrored surface — and slow down
when you have any doubt.
Remember: Any Antilock Brake System (ABS) helps
avoid only the braking skid.
4-11
Page 218 of 408
Winter Driving
Driving on Snow or Ice
Drive carefully when there is snow or ice between the
tires and the road, creating less traction or grip. Wet ice
can occur at about 32°F (0°C) when freezing rain
begins to fall, resulting in even less traction. Avoid
driving on wet ice or in freezing rain until roads can be
treated with salt or sand.
Drive with caution, whatever the condition. Accelerate
gently so traction is not lost. Accelerating too quickly
causes the wheels to spin and makes the surface under
the tires slick, so there is even less traction.
Try not to break the fragile traction. If you accelerate too
fast, the drive wheels will spin and polish the surface
under the tires even more.
TheAntilock Brake System (ABS) on page 4-4improves
vehicle stability during hard stops on a slippery roads,
but apply the brakes sooner than when on dry
pavement.Allow greater following distance on any slippery road
and watch for slippery spots. Icy patches can occur on
otherwise clear roads in shaded areas. The surface
of a curve or an overpass can remain icy when the
surrounding roads are clear. Avoid sudden steering
maneuvers and braking while on ice.
Turn off cruise control, if equipped, on slippery surfaces.
Blizzard Conditions
Being stuck in snow can be in a serious situation. Stay
with the vehicle unless there is help nearby. If possible,
use theRoadside Assistance Program on page 7-7.
To get help and keep everyone in the vehicle safe:
•Turn on theHazard Warning Flashers on page 3-6.
•Tie a red cloth to an outside mirror.
4-16
Page 219 of 408
{CAUTION:
Snow can trap engine exhaust under the vehicle.
This may cause exhaust gases to get inside.
Engine exhaust contains carbon monoxide (CO)
which cannot be seen or smelled. It can cause
unconsciousness and even death.
If the vehicle is stuck in the snow:
•Clear away snow from around the base of
your vehicle, especially any that is blocking
the exhaust pipe and/or the fuel operated
heater exhaust system, if equipped. If the
vehicle has a diesel engine and a fuel
operated heater, see “Fuel Operated Heater
(FOH)” in the diesel engine supplement.
•Check again from time to time to be sure
snow does not collect there.
•Open a window about two inches on the side
of the vehicle that is away from the wind to
bring in fresh air.
CAUTION: (Continued)
CAUTION: (Continued)
•
Fully open the air outlets on or under the
instrument panel.
•Adjust the Climate Control system to a setting
that circulates the air inside the vehicle and
set the fan speed to the highest setting.
See Climate Control System in the Index.
For more information about carbon monoxide, see
Engine Exhaust on page 2-30.
Snow can trap exhaust gases under your vehicle.
This can cause deadly CO (carbon monoxide) gas
to get inside. CO could overcome you and kill you.
You cannot see it or smell it, so you might not
know it is in your vehicle. Clear away snow from
around the base of your vehicle, especially any
that is blocking the exhaust
Run the engine for short periods only as needed to
keep warm, but be careful.
To save fuel, run the engine for only short periods as
needed to warm the vehicle and then shut the engine off
and close the window most of the way to save heat.
Repeat this until help arrives but only when you feel really
uncomfortable from the cold. Moving about to keep warm
also helps.
4-17
Page 222 of 408
Tire and Loading Information Label
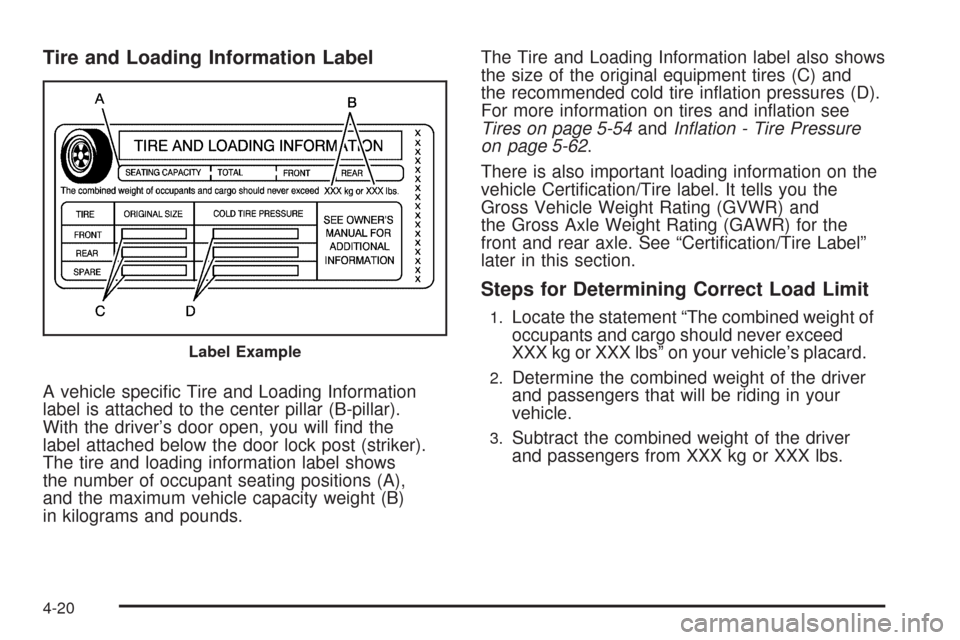
A vehicle specific Tire and Loading Information
label is attached to the center pillar (B-pillar).
With the driver’s door open, you will find the
label attached below the door lock post (striker).
The tire and loading information label shows
the number of occupant seating positions (A),
and the maximum vehicle capacity weight (B)
in kilograms and pounds.The Tire and Loading Information label also shows
the size of the original equipment tires (C) and
the recommended cold tire inflation pressures (D).
For more information on tires and inflation see
Tires on page 5-54andInflation - Tire Pressure
on page 5-62.
There is also important loading information on the
vehicle Certification/Tire label. It tells you the
Gross Vehicle Weight Rating (GVWR) and
the Gross Axle Weight Rating (GAWR) for the
front and rear axle. See “Certification/Tire Label”
later in this section.
Steps for Determining Correct Load Limit
1.Locate the statement “The combined weight of
occupants and cargo should never exceed
XXX kg or XXX lbs” on your vehicle’s placard.
2.Determine the combined weight of the driver
and passengers that will be riding in your
vehicle.
3.Subtract the combined weight of the driver
and passengers from XXX kg or XXX lbs.
Label Example
4-20
Page 228 of 408
Dinghy Towing
Two-Wheel-Drive Vehicles
Notice:If the vehicle is towed with all four wheels
on the ground, the drivetrain components could
be damaged. The repairs would not be covered by
the vehicle warranty. Do not tow the vehicle with all
four wheels on the ground.
Two-wheel-drive vehicles should not be towed with
all four wheels on the ground. Two-wheel-drive
transmissions have no provisions for internal lubrication
while being towed.
All-Wheel-Drive Vehicles
The vehicle was not designed to be towed with all four
wheels on the ground. To properly tow these vehicles,
they should be placed on a platform trailer with all
four wheels off the ground.
Notice:Towing an all-wheel-drive vehicle with all
four wheels on the ground, or even with only two of
its wheels on the ground, will damage drivetrain
components. Do not tow an all-wheel-drive vehicle
with any of its wheels on the ground.
Dolly Towing
Rear Towing (Rear Wheels Off the Ground)
Two-Wheel-Drive Vehicles
Use the following procedure to tow the vehicle from
the rear:
1. Attach the dolly to the tow vehicle following the
dolly manufacturer’s instructions.
2. Drive the rear wheels onto the dolly.
3. Firmly set the parking brake. SeeParking Brake on
page 2-26for more information.
4. Put the transmission in P (Park).
5. Secure the vehicle to the dolly following the
manufacturer’s instructions.
6. Use an adequate clamping device designed for
towing to ensure that the front wheels are locked
into the straight position.
7. Turn the ignition to LOCK/OFF.
If the tow vehicle will not be started or driven for
six weeks or more, remove the battery cable
from the negative terminal (post) of the battery to
prevent the battery from draining while towing.
4-26