2009 CHEVROLET CORVETTE climate control
[x] Cancel search: climate controlPage 1 of 434

Seats and Restraint System............................. 1-1
Front Seats
............................................... 1-2
Safety Belts
.............................................. 1-8
Child Restraints
.......................................1-25
Airbag System
.........................................1-44
Restraint System Check
............................1-60
Features and Controls..................................... 2-1
Keys
........................................................ 2-3
Doors and Locks
......................................2-10
Windows
.................................................2-16
Theft-Deterrent Systems
............................2-18
Starting and Operating Your Vehicle
...........2-21
Mirrors
....................................................2-37
OnStar
®System
......................................2-40
Universal Home Remote System
................2-44
Storage Areas
.........................................2-51
Roof Panel
..............................................2-54
Convertible Top
.......................................2-59
Instrument Panel............................................. 3-1
Instrument Panel Overview
.......................... 3-4
Climate Controls
......................................3-24
Warning Lights, Gages, and Indicators
........3-31
Driver Information Center (DIC)
..................3-49
Audio System(s)
.......................................3-80Driving Your Vehicle....................................... 4-1
Your Driving, the Road, and the Vehicle
....... 4-2
Towing
...................................................4-28
Service and Appearance Care.......................... 5-1
Service
..................................................... 5-3
Fuel
......................................................... 5-6
Checking Things Under the Hood
...............5-12
Rear Axle
...............................................5-55
Headlamp Aiming
.....................................5-56
Bulb Replacement
....................................5-56
Windshield Replacement
...........................5-60
Windshield Wiper Blade Replacement
.........5-60
Tires
......................................................5-62
Appearance Care
.....................................5-91
Vehicle Identi�cation
...............................5-101
Electrical System
....................................5-102
Capacities and Speci�cations
...................5-110
Maintenance Schedule..................................... 6-1
Maintenance Schedule
................................ 6-2
Customer Assistance Information.................... 7-1
Customer Assistance and Information
........... 7-2
Reporting Safety Defects
...........................7-14
Vehicle Data Recording and Privacy
...........7-16
Index................................................................ 1
2009 Chevrolet Corvette Owner ManualM
Page 79 of 434
Hatch
{CAUTION:
Exhaust gases may enter the vehicle if it is driven
with the liftgate, trunk/hatch open, or with any
objects that pass through the seal between the
body and the trunk/hatch or liftgate. Engine exhaust
contains Carbon Monoxide (CO) which cannot be
seen or smelled. It can cause unconsciousness
and even death.
If the vehicle must be driven with the liftgate, or
trunk/hatch open:
Close all of the windows
Fully open the air outlets on or under the
instrument panel
CAUTION: (Continued)
CAUTION: (Continued)
Adjust the Climate Control system to a setting
that brings in only outside air and set the fan
speed to the highest setting. See Climate
Control System in the Index.
If the vehicle is equipped with a power liftgate,
disable the power liftgate function.
For more information about carbon monoxide, see
Engine Exhaust on page 2-35.
Notice:Closing the hatch/trunk lid forcefully or
from the sides can cause damage to the glass, the
defogger or the weatherstripping. Be sure objects
will �t in the hatch/trunk area before closing
the hatch/trunk lid. When closing the hatch/trunk lid,
gently pull down from the center.
Notice:Do not store heavy or sharp objects
in the rear storage compartments located in the
hatch/trunk area. The objects could damage
the underbody.
2-13
Page 106 of 434

Outside Convex Mirror
{CAUTION:
A convex mirror can make things (like other
vehicles) look farther away than they really are.
If you cut too sharply into the right lane, you could
hit a vehicle on the right. Check the inside mirror or
glance over your shoulder before changing lanes.
The passenger side mirror is convex shaped. A convex
mirror’s surface is curved so more can be seen from
the driver seat.
Outside Heated Mirrors
<(Rear Window Defogger):Press to heat the
mirrors.
See “Rear Window Defogger” underDual Automatic
Climate Control System on page 3-24for more
information.
OnStar®System
OnStar uses several innovative technologies and live
advisors to provide a wide range of safety, security,
information, and convenience services. If the airbags
deploy, the system is designed to make an automatic
call to OnStar Emergency advisors who can request
emergency services be sent to your location. If the keys
are locked in the vehicle, call OnStar at 1-888-4-ONSTAR
to have a signal sent to unlock the doors. OnStar
Hands-Free Calling, including 30 trial minutes good
for 60 days, is available on most vehicles. OnStar
Turn-by-Turn Navigation service, with one trial route, is
available on most vehicles. Press the OnStar button to
have an OnStar advisor contact Roadside Service.
OnStar service is provided subject to the OnStar Terms
and Conditions included in the OnStar Subscriber glove
box literature.
2-40
Page 137 of 434
Instrument Panel Overview...............................3-4
Hazard Warning Flashers................................3-6
Horn .............................................................3-6
Tilt Wheel.....................................................3-6
Turn Signal/Multifunction Lever.........................3-7
Turn and Lane-Change Signals (Auto Signal).....3-8
Headlamp High/Low-Beam Changer..................3-8
Flash-to-Pass.................................................3-9
Windshield Wipers..........................................3-9
Windshield Washer.......................................3-10
Cruise Control..............................................3-10
Exterior Lamps.............................................3-14
Wiper Activated Headlamps............................3-14
Headlamps on Reminder................................3-15
Daytime Running Lamps (DRL).......................3-15
Fog Lamps ..................................................3-16
Twilight Sentinel
®..........................................3-16
Exterior Lighting Battery Saver........................3-17
Instrument Panel Brightness...........................3-18
Courtesy Lamps...........................................3-18
Entry/Exit Lighting.........................................3-18
Reading Lamps............................................3-18
Battery Run-Down Protection..........................3-18
Head-Up Display (HUD).................................3-19
Accessory Power Outlet(s).............................3-23
Ashtray(s) and Cigarette Lighter......................3-24Climate Controls............................................3-24
Dual Automatic Climate Control System...........3-24
Outlet Adjustment.........................................3-29
Passenger Compartment Air Filter...................3-30
Warning Lights, Gages, and Indicators............3-31
Instrument Panel Cluster................................3-32
Speedometer and Odometer...........................3-34
Tachometer.................................................3-34
Safety Belt Reminders...................................3-34
Airbag Readiness Light..................................3-35
Passenger Airbag Status Indicator...................3-36
Voltmeter Gage............................................3-37
One-to-Four Shift Light (Manual Transmission) . . .3-38
Brake System Warning Light..........................3-38
Antilock Brake System (ABS) Warning Light.....3-39
Traction Control System (TCS) Warning Light. . . .3-40
Active Handling System Light.........................3-40
Engine Coolant Temperature Gage..................3-41
Tire Pressure Light.......................................3-42
Malfunction Indicator Lamp.............................3-42
Engine Oil Pressure Gage.............................3-46
Security Light...............................................3-47
Fog Lamp Light............................................3-47
Lights On Reminder......................................3-47
Highbeam On Light.......................................3-47
Fuel Gage
...................................................3-48
Boost Gage (ZR1 Only).................................3-49
Section 3 Instrument Panel
3-1
Page 141 of 434
The main components of the instrument panel are the following:
A.Outlet Adjustment on page 3-29.
B.Head-Up Display (HUD) on page 3-19(If Equipped).
C.Turn Signal/Multifunction Lever on page 3-7.
Cruise Control on page 3-10.Fog Lamps on
page 3-16.Exterior Lamps on page 3-14.
D. Manual Shift Paddles (If Equipped). SeeAutomatic
Transmission Operation on page 2-26.
E.Driver Information Center (DIC) on page 3-49.
F.Instrument Panel Cluster on page 3-32.
G.Windshield Wipers on page 3-9andWindshield
Washer on page 3-10.
H.DIC Operation and Displays on page 3-49.
I.Hazard Warning Flashers on page 3-6.
J.Audio System(s) on page 3-80.
K.Dual Automatic Climate Control System on
page 3-24.
L. Fuel Door Release Button. SeeFilling the Tank
on page 5-9. Hatch/Trunk Release Button.
See “Hatch/Trunk Lid Release” underHatch
on page 2-13.
M.Instrument Panel Brightness on page 3-18.
N. Power Folding Top Switch (If Equipped).
SeeConvertible Top (Manual) on page 2-59or
Convertible Top (Power) on page 2-66.O.Bluetooth
®on page 3-96(If Equipped).
Audio Steering Wheel Controls on page 3-106
(If Equipped).
P.Tilt Wheel on page 3-6.
Q.Horn on page 3-6.
R. Telescopic Wheel Button (If Equipped). SeeTilt
Wheel on page 3-6.
S.Ignition Positions on page 2-22.
T.Heated Seats on page 1-4(If Equipped).
U. Shift Lever (Automatic Shown). SeeAutomatic
Transmission Operation on page 2-26orManual
Transmission Operation on page 2-30.
V.Active Handling System on page 4-8.
W.Accessory Power Outlet(s) on page 3-23.
X.Selective Ride Control on page 4-10.
Y.Cupholders on page 2-51.
Z.Ashtray(s) and Cigarette Lighter on page 3-24.
AA.Parking Brake on page 2-32.
AB.Glove Box on page 2-51.
AC.Instrument Panel Fuse Block on page 5-103.
3-5
Page 160 of 434
Ashtray(s) and Cigarette Lighter
The ashtray and cigarette lighter are located on the
instrument panel, in front of the shift lever. To use the
ashtray, press on the indentation at the top of the door.
Notice:If papers, pins, or other �ammable items
are put in the ashtray, hot cigarettes or other
smoking materials could ignite them and possibly
damage the vehicle. Never put �ammable items
in the ashtray.
Loose objects, such as paper clips, can lodge behind
and beneath the ashtray lid and prevent movement
of the lid. You should avoid putting small, loose objects
near the ashtray.
To use the cigarette lighter, push it in all the way and let
go. When it is ready, it will pop back out by itself.
Notice:Holding a cigarette lighter in while it is
heating does not let the lighter back away from the
heating element when it is hot. Damage from
overheating can occur to the lighter or heating
element, or a fuse could be blown. Do not hold a
cigarette lighter in while it is heating.
Climate Controls
Dual Automatic Climate Control
System
With this system the heating, cooling, and ventilation
can be controlled.
A. Driver Temperature
Controls
B. Display
C. Passenger
Temperature Control
D. AUTO
E. RecirculationF. Air Conditioning
G. Fan Control
H. Air Delivery
Mode Control
I. Defrost
J. Rear Window
Defogger
3-24
Page 162 of 434
Manual Operation
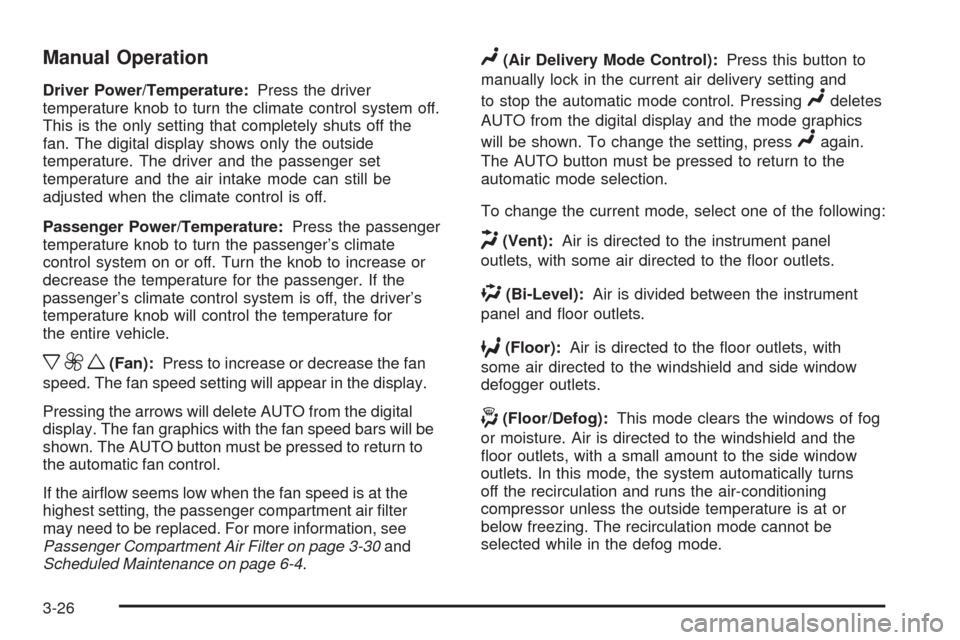
Driver Power/Temperature:Press the driver
temperature knob to turn the climate control system off.
This is the only setting that completely shuts off the
fan. The digital display shows only the outside
temperature. The driver and the passenger set
temperature and the air intake mode can still be
adjusted when the climate control is off.
Passenger Power/Temperature:Press the passenger
temperature knob to turn the passenger’s climate
control system on or off. Turn the knob to increase or
decrease the temperature for the passenger. If the
passenger’s climate control system is off, the driver’s
temperature knob will control the temperature for
the entire vehicle.
x9w(Fan):Press to increase or decrease the fan
speed. The fan speed setting will appear in the display.
Pressing the arrows will delete AUTO from the digital
display. The fan graphics with the fan speed bars will be
shown. The AUTO button must be pressed to return to
the automatic fan control.
If the air�ow seems low when the fan speed is at the
highest setting, the passenger compartment air �lter
may need to be replaced. For more information, see
Passenger Compartment Air Filter on page 3-30and
Scheduled Maintenance on page 6-4.
N(Air Delivery Mode Control):Press this button to
manually lock in the current air delivery setting and
to stop the automatic mode control. Pressing
Ndeletes
AUTO from the digital display and the mode graphics
will be shown. To change the setting, press
Nagain.
The AUTO button must be pressed to return to the
automatic mode selection.
To change the current mode, select one of the following:
H(Vent):Air is directed to the instrument panel
outlets, with some air directed to the �oor outlets.
%(Bi-Level):Air is divided between the instrument
panel and �oor outlets.
6(Floor):Air is directed to the �oor outlets, with
some air directed to the windshield and side window
defogger outlets.
-(Floor/Defog):This mode clears the windows of fog
or moisture. Air is directed to the windshield and the
�oor outlets, with a small amount to the side window
outlets. In this mode, the system automatically turns
off the recirculation and runs the air-conditioning
compressor unless the outside temperature is at or
below freezing. The recirculation mode cannot be
selected while in the defog mode.
3-26
Page 164 of 434

The air conditioning system removes moisture from the
air, so a small amount of water might drip under the
vehicle while idling or after turning off the engine.
This is normal.
?(Recirculation):Press to turn the recirculation
mode on or off. An indicator light comes on to show that
recirculation is on. This mode prevents outside air
from entering your vehicle. It can be used to prevent
outside air and odors from entering your vehicle and to
help cool the air inside your vehicle more quickly.
Recirculation mode is not available in defrost or
defog mode.
Sensors
The solar sensor on the vehicle monitors the solar heat
and uses the information to maintain the selected
temperature when operating in AUTO mode by
automatically adjusting the temperature, fan speed and
air delivery system. The system may also supply
cooler air to the side of the vehicle facing the sun.
The recirculation mode will also be activated, as
necessary. Do not cover the solar sensor located on the
top of the instrument panel near the windshield or the
system will not work properly.There is also a sensor located behind the front bumper.
This sensor reads the outside air temperature and
helps to maintain the temperature inside the vehicle.
Any cover on the front of the vehicle could give a false
reading in the temperature.
If the outside temperature goes up, the displayed
temperature will not change until:
The vehicle’s speed is above 12 mph (19 km/h) for
�ve minutes.
The vehicle’s speed is above 32 mph (52 km/h) for
two and a half minutes.
These delays prevent false readings. If the temperature
goes down, the outside temperature will be shown
when you start the vehicle. If it has been turned off for
less than three hours, the temperature will be recalled
from the previous vehicle operation.
There is also an inside temperature sensor located to
the left of the ignition switch. The automatic climate
control system uses this sensor to receive information,
so if you block or cover it, the system will not function
properly.
3-28