Page 111 of 434
Be sure to keep the original remote control
transmitter for use in other vehicles, as well as,
for future programming. Only the original remote control
transmitter is needed for Fixed Code programming.
The programmed buttons should be erased when the
vehicle is sold or the lease ends. See “Erasing Universal
Home Remote Buttons” later in this section.
Park the vehicle outside of the garage when
programming a garage door. Be sure that people
and objects are clear of the garage door or gate
that is being programmed.
Programming Universal Home
Remote — Rolling Code
For questions or help programming the Universal
Home Remote System, call 1-866-572-2728 or go to
learcar2u.com.
Most garage door openers sold after 1996 are Rolling
Code units.
Programming a garage door opener involves
time-sensitive actions, so read the entire procedure
before starting. Otherwise, the device will time out
and the procedure will have to be repeated.To program up to three devices:
1. Press START or put the vehicle in accessory mode.
SeeIgnition Positions on page 2-22for additional
information.
Programming can only occur when the vehicle is
running or in accessory mode.
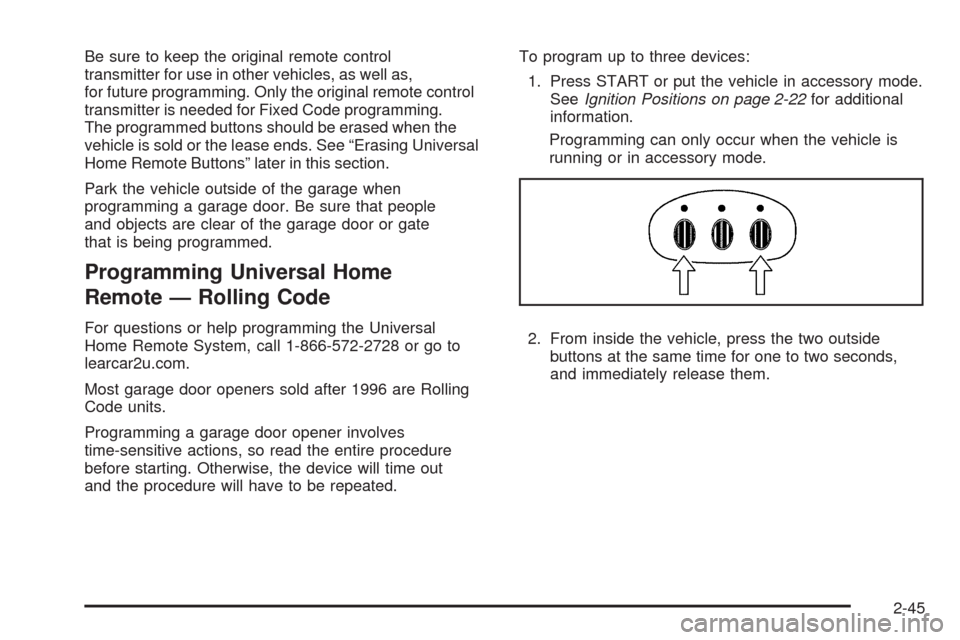
2. From inside the vehicle, press the two outside
buttons at the same time for one to two seconds,
and immediately release them.
2-45
Page 113 of 434
Programming Universal Home
Remote — Fixed Code
For questions or help programming the Universal
Home Remote System, call 1-866-572-2728 or go to
learcar2u.com.
Most garage door openers sold before 1996 are Fixed
Code units.
Programming a garage door opener involves
time-sensitive actions, so read the entire procedure
before starting. Otherwise, the device will time out
and the procedure will have to be repeated.
To program up to three devices:
1. Press START or put the vehicle in accessory mode.
SeeIgnition Positions on page 2-22for additional
information.
Programming can only occur when the vehicle is
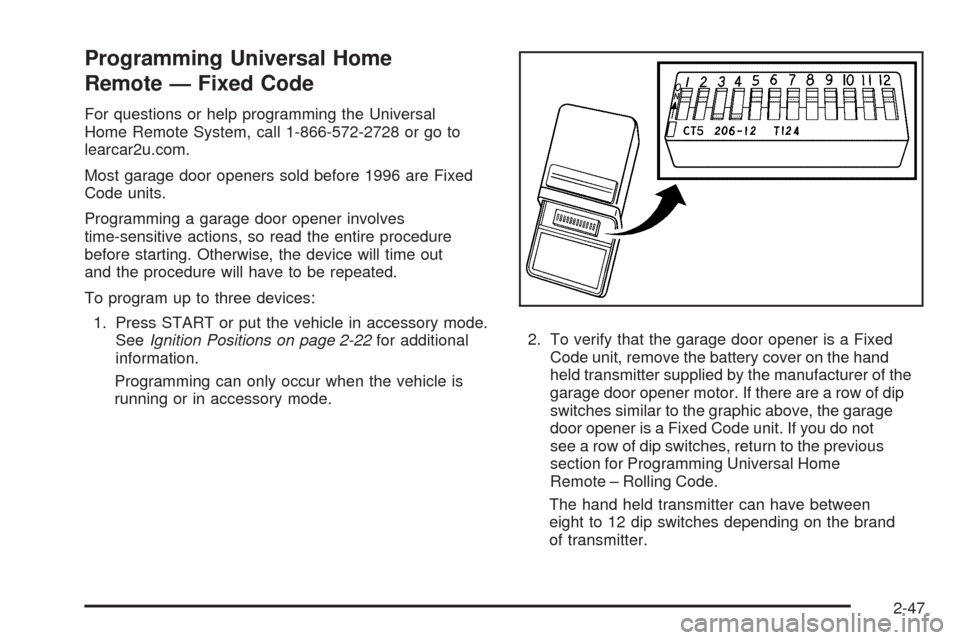
running or in accessory mode.2. To verify that the garage door opener is a Fixed
Code unit, remove the battery cover on the hand
held transmitter supplied by the manufacturer of the
garage door opener motor. If there are a row of dip
switches similar to the graphic above, the garage
door opener is a Fixed Code unit. If you do not
see a row of dip switches, return to the previous
section for Programming Universal Home
Remote – Rolling Code.
The hand held transmitter can have between
eight to 12 dip switches depending on the brand
of transmitter.
2-47
Page 121 of 434
Removing the Roof Panel
{CAUTION:
Do not try to remove a roof panel while the vehicle
is moving. Trying to remove the roof panel while the
vehicle is moving could cause an accident. The
panel could fall into the vehicle and cause you to
lose control, or it could �y off and strike another
vehicle. You or others could be injured. Remove
the roof panel only when the vehicle is parked.
Until you are sure you can remove the panel alone,
have someone help you.
Notice:If you drop or rest a roof panel on its
edges, the roof panel, paint and/or weather-stripping
may be damaged. Always place the roof panel in
the stowage receivers after removing it from
the vehicle.
1. Park on a level surface and set the parking brake.
Shift an automatic transmission into P (Park). Shift
a manual transmission into N (Neutral).
2. Make sure the ignition is off.3. Lower both sun visors.
4. Open the rear hatch and remove any items that
may interfere with proper storage of the roof panel.
5. Lower the windows.
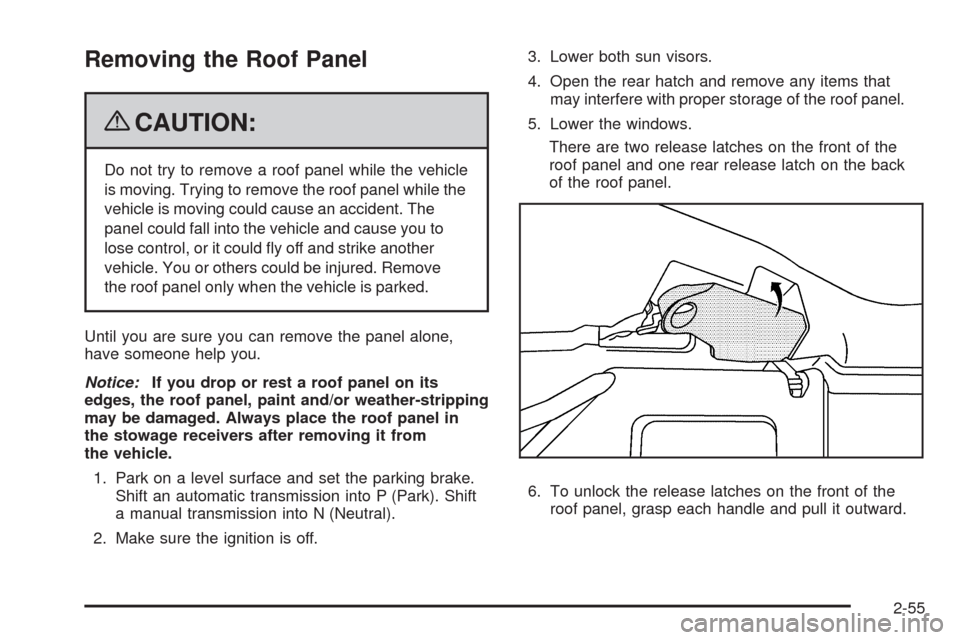
There are two release latches on the front of the
roof panel and one rear release latch on the back
of the roof panel.
6. To unlock the release latches on the front of the
roof panel, grasp each handle and pull it outward.
2-55
Page 127 of 434
Lowering the Manual Convertible Top
1. Park on a level surface. Shift an automatic
transmission into P (Park) and set the parking
brake. Shift a manual transmission into N (Neutral)
and set the parking brake.
2. Make sure the ignition is off.
3. Make sure the trunk is closed.
4. The convertible top front latch, located above the
inside rearview mirror, must be unlocked. Pull the
convertible top front latch down and turn it clockwise
to unlock it.5. Lift upward on the front edge (A) of the convertible
top off of the windshield frame. Then lift upward
on the rear edge (B) of the convertible top so it is
vertical to the tonneau cover (C). The front edge (A)
and rear edge (B) should be straight up.
2-61
Page 130 of 434
9. Then move the top rearward to its fully-stored
position.
10. After the top is stored, apply one even push on the
center of the front edge (A) of the convertible top to
assure that the top is fully retracted.
11. Close the tonneau cover (B) by pressing down on it
with a swift, �rm motion.
Raising the Manual Convertible Top
1. Park on a level surface. Shift an automatic
transmission into P (Park) and set the parking brake.
Shift a manual transmission into N (Neutral) and set
the parking brake.
2. Lower both windows.
3. Make sure the ignition is off.
4. Tilt the driver’s seat forward and press the tonneau
cover release button, or use the manual release
cable if battery power has been lost. See Step 6
under “Lowering the Manual Convertible Top” earlier
in this section.
After pressing the release button, the driver’s
and passenger’s door glass should retract to
the full-down position, if they have not already
been lowered.
5. Lift the tonneau cover.
2-64
Page 141 of 434
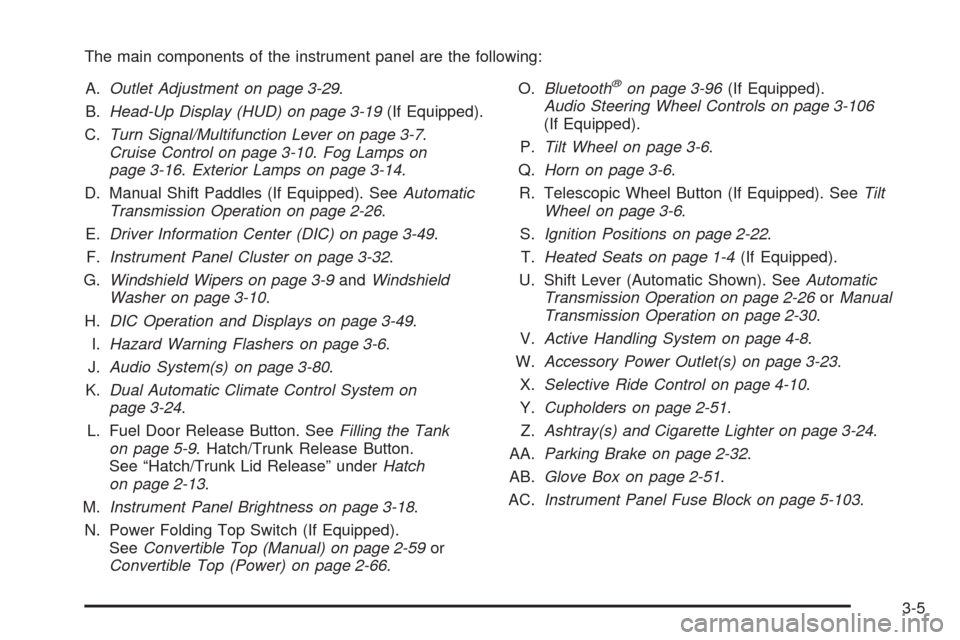
The main components of the instrument panel are the following:
A.Outlet Adjustment on page 3-29.
B.Head-Up Display (HUD) on page 3-19(If Equipped).
C.Turn Signal/Multifunction Lever on page 3-7.
Cruise Control on page 3-10.Fog Lamps on
page 3-16.Exterior Lamps on page 3-14.
D. Manual Shift Paddles (If Equipped). SeeAutomatic
Transmission Operation on page 2-26.
E.Driver Information Center (DIC) on page 3-49.
F.Instrument Panel Cluster on page 3-32.
G.Windshield Wipers on page 3-9andWindshield
Washer on page 3-10.
H.DIC Operation and Displays on page 3-49.
I.Hazard Warning Flashers on page 3-6.
J.Audio System(s) on page 3-80.
K.Dual Automatic Climate Control System on
page 3-24.
L. Fuel Door Release Button. SeeFilling the Tank
on page 5-9. Hatch/Trunk Release Button.
See “Hatch/Trunk Lid Release” underHatch
on page 2-13.
M.Instrument Panel Brightness on page 3-18.
N. Power Folding Top Switch (If Equipped).
SeeConvertible Top (Manual) on page 2-59or
Convertible Top (Power) on page 2-66.O.Bluetooth
®on page 3-96(If Equipped).
Audio Steering Wheel Controls on page 3-106
(If Equipped).
P.Tilt Wheel on page 3-6.
Q.Horn on page 3-6.
R. Telescopic Wheel Button (If Equipped). SeeTilt
Wheel on page 3-6.
S.Ignition Positions on page 2-22.
T.Heated Seats on page 1-4(If Equipped).
U. Shift Lever (Automatic Shown). SeeAutomatic
Transmission Operation on page 2-26orManual
Transmission Operation on page 2-30.
V.Active Handling System on page 4-8.
W.Accessory Power Outlet(s) on page 3-23.
X.Selective Ride Control on page 4-10.
Y.Cupholders on page 2-51.
Z.Ashtray(s) and Cigarette Lighter on page 3-24.
AA.Parking Brake on page 2-32.
AB.Glove Box on page 2-51.
AC.Instrument Panel Fuse Block on page 5-103.
3-5
Page 142 of 434
Hazard Warning Flashers
The hazard warning �ashers warns others that you have
a problem. The button is located near the center of
the instrument panel.
|:Press to make the front and rear turn signal lamps
�ash on and off. Press again to turn the �ashers off.
The hazard warning �ashers work no matter what mode
the ignition is in, even if the ignition is turned off.
When the hazard warning �ashers are on, the turn
signals will not work.
Horn
Press near or on the horn symbols on the steering
wheel pad to sound the horn.
Tilt Wheel
A tilt wheel allows you to adjust the steering wheel
before you drive. You can raise it to the highest level to
give your legs more room when you exit and enter
the vehicle.
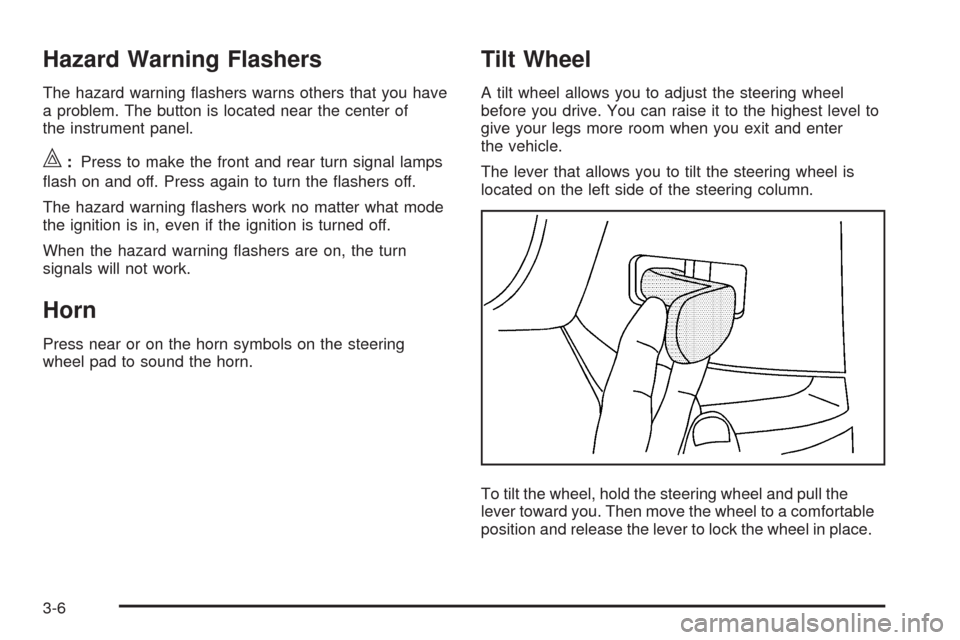
The lever that allows you to tilt the steering wheel is
located on the left side of the steering column.
To tilt the wheel, hold the steering wheel and pull the
lever toward you. Then move the wheel to a comfortable
position and release the lever to lock the wheel in place.
3-6
Page 149 of 434
Using Cruise Control on Hills
How well the cruise control works on hills depends upon
the vehicle’s speed, load, and the steepness of the
hills. When going up steep hills, you might want to step
on the accelerator pedal to maintain the vehicle’s
speed. When going downhill, you might have to brake
or shift to a lower gear to keep the vehicle’s speed
down. When the brakes are applied the cruise control
turns off.
Cruise Control in Sport/Mode and Manual
Paddle Shift Gear Selection
When the vehicle is in S (Sport Mode) and the manual
paddle shift controls are not being used, cruise
control operates in the same manner as D (Drive).
When the vehicle is in S (Sport Mode) and the manual
paddle shift controls are being used, cruise control
operates as follows:
If cruise control is active and a gear is selected with
the manual paddle shift controls, the vehicle speed is
maintained in the driver selected gear and will not
automatically up-shift or down-shift the transmission
while the driver’s gear selection is active.
If driving in hilly terrain, cruise control may not be
able to maintain vehicle speed if an up-shift or
down-shift is not selected by the driver. While driving
on hilly terrain and cruise control is active with
a manual paddle shift gear selection, the driver
must select the proper gear for the terrain or select
D (Drive) on the gear range selector for full automatic
transmission operation.
Ending Cruise Control
To end a cruise control session, step lightly on the
brake pedal. If the vehicle has a manual transmission,
lightly tapping the clutch will also end a cruise control
session.
Move the cruise control switch to
9to turn the system
completely off.
When cruise control is disengaged, the CRUISE
DISENGAGED message displays on the Driver
Information Center (DIC). SeeDIC Warnings and
Messages on page 3-54.
Erasing Speed Memory
The cruise control set speed memory is erased when
the cruise control or the ignition is turned off.
3-13