2009 BMW Z4 SDRIVE35I USB
[x] Cancel search: USBPage 103 of 248
Controls
101Reference
At a glance
Driving tips
Communications
Navigation
Entertainment
Mobility
Calibrating the digital compass
The digital compass must be calibrated in the
following situations:
> An incorrect compass direction is shown.
> The compass direction shown does not
change although the direction of
travel does.
> Not all compass directions are shown.
Procedure
1.Make sure that no la rge metal objects or
overhead power lines are in the vicinity of
your vehicle and that you have enough
space to drive in a circle.
2. Set the currently valid compass zone.
3. ensure that the retractable hardtop is fully
closed.
4. Press the adjustment button for approx.
6-7 seconds to call up C. Then drive in at
least one full circle at a speed of no more
than 4mph or 7km/h.
If calibration is successful, the display
changes from C to a compass direction.
5. Open the retractable hardtop fully and
repeat step 4.
Setting right-hand/left-hand steering
Your digital compass is factory-set to right-
hand or left-hand steeri ng, in accordance with
your vehicle.
Setting the language
You can set the language of the display:
Press the adjustment button for approx.
12-13 seconds. Briefly press the adjustment
button again to switch between English, "E",
and German, "O".
The setting is automatically saved after approx.
10 seconds.
Glove compartment
Opening
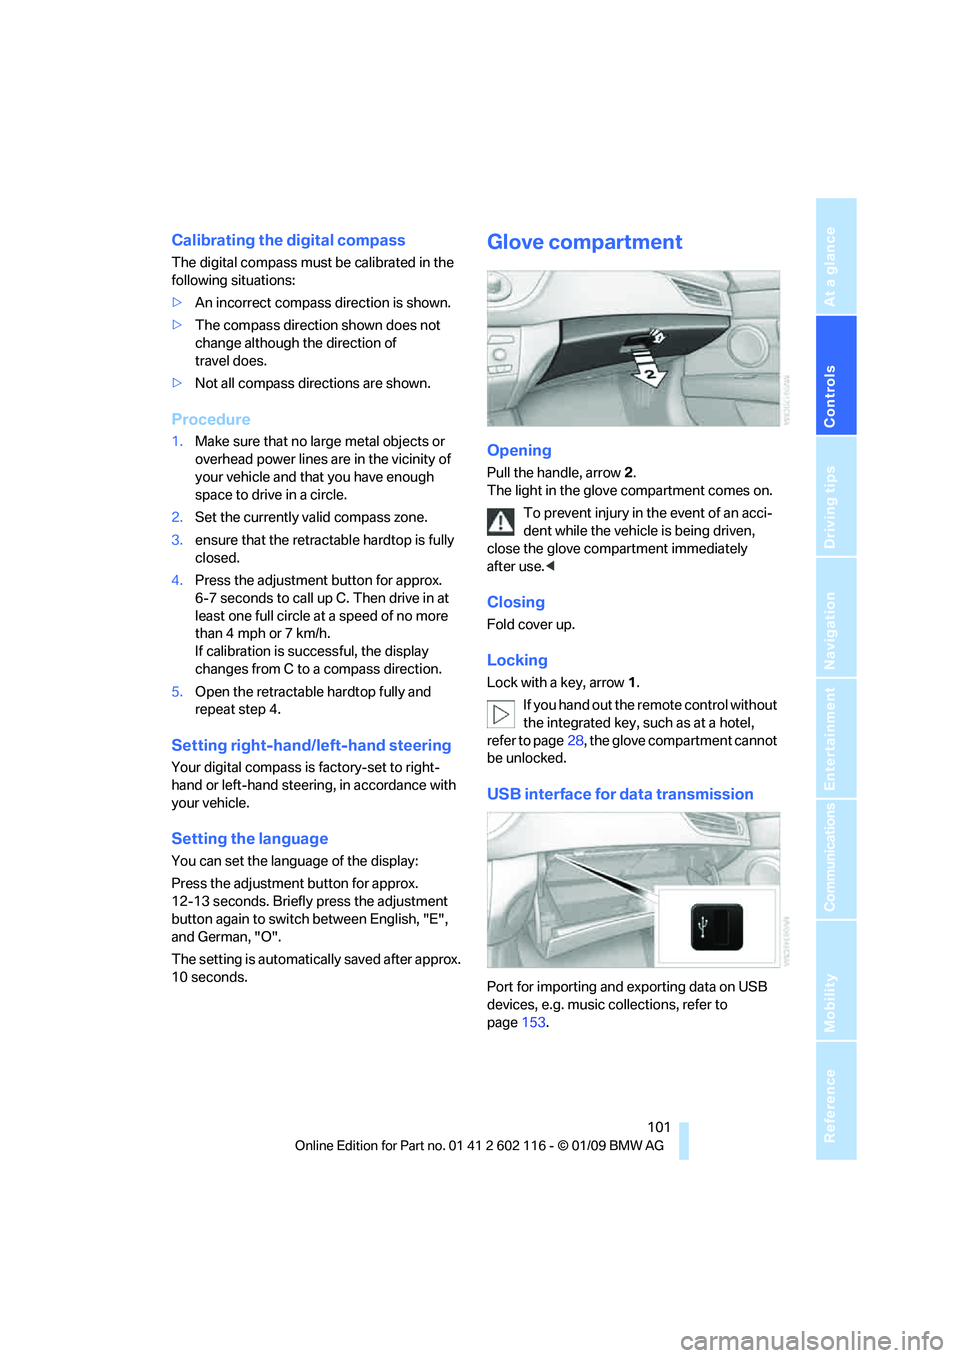
Pull the handle, arrow 2.
The light in the glove compartment comes on.
To prevent injury in the event of an acci-
dent while the vehicle is being driven,
close the glove compartment immediately
after use. <
Closing
Fold cover up.
Locking
Lock with a key, arrow 1.
If you hand out the remote control without
the integrated key, such as at a hotel,
refer to page 28, the glove compartment cannot
be unlocked.
USB interface for data transmission
Port for importing and exporting data on USB
devices, e.g. music collections, refer to
page 153.
Page 104 of 248
Practical interior accessories
102
Observe the following when connecting:
>
Do not use force when plugging the con-
nector into the USB audio interface.
> Do not connect devices such as fans or
lamps to the USB audio interface.
> Do not connect a USB hard disk.
> Do not use the USB in terface to recharge
external devices.
Center armrest
Storage compartment
The center armrest contains either two cup
holders, a compartment or the cover for the
snap-in adapter
*, depending on the equipment
version. For more details on this mobile phone
cradle, see page 174.
Locking the storage compartment*
When you lock the vehicle from the outside, the
storage compartment in the center armrest is
locked as well.
Opening
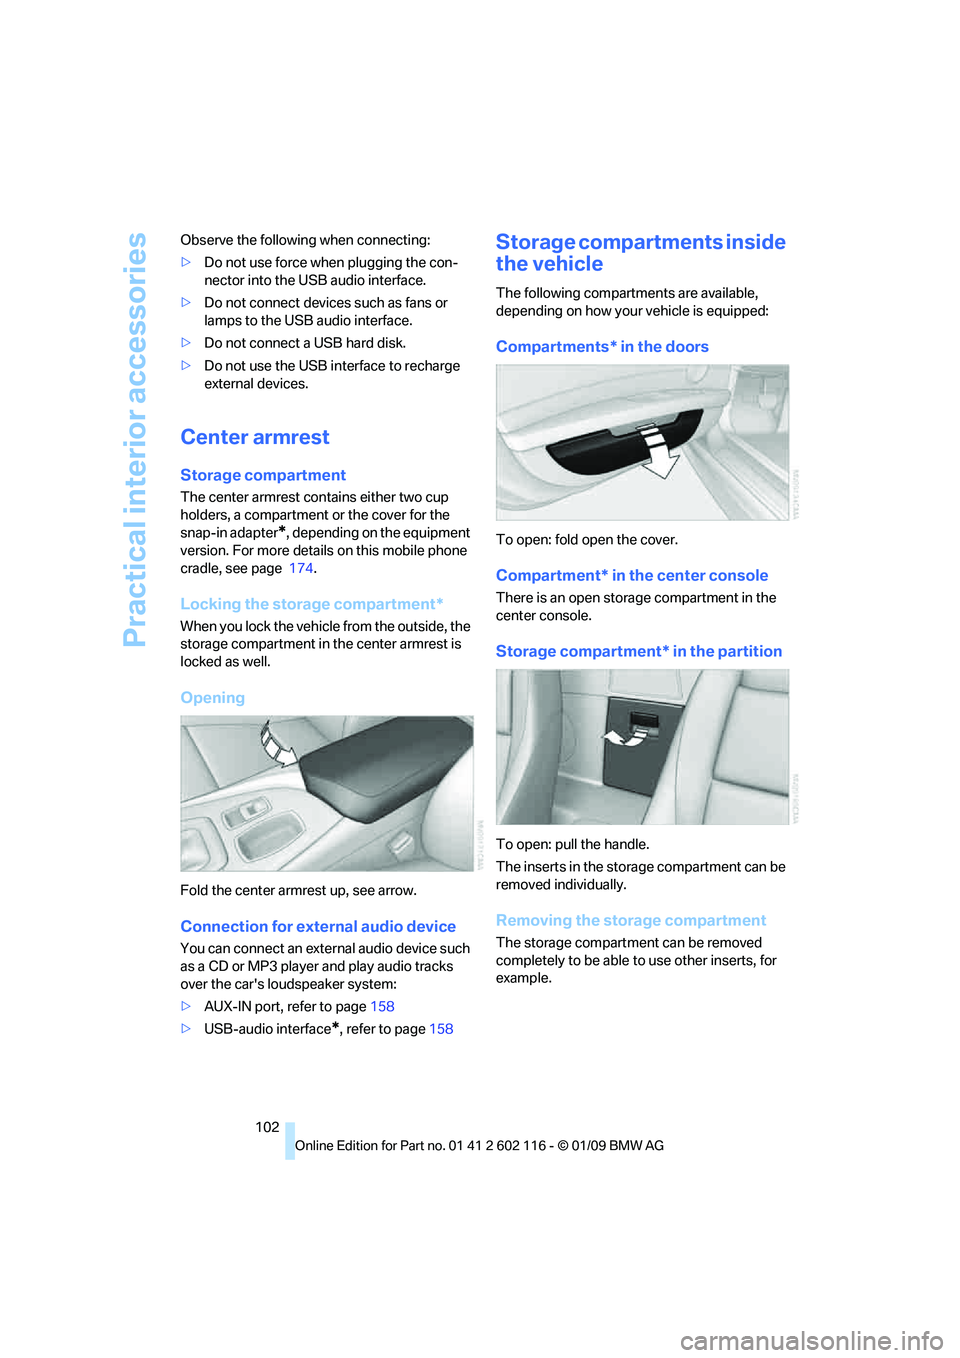
Fold the center armrest up, see arrow.
Connection for exte rnal audio device
You can connect an external audio device such
as a CD or MP3 player and play audio tracks
over the car's loudspeaker system:
>AUX-IN port, refer to page 158
> USB-audio interface
*, refer to page 158
Storage compartments inside
the vehicle
The following compartments are available,
depending on how your vehicle is equipped:
Compartments* in the doors
To open: fold open the cover.
Compartment* in the center console
There is an open storage compartment in the
center console.
Storage compartment* in the partition
To open: pull the handle.
The inserts in the storage compartment can be
removed individually.
Removing the storage compartment
The storage compartment can be removed
completely to be able to use other inserts, for
example.
Page 155 of 248
Navigation
Entertainment
Driving tips
153Reference
At a glance
Controls
Communications
Mobility
Music collection
Storing music
The music tracks from CDs/DVDs and USB
devices can be stored in the music collection in
the vehicle and played from there.
> Audio CD: tracks are converted into a com-
pressed audio format when they are stored.
If available, information on the album, such
as the artist, is stored as well.
> CD/DVD or USB device with compressed
audio files: The entire content of the CD/
DVD or the USB device is stored in the vehi-
cle as an album. After storing, the tracks and
directories can be dele ted individually. Files
are only stored in the WMA, MP3, and AAC
formats.
Tracks with DRM copy protection can be
stored in the vehicle but cannot be
played back.
Regularly back up the music data; other-
wise, it could be lost if there is a fault on
the hard disk. <
Music recognition technology and
related data ar e provided by
Gracenote®. Gracenote® is the industry stan-
dard in music recogn ition technology and
related content delivery. For more information,
please visit www.gracenote.com.
CD and music-related data from Gracenote,
Inc., copyright © 2000-2008 Gracenote.
Gracenote Software, copyright 2000-2008
Gracenote. This product and service may prac-
tice one or more of the following U.S. Patents:
#5,987,525; #6,061,680; #6,154,773,
#6,161,132, #6,230,192, #6,230,207,
#6,240,459, #6,330,593, and other patents
issued or pending. So me services supplied
under license from Open Globe, Inc. for U.S.
Patent: 6.304.523.
Storing from a CD/DVD
CDs/DVDs can only be stored from the CD/DVD
player.
1. Insert a CD/DVD into the CD/DVD player.
2. "CD/Multimedia"
3. "CD/DVD"
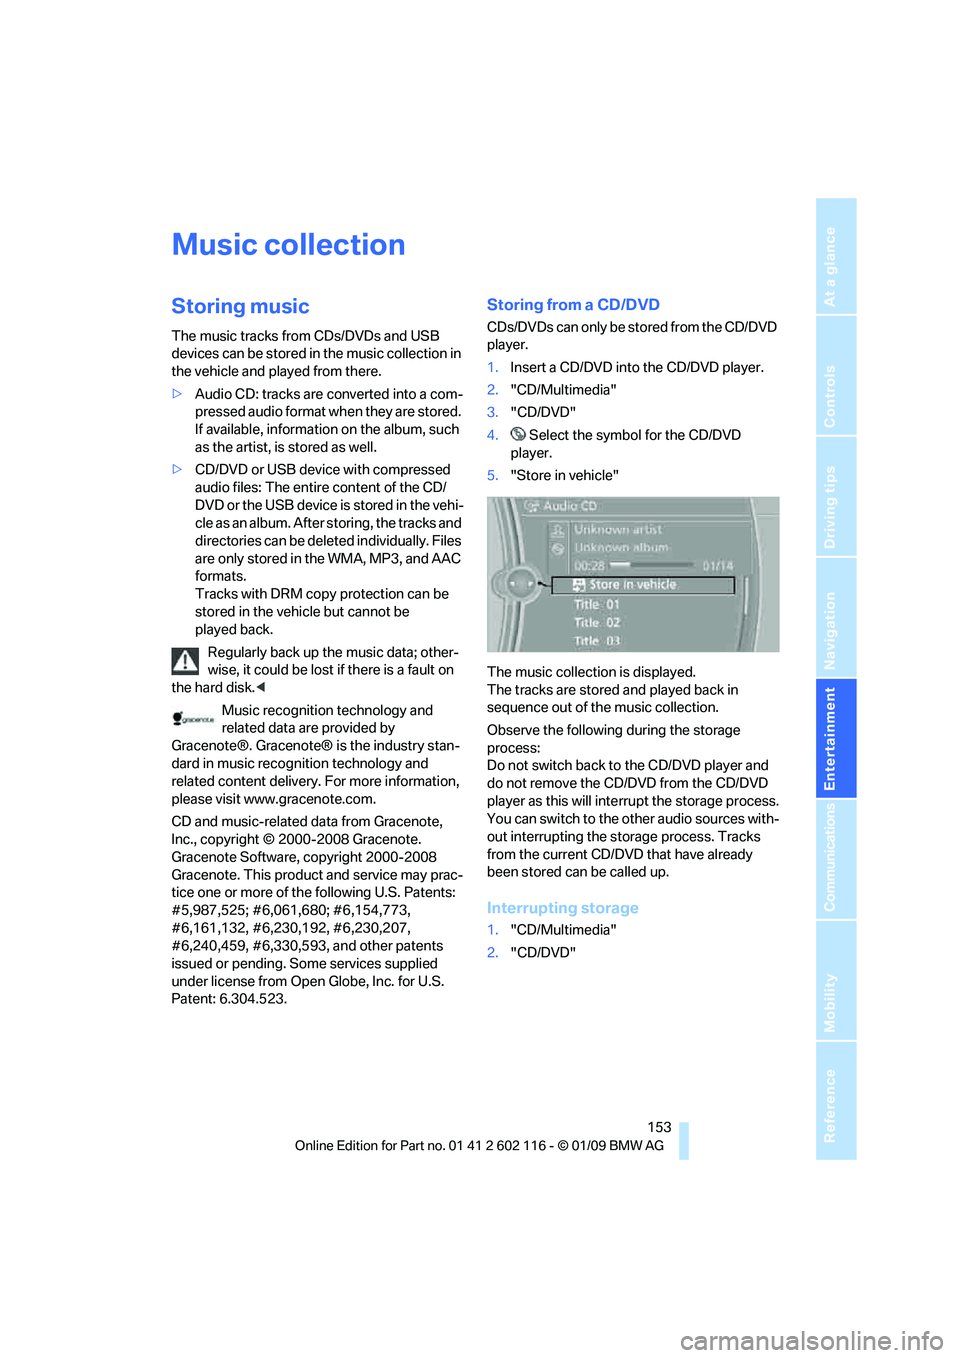
4. Select the symbol for the CD/DVD
player.
5. "Store in vehicle"
The music collection is displayed.
The tracks are stored and played back in
sequence out of the music collection.
Observe the following during the storage
process:
Do not switch back to the CD/DVD player and
do not remove the CD/DVD from the CD/DVD
player as this will inte rrupt the storage process.
You can switch to the other audio sources with-
out interrupting the storage process. Tracks
from the current CD/DVD that have already
been stored can be called up.
Interrupting storage
1. "CD/Multimedia"
2. "CD/DVD"
Page 156 of 248
Music collection
154
3.
"Storing..."
4. "Cancel storing"
The storage process is interrupted and can be
continued at any time.
Continuing the storage process
1. "CD/Multimedia"
2. "CD/DVD"
3. Select the symbol for the CD/DVD
player.
4. "Continue storing"
Storage of the CD continues at the beginning of
the track at which storage was interrupted.
Album information
During storage, information such as the name
of the artist is stored with the track, if this infor-
mation is available in th e vehicle database or on
the CD.
Storing from a USB device
To store music, a suitable device must be con-
nected to the USB interface in the glove com-
partment.
> Suitable devices: USB mass storage
devices, such as USB flash drives or MP3
players with a USB interface.
> Unsuitable devices: USB hard disks, USB
hubs, USB memory card readers with multi-
ple inserts, Apple iPod/iPhone.
It is only possible to store music from a
USB device via the USB interface in the
glove compartment. < 1.
Connect the USB device to the USB inter-
face in the glove compartment.
2. "CD/Multimedia"
3. "Music collection"
4. Open "Options".
5. "Music import/export"
6. "Import music (USB)"
Playing music
Music search
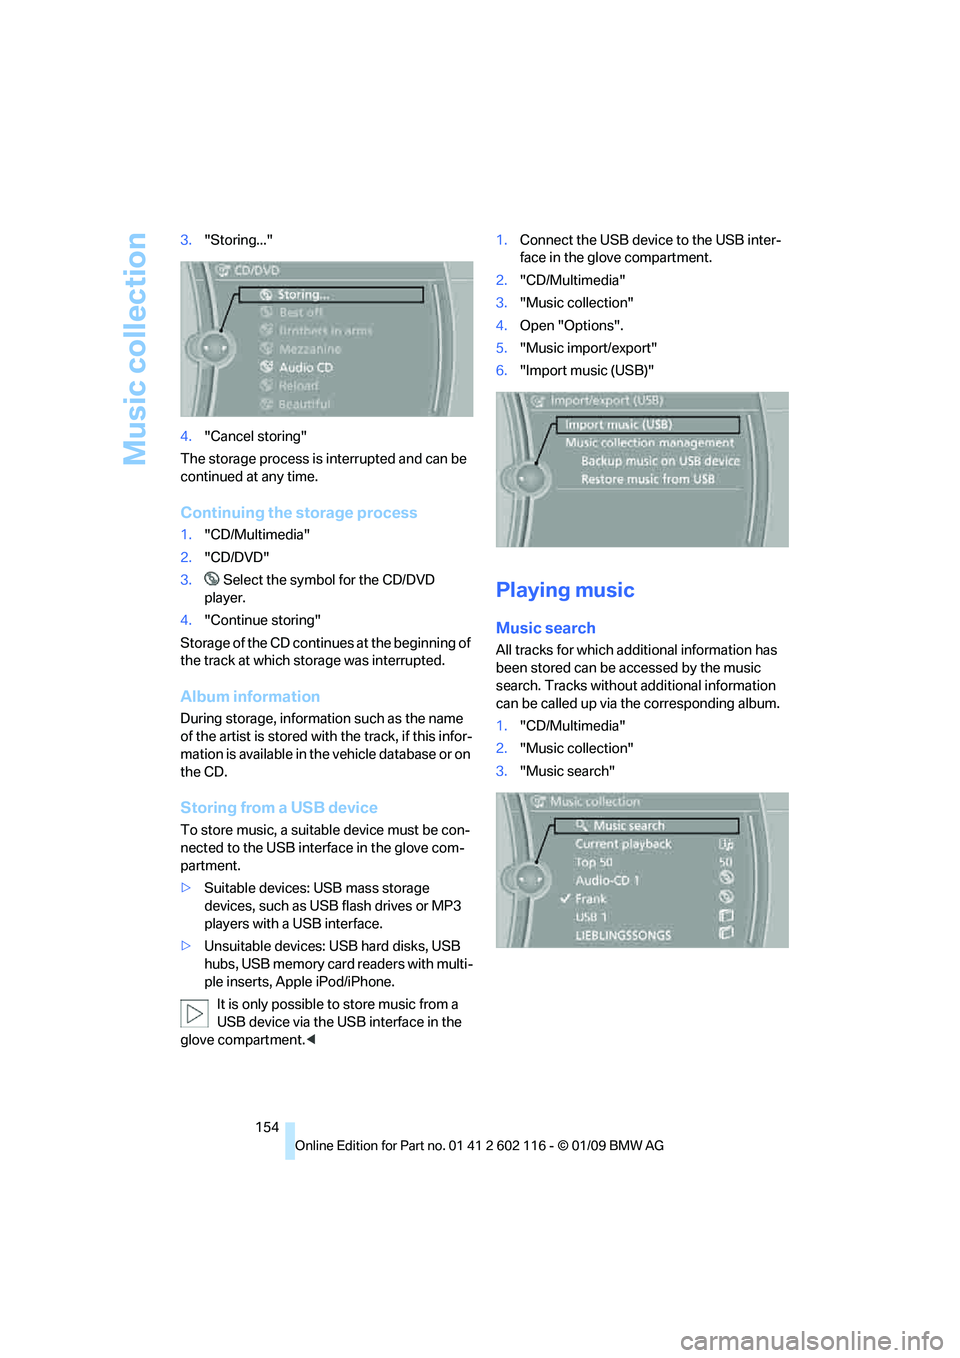
All tracks for which additional information has
been stored can be accessed by the music
search. Tracks without additional information
can be called up via th e corresponding album.
1. "CD/Multimedia"
2. "Music collection"
3. "Music search"
Page 158 of 248
Music collection
156
4.
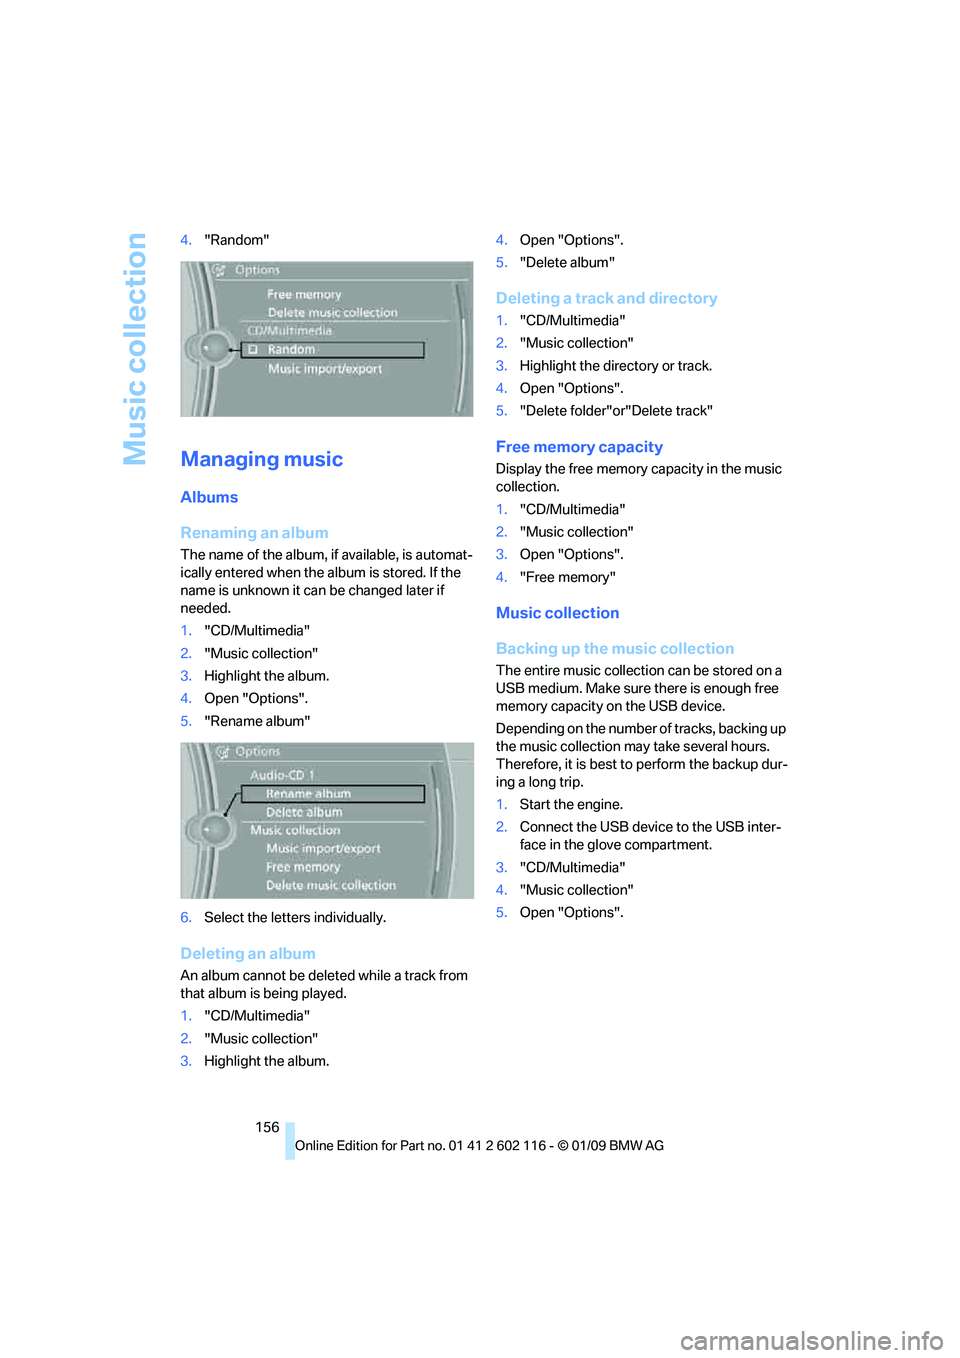
"Random"
Managing music
Albums
Renaming an album
The name of the album, if available, is automat-
ically entered when the album is stored. If the
name is unknown it can be changed later if
needed.
1."CD/Multimedia"
2. "Music collection"
3. Highlight the album.
4. Open "Options".
5. "Rename album"
6. Select the letters individually.
Deleting an album
An album cannot be dele ted while a track from
that album is being played.
1. "CD/Multimedia"
2. "Music collection"
3. Highlight the album. 4.
Open "Options".
5. "Delete album"
Deleting a track and directory
1."CD/Multimedia"
2. "Music collection"
3. Highlight the directory or track.
4. Open "Options".
5. "Delete folder"or"Delete track"
Free memory capacity
Display the free memory capacity in the music
collection.
1. "CD/Multimedia"
2. "Music collection"
3. Open "Options".
4. "Free memory"
Music collection
Backing up the music collection
The entire music collection can be stored on a
USB medium. Make sure there is enough free
memory capacity on the USB device.
Depending on the number of tracks, backing up
the music collection may take several hours.
Therefore, it is best to perform the backup dur-
ing a long trip.
1.Start the engine.
2. Connect the USB device to the USB inter-
face in the glove compartment.
3. "CD/Multimedia"
4. "Music collection"
5. Open "Options".
Page 159 of 248
Navigation
Entertainment
Driving tips
157Reference
At a glance
Controls
Communications
Mobility
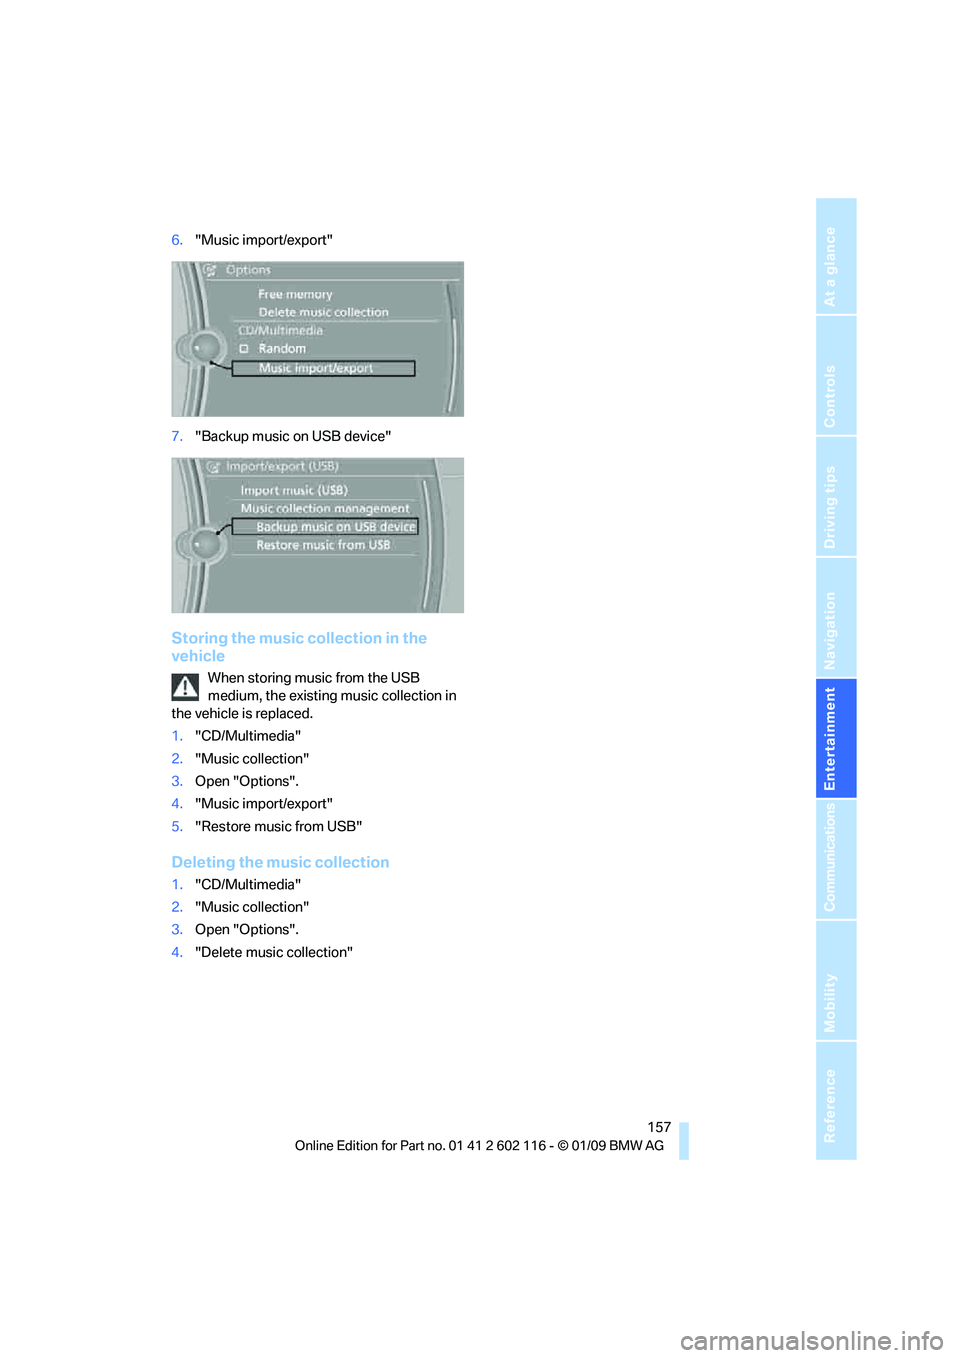
6."Music import/export"
7. "Backup music on USB device"
Storing the music collection in the
vehicle
When storing music from the USB
medium, the existing music collection in
the vehicle is replaced.
1. "CD/Multimedia"
2. "Music collection"
3. Open "Options".
4. "Music import/export"
5. "Restore music from USB"
Deleting the music collection
1."CD/Multimedia"
2. "Music collection"
3. Open "Options".
4. "Delete music collection"
Page 160 of 248
External devices
158
External devices
AUX-IN port
You can connect an external audio device, for
instance an MP3 player, and play audio tracks
over the car's loudspeaker system. You can
adjust the tone using iDrive.
Connecting
Lift up the center armrest.
Connection for audio playback:
TRS connector 1/8 in/3.5 mm
To play audio tracks over the car's loudspeaker
system, connect the headset or line-out port of
the external device to the AUX-IN port.
Starting audio playback
Connect the audio device, switch it on and
select a track. Operate the system on the audio
device.
Via iDrive
iDrive, for operating pr inciple refer to page16.
1. "CD/Multimedia"
2. "AUX (front)"
Adjusting volume
The volume of the sound output depends on
the audio device. If this volume differs markedly
from the volume of the other audio sources, it is
advisable to adjust the volumes.
1. "CD/Multimedia"
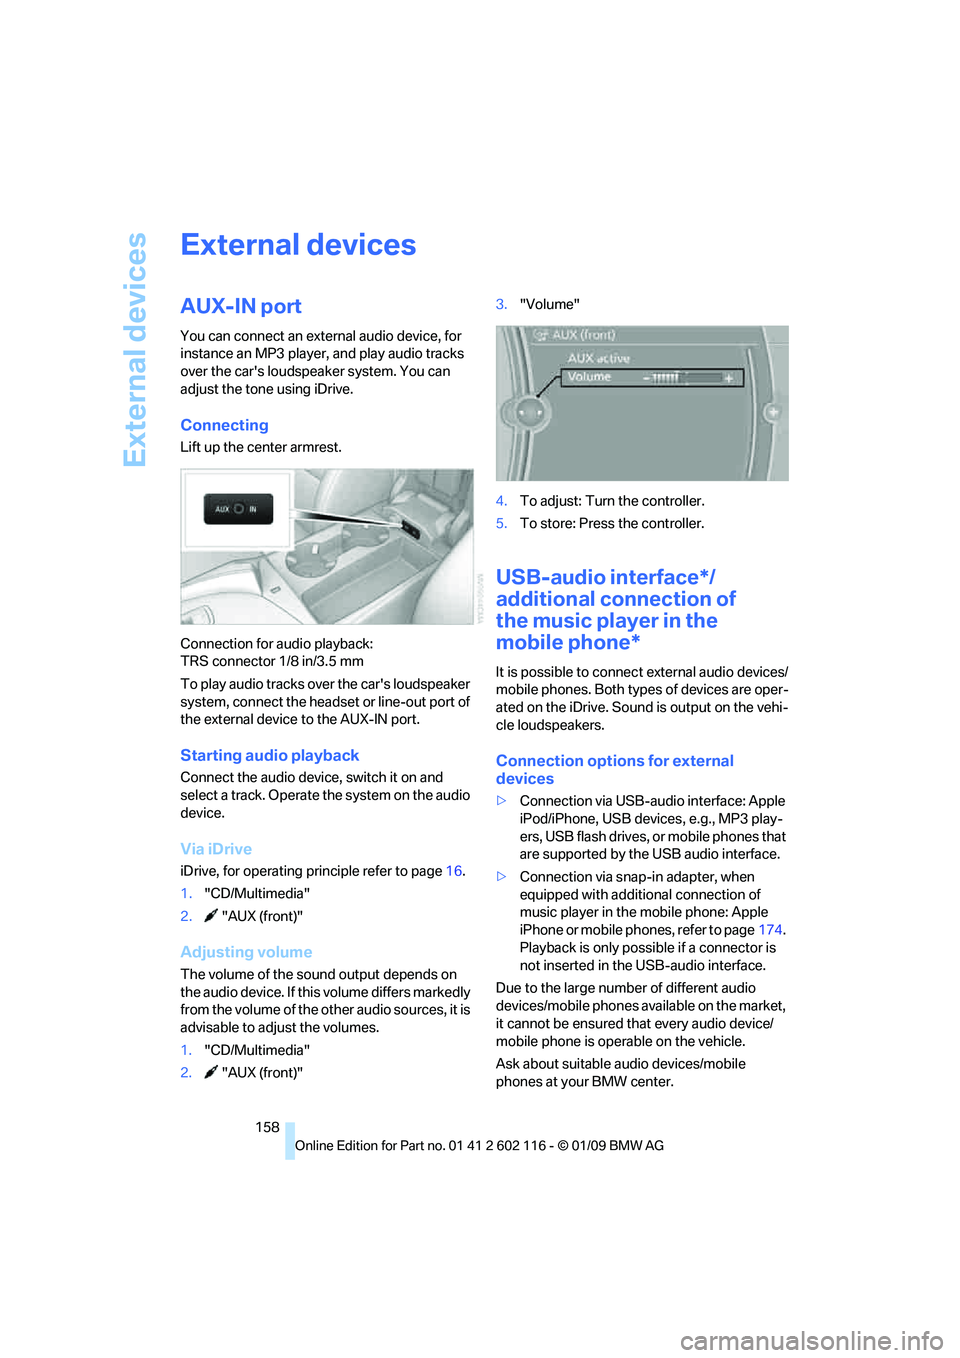
2. "AUX (front)" 3.
"Volume"
4. To adjust: Turn the controller.
5. To store: Press the controller.
USB-audio interface*/
additional connection of
the music player in the
mobile phone*
It is possible to connec t external audio devices/
mobile phones. Both types of devices are oper-
ated on the iDrive. Sound is output on the vehi-
cle loudspeakers.
Connection options for external
devices
> Connection via USB-audio interface: Apple
iPod/iPhone, USB devices, e.g., MP3 play-
ers, USB flash drives, or mobile phones that
are supported by the USB audio interface.
> Connection via snap-in adapter, when
equipped with additional connection of
music player in the mobile phone: Apple
iPhone or mobile phones, refer to page 174.
Playback is only possib le if a connector is
not inserted in the USB-audio interface.
Due to the large number of different audio
devices/mobile phones av ailable on the market,
it cannot be ensured that every audio device/
mobile phone is operable on the vehicle.
Ask about suitable audio devices/mobile
phones at your BMW center.
Page 161 of 248
Navigation
Entertainment
Driving tips
159Reference
At a glance
Controls
Communications
Mobility
Audio files
Standard audio formats, e.g. MP3, WMA, WAV
(PCM) and AAC, and playlists in the M3U format
can be played.
Connecting via USB-audio interface
Lift up the center armrest.
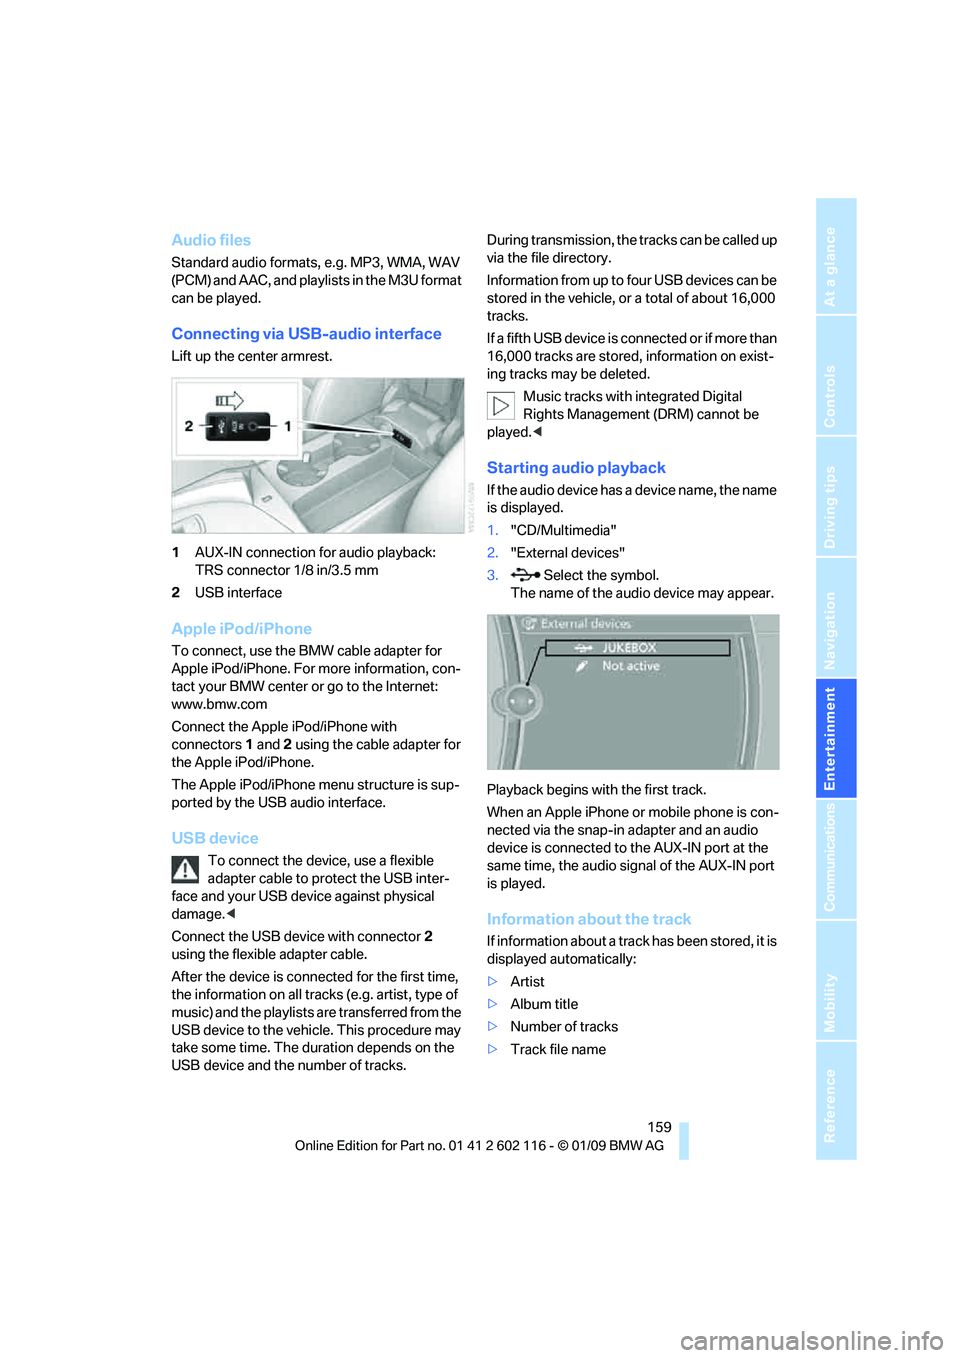
1AUX-IN connection for audio playback:
TRS connector 1/8 in/3.5 mm
2 USB interface
Apple iPod/iPhone
To connect, use the BMW cable adapter for
Apple iPod/iPhone. For more information, con-
tact your BMW center or go to the Internet:
www.bmw.com
Connect the Apple iPod/iPhone with
connectors 1 and 2 using the cable adapter for
the Apple iPod/iPhone.
The Apple iPod/iPhone menu structure is sup-
ported by the USB audio interface.
USB device
To connect the device, use a flexible
adapter cable to protect the USB inter-
face and your USB device against physical
damage. <
Connect the USB device with connector 2
using the flexible adapter cable.
After the device is connected for the first time,
the information on all trac ks (e.g. artist, type of
music) and the playlists are transferred from the
USB device to the vehicle. This procedure may
take some time. The du ration depends on the
USB device and the number of tracks. During transmission, the tracks can be called up
via the file directory.
Information from up to four USB devices can be
stored in the vehicle, or a total of about 16,000
tracks.
I f a f i f t h U S B d e v i c e i s c o n n e c t e d o r i f m o r e t h a n
16,000 tracks are stored, information on exist-
ing tracks may be deleted.
Music tracks with integrated Digital
Rights Management (DRM) cannot be
played. <
Starting audio playback
If the audio device has a device name, the name
is displayed.
1."CD/Multimedia"
2. "External devices"
3. Select the symbol.
The name of the audio device may appear.
Playback begins with the first track.
When an Apple iPhone or mobile phone is con-
nected via the snap-in adapter and an audio
device is connected to the AUX-IN port at the
same time, the audio signal of the AUX-IN port
is played.
Information about the track
If information about a track has been stored, it is
displayed automatically:
> Artist
> Album title
> Number of tracks
> Track file name