2009 BMW Z4 SDRIVE35I engine
[x] Cancel search: enginePage 206 of 248

Care
204
Care
Care products
Regular cleaning and care contributes signifi-
cantly to the value retention of your BMW.
BMW recommends cleaning and caring for your
vehicle with products that are approved by
BMW for this purpose.
Your BMW center will be happy to advise you on
the products and services available for cleaning
and caring for your BMW.
Original BMW CareProducts have been
material tested, labo ratory checked and
proven in the field, and offer optimal care and
protection for your vehicle. <
Do not use cleaners that contain alcohol
or solvents as these may result in
damage. <
Cleaning agents can contain substances
that are dangerous or hazardous to your
health. Therefore, follow the warning and safety
instructions on the packaging. When cleaning
inside the vehicle, always open the doors or
windows of the vehicle. In enclosed areas, pro-
vide for sufficient ventilation. Only use products
designed for cleaning vehicles. <
Exterior care
Washing the vehicle
Especially during the winter months,
ensure that the vehicle is washed more
frequently. Heavy soiling and road salt can lead
to vehicle damage. <
After washing the vehicle, apply the
brakes briefly to dry them, otherwise
water can reduce braking efficiency over the
short term and brake discs can corrode. <
Automatic car washes
Preference should be given to cloth car washes.
Do not use high-pressure car washes,
otherwise water may drip into the vehicle
around the windows. <
Before driving into a car wash, ensure that it is
suitable for your BMW. Check the following:
> Dimensions of your vehicle, refer to
page 221.
> If necessary: fold in the exterior mirrors,
refer to page 45.
> Maximum permissible tire width.
Avoid car washes with guide rail heights
over 4 in/10 cm, otherwise there is danger
of damaging chassis parts. <
Preparations before driv ing into an automatic
car wash:
> Unscrew the rod antenna
*
>Deactivate the rain sensor* to avoid unin-
tentional activation of the wipers.
> Remove additional attachments, e.g.
spoiler or telephone an tennas, if there is a
possibility that they could be damaged.
Automatic transmission
Before driving into an automatic car wash, per-
form the following steps to ensure that the vehi-
cle can roll:
1. Insert the remote cont rol, even with conve-
nient access, into the ignition lock.
2. Move the selector lever to position N.
3. Release the parking brake.
4. Switch off the engine.
5. Leave the remote control in the ignition lock
so that the vehicle can roll.
Page 207 of 248

Mobility
205Reference
At a glance
Controls
Driving tips
Communications
Navigation
Entertainment
7-gear sport automatic transmission
with dual clutch
Before driving into an automatic car wash, per-
form the following steps to ensure that the vehi-
cle can roll:
1. Insert the remote control, even with conve-
nient access, into the ignition lock.
2. Engage transmission position N.
3. Release the parking brake.
4. Switch off the engine.
5. Leave the remote control in the ignition lock
so that the vehicle can roll.
Transmission position P is engaged:
> Automatically after approx. 30 minutes
> When you take the remo te control out of the
ignition lock
Steam jets / high -pressure washers
When using steam jets or high-pressure
washers, ensure that you maintain suffi-
cient clearance to the vehicle and do not exceed
a temperature of 60°C.
Insufficient clearance or excessive pressure or
temperature can lead to component damage or
water penetration. Follow the operating instruc-
tions of the high-pressure washer. <
When using high-pressure washers, do
not spray against the seals of the retract-
able hardtop, the sensor s and the cameras, e.g.
of the Park Distance Control or Rear View Cam-
era, for an extended period and maintain a dis-
tance of at least 12 in/30 cm. <
Manual car wash
When washing the vehicle by hand, use large
quantities of water and car shampoo if neces-
sary. Clean the vehicle with a sponge or wash-
ing brush, applying light pressure only.
Before cleaning the windshield, deacti-
vate the rain sensor or switch off the igni-
tion to prevent unintent ional activation of the
wipers. <
Observe local regulations pertaining to
washing vehicles by hand. <
Headlamps
Do not rub them dry and do not use abrasive or
corrosive cleaning agents.
Remove contamination, such as insects, by
soaking with shampoo or insect remover and
then rinsing with plenty of water.
Thaw ice with a windshield de-icer and do not
use an ice scraper.
Windows
Clean the inside and outside surfaces of the
windows and the mirrors with window cleaner.
Do not clean the mirrors with cleaners
containing quartz. <
Retractable hardtop
Proceed as you would in a normal car wash.
When you open a we t hardtop, water
drops may run into the cargo bay. If nec-
essary, remove items from the cargo bay
beforehand to avoid water stains or soiling. <
Paintwork care
Regular care contributes to value retention and
protects the paintwork against the long-term
effects of damaging substances.
Region-specific environmental influences can
damage the vehicle paintwork. Therefore, it is
important to adapt the frequency and scope of
car care accordingly.
Immediately remove aggressive materials such
as spilled fuel, oil, grease, brake fluid, tree sap or
bird droppings to prevent damage to the
paintwork.
Repairing paintwork damage
Immediately repair scratches or similar
damage, such as that caused by stones
hitting the vehicle, wher e necessary to prevent
rusting. <
BMW recommends having paintwork damage
repaired by a profession al paint repair work-
shop according to BMW specifications using
original BMW paint materials.
Page 210 of 248
Replacing components
208
Replacing components
Onboard tool kit
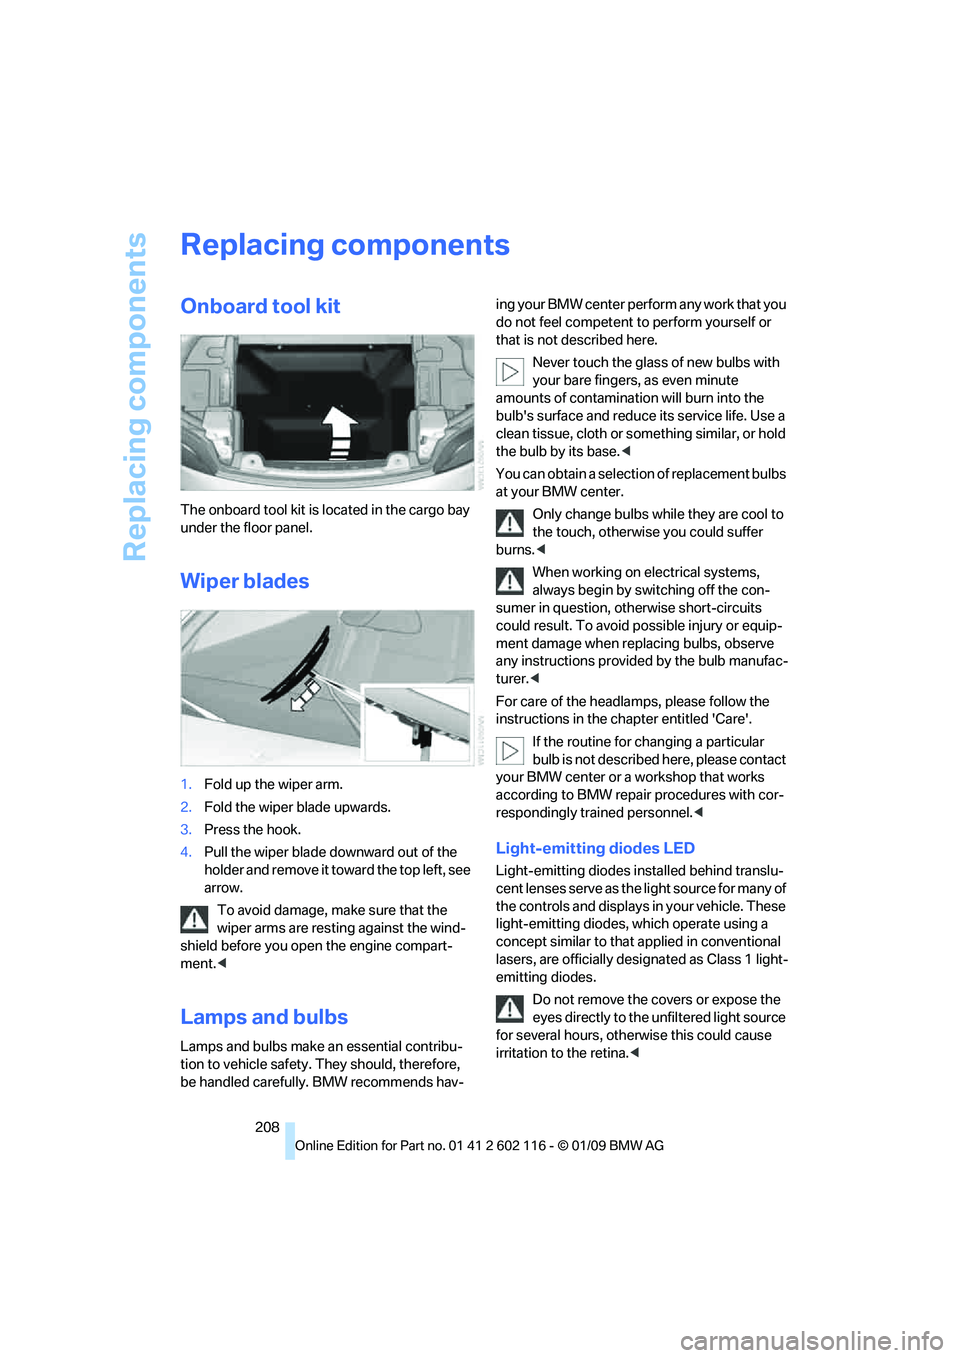
The onboard tool kit is located in the cargo bay
under the floor panel.
Wiper blades
1. Fold up the wiper arm.
2. Fold the wiper blade upwards.
3. Press the hook.
4. Pull the wiper blade do wnward out of the
holder and remove it to ward the top left, see
arrow.
To avoid damage, ma ke sure that the
wiper arms are resting against the wind-
shield before you open the engine compart-
ment. <
Lamps and bulbs
Lamps and bulbs make an essential contribu-
tion to vehicle safety. They should, therefore,
be handled carefully. BMW recommends hav- ing your BMW center perform any work that you
do not feel competent to
perform yourself or
that is not described here.
Never touch the glass of new bulbs with
your bare fingers, as even minute
amounts of contamination will burn into the
bulb's surface and reduce its service life. Use a
clean tissue, cloth or something similar, or hold
the bulb by its base. <
You can obtain a selection of replacement bulbs
at your BMW center.
Only change bulbs while they are cool to
the touch, otherwise you could suffer
burns. <
When working on electrical systems,
always begin by switching off the con-
sumer in question, otherwise short-circuits
could result. To avoid possible injury or equip-
ment damage when replacing bulbs, observe
any instructions provided by the bulb manufac-
turer.<
For care of the headlamps, please follow the
instructions in the chapter entitled 'Care'.
If the routine for changing a particular
bulb is not described here, please contact
your BMW center or a workshop that works
according to BMW repair procedures with cor-
respondingly trained personnel. <
Light-emitting diodes LED
Light-emitting diodes installed behind translu-
cent lenses serve as the light source for many of
the controls and displays in your vehicle. These
light-emitting diodes, which operate using a
concept similar to that applied in conventional
lasers, are officially desi gnated as Class 1 light-
emitting diodes.
Do not remove the covers or expose the
eyes directly to the unfiltered light source
for several hours, othe rwise this could cause
irritation to the retina. <
Page 214 of 248

Replacing components
212
Vehicle battery
Battery care
The battery is 100 % maintenance-free, the
electrolyte will last for the life of the battery
when the vehicle is operated in a temperate cli-
mate. Your BMW center will be glad to advise in
all matters concerning the battery.
Charging the battery
Only charge the battery in the vehicle via the
terminals in the engine compartment with the
engine off. Connections, refer to Jump starting
on page 214.
Disposal
Have old batteries disposed of by your
BMW center or hand them in to a recy-
cling center. Maintain th e battery in an upright
position for transport and storage. Always
secure the battery agains t tipping over during
transport. <
Power failure
After a temporary power lo ss, the functioning of
some equipment may be limited and require
reinitialization. Individual settings may likewise
have been lost and will have to be programmed:
> Time and date
These values must be updated, refer to
page 71.
> Radio
In some cases, statio ns may have to be
stored again, refer to page 142.
> Navigation system
Operability must be waited for, refer to
page 118.
> Seat and mirror memory
The positions must be stored again, refer to
page 43.
> Inside rearview mirror with digital compass
The system must be calibrated, refer to
page 101.
Fuses
Never attempt to repa ir a blown fuse and
do not replace a defective fuse with a sub-
stitute of another color or amperage rating, oth-
erwise this could lead to a circuit overload, ulti-
mately resulting in a fire in the vehicle. <
1. Remove the screws 1 using the screwdriver
from the onboard tool kit.
2. Remove the cover 2, unwinding the cable to
the footwell lamp
*, if necessary.
3. Release the shiny fastener 3.
4. Fold the current distributor 4 downward
and pull forward.
Spare fuses and a pair of plastic forceps are set
in holders on the distributor box.
See the inside of the cover for information on
fuse assignment.
The cover is reinsta lled in reverse order.
Page 216 of 248
Giving and receiving assistance
214
First aid pouch*
Some of the articles contained in the first aid
pouch have a limited service life. Therefore,
check the expiration dates of the contents reg-
ularly and replace any items in good time, if nec-
essary.
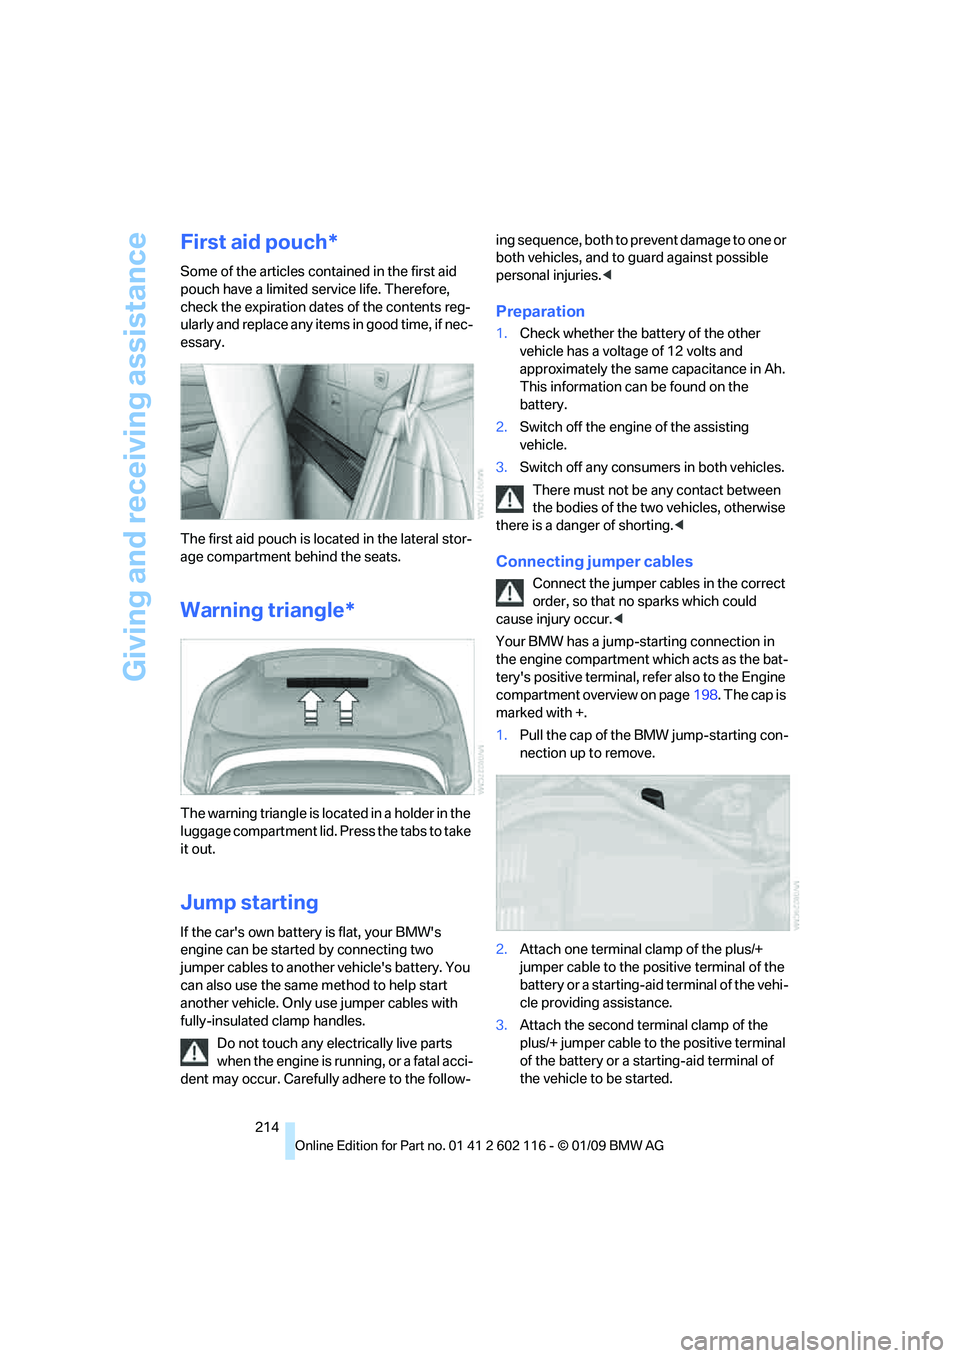
The first aid pouch is loca ted in the lateral stor-
age compartment behind the seats.
Warning triangle*
The warning triangle is lo cated in a holder in the
luggage compartment lid. Press the tabs to take
it out.
Jump starting
If the car's own battery is flat, your BMW's
engine can be starte d by connecting two
jumper cables to another vehicle's battery. You
can also use the same method to help start
another vehicle. Only use jumper cables with
fully-insulated clamp handles.
Do not touch any elec trically live parts
when the engine is runn ing, or a fatal acci-
dent may occur. Carefully adhere to the follow-ing sequence, both to pr
event damage to one or
both vehicles, and to guard against possible
personal injuries.<
Preparation
1. Check whether the battery of the other
vehicle has a voltage of 12 volts and
approximately the same capacitance in Ah.
This information can be found on the
battery.
2. Switch off the engine of the assisting
vehicle.
3. Switch off any consumers in both vehicles.
There must not be any contact between
the bodies of the tw o vehicles, otherwise
there is a danger of shorting. <
Connecting jumper cables
Connect the jumper cables in the correct
order, so that no sparks which could
cause injury occur. <
Your BMW has a jump-starting connection in
the engine compartment which acts as the bat-
tery's positive terminal, refer also to the Engine
compartment overview on page 198. The cap is
marked with +.
1. Pull the cap of the BMW jump-starting con-
nection up to remove.
2. Attach one terminal clamp of the plus/+
jumper cable to the positive terminal of the
battery or a starting-aid terminal of the vehi-
cle providing assistance.
3. Attach the second te rminal clamp of the
plus/+ jumper cable to the positive terminal
of the battery or a star ting-aid terminal of
the vehicle to be started.
Page 217 of 248
Mobility
215Reference
At a glance
Controls
Driving tips
Communications
Navigation
Entertainment
4.Attach one terminal clamp of the minus/–
jumper cable to the nega tive terminal of the
battery or to an engine or body ground of
the assisting vehicle.
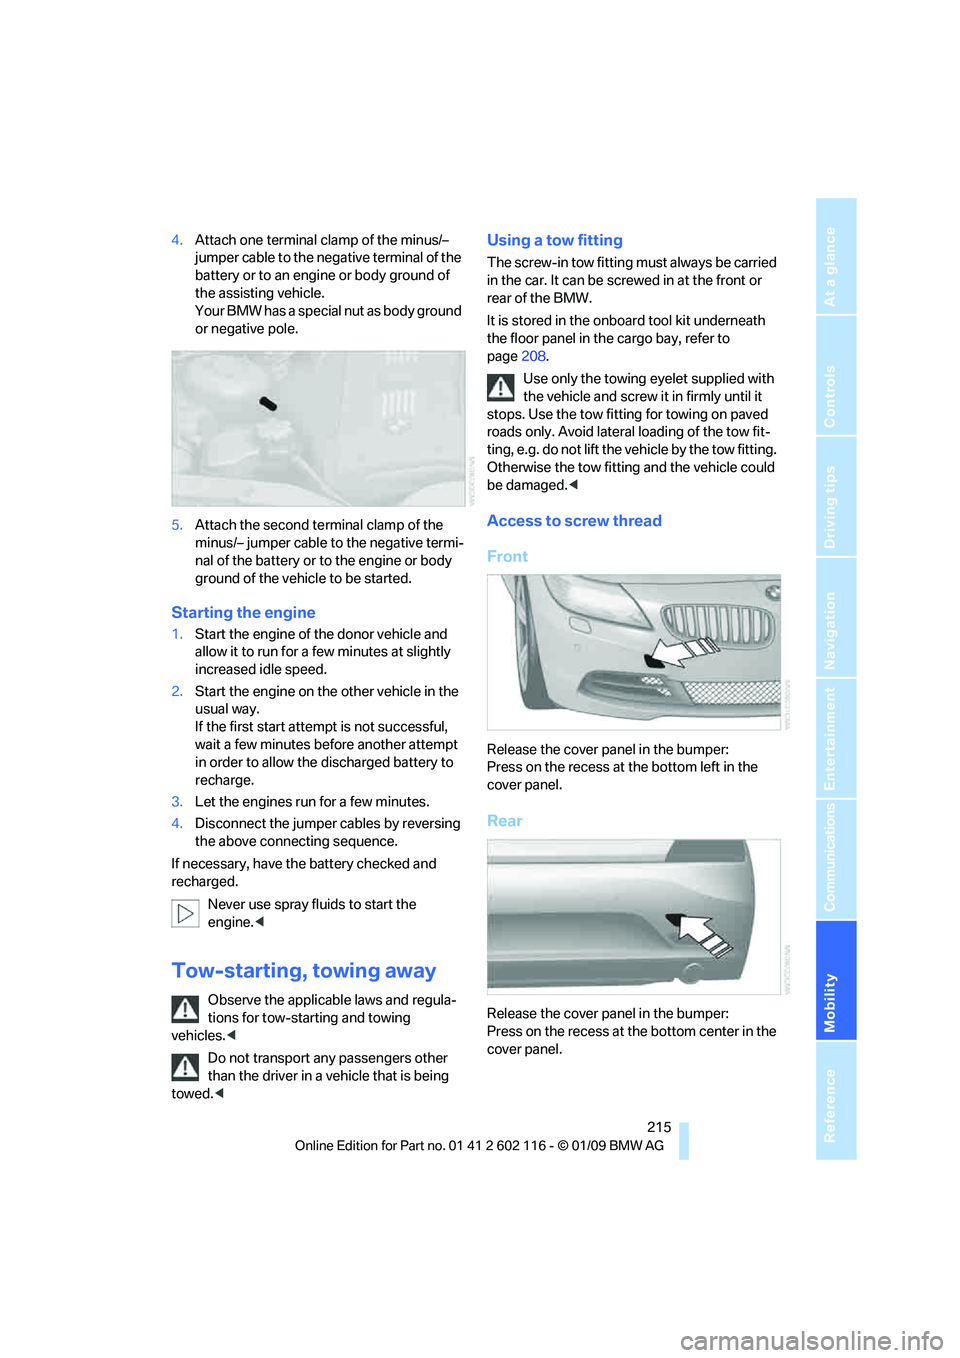
Your BMW has a special nut as body ground
or negative pole.
5. Attach the second te rminal clamp of the
minus/– jumper cable to the negative termi-
nal of the battery or to the engine or body
ground of the vehicle to be started.
Starting the engine
1. Start the engine of the donor vehicle and
allow it to run for a few minutes at slightly
increased idle speed.
2. Start the engine on the other vehicle in the
usual way.
If the first start attempt is not successful,
wait a few minutes be fore another attempt
in order to allow the discharged battery to
recharge.
3. Let the engines run for a few minutes.
4. Disconnect the jumper cables by reversing
the above connecting sequence.
If necessary, have the battery checked and
recharged.
Never use spray fluids to start the
engine. <
Tow-starting, towing away
Observe the applicable laws and regula-
tions for tow-starting and towing
vehicles. <
Do not transport any passengers other
than the driver in a vehicle that is being
towed. <
Using a tow fitting
The screw-in tow fitting must always be carried
in the car. It can be sc rewed in at the front or
rear of the BMW.
It is stored in the onboard tool kit underneath
the floor panel in the cargo bay, refer to
page 208.
Use only the towing eyelet supplied with
the vehicle and screw it in firmly until it
stops. Use the tow fitting for towing on paved
roads only. Avoid lateral loading of the tow fit-
ting, e.g. do not lift the vehicle by the tow fitting.
Otherwise the tow fitting and the vehicle could
be damaged. <
Access to screw thread
Front
Release the cover panel in the bumper:
Press on the recess at the bottom left in the
cover panel.
Rear
Release the cover panel in the bumper:
Press on the recess at the bottom center in the
cover panel.
Page 218 of 248
Giving and receiving assistance
216
Being towed
Make sure that the ignition is switched on,
refer to page50, otherwise the low-beam
headlamps, tail lamps, turn signal indicators and
windshield wipers may be unavailable.
If the electrical system fails, do not tow-start or
tow the vehicle. The electrical steering wheel
lock cannot be released and the vehicle cannot
be steered. Jump-starting, refer to page 214.
Power steering assistance is not available when
the engine is not running. Thus, braking and
steering will requir e increased effort.<
Manual transmission
Gearshift lever in neutral position.
Automatic transmission
Selector lever in position N.
Changing selector leve r positions, refer to
page 54.
Do not exceed a towing speed of 31 mph
or 50 km/h and a towing distance of
31 miles/50 km, otherwise the automatic trans-
mission may be damaged. <
7-gear sport automatic transmission
with dual clutch
Ensure that transmission lock P is not
engaged as the rear wheels will otherwise
be blocked.
When using the car wash function, refer to
page 205, note that the parking lock P is
engaged automatically after approx. 30 min-
utes, blocking the rear wheels.
If an electrical malfunction occurs or if towing
takes longer than approx. 20 minutes, manually
release the parking lock, refer to page 58.<
Do not exceed a towing speed of 31 mph
or 50 km/h and a towing distance of
31 miles/50 km, otherwise the 7-gear sport
automatic transmission may be damaged. <
Towing methods
Do not lift the vehicle by a tow fitting or
body and chassis parts, otherwise dam-
age may result. <
With a tow bar
The towing vehicle must not be lighter
than the towed vehicle, otherwise it may
be impossible to maintain control. <
The tow fittings used should be on the same
side on both vehicles. Should it prove impossi-
ble to avoid mounting the tow bar at an angle,
please observe the following:
> Clearance and maneuvering capability will
be sharply limited during cornering.
> The tow bar will generate la teral forces if it is
attached offset.
Attach the tow bar to the tow fittings only,
as attaching it to othe r parts of the vehicle
could result in damage. <
With a tow rope
When starting off in the towing vehicle, make
sure that the tow rope is taut.
To avoid jerking and the associated
stresses on vehicle components when
towing, always use nylon ropes or nylon straps.
Attach the tow rope to the tow fittings only, as
attaching it to other pa rts of the vehicle could
result in damage. <
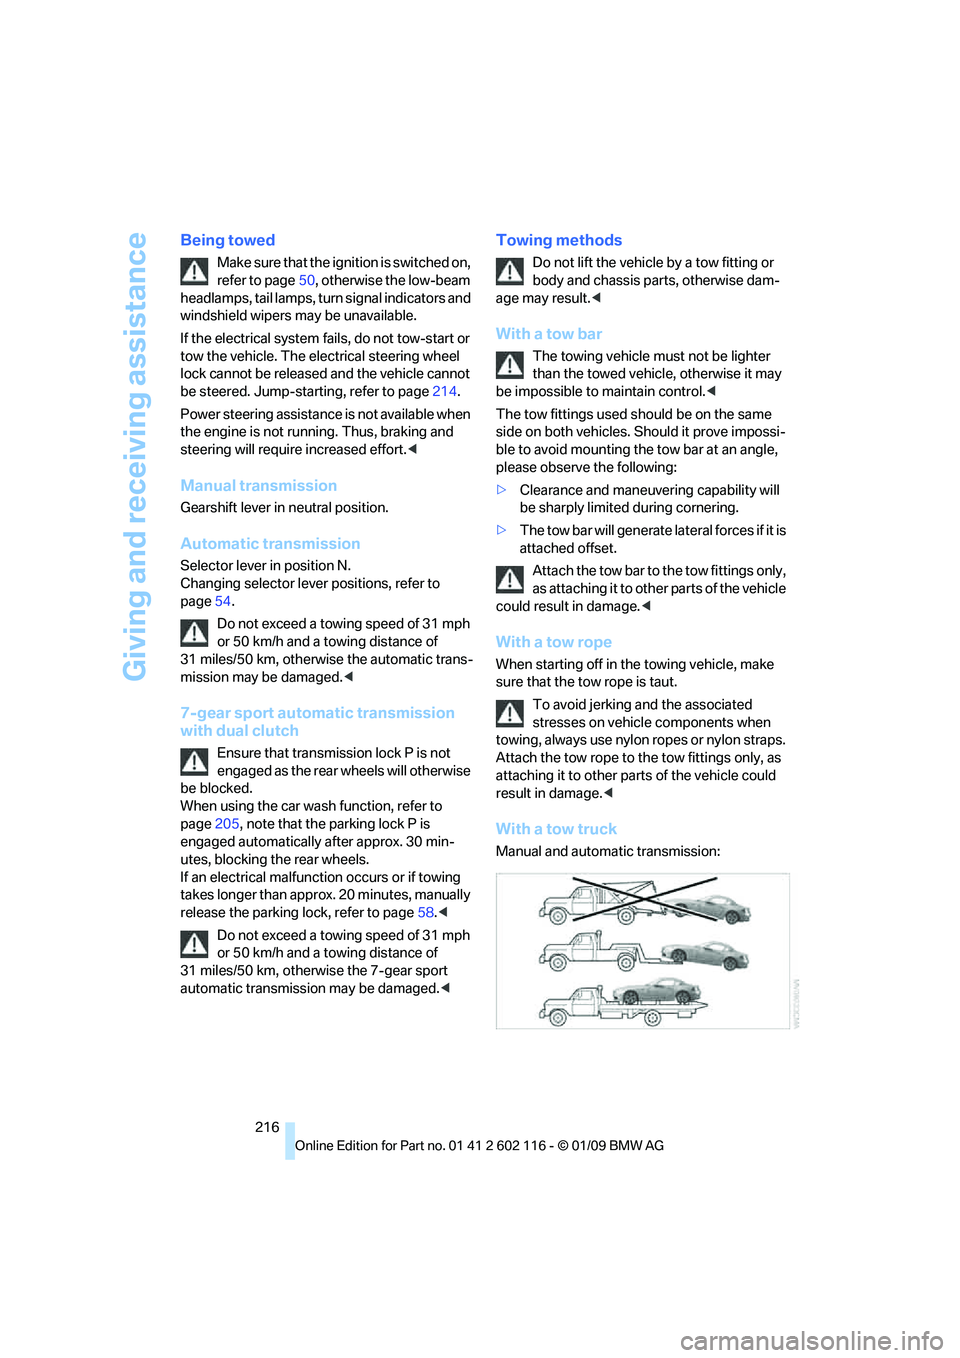
With a tow truck
Manual and automatic transmission:
Page 219 of 248
Mobility
217Reference
At a glance
Controls
Driving tips
Communications
Navigation
Entertainment
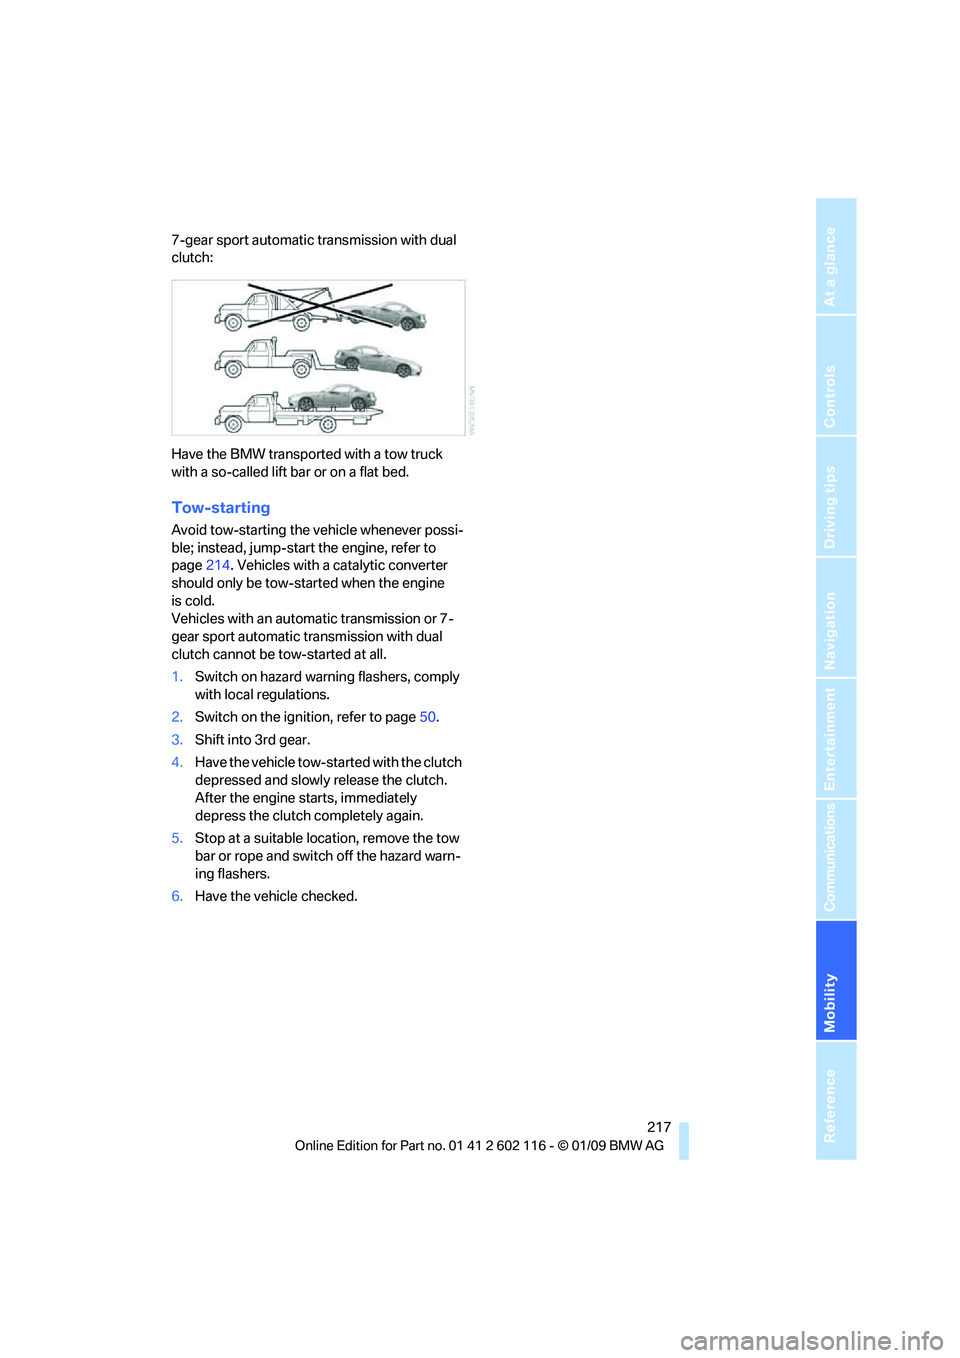
7-gear sport automatic transmission with dual
clutch:
Have the BMW transported with a tow truck
with a so-called lift bar or on a flat bed.
Tow-starting
Avoid tow-starting the vehicle whenever possi-
ble; instead, jump-start the engine, refer to
page214. Vehicles with a catalytic converter
should only be tow-st arted when the engine
is cold.
Vehicles with an automatic transmission or 7-
gear sport automatic transmission with dual
clutch cannot be tow-started at all.
1. Switch on hazard warning flashers, comply
with local regulations.
2. Switch on the ignition, refer to page 50.
3. Shift into 3rd gear.
4. Have the vehicle tow-started with the clutch
depressed and slowly release the clutch.
After the engine starts, immediately
depress the clutch completely again.
5. Stop at a suitable location, remove the tow
bar or rope and switch off the hazard warn-
ing flashers.
6. Have the vehi cle checked.