Page 137 of 248
Navigation
Driving tips
135Reference
At a glance
Controls
Communications
Entertainment
Mobility
Page 141 of 248
Navigation
Entertainment
Driving tips
139Reference
At a glance
Controls
Communications
Mobility
Treble, bass, balance, fader
>"Balance": left/right volume distribution
> "Fader": front/rear volume distribution
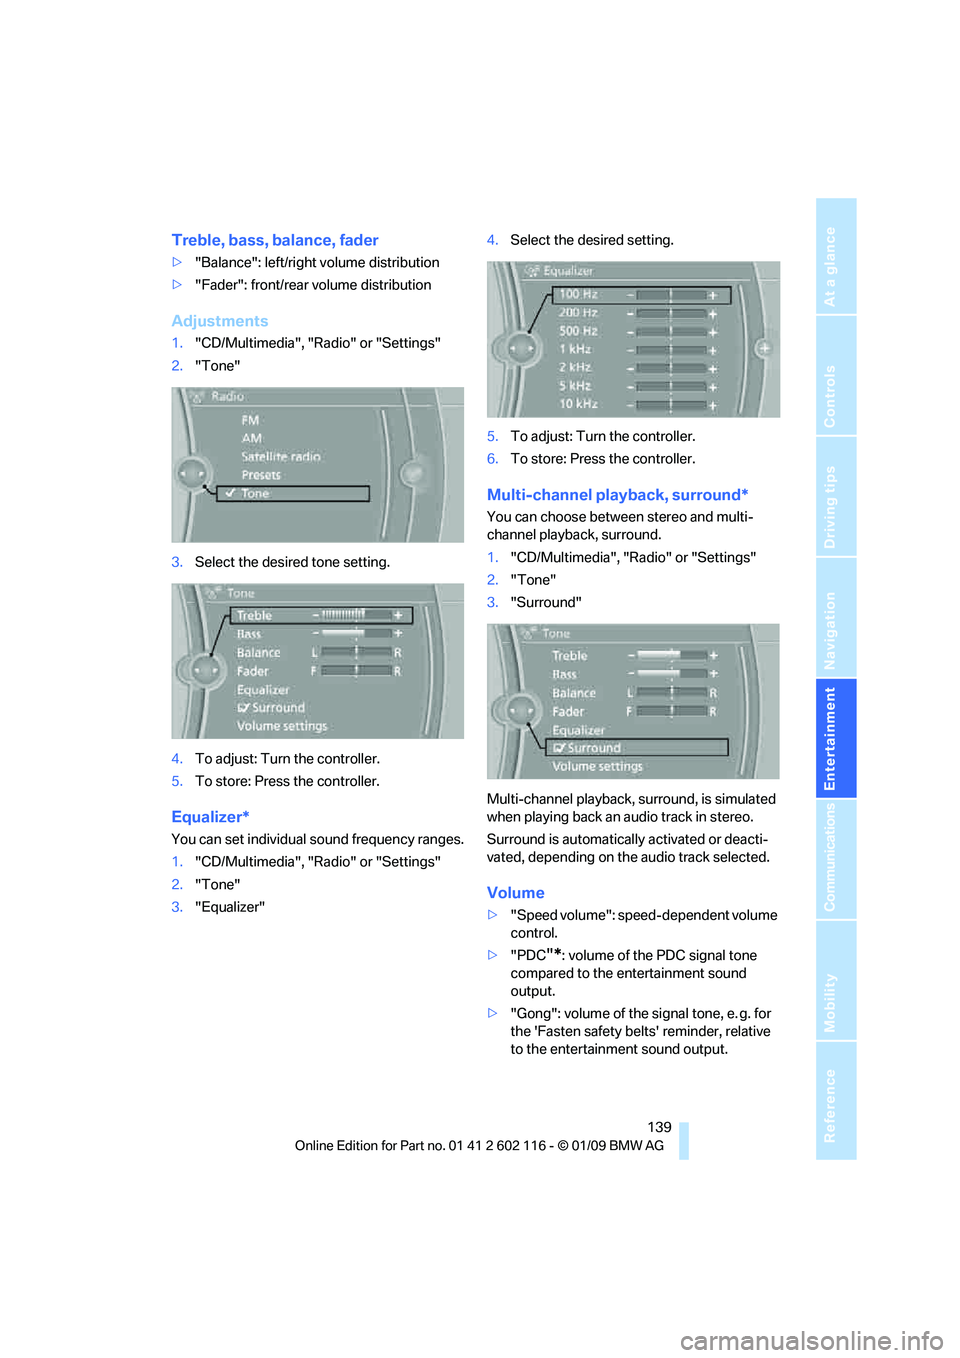
Adjustments
1."CD/Multimedia", "Radio" or "Settings"
2. "Tone"
3. Select the desired tone setting.
4. To adjust: Turn the controller.
5. To store: Press the controller.
Equalizer*
You can set individual sound frequency ranges.
1."CD/Multimedia", "Radio" or "Settings"
2. "Tone"
3. "Equalizer" 4.
Select the desired setting.
5. To adjust: Turn the controller.
6. To store: Press the controller.
Multi-channel playback, surround*
You can choose between stereo and multi-
channel playback, surround.
1."CD/Multimedia", "Radio" or "Settings"
2. "Tone"
3. "Surround"
Multi-channel playback, surround, is simulated
when playing back an audio track in stereo.
Surround is automatically activated or deacti-
vated, depending on the audio track selected.
Volume
> "Speed volume": speed-dependent volume
control.
> "PDC
"*: volume of the PDC signal tone
compared to the entertainment sound
output.
> "Gong": volume of the signal tone, e. g. for
the 'Fasten safety belts' reminder, relative
to the entertainment sound output.
Page 143 of 248
Navigation
Entertainment
Driving tips
141Reference
At a glance
Controls
Communications
Mobility
Radio
Your radio is designed for reception of the fol-
lowing stations:
>FM and AM
> HD radio
*
>Satellite radio*
Selecting a station
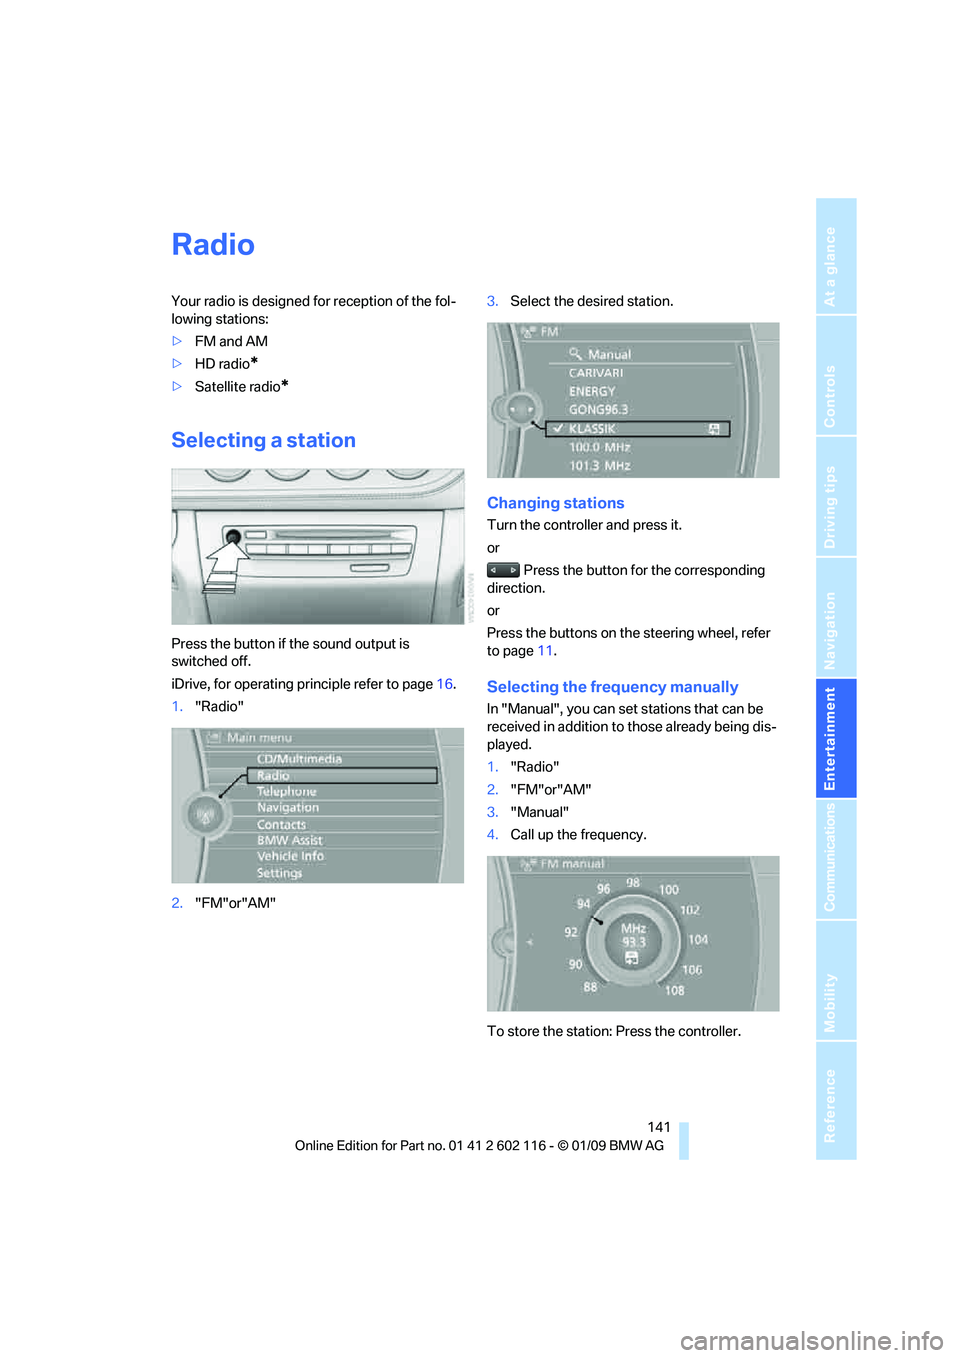
Press the button if the sound output is
switched off.
iDrive, for operating principle refer to page 16.
1. "Radio"
2. "FM"or"AM" 3.
Select the desired station.
Changing stations
Turn the controller and press it.
or
Press the button for the corresponding
direction.
or
Press the buttons on the steering wheel, refer
to page 11.
Selecting the frequency manually
In "Manual", you can set stations that can be
received in addition to those already being dis-
played.
1. "Radio"
2. "FM"or"AM"
3. "Manual"
4. Call up the frequency.
To store the station: Press the controller.
Page 145 of 248
Navigation
Entertainment
Driving tips
143Reference
At a glance
Controls
Communications
Mobility
Displaying additional information
Some stations broadcast additional information
on the current track, such as the name of the
artist.
1.Select the desired station.
2. Open "Options".
3. "Station info"
Selecting a substation
1.Select the desired station.
2. Press the controller.
3. Select the substation.
Presets
It is possible to stor e up to 40 stations.
Calling up a station
1."Radio"
2. "Presets"
3. Call up the desired station.
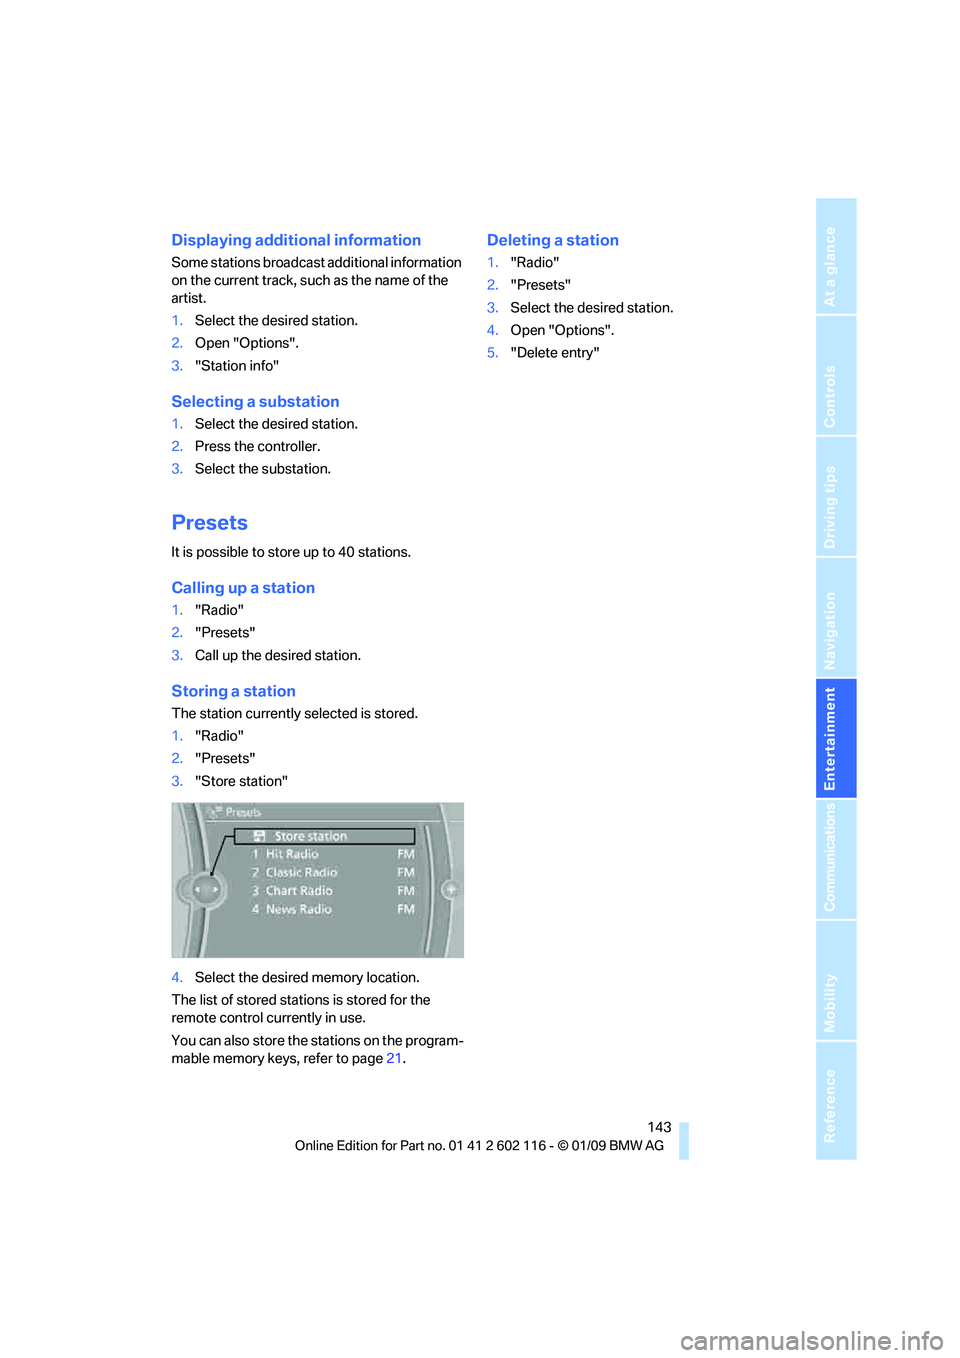
Storing a station
The station currently selected is stored.
1."Radio"
2. "Presets"
3. "Store station"
4. Select the desired memory location.
The list of stored stations is stored for the
remote control currently in use.
You can also store the st ations on the program-
mable memory keys, refer to page 21.
Deleting a station
1."Radio"
2. "Presets"
3. Select the desired station.
4. Open "Options".
5. "Delete entry"
Page 147 of 248
Navigation
Entertainment
Driving tips
145Reference
At a glance
Controls
Communications
Mobility
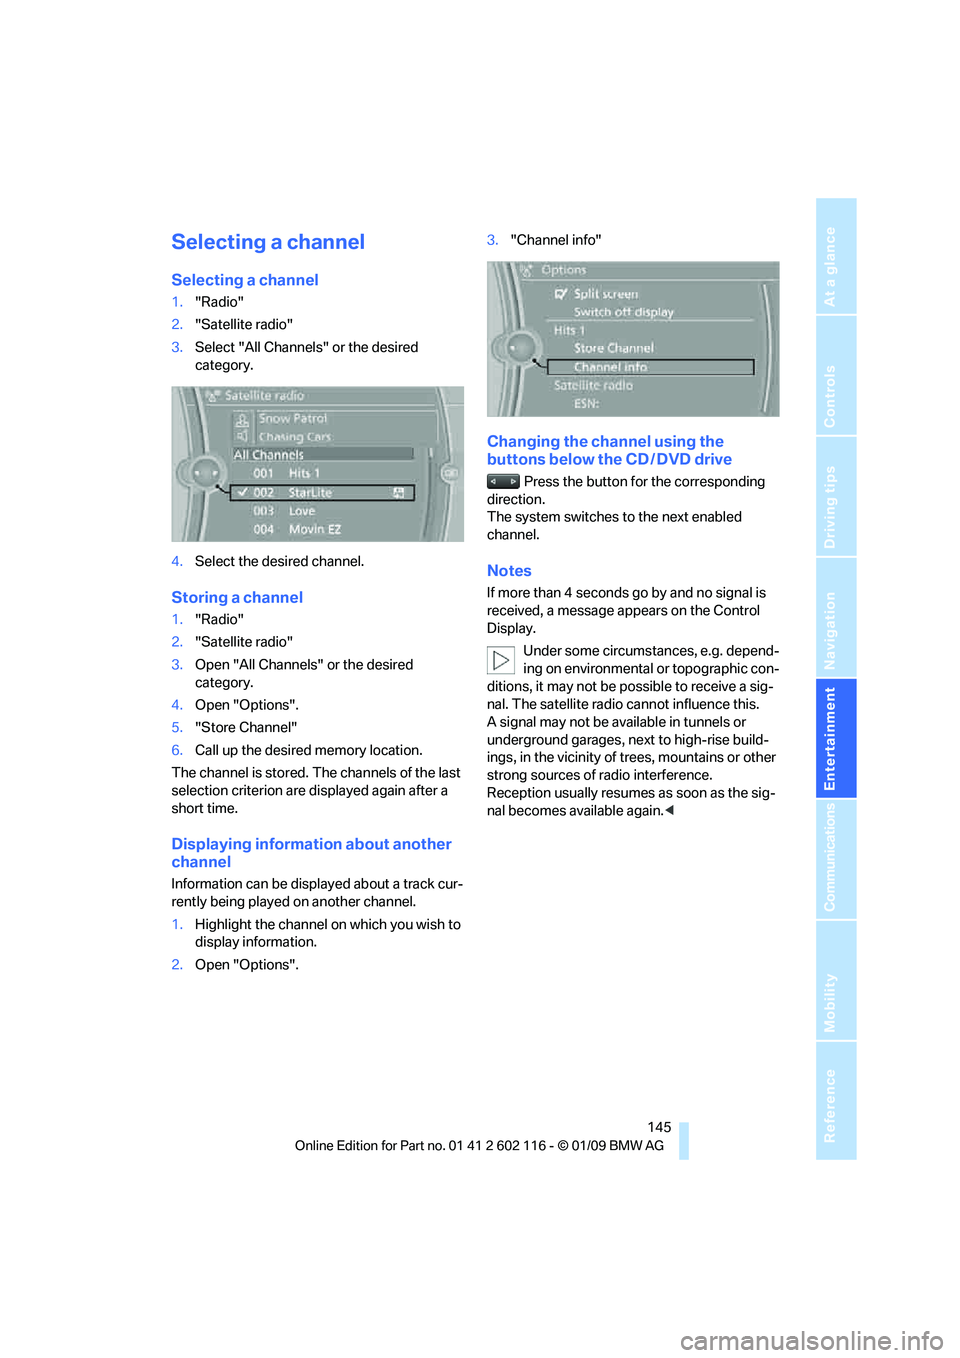
Selecting a channel
Selecting a channel
1."Radio"
2. "Satellite radio"
3. Select "All Channels" or the desired
category.
4. Select the desired channel.
Storing a channel
1."Radio"
2. "Satellite radio"
3. Open "All Channels" or the desired
category.
4. Open "Options".
5. "Store Channel"
6. Call up the desired memory location.
The channel is stored. The channels of the last
selection criterion are displayed again after a
short time.
Displaying information about another
channel
Information can be displayed about a track cur-
rently being played on another channel.
1. Highlight the channel on which you wish to
display information.
2. Open "Options". 3.
"Channel info"
Changing the channel using the
buttons below the CD / DVD drive
Press the button for the corresponding
direction.
The system switches to the next enabled
channel.
Notes
If more than 4 seconds go by and no signal is
received, a message appears on the Control
Display.
Under some circumstances, e.g. depend-
ing on environmental or topographic con-
ditions, it may not be possible to receive a sig-
nal. The satellite radio cannot influence this.
A signal may not be av ailable in tunnels or
underground garages, ne xt to high-rise build-
ings, in the vicinity of trees, mountains or other
strong sources of radio interference.
Reception usually resumes as soon as the sig-
nal becomes available again. <
Page 149 of 248
Navigation
Entertainment
Driving tips
147Reference
At a glance
Controls
Communications
Mobility
Audio CDs
1."CD/Multimedia"
2. "CD/DVD"
3. Select the desired CD or DVD.
4. Select the desired trac k to begin playback.
CDs/CDs/DVDs with compressed audio
files*
Depending on the data, some letters and num-
bers of the CD/DVD may not be displayed cor-
rectly.
1."CD/Multimedia"
2. "CD/DVD"
3. Select the desired CD or DVD.
4. Select the director y, if necessary.
To change to a higher level directory: move
the controller to the left. 5.
Select a track and press the controller.
Displaying information about the
track*
If information about a track has been stored, it is
displayed automatically:
>Artist
> Album title
> Number of tracks on the CD/DVD
> Track file name
Random play sequence
The tracks on the current CD/DVD are played
once each in random order.
1."CD/Multimedia"
2. "CD/DVD"
3. Select the desired CD or DVD.
4. Open "Options".
Page 151 of 248
Navigation
Entertainment
Driving tips
149Reference
At a glance
Controls
Communications
Mobility
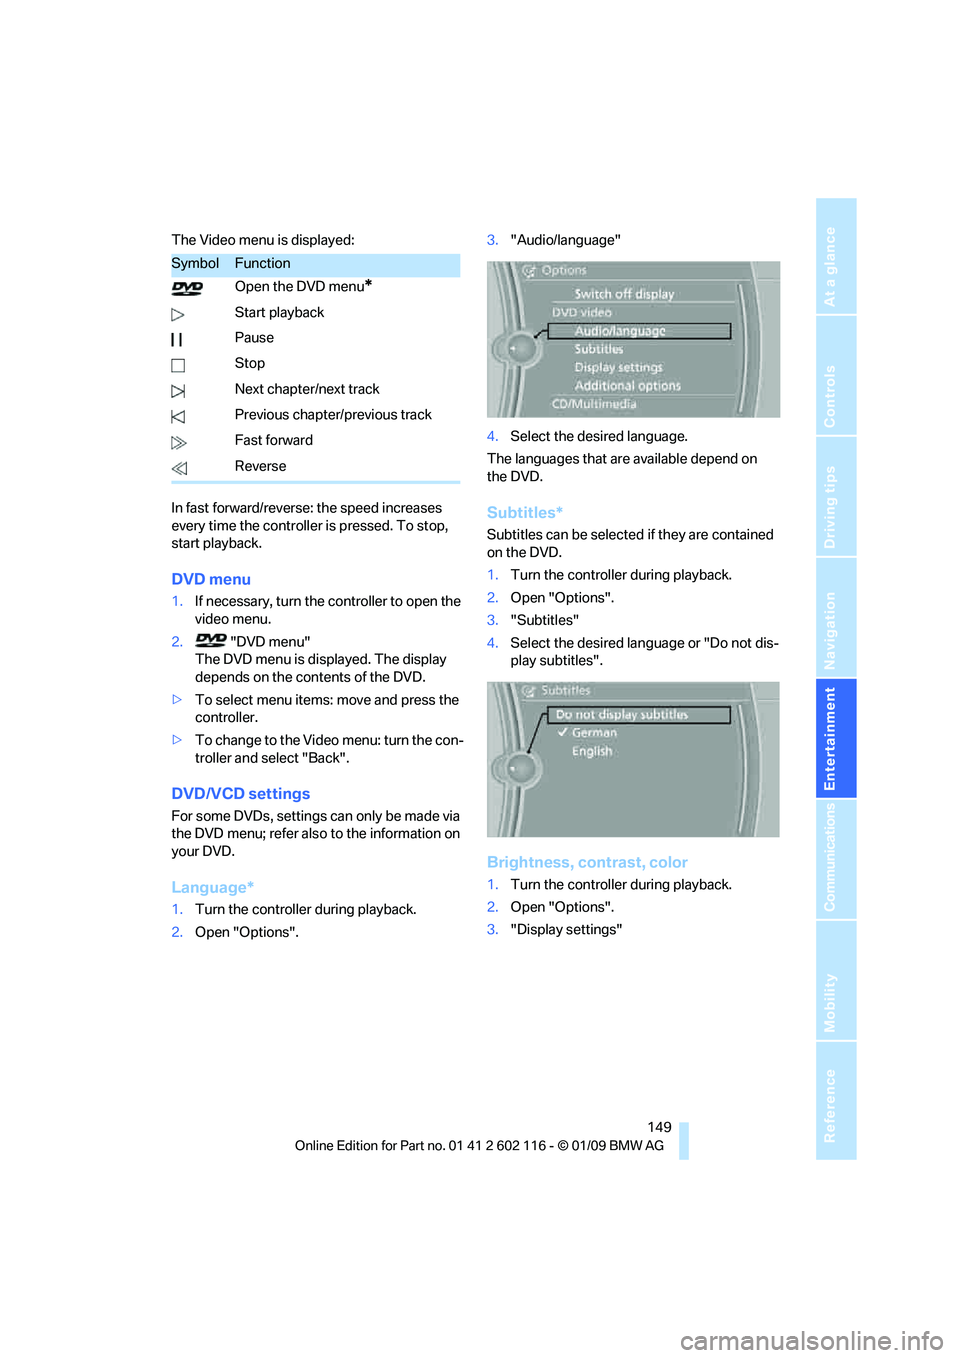
The Video menu is displayed:
In fast forward/reverse: the speed increases
every time the controller is pressed. To stop,
start playback.
DVD menu
1.If necessary, turn the controller to open the
video menu.
2. "DVD menu"
The DVD menu is displayed. The display
depends on the contents of the DVD.
> To select menu items: move and press the
controller.
> To change to the Vide o menu: turn the con-
troller and select "Back".
DVD/VCD settings
For some DVDs, settings can only be made via
the DVD menu; refer also to the information on
your DVD.
Language*
1. Turn the controller during playback.
2. Open "Options". 3.
"Audio/language"
4. Select the desired language.
The languages that are available depend on
the DVD.
Subtitles*
Subtitles can be selected if they are contained
on the DVD.
1. Turn the controller during playback.
2. Open "Options".
3. "Subtitles"
4. Select the desired language or "Do not dis-
play subtitles".
Brightness, contrast, color
1.Turn the controller during playback.
2. Open "Options".
3. "Display settings"
SymbolFunction
Open the DVD menu
*
Start playback
Pause
Stop
Next chapter/next track
Previous chapter/previous track
Fast forward
Reverse
Page 153 of 248
Navigation
Entertainment
Driving tips
151Reference
At a glance
Controls
Communications
Mobility
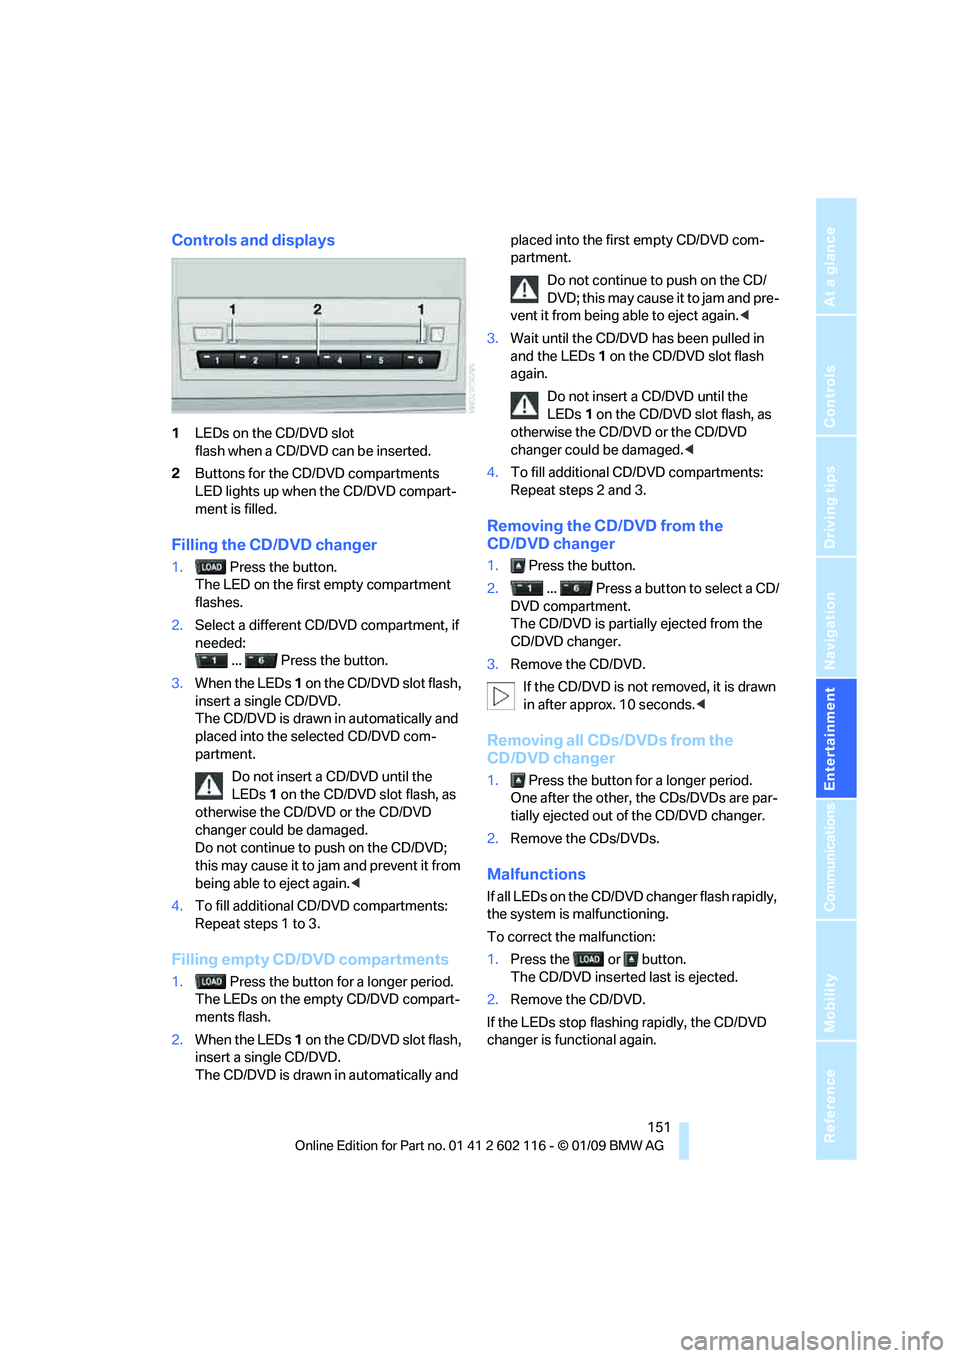
Controls and displays
1LEDs on the CD/DVD slot
flash when a CD/DVD can be inserted.
2 Buttons for the CD/DVD compartments
LED lights up when the CD/DVD compart-
ment is filled.
Filling the CD/DVD changer
1. Press the button.
The LED on the first empty compartment
flashes.
2. Select a different CD/DVD compartment, if
needed:
... Press the button.
3. When the LEDs 1 on the CD/DVD slot flash,
insert a single CD/DVD.
The CD/DVD is drawn in automatically and
placed into the selected CD/DVD com-
partment.
Do not insert a CD/DVD until the
LEDs 1 on the CD/DVD slot flash, as
otherwise the CD/DVD or the CD/DVD
changer could be damaged.
Do not continue to push on the CD/DVD;
this may cause it to jam and prevent it from
being able to eject again. <
4. To fill additional CD/DVD compartments:
Repeat steps 1 to 3.
Filling empty CD/DVD compartments
1. Press the button for a longer period.
The LEDs on the empty CD/DVD compart-
ments flash.
2. When the LEDs 1 on the CD/DVD slot flash,
insert a single CD/DVD.
The CD/DVD is drawn in automatically and placed into the first empty CD/DVD com-
partment.
Do not continue to push on the CD/
DVD; this may cause it to jam and pre-
vent it from being able to eject again. <
3. Wait until the CD/DVD has been pulled in
and the LEDs 1 on the CD/DVD slot flash
again.
Do not insert a CD/DVD until the
LEDs 1 on the CD/DVD slot flash, as
otherwise the CD/DVD or the CD/DVD
changer could be damaged.<
4. To fill additional CD/DVD compartments:
Repeat steps 2 and 3.
Removing the CD/DVD from the
CD/DVD changer
1. Press the button.
2. ... Press a button to select a CD/
DVD compartment.
The CD/DVD is partia lly ejected from the
CD/DVD changer.
3. Remove the CD/DVD.
If the CD/DVD is not removed, it is drawn
in after approx. 10 seconds. <
Removing all CDs/DVDs from the
CD/DVD changer
1. Press the button for a longer period.
One after the other, the CDs/DVDs are par-
tially ejected out of the CD/DVD changer.
2. Remove the CDs/DVDs.
Malfunctions
If all LEDs on the CD/DVD changer flash rapidly,
the system is malfunctioning.
To correct the malfunction:
1.Press the or button.
The CD/DVD inserted last is ejected.
2. Remove the CD/DVD.
If the LEDs stop flashing rapidly, the CD/DVD
changer is functional again.