2009 BMW Z4 SDRIVE30I light
[x] Cancel search: lightPage 124 of 248
Destination entry
122
Editing or deleting an address
1."Navigation"
2. "Address book"
3. Highlight the entry.
4. Open "Options".
5. "Edit in Contacts" or "Delete entry".
Using home address as destination
The home address must be stored as a destina-
tion. Refer to Specifying a contact as the home
address, page 176.
1. "Navigation"
2. "Address book"
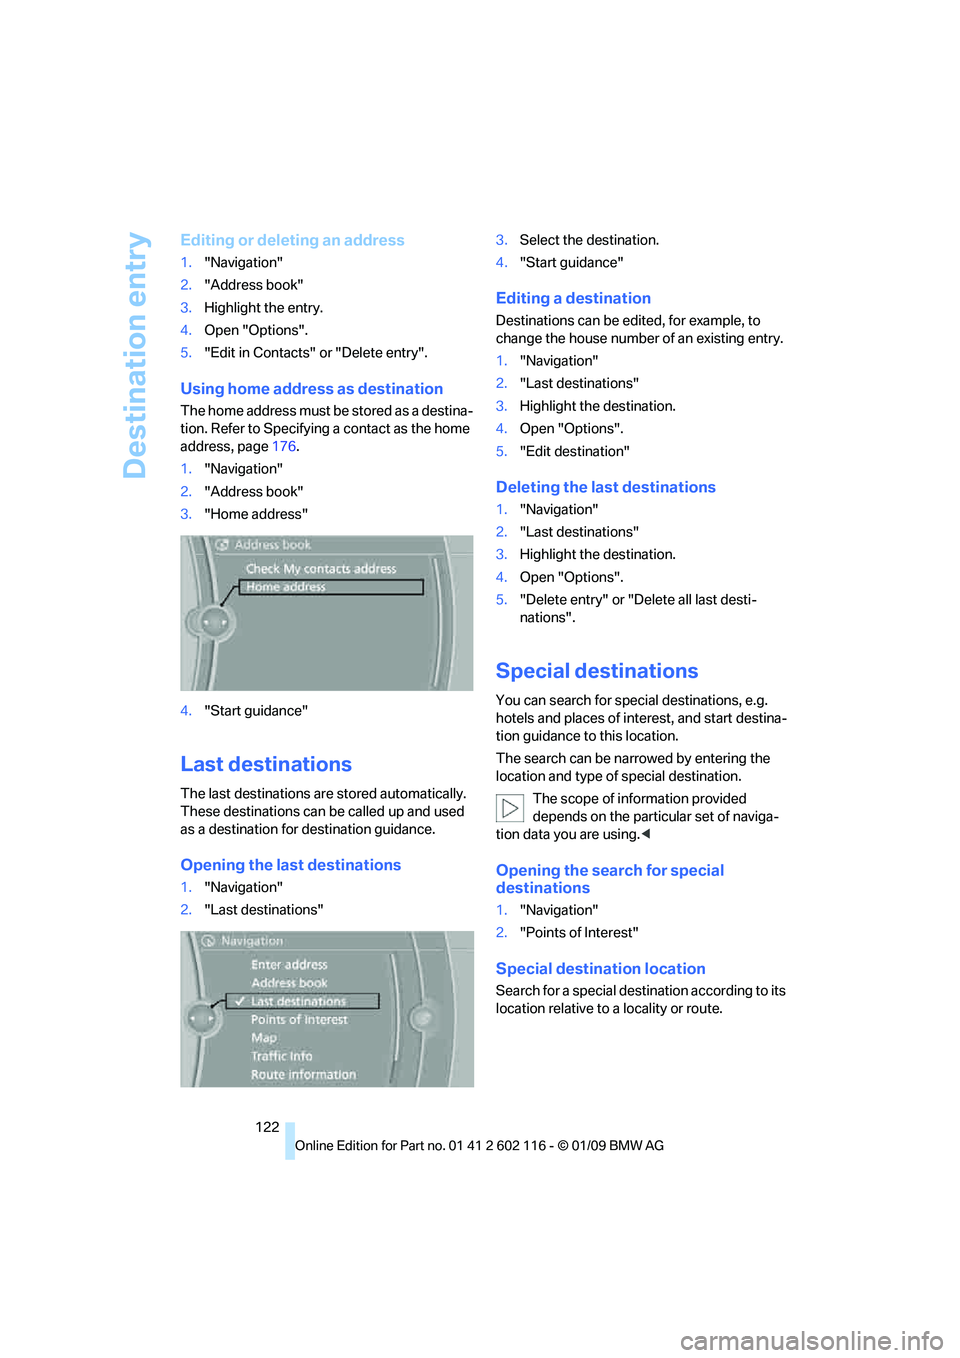
3. "Home address"
4. "Start guidance"
Last destinations
The last destinations are stored automatically.
These destinations can be called up and used
as a destination for destination guidance.
Opening the last destinations
1."Navigation"
2. "Last destinations" 3.
Select the destination.
4. "Start guidance"
Editing a destination
Destinations can be edited, for example, to
change the house number of an existing entry.
1."Navigation"
2. "Last destinations"
3. Highlight the destination.
4. Open "Options".
5. "Edit destination"
Deleting the last destinations
1."Navigation"
2. "Last destinations"
3. Highlight the destination.
4. Open "Options".
5. "Delete entry" or "Delete all last desti-
nations".
Special destinations
You can search for spec ial destinations, e.g.
hotels and places of interest, and start destina-
tion guidance to this location.
The search can be narrowed by entering the
location and type of special destination. The scope of information provided
depends on the partic ular set of naviga-
tion data you are using. <
Opening the search for special
destinations
1."Navigation"
2. "Points of Interest"
Special destination location
Search for a special destination according to its
location relative to a locality or route.
Page 125 of 248
Navigation
Driving tips
123Reference
At a glance
Controls
Communications
Entertainment
Mobility
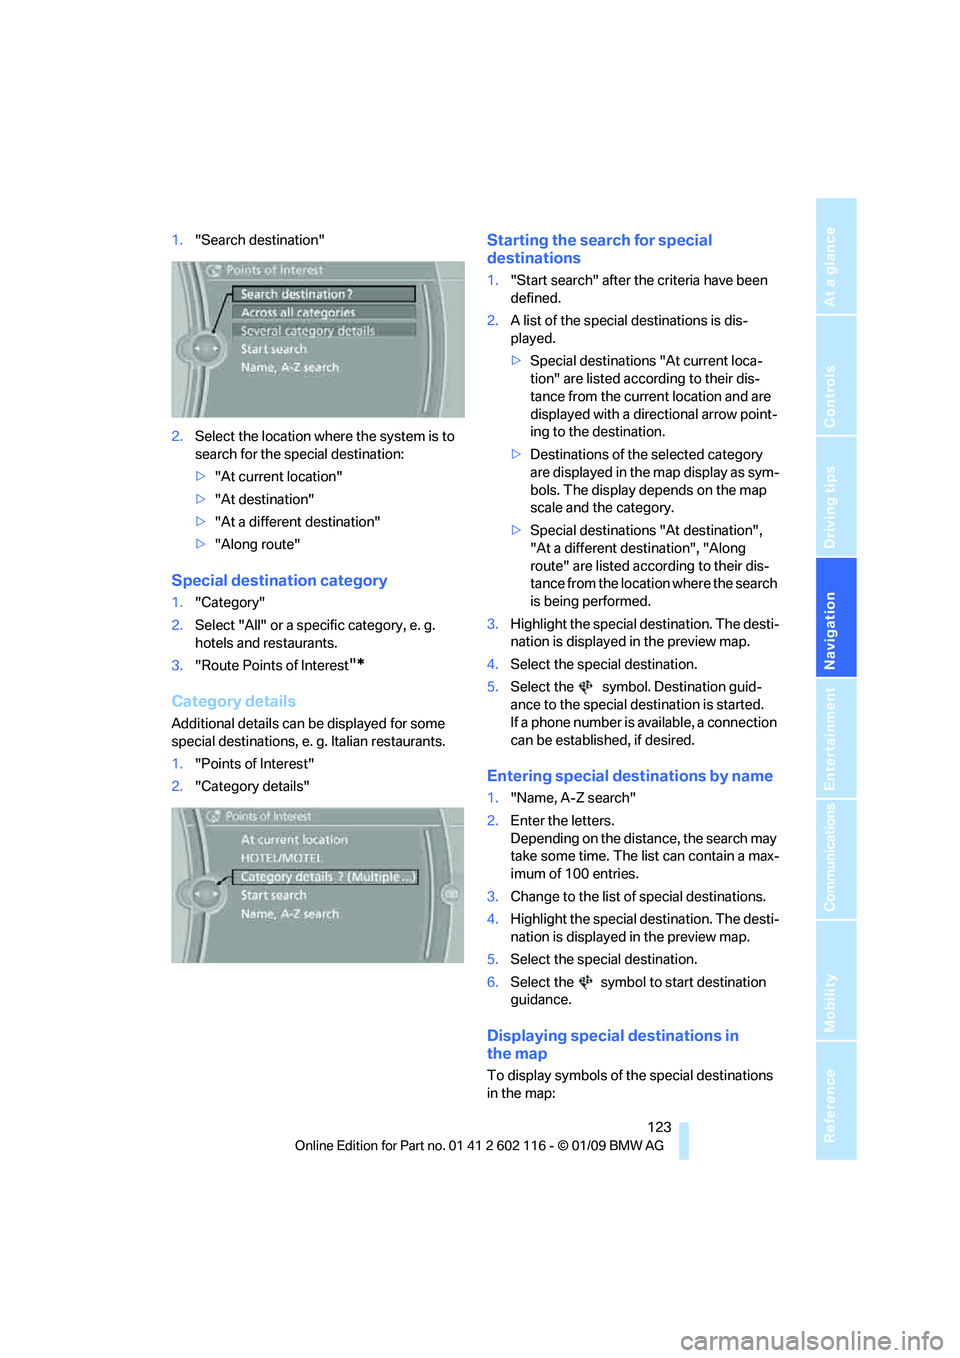
1."Search destination"
2. Select the location where the system is to
search for the special destination:
>"At current location"
> "At destination"
> "At a different destination"
> "Along route"
Special destination category
1. "Category"
2. Select "All" or a spec ific category, e. g.
hotels and restaurants.
3. "Route Points of Interest
"*
Category details
Additional details can be displayed for some
special destinations, e. g. Italian restaurants.
1. "Points of Interest"
2. "Category details"
Starting the search for special
destinations
1."Start search" after the criteria have been
defined.
2. A list of the special destinations is dis-
played.
>Special destinations "At current loca-
tion" are listed according to their dis-
tance from the current location and are
displayed with a directional arrow point-
ing to the destination.
> Destinations of the selected category
are displayed in the map display as sym-
bols. The display depends on the map
scale and the category.
> Special destinations "At destination",
"At a different destination", "Along
route" are listed acco rding to their dis-
tance from the locati on where the search
is being performed.
3. Highlight the special destination. The desti-
nation is displayed in the preview map.
4. Select the special destination.
5. Select the symbol. Destination guid-
ance to the special destination is started.
If a phone number is available, a connection
can be established, if desired.
Entering special destinations by name
1."Name, A-Z search"
2. Enter the letters.
Depending on the distance, the search may
take some time. The list can contain a max-
imum of 100 entries.
3. Change to the list of special destinations.
4. Highlight the special destination. The desti-
nation is displayed in the preview map.
5. Select the special destination.
6. Select the symbol to start destination
guidance.
Displaying special destinations in
the map
To display symbols of the special destinations
in the map:
Page 127 of 248
Navigation
Driving tips
125Reference
At a glance
Controls
Communications
Entertainment
Mobility
Entering a destination by
voice commands*
You can enter a desired destination via the
voice activation system. During the destination
input, you can switch between voice entry and
entry via iDrive at any ti me. To do so, reactivate
the voice activation system if necessary.
You can have the possible commands
read aloud via {Voice commands }.<
Entering an address
1. Press the button on the steering wheel.
3. Wait for the system to prompt you for a par-
ticular part of the address.
5. Say the name of the destination state/prov-
ince in the language of the voice activation
system.
Entering a town/city
The destination town/cit y can be spelled or
entered as a complete word
*.
The methods of entry depend on the nav-
igation data in use and the country and
language settings. <
Spelling the destination
To enter a destination, sp ell it in the way it is
commonly spelled in the destination country.
Pronounce the letters smoothly and at normal
volume, avoiding excessive emphases and
pauses. The system can suggest up to 20 destinations
that meet your entries. Up to 7 entries at a time
appear on the Control Display.
The town/city can also be
selected from the list
via iDrive: turn the controller until the destina-
tion is selected and press the controller.
Entering the destination as a
complete word
The names of towns/cities and streets located
in the region in which th e language of the voice
activation system is spoken can be entered as
an entire word.
Example: to enter a U.S. destination as an entire
word, the system language must be English.
Speak smoothly and at normal volume, and
avoid excessive emphases and pauses.
1. Wait for the system to ask for the town/city
of destination.
The system may suggest multiple destina-
tions that meet your entries.
Identical-sounding towns/cities that can-
not be distinguished by the system are
compiled in a separate list and shown as a des-
tination followed by three dots.
If necessary, select this entry with {Yes }. Then
select the desired tow n/city from that list.<
2.
{Enter address }
4. Say the particular part of the address,
e.g. {State }
1. Spell the town/city:
Say at least the first three letters of the
town/city. The more letters you say, the
more accurately th e system will recog-
nize the town/city.
The system suggests a location.
2. Select a location:
>Select a highlighted town/city: {Yes }
> Select another town/city: {No }
> Select an entry, e.g. {Entry 2 }
> Re-enter the town/city: {New entry }
2. Say the name of the destination
town/city.
The system suggests a location.
3. Select a location:
>Select a highlighted town/city: {Yes }
> Select another town/city: {No }
> Select an entry, e.g. {Entry 2 }
> Enter the town/city by spelling:
{Spell city }
Page 131 of 248
Navigation
Driving tips
129Reference
At a glance
Controls
Communications
Entertainment
Mobility
point out traffic obstructions along the original
route.
Depending on the type of road and the nature
and length of the traffic obstruction, the route
can also be calculated so that you travel
through the traffic obstruction.
1. "Navigation"
2. Open "Options".
3. "Dynamic guidance"
If the "Avoid highways", "Avoid toll roads"
or "Avoid ferries" route criteria are
selected, route calculation may take consider-
ably longer. <
Route
General information
Depending on the equipment in your vehicle,
different views of the route are available during
destination guidance.
>Map display
> Arrow display
> Displaying towns/cities and streets along
the route
Displaying a list of the streets or
towns/cities on the route
When destination guidance is started, a list of
the streets and towns/cities on the route is dis-
played. The driving distances and traffic bulle-
tins are displayed for each route section.
>Display a list of the streets and towns/cities
on the route.
> Display the traffic bulletins and the driving
distance for each route section.
1. "Navigation"
2. "Route information"
3. Highlight a section.
The section is displaye d in the preview map.
Bypassing a section of the route
During destination guidan ce, you can revise the
navigation system's ro ute recommendations to avoid particular stretches of road. Enter the
number of miles/kilomete
rs that you want to
travel before returning to the original route.
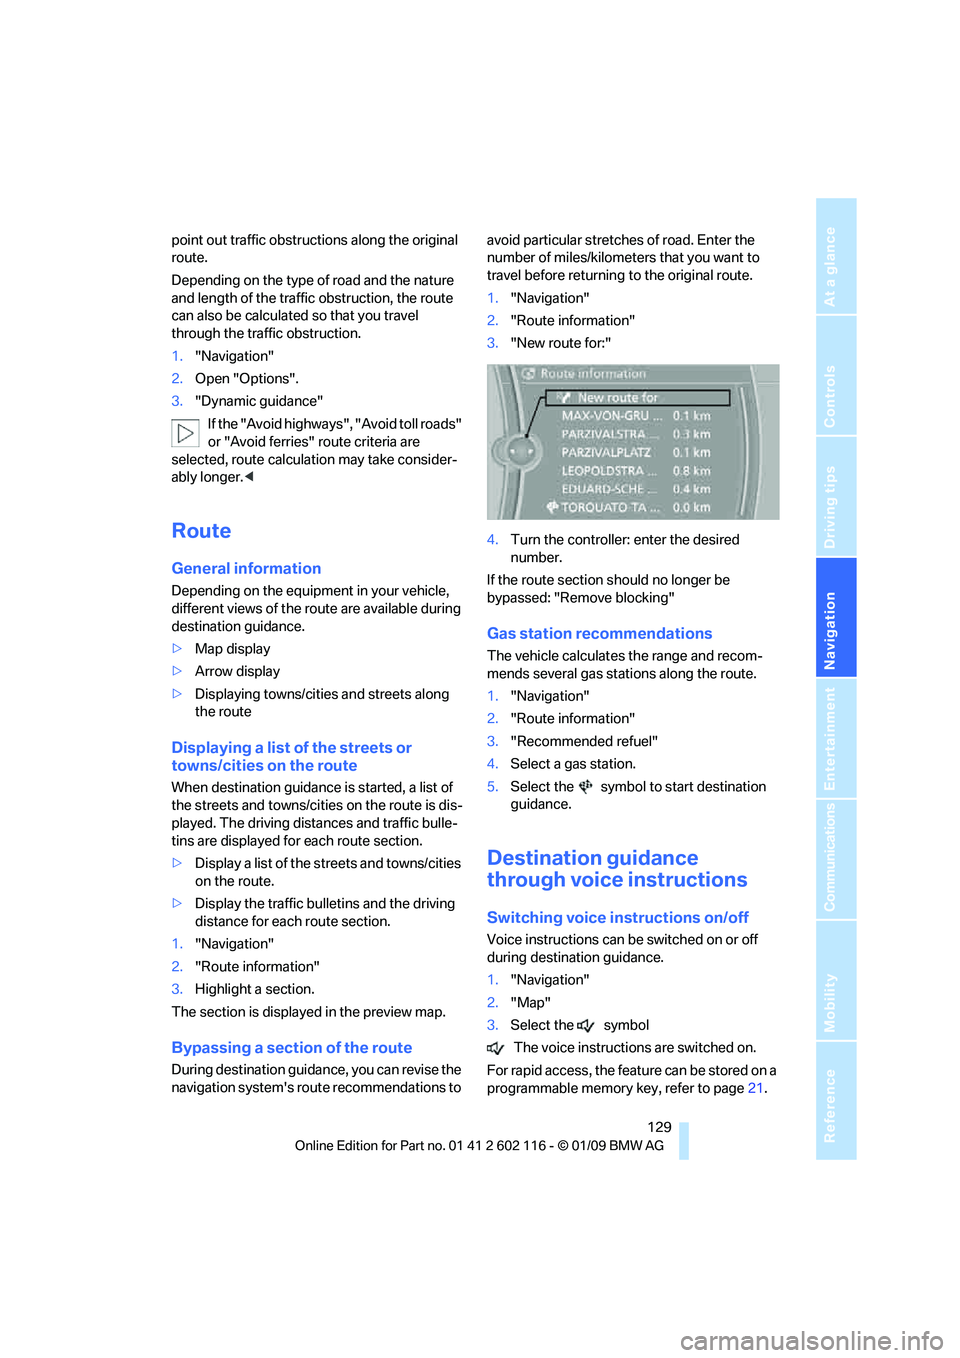
1. "Navigation"
2. "Route information"
3. "New route for:"
4. Turn the controller: enter the desired
number.
If the route section sh ould no longer be
bypassed: "Remove blocking"
Gas station recommendations
The vehicle calculates the range and recom-
mends several gas stations along the route.
1. "Navigation"
2. "Route information"
3. "Recommended refuel"
4. Select a gas station.
5. Select the symbol to start destination
guidance.
Destination guidance
through voice instructions
Switching voice in structions on/off
Voice instructions can be switched on or off
during destination guidance.
1."Navigation"
2. "Map"
3. Select the symbol
The voice instructions are switched on.
For rapid access, the feat ure can be stored on a
programmable memory key, refer to page21.
Page 132 of 248
Destination guidance
130
Repeating a voice instruction
1."Navigation"
2. "Map"
3. Select the symbol twice.
Adjusting volume for voice instructions
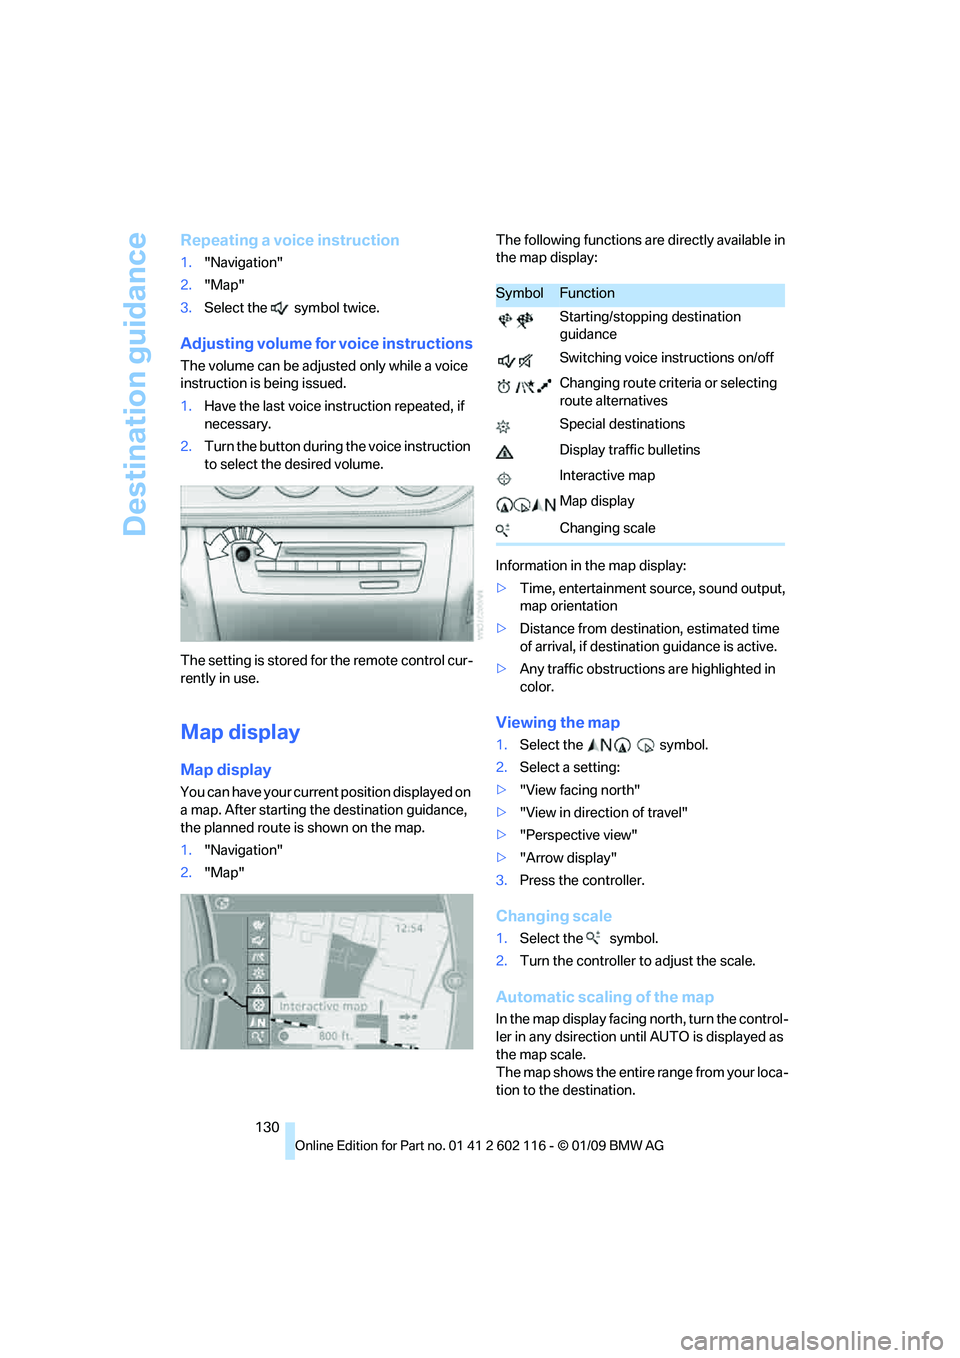
The volume can be adjust ed only while a voice
instruction is being issued.
1. Have the last voice in struction repeated, if
necessary.
2. Turn the button during the voice instruction
to select the desired volume.
The setting is stored fo r the remote control cur-
rently in use.
Map display
Map display
You can have your current position displayed on
a map. After starting th e destination guidance,
the planned route is shown on the map.
1. "Navigation"
2. "Map" The following functions ar
e directly available in
the map display:
Information in the map display:
> Time, entertainment so urce, sound output,
map orientation
> Distance from destination, estimated time
of arrival, if destination guidance is active.
> Any traffic obstructions are highlighted in
color.
Viewing the map
1.Select the symbol.
2. Select a setting:
> "View facing north"
> "View in direction of travel"
> "Perspective view"
> "Arrow display"
3. Press the controller.
Changing scale
1.Select the symbol.
2. Turn the controller to adjust the scale.
Automatic scaling of the map
In the map display facing north, turn the control-
ler in any dsirection until AUTO is displayed as
the map scale.
The map shows the entire range from your loca-
tion to the destination.
SymbolFunction
Starting/stopping destination
guidance
Switching voice instructions on/off
Changing route criteria or selecting
route alternatives
Special destinations
Display traffic bulletins
Interactive map
Map display
Changing scale
Page 147 of 248
Navigation
Entertainment
Driving tips
145Reference
At a glance
Controls
Communications
Mobility
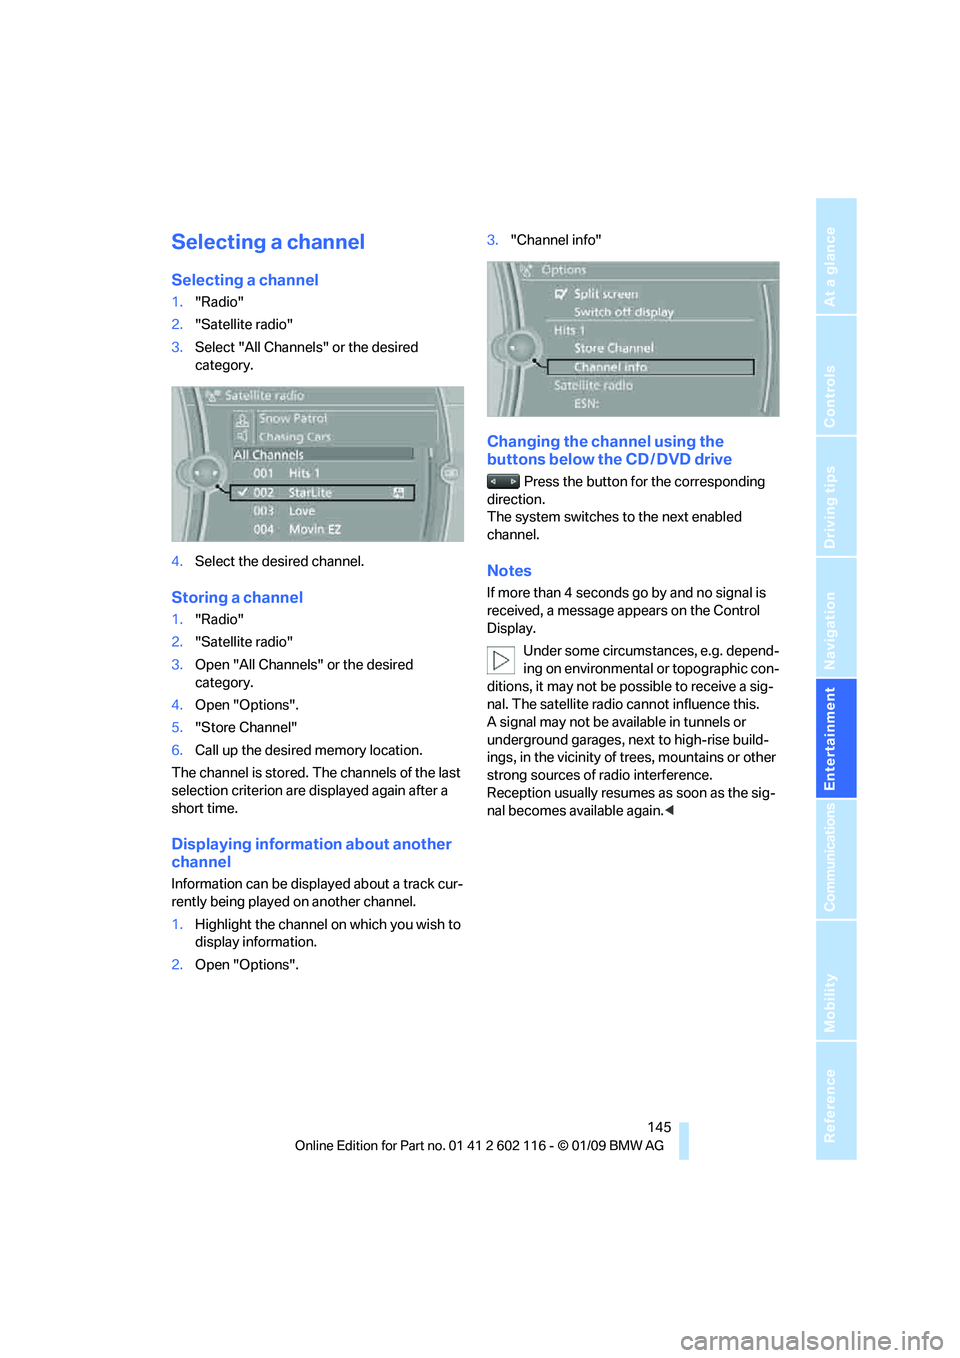
Selecting a channel
Selecting a channel
1."Radio"
2. "Satellite radio"
3. Select "All Channels" or the desired
category.
4. Select the desired channel.
Storing a channel
1."Radio"
2. "Satellite radio"
3. Open "All Channels" or the desired
category.
4. Open "Options".
5. "Store Channel"
6. Call up the desired memory location.
The channel is stored. The channels of the last
selection criterion are displayed again after a
short time.
Displaying information about another
channel
Information can be displayed about a track cur-
rently being played on another channel.
1. Highlight the channel on which you wish to
display information.
2. Open "Options". 3.
"Channel info"
Changing the channel using the
buttons below the CD / DVD drive
Press the button for the corresponding
direction.
The system switches to the next enabled
channel.
Notes
If more than 4 seconds go by and no signal is
received, a message appears on the Control
Display.
Under some circumstances, e.g. depend-
ing on environmental or topographic con-
ditions, it may not be possible to receive a sig-
nal. The satellite radio cannot influence this.
A signal may not be av ailable in tunnels or
underground garages, ne xt to high-rise build-
ings, in the vicinity of trees, mountains or other
strong sources of radio interference.
Reception usually resumes as soon as the sig-
nal becomes available again. <
Page 148 of 248
CD/DVD player and CD/DVD changer
146
CD/DVD player and CD/DVD changer
CD/DVD playback
Inserting a CD/DVD
Insert the CD/DVD into the drive with the
printed side up. The CD/D VD is drawn in auto-
matically.
Playback starts automatically if the sound out-
put is on. When playing CDs/DVDs with com-
pressed audio files, it may take several minutes
to read in the data, de pending on the directory
structure.
Playable formats
> DVD: DVD-ROM, DVD-R, DVD+R, DVD-
RW, DVD+RW, DVD-R DL, DVD+R DL,
DVD audio (video part only), DVD video
> CD: CD-ROM, CD-R, CD-RW, CD-DA,
VCD, SVCD
> Compressed audio files: MP3, WMA, AAC
Start playback
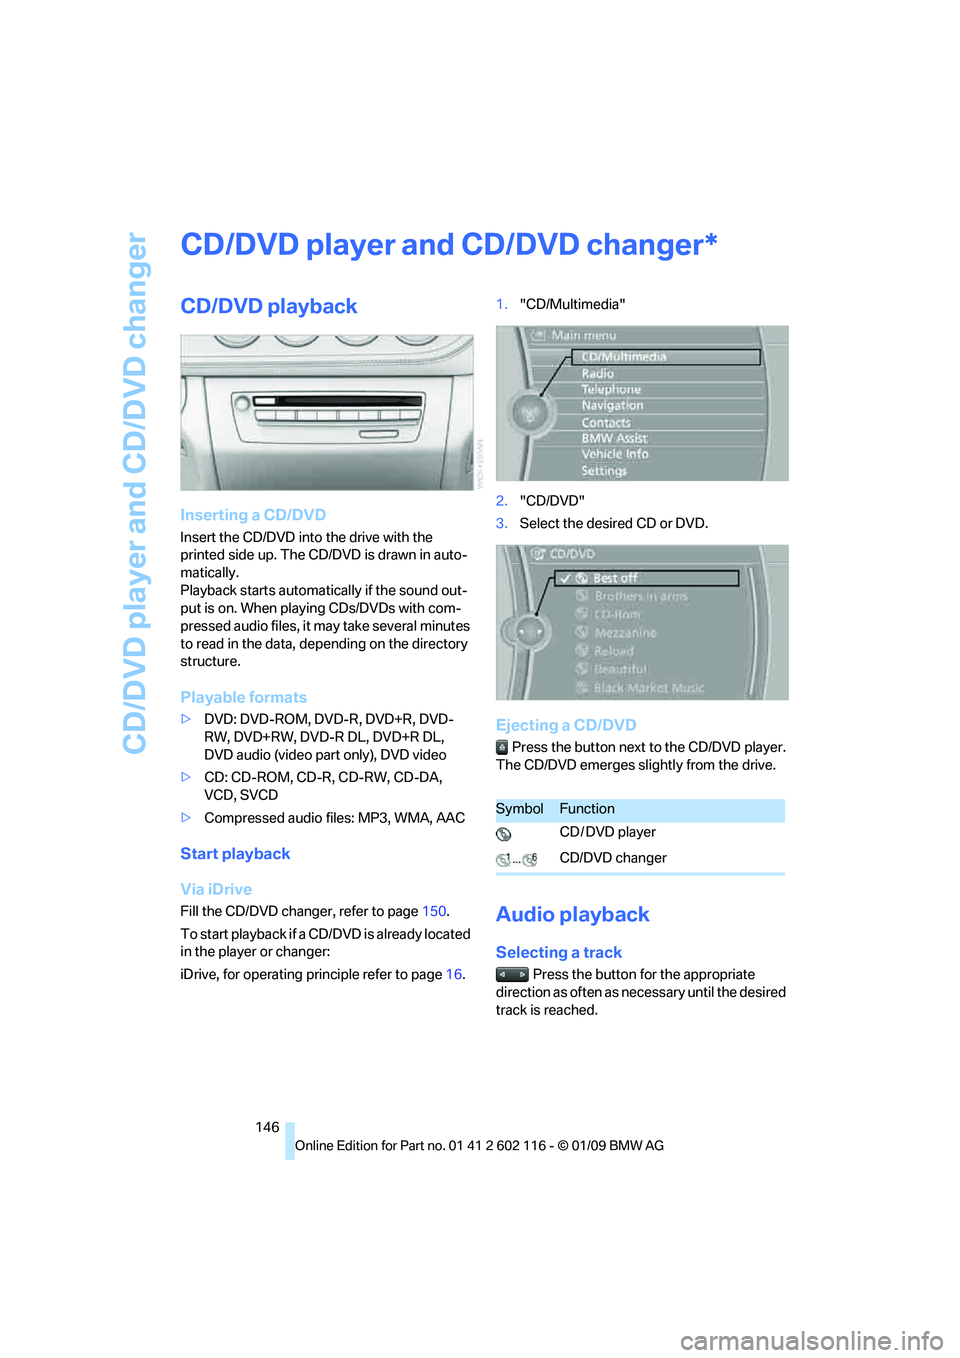
Via iDrive
Fill the CD/DVD chan ger, refer to page150.
To start playback if a CD/DVD is already located
in the player or changer:
iDrive, for operating pr inciple refer to page16. 1.
"CD/Multimedia"
2. "CD/DVD"
3. Select the desired CD or DVD.
Ejecting a CD/DVD
Press the button next to the CD/DVD player.
The CD/DVD emerges slightly from the drive.
Audio playback
Selecting a track
Press the button for the appropriate
direction as often as necessary until the desired
track is reached.
*
SymbolFunction
CD / DVD player
CD/DVD changer
Page 153 of 248
Navigation
Entertainment
Driving tips
151Reference
At a glance
Controls
Communications
Mobility
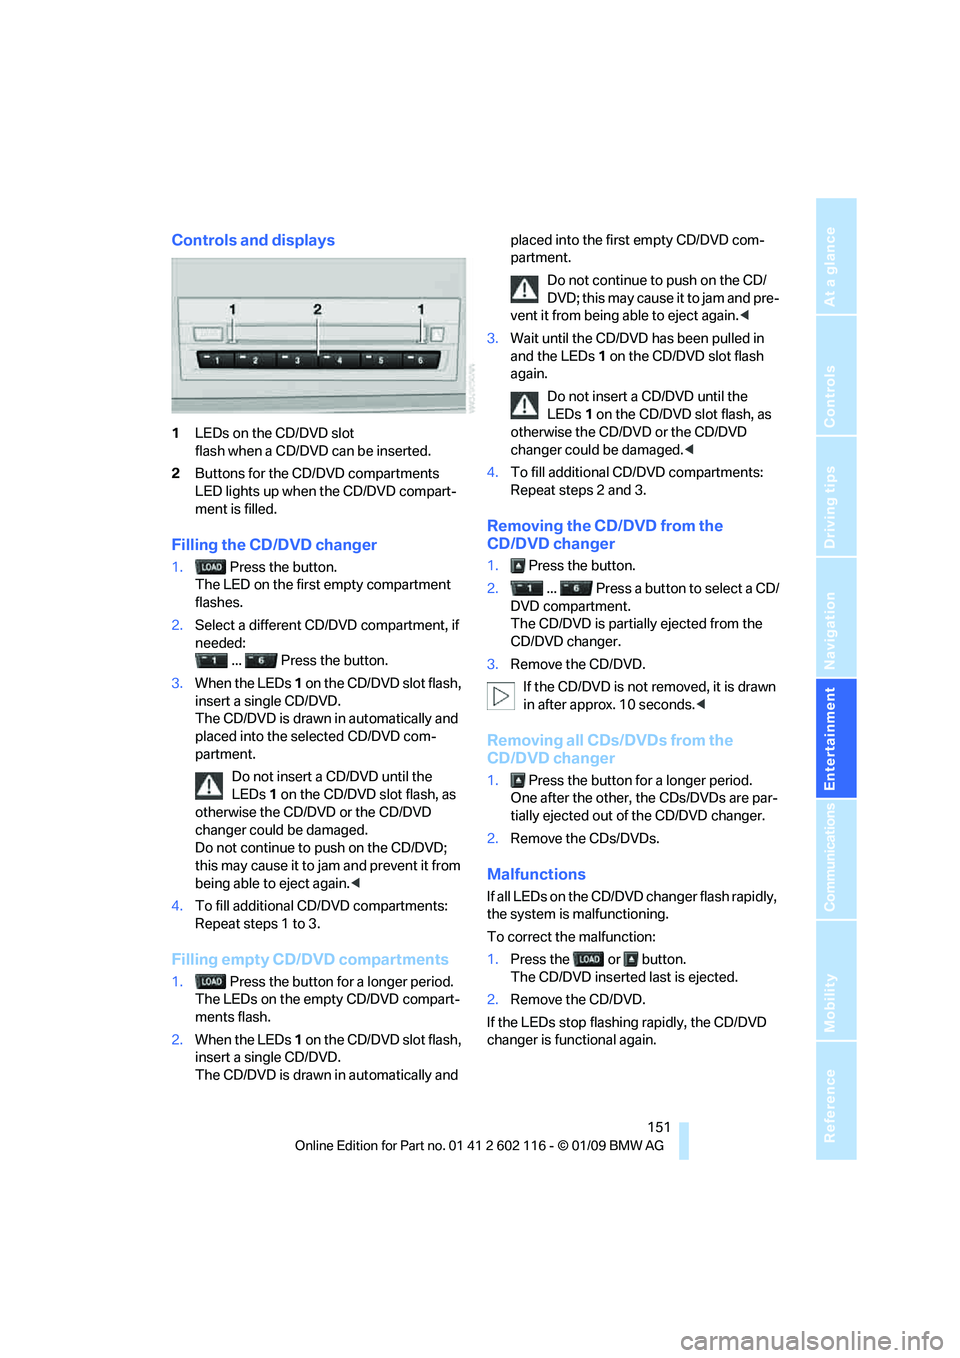
Controls and displays
1LEDs on the CD/DVD slot
flash when a CD/DVD can be inserted.
2 Buttons for the CD/DVD compartments
LED lights up when the CD/DVD compart-
ment is filled.
Filling the CD/DVD changer
1. Press the button.
The LED on the first empty compartment
flashes.
2. Select a different CD/DVD compartment, if
needed:
... Press the button.
3. When the LEDs 1 on the CD/DVD slot flash,
insert a single CD/DVD.
The CD/DVD is drawn in automatically and
placed into the selected CD/DVD com-
partment.
Do not insert a CD/DVD until the
LEDs 1 on the CD/DVD slot flash, as
otherwise the CD/DVD or the CD/DVD
changer could be damaged.
Do not continue to push on the CD/DVD;
this may cause it to jam and prevent it from
being able to eject again. <
4. To fill additional CD/DVD compartments:
Repeat steps 1 to 3.
Filling empty CD/DVD compartments
1. Press the button for a longer period.
The LEDs on the empty CD/DVD compart-
ments flash.
2. When the LEDs 1 on the CD/DVD slot flash,
insert a single CD/DVD.
The CD/DVD is drawn in automatically and placed into the first empty CD/DVD com-
partment.
Do not continue to push on the CD/
DVD; this may cause it to jam and pre-
vent it from being able to eject again. <
3. Wait until the CD/DVD has been pulled in
and the LEDs 1 on the CD/DVD slot flash
again.
Do not insert a CD/DVD until the
LEDs 1 on the CD/DVD slot flash, as
otherwise the CD/DVD or the CD/DVD
changer could be damaged.<
4. To fill additional CD/DVD compartments:
Repeat steps 2 and 3.
Removing the CD/DVD from the
CD/DVD changer
1. Press the button.
2. ... Press a button to select a CD/
DVD compartment.
The CD/DVD is partia lly ejected from the
CD/DVD changer.
3. Remove the CD/DVD.
If the CD/DVD is not removed, it is drawn
in after approx. 10 seconds. <
Removing all CDs/DVDs from the
CD/DVD changer
1. Press the button for a longer period.
One after the other, the CDs/DVDs are par-
tially ejected out of the CD/DVD changer.
2. Remove the CDs/DVDs.
Malfunctions
If all LEDs on the CD/DVD changer flash rapidly,
the system is malfunctioning.
To correct the malfunction:
1.Press the or button.
The CD/DVD inserted last is ejected.
2. Remove the CD/DVD.
If the LEDs stop flashing rapidly, the CD/DVD
changer is functional again.