2009 BMW Z4 SDRIVE30I light
[x] Cancel search: lightPage 154 of 248
CD/DVD player and CD/DVD changer
152
Notes
BMW CD/DVD players and changers are
officially designated Class 1 laser prod-
ucts. Do not operate if the cover is damaged,
otherwise severe eye damage can result.
Do not use self-recorded CDs/DVDs with labels
applied as these can become detached during
playback due to heat build-up and can cause
irreparable damage to the device.
Only use round CDs/DVDs with a standard
diameter of 4.7 in/12 cm and do not play CDs/
DVDs with an adapter, e.g. Single-CDs, other-
wise the CDs or the adapter can jam and will no
longer eject.
Do not use a combined CD/DVD, e.g. DVD
Plus,
otherwise the CD/DVD can jam and will no
longer eject. <
General malfunctions
BMW CD/DVD changers and players have been
optimized for performance in vehicles. In some
instances they may be mo re sensitive to faulty
CDs/DVDs than stationary devices would be.
If a CD/DVD cannot be pl ayed, first check if it
has been inserted correctly.
Humidity
High levels of humidity can lead to condensa-
tion on the CD/DVD or the laser's scan lens and
temporarily prevent playback.
Malfunctions with individual CDs/DVDs
If malfunctions only occur with individual CDs/
DVDs, one of the following factors may be the
cause.
Self-recorded CDs/DVDs
Possible reasons for malfunctions with self-
recorded CDs/DVDs are, e.g. inconsistent data-
creation or recording processes, or poor quality
or high age of the CD/DVD blank.
Only label CDs/DVDs on the top, with a pen
designed for this purpose.
Damage
Avoid leaving fingerprints, as well as dust,
scratches or moisture on the CDs/DVDs.
Keep CDs/DVDs in protective sleeves or cases.
Do not subject CDs/DVDs to temperatures over
506 , high levels of humidity or direct sunlight.
CDs/DVDs with copy protection
CDs/DVDs are often co py-protected by the
manufacturer. This can mean that some CDs/
DVDs cannot be played or can only be played to
a limited extent.
MACROVISION
This product contains copyrighted technology
that is based on multiple registered US patents
and the intellectual proper ty of the Macrovision
Corporation and other manufacturers. The use
of this copy protection must be approved by
Macrovision. Media protected by this product -
unless otherwise agreed with Macrovision -
may only be used for private purposes. Copying
of this technology is prohibited.
Page 158 of 248
Music collection
156
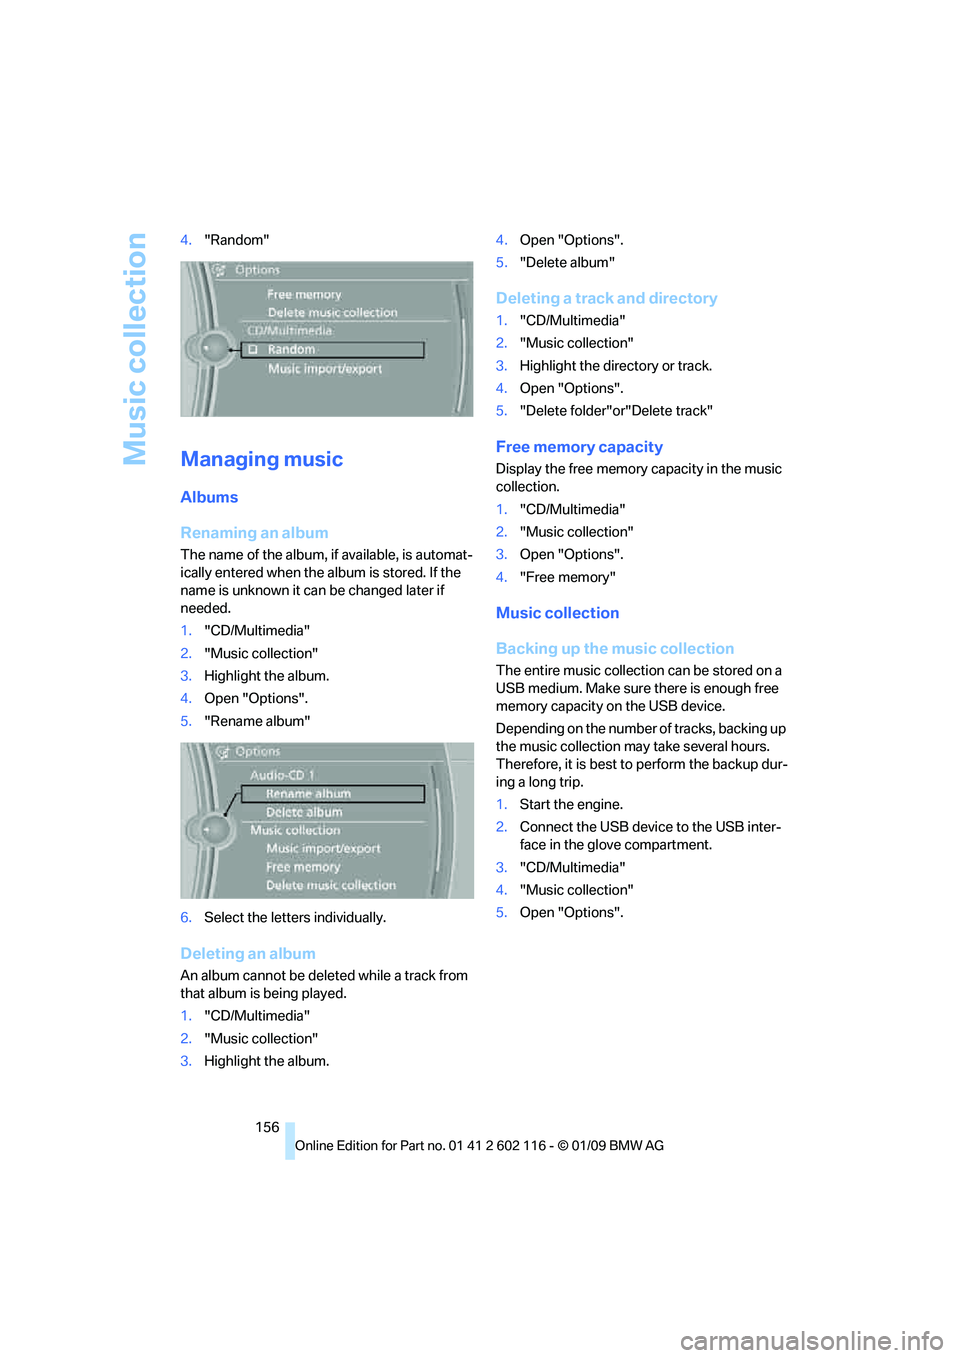
4.
"Random"
Managing music
Albums
Renaming an album
The name of the album, if available, is automat-
ically entered when the album is stored. If the
name is unknown it can be changed later if
needed.
1."CD/Multimedia"
2. "Music collection"
3. Highlight the album.
4. Open "Options".
5. "Rename album"
6. Select the letters individually.
Deleting an album
An album cannot be dele ted while a track from
that album is being played.
1. "CD/Multimedia"
2. "Music collection"
3. Highlight the album. 4.
Open "Options".
5. "Delete album"
Deleting a track and directory
1."CD/Multimedia"
2. "Music collection"
3. Highlight the directory or track.
4. Open "Options".
5. "Delete folder"or"Delete track"
Free memory capacity
Display the free memory capacity in the music
collection.
1. "CD/Multimedia"
2. "Music collection"
3. Open "Options".
4. "Free memory"
Music collection
Backing up the music collection
The entire music collection can be stored on a
USB medium. Make sure there is enough free
memory capacity on the USB device.
Depending on the number of tracks, backing up
the music collection may take several hours.
Therefore, it is best to perform the backup dur-
ing a long trip.
1.Start the engine.
2. Connect the USB device to the USB inter-
face in the glove compartment.
3. "CD/Multimedia"
4. "Music collection"
5. Open "Options".
Page 168 of 248
Telephone
166
If the pairing was succe
ssful, the mobile phone
appears at the top of the list of mobile phones.
As soon as a mobile phone is detected by the
vehicle, the phone book entries stored on the
SIM card or on your mobile phone are transmit-
ted to the vehicle. This data transfer depends
on your mobile phone an d can take several min-
utes; please refer to your mobile phone's oper-
ating instructions, if necessary.
If not all phone book entries are displayed:
> Transfer all phone book entries from the
SIM card to the mobile phone, if necessary.
> Phone book entries with special characters
may not be displayed.
Checks to perform if pairing is
unsuccessful
>Is the mobile phone supported by the
mobile phone preparation package? You
can obtain information on the Internet at:
www.bmw.com/bluetooth.
> Do the Bluetooth passkeys on the mobile
phone and vehicle match? The same Blue-
tooth passkey must be entered on the
mobile phone's disp lay and via iDrive.
> Did it take you more than 30 seconds to
enter the Bluetooth passkey? Repeat the
pairing procedure.
> Only a limited number of devices can be
connected with the mob ile phone. If neces-
sary, delete connections with other devices.
> Is the mobile phone no longer responding?
Switch the mobile phone off and on or
briefly disconnect the power supply.
Connecting a particular mobile phone
If more than one mobile phone is detected by
the vehicle, the mobile phone at the top of the
list is connected. A different mobile phone can
be connected by selecting it.
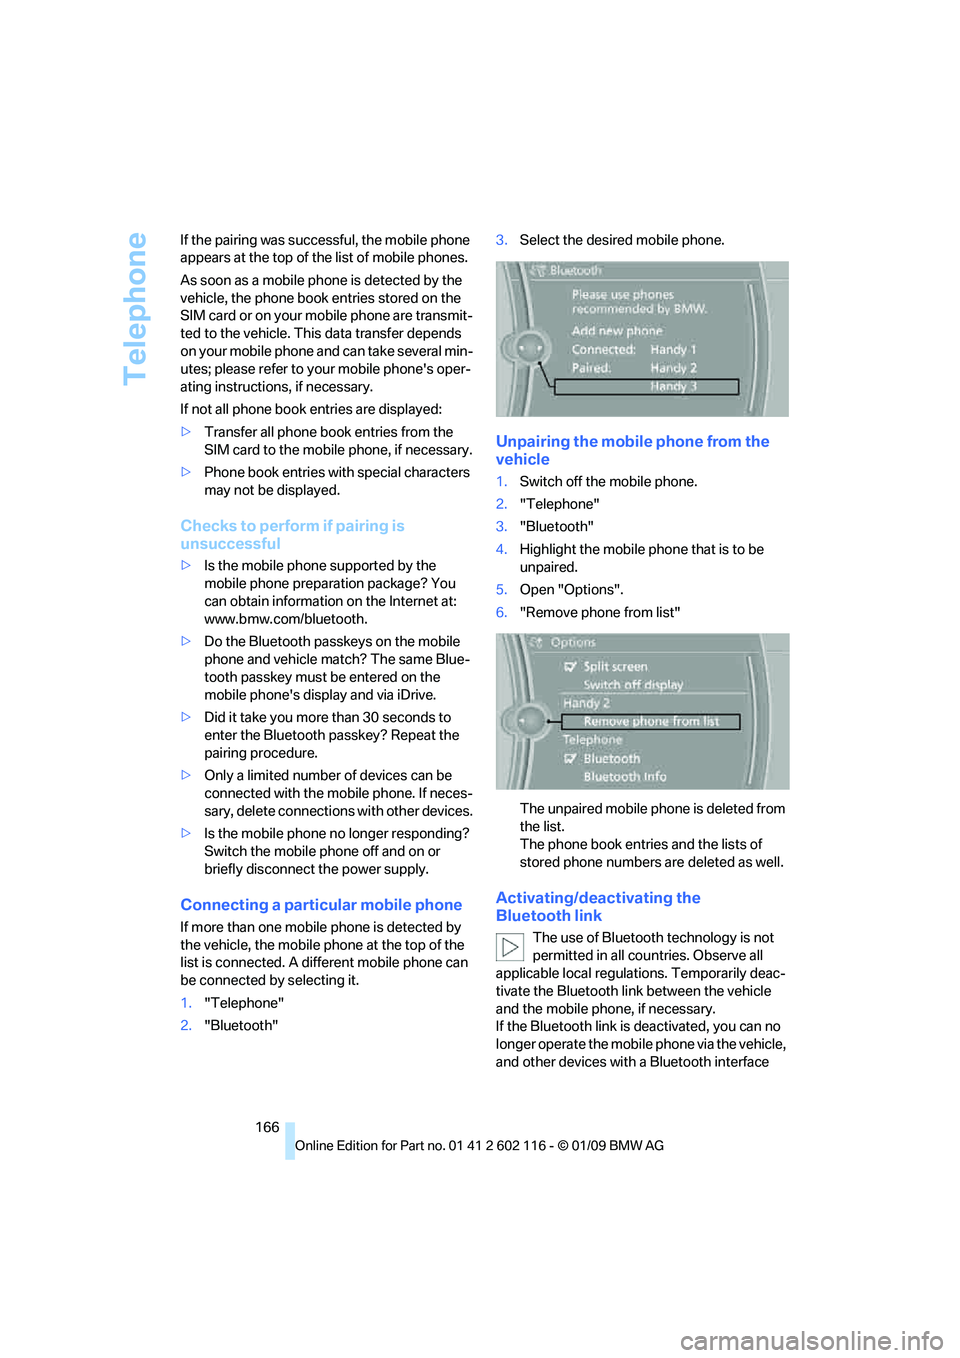
1."Telephone"
2. "Bluetooth" 3.
Select the desired mobile phone.
Unpairing the mobile phone from the
vehicle
1.Switch off the mobile phone.
2. "Telephone"
3. "Bluetooth"
4. Highlight the mobile phone that is to be
unpaired.
5. Open "Options".
6. "Remove phone from list"
The unpaired mobile ph one is deleted from
the list.
The phone book entries and the lists of
stored phone numbers are deleted as well.
Activating/deactivating the
Bluetooth link
The use of Bluetooth technology is not
permitted in all coun tries. Observe all
applicable local regulati ons. Temporarily deac-
tivate the Bluetooth lin k between the vehicle
and the mobile phon e, if necessary.
If the Bluetooth link is deactivated, you can no
longer operate the mobile phone via the vehicle,
and other devices with a Bluetooth interface
Page 171 of 248
169
Entertainment
Reference
At a glance
Controls
Driving tips
Communications
Navigation
Mobility
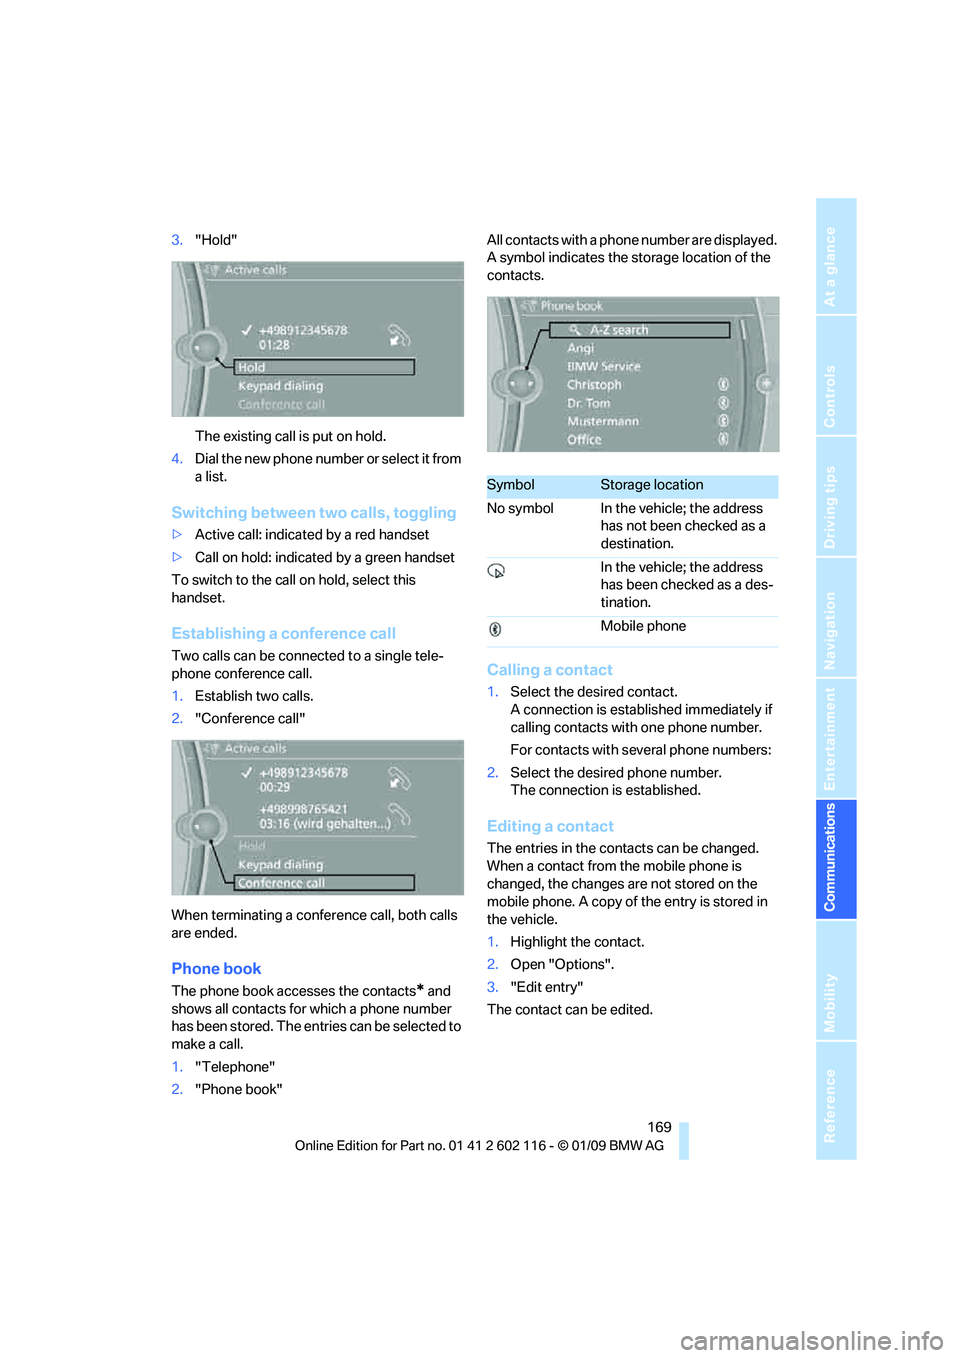
3. "Hold"
The existing call is put on hold.
4. D ial the new phone number or se lect it fro m
a list.
Switching between two calls, toggling
>Active call: indicated by a red handset
> Call on hold: indicate d by a green handset
To switch to the call on hold, select this
handset.
Establishing a conference call
Two calls can be connected to a single tele-
phone conference call.
1. Establish two calls.
2. "Conference call"
When terminating a conference call, both calls
are ended.
Phone book
The phone book accesses the contacts* and
shows all contacts for which a phone number
has been stored. The entries can be selected to
make a call.
1. "Telephone"
2. "Phone book" All contacts with a phone number are displayed.
A symbol indicates the storage location of the
contacts.
Calling a contact
1.
Select the desired contact.
A connection is established immediately if
calling contacts with one phone number.
For contacts with several phone numbers:
2. Select the desired phone number.
The connection is established.
Editing a contact
The entries in the cont acts can be changed.
When a contact from the mobile phone is
changed, the changes are not stored on the
mobile phone. A copy of the entry is stored in
the vehicle.
1. Highlight the contact.
2. Open "Options".
3. "Edit entry"
The contact can be edited.
SymbolStorage location
No symbol In the vehicle; the address has not been checked as a
destination.
In the vehicle; the address
has been checked as a des-
tination.
Mobile phone
Page 172 of 248
Telephone
170
Redialing
The eight phone numbers dialed last are stored.
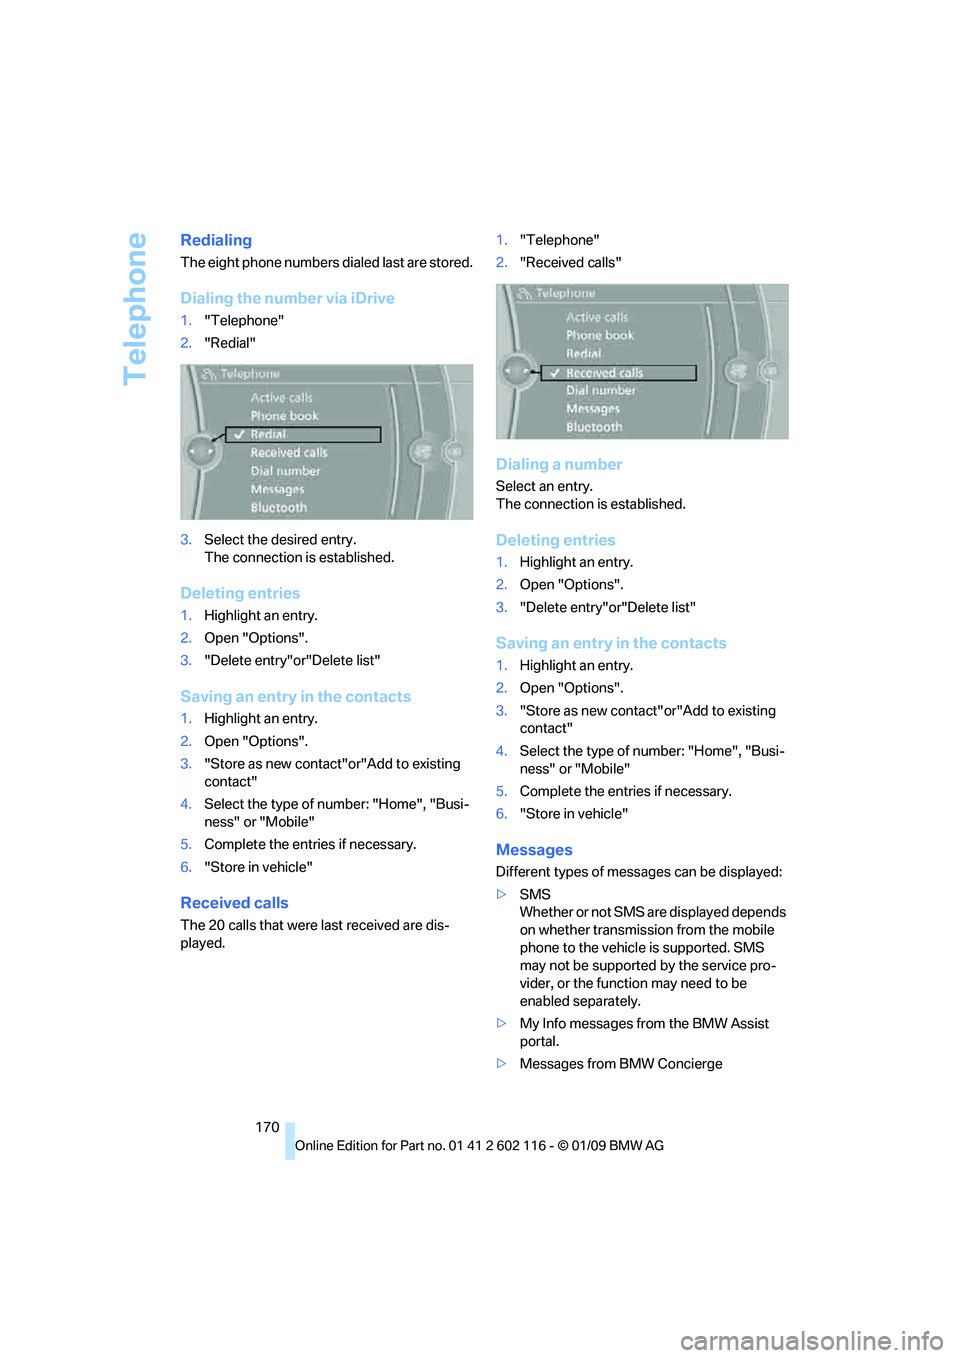
Dialing the number via iDrive
1."Telephone"
2. "Redial"
3. Select the desired entry.
The connection is established.
Deleting entries
1.Highlight an entry.
2. Open "Options".
3. "Delete entry"or"Delete list"
Saving an entry in the contacts
1.Highlight an entry.
2. Open "Options".
3. "Store as new contact"or"Add to existing
contact"
4. Select the type of number: "Home", "Busi-
ness" or "Mobile"
5. Complete the entries if necessary.
6. "Store in vehicle"
Received calls
The 20 calls that were last received are dis-
played. 1.
"Telephone"
2. "Received calls"
Dialing a number
Select an entry.
The connection is established.
Deleting entries
1.Highlight an entry.
2. Open "Options".
3. "Delete entry"or"Delete list"
Saving an entry in the contacts
1.Highlight an entry.
2. Open "Options".
3. "Store as new contact" or"Add to existing
contact"
4. Select the type of number: "Home", "Busi-
ness" or "Mobile"
5. Complete the entries if necessary.
6. "Store in vehicle"
Messages
Different types of messa ges can be displayed:
> SMS
Whether or not SMS are displayed depends
on whether transmission from the mobile
phone to the vehicle is supported. SMS
may not be supported by the service pro-
vider, or the function may need to be
enabled separately.
> My Info messages from the BMW Assist
portal.
> Messages from BMW Concierge
Page 179 of 248
177
Entertainment
Reference
At a glance
Controls
Driving tips
Communications
Navigation
Mobility
search is offered. A sy mbol indicates the stor-
age location of the contacts:
Displaying the detailed view
Select the desired contact.
All fields that have been filled in for that contact
are displayed.
Selecting a contact as the navigation
destination
1. "My contacts"
2. Select the desired contact.
3. Select the desired address.
Contacts from the mobile phone may contain
addresses that do not match the navigation
data contained in the vehicle and thus cannot
be used for destination guidance. In this case:
Manually correct the address.
Checking the address as a destination
An address that is to be used for destination
guidance must match the navigation data con-
tained in the vehicle. An address that is stored
on the mobile phone ca n be matched to the
navigation data.
1. Select the desired contact.
2. Open "Options". 3.
"Check as destination"
4. Correct and store the a ddress, if necessary.
After an address has been corrected, the con-
tact can be stored in the vehicle. The address is
not changed on the mobile phone.
Dialing phone numbers
1. "My contacts"
2. Select the desired contact.
3. Select the desired phone number.
The connection is established.
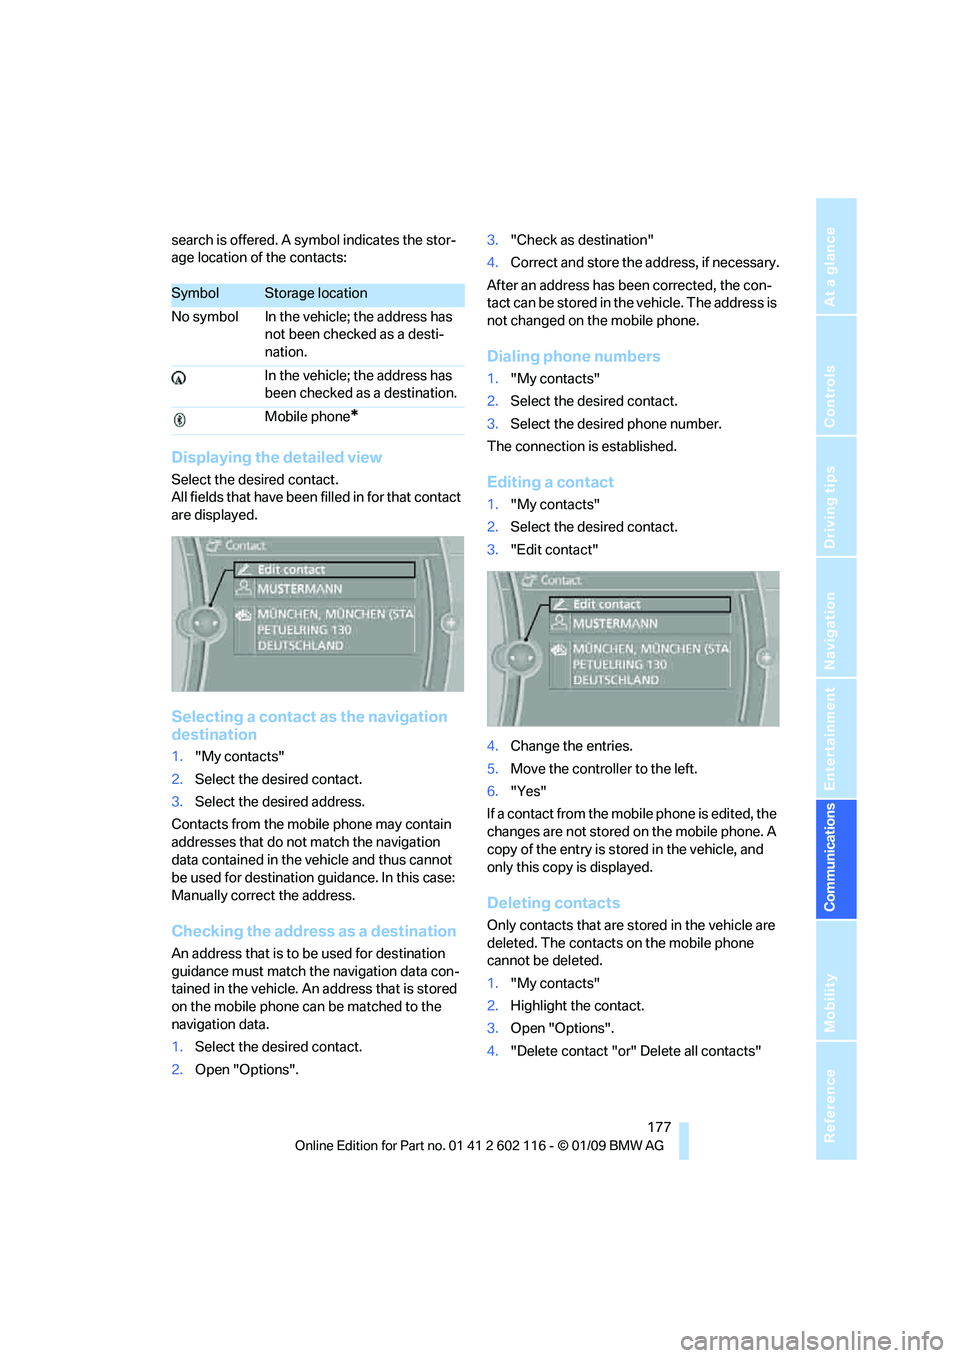
Editing a contact
1. "My contacts"
2. Select the desired contact.
3. "Edit contact"
4. Change the entries.
5. Move the controlle r to the left.
6. "Yes"
If a contact from the mobile phone is edited, the
changes are not stored on the mobile phone. A
copy of the entry is stor ed in the vehicle, and
only this copy is displayed.
Deleting contacts
Only contacts that are stored in the vehicle are
deleted. The contacts on the mobile phone
cannot be deleted.
1. "My contacts"
2. Highlight the contact.
3. Open "Options".
4. "Delete contact "or" Delete all contacts"
SymbolStorage location
No symbol In the vehicle; the address has not been checked as a desti-
nation.
In the vehicle; the address has
been checked as a destination.
Mobile phone
*
Page 183 of 248
181
Entertainment
Reference
At a glance
Controls
Driving tips
Communications
Navigation
Mobility
Using BMW Search
To select and display content:
> Turn the controller to highlight an element.
> Press the controller to display an element.
Opening the start page
1.Open "Options".
2. "Home"
Loading a new page
1.Open "Options".
2. "Update"
Canceling
1.Open "Options".
2. "Cancel loading"
Logging in
To display e-mails, contacts from BMW Search
or other personal data, you need to log in.
1."BMW Assist"
2. "BMW Search"
3. Open "Options".
4. "User identification" 5.
"User name:"
6. Enter the user name and select "OK".
7. "Password"
8. Enter the password and select "OK".
9. "OK"
Logging in automatically
When BMW Search is opened, you are logged
in automatically.
"Logon automatically"
Logging off
1."BMW Assist"
2. "BMW Search"
3. Open "Options".
4. "User logoff"
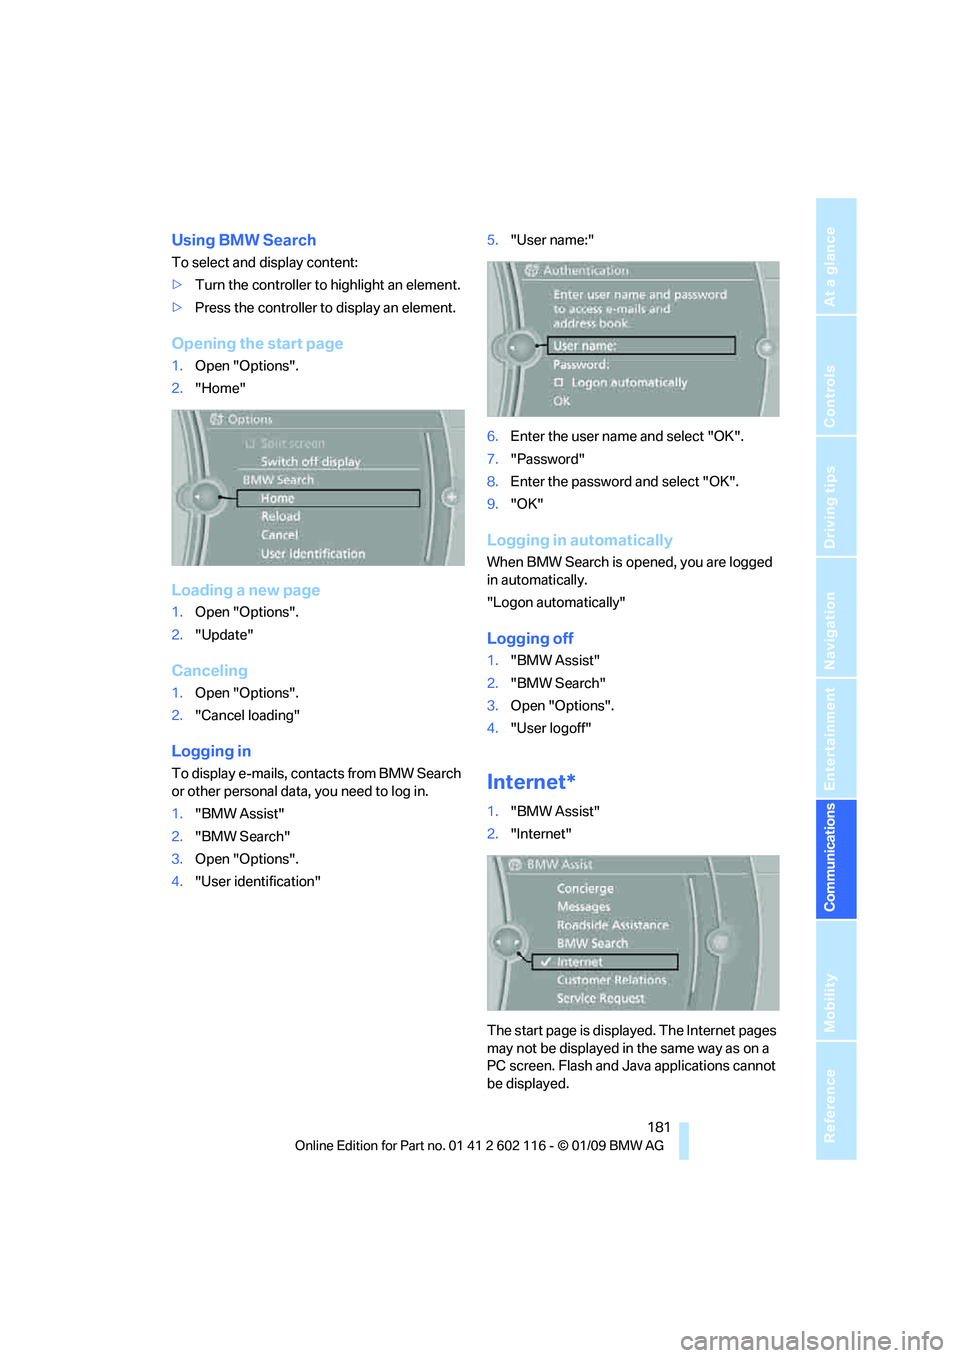
Internet*
1."BMW Assist"
2. "Internet"
The start page is displayed. The Internet pages
may not be displayed in the same way as on a
PC screen. Flash and Java applications cannot
be displayed.
Page 190 of 248
Refueling
188
Refueling
Always switch off the engine before refu-
eling, otherwise, fuel cannot be added to
the tank and a messag e will be displayed.<
Take all precautionary measures and
observe all applicable regulations when
handling fuel. Do not carry any spare fuel con-
tainers in your vehicle. They can develop a leak
and cause an explosion or cause a fire in the
event of an accident. <
Fuel filler door
Opening
1.Open fuel filler door. To do so, lightly press
the rear edge.
2. Turn the gas cap counterclockwise.
3. Place the gas cap in th e bracket attached to
the fuel filler door.
Closing
Fit the cap and turn it cl ockwise until you clearly
hear a click.
Do not pinch the band attached to the
cap, otherwise the cap cannot be closed
properly and fuel vapors can escape. A mes-
sage will be displayed if the gas cap is loose or
missing. <
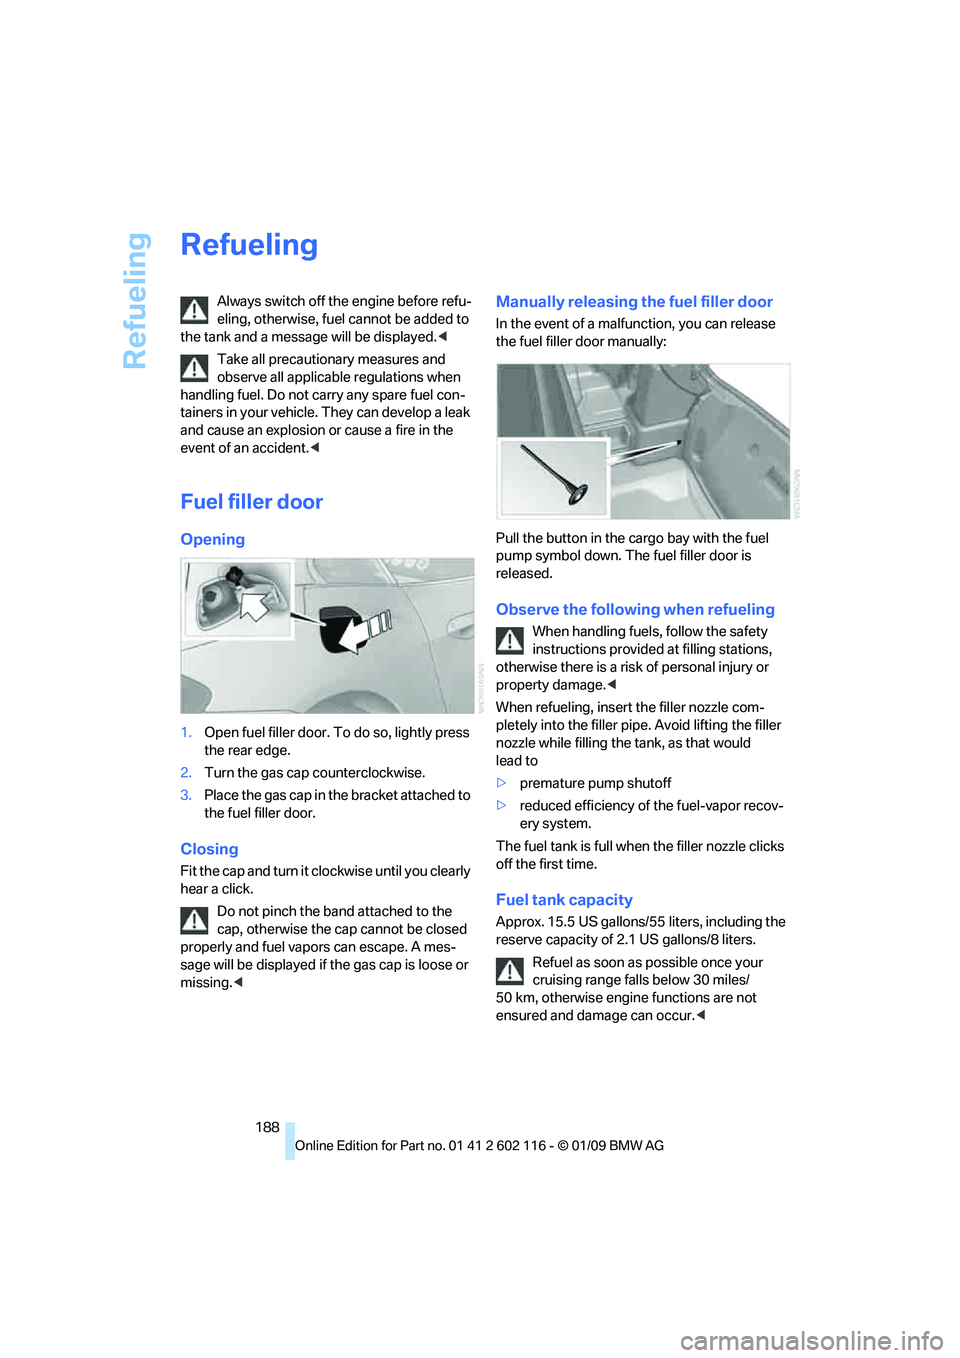
Manually releasing the fuel filler door
In the event of a malfunction, you can release
the fuel filler door manually:
Pull the button in the cargo bay with the fuel
pump symbol down. The fuel filler door is
released.
Observe the following when refueling
When handling fuels, follow the safety
instructions provided at filling stations,
otherwise there is a risk of personal injury or
property damage. <
When refueling, insert the filler nozzle com-
pletely into the filler pipe. Avoid lifting the filler
nozzle while filling the tank, as that would
lead to
> premature pump shutoff
> reduced efficiency of the fuel-vapor recov-
ery system.
The fuel tank is full when the filler nozzle clicks
off the first time.
Fuel tank capacity
Approx. 15.5 US gallons/5 5 liters, including the
reserve capacity of 2.1 US gallons/8 liters.
Refuel as soon as possible once your
cruising range falls below 30 miles/
50 km, otherwise engine functions are not
ensured and damage can occur. <