2009 BMW Z4 SDRIVE30I tow
[x] Cancel search: towPage 61 of 248
Controls
59Reference
At a glance
Driving tips
Communications
Navigation
Entertainment
Mobility
5.Turn the Allen wrench as far as it will go,
arrow 2. The transmission lock is released.
Do not turn the Allen wrench in the
opposite direction as this may dam-
age the mechanism.<
6. Draw the Allen wrench out of the opening.
After parking the vehicle, lock the trans-
mission lock again. Otherwise, there is a
danger of the vehicle rolling. <
Locking
1.Press the button, see arrow.
The transmission lock is locked again.
2. Clip the sleeve of the selector lever back in
place.
3. Set the parking brake.
Jump-starting and towing, refer to page 214.
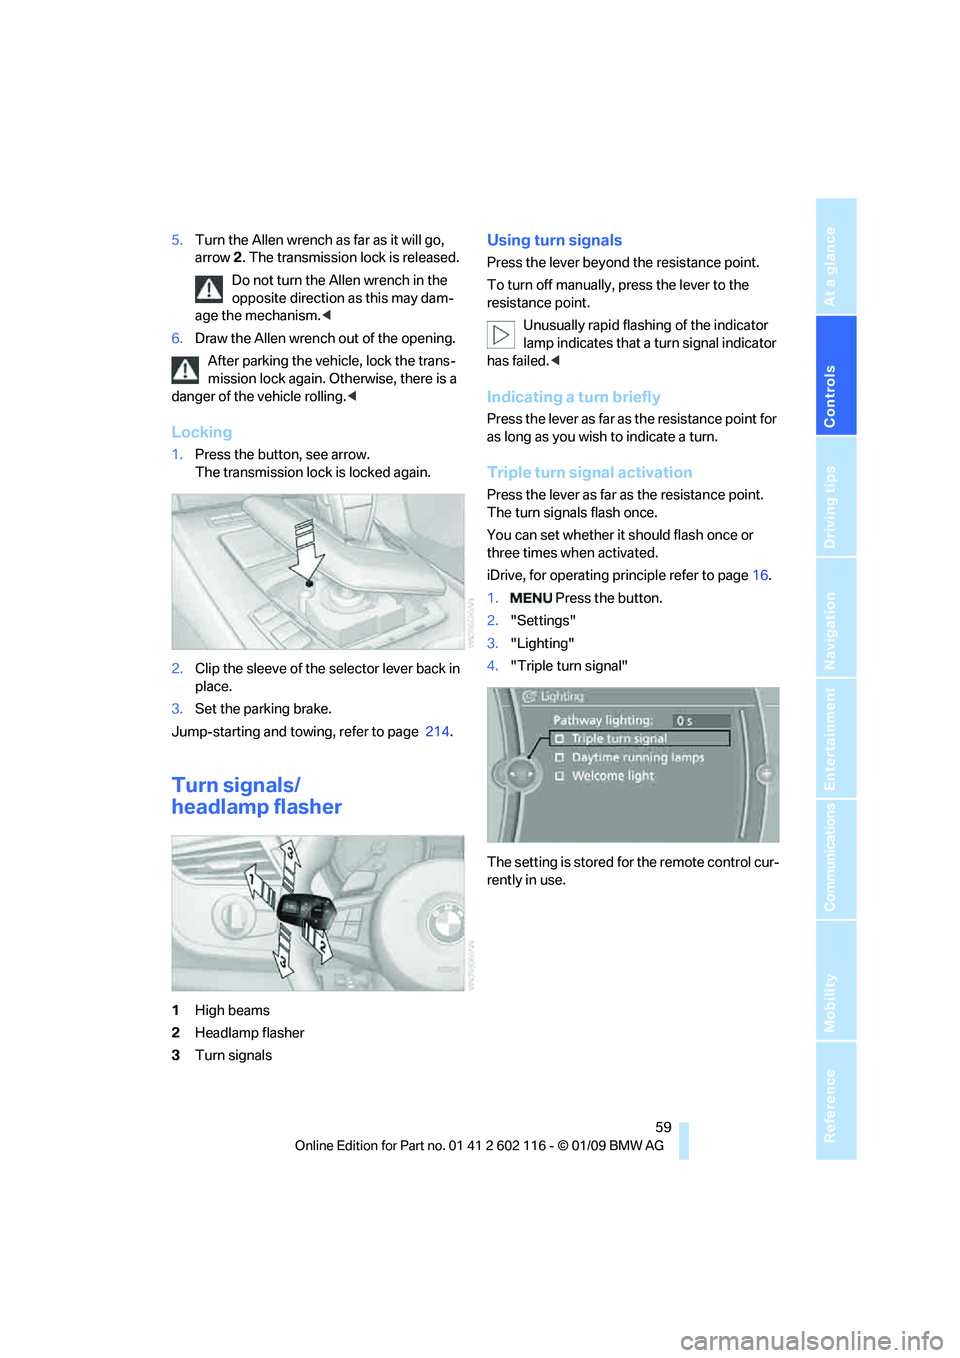
Turn signals/
headlamp flasher
1High beams
2 Headlamp flasher
3 Turn signals
Using turn signals
Press the lever beyond the resistance point.
To turn off manually, press the lever to the
resistance point.
Unusually rapid flashi ng of the indicator
lamp indicates that a turn signal indicator
has failed. <
Indicating a turn briefly
Press the lever as far as the resistance point for
as long as you wish to indicate a turn.
Triple turn signal activation
Press the lever as far as the resistance point.
The turn signals flash once.
You can set whether it should flash once or
three times when activated.
iDrive, for operating pr inciple refer to page16.
1. Press the button.
2. "Settings"
3. "Lighting"
4. "Triple turn signal"
The setting is stored for the remote control cur-
rently in use.
Page 79 of 248
Controls
77Reference
At a glance
Driving tips
Communications
Navigation
Entertainment
Mobility
Technology for driving comfort and safety
Park Distance Control PDC*
The concept
The PDC assists you with maneuvering in tight
parking spaces. Acoustic signals and a visual
indicator
warn you of the presence of an object
in front of
* or behind your ve hicle. To measure
the distance, there are four ultrasonic sensors
in either bumper.
These sensors have a range of approx. 6.5 ft/
2 m. However, an acoustic warning does not
sound until an object is approx. 24 in/60 cm
from the corner sensors, or approx. 5 ft/1.50 m
from the center sensors.
PDC is a parking aid that can indicate
objects when they are approached
slowly, as is usually th e case when parking.
Avoid approaching an obje ct a t h i g h s p e e d , o t h -
erwise physical circumstances may lead to the
system warning being issued too late. <
Switching on automatically
With the engine running or the ignition switched
on, the system is activated after approx. 1 sec-
ond when you engage reverse gear or move the
automatic transmission selector lever to
position R. Wait this short period before driving.
Switching off automatically
After approx. 165 ft/50 m of driving or above
approx. 20 mph or 30 km/h, the system
switches off and the LED goes out.
Signal tones
When nearing an object, its position is indicated
correspondingly by an in terval tone. As the dis-
tance between vehicle and object decreases,
the intervals between the tones become
shorter. If the distance to the nearest object
falls to below roughly 1 f t/30 cm, then a contin-
uous tone sounds.
An interval tone is interrupted after approx.
3seconds >
if you remain in front of an object that has
been detected by only one of the corner
sensors
> if you are driving parallel to a wall.
Malfunction
The indicator lamp in the instrument
cluster comes on. PDC is malfunc-
tioning. A message appears on the
Control Display. Have the system checked.
To avoid this problem, keep the sensors clean
and free of ice or snow in order to ensure that
they will continue to operate effectively. When
using a high-pressure cleaner, do not spray the
sensors for extended periods of time and only
from a distance of at least 4 in/10 cm.
PDC with visual warning
The approach of the vehicle to an object is
shown on the Control Display. Objects that are
farther away are displayed on the Control Dis-
play before a signal to ne sounds. The display
appears on the Control Display as soon as PDC
is activated.
System limitations
Even with PDC, final responsibility for
estimating the distance between the
vehicle and any obstructions always remains
with the driver. Even when sensors are pro-
vided, there is a blind spot in which objects can
no longer be detected. The system is also sub-
ject to the physical limit s that apply to all forms
of ultrasonic measurement, such as those
encountered with trailer towbars and hitches,
thin or wedge-shaped objects, etc. Low objects
that have already been displayed, e.g. curbs,
can disappear again from the detection area of
the sensors before or af ter a continuous tone
sounds. Higher, protruding objects, e.g. ledges,
cannot be detected. Therefore, always drive
cautiously, otherwise there is a risk of personal
injury or property damage.
Page 91 of 248
Controls
89Reference
At a glance
Driving tips
Communications
Navigation
Entertainment
Mobility
Welcome lamps are activated and are
stored for the remote control currently in use.
Pathway lighting
If you activate the head lamp flasher after park-
ing the car, with the lig hts switched off, the
low beams come on and remain on for a
certain time.
You can adjust the operating period or deacti-
vate the function.
iDrive, for operating principle refer to page 16.
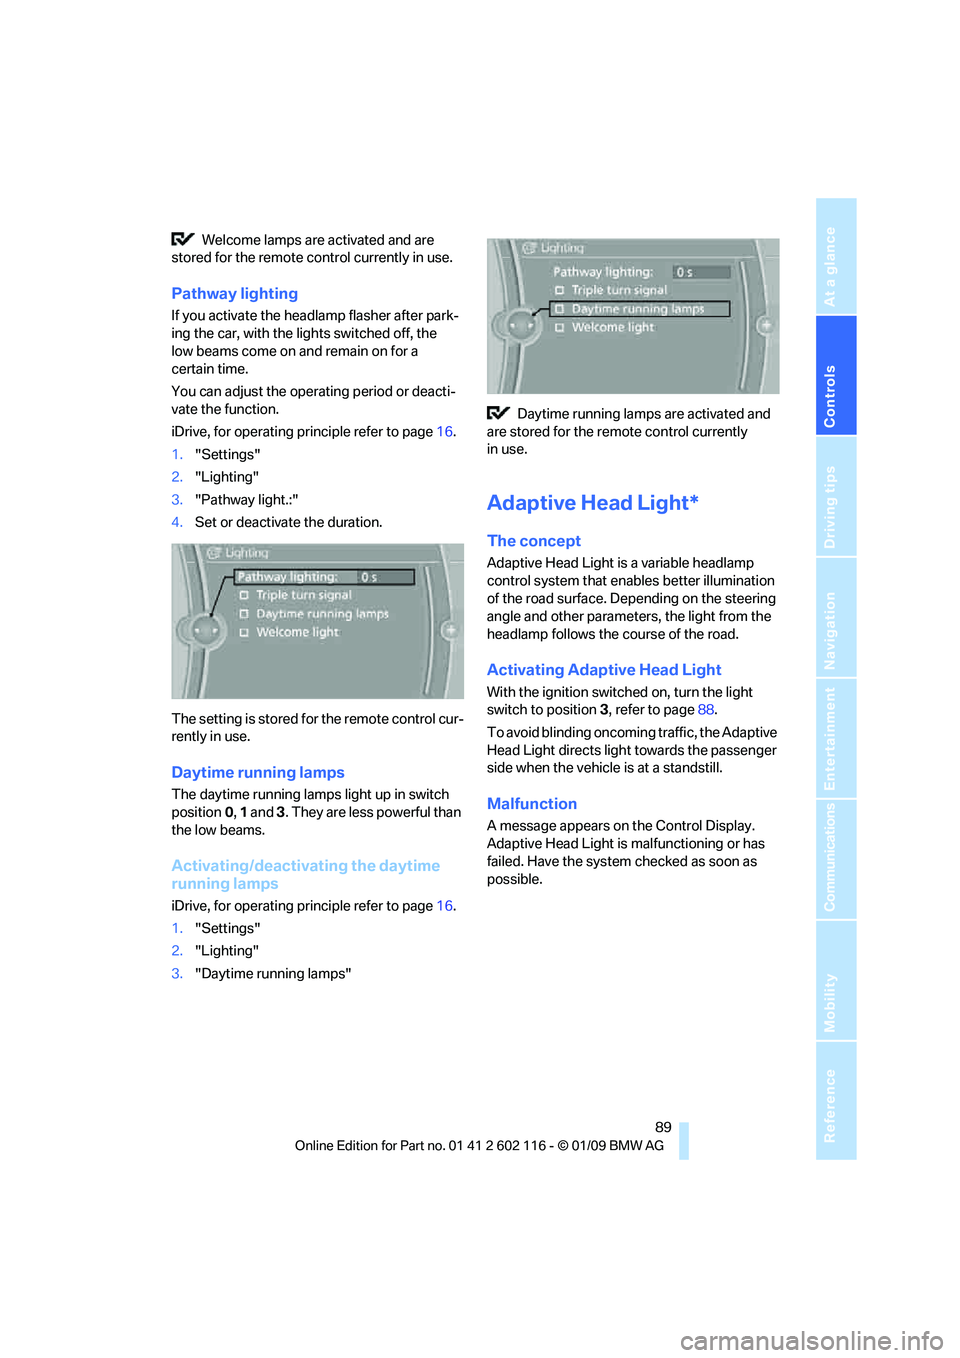
1. "Settings"
2. "Lighting"
3. "Pathway light.:"
4. Set or deactivate the duration.
The setting is stored for the remote control cur-
rently in use.
Daytime running lamps
The daytime running lamps light up in switch
position 0, 1 and 3. They are less powerful than
the low beams.
Activating/deactivating the daytime
running lamps
iDrive, for operating principle refer to page 16.
1. "Settings"
2. "Lighting"
3. "Daytime running lamps" Daytime running lamps are activated and
are stored for the remote control currently
in use.
Adaptive Head Light*
The concept
Adaptive Head Light is a variable headlamp
control system that en ables better illumination
of the road surface. Depending on the steering
angle and other parameters, the light from the
headlamp follows the course of the road.
Activating Adapti ve Head Light
With the ignition switched on, turn the light
switch to position 3, refer to page 88.
To avoid blinding oncoming traffic, the Adaptive
Head Light directs light towards the passenger
side when the vehicle is at a standstill.
Malfunction
A message appears on the Control Display.
Adaptive Head Light is malfunctioning or has
failed. Have the system checked as soon as
possible.
Page 94 of 248
Climate
92
Climate
Equipment versions
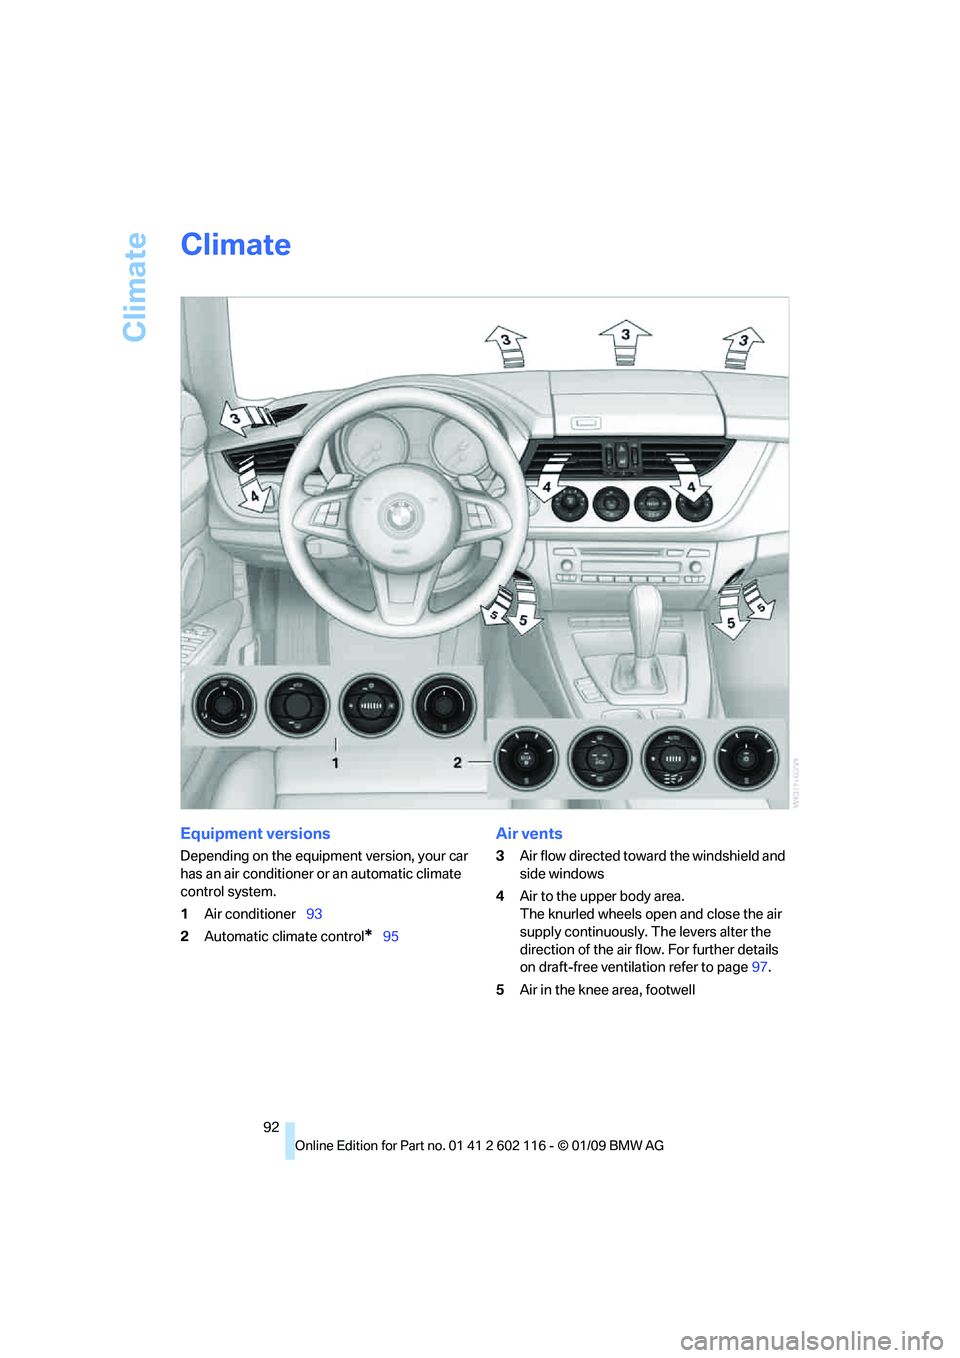
Depending on the equipment version, your car
has an air conditioner or an automatic climate
control system.
1Air conditioner 93
2 Automatic climate control
*95
Air vents
3Air flow directed towa rd the windshield and
side windows
4 Air to the upper body area.
The knurled wheels open and close the air
supply continuously. The levers alter the
direction of the air flow. For further details
on draft-free ventilation refer to page 97.
5 Air in the knee area, footwell
Page 95 of 248
Controls
93Reference
At a glance
Driving tips
Communications
Navigation
Entertainment
Mobility
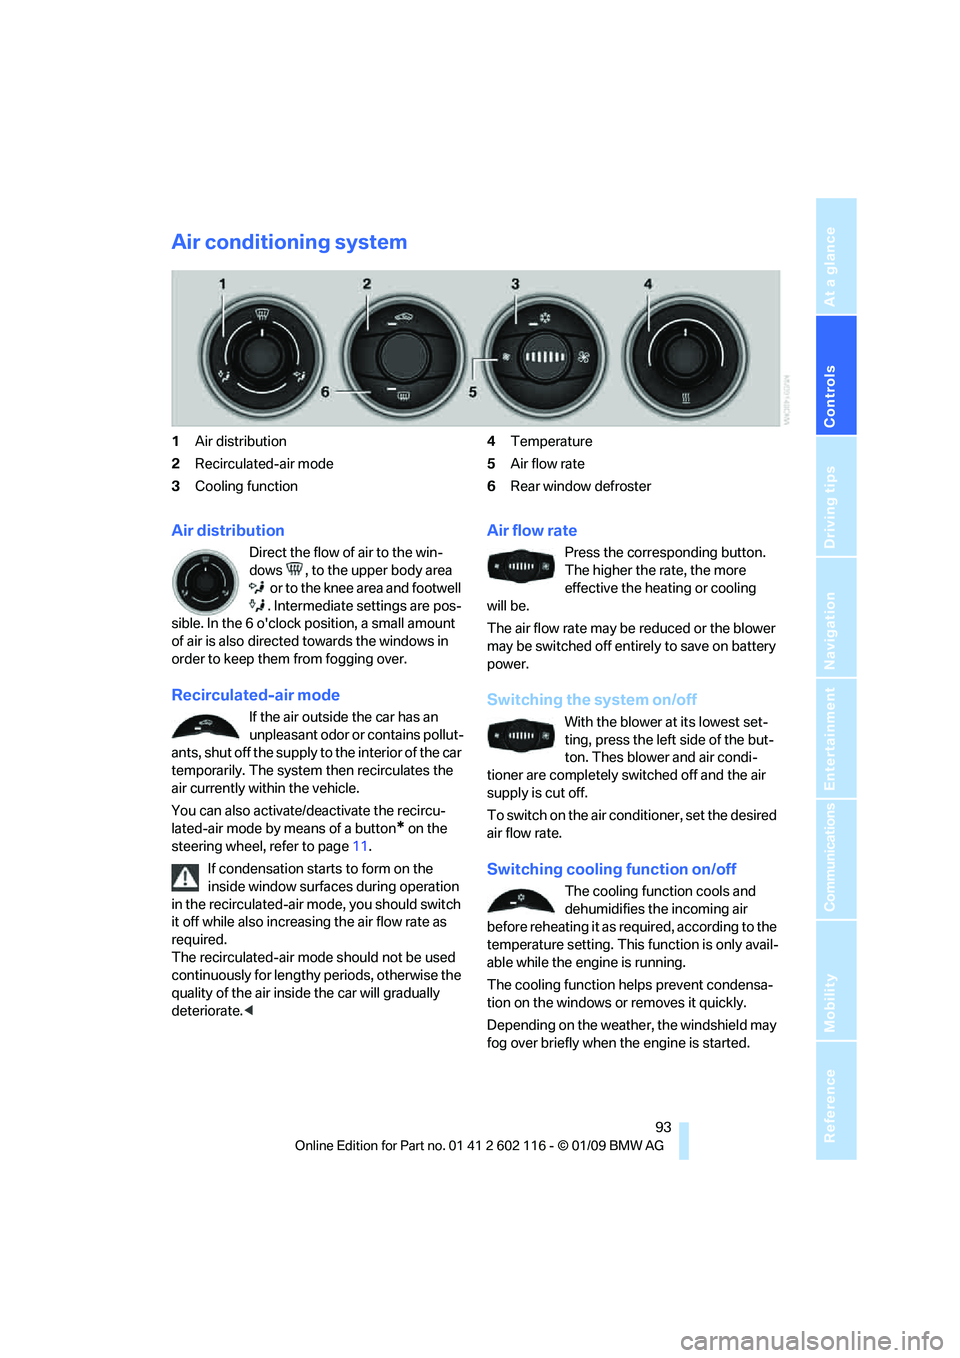
Air conditioning system
1Air distribution
2 Recirculated-air mode
3 Cooling function 4
Temperature
5 Air flow rate
6 Rear window defroster
Air distribution
Direct the flow of air to the win-
dows , to the upper body area
or to the knee area and footwell
. Intermediate settings are pos-
sible. In the 6 o'clock position, a small amount
of air is also directed towards the windows in
order to keep them from fogging over.
Recirculated-air mode
If the air outside the car has an
unpleasant odor or contains pollut-
ants, shut off the supply to the interior of the car
temporarily. The system then recirculates the
air currently within the vehicle.
You can also activate/d eactivate the recircu-
lated-air mode by means of a button
* on the
steering wheel, refer to page 11.
If condensation starts to form on the
inside window surfaces during operation
in the recirculated-air mode, you should switch
it off while also increasing the air flow rate as
required.
The recirculated-air mode should not be used
continuously for lengthy periods, otherwise the
quality of the air inside the car will gradually
deteriorate. <
Air flow rate
Press the corresponding button.
The higher the rate, the more
effective the heating or cooling
will be.
The air flow rate may be reduced or the blower
may be switched off entire ly to save on battery
power.
Switching the system on/off
With the blower at its lowest set-
ting, press the left side of the but-
ton. Thes blower and air condi-
tioner are completely switched off and the air
supply is cut off.
To switch on the air cond itioner, set the desired
air flow rate.
Switching cooling function on/off
The cooling function cools and
dehumidifies the incoming air
before reheating it as re quired, according to the
temperature setting. This function is only avail-
able while the engine is running.
The cooling function helps prevent condensa-
tion on the windows or removes it quickly.
Depending on the weathe r, the windshield may
fog over briefly when the engine is started.
Page 96 of 248
Climate
94
Rear window defroster
The defroster switches off auto-
matically after a certain time or
when the hardtop is opened.
Temperature
To increase the temperature, turn
the rotary switch clockwise
towards red.
For a lower temperature, turn the
rotary switch counterc lockwise towards blue.
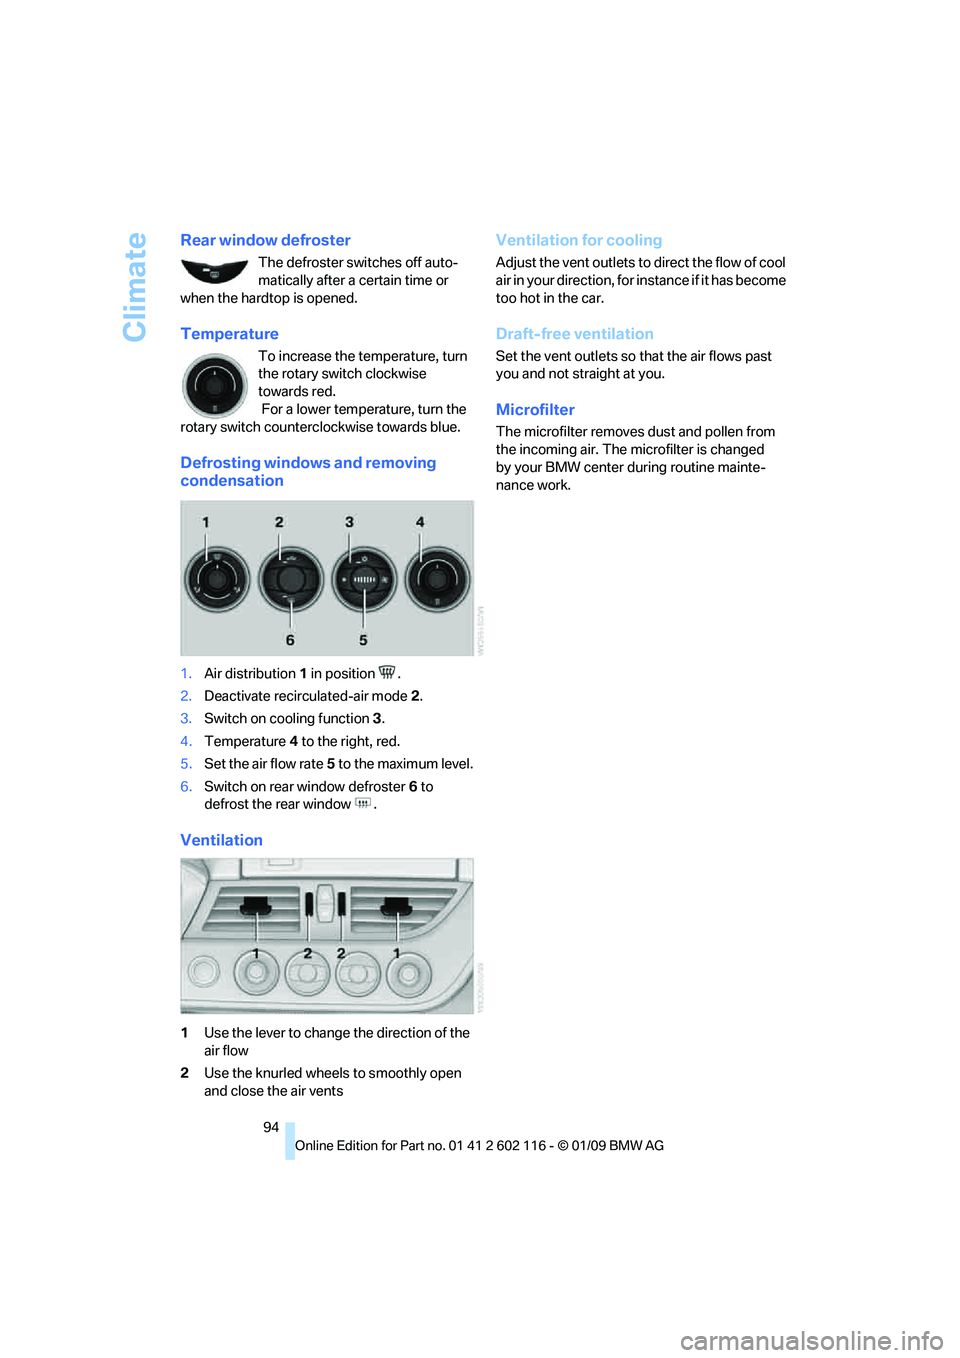
Defrosting windows and removing
condensation
1.Air distribution 1 in position .
2. Deactivate recirc ulated-air mode 2.
3. Switch on cooling function 3.
4. Temperature 4 to the right, red.
5. Set the air flow rate 5 to the maximum level.
6. Switch on rear window defroster 6 to
defrost the rear window .
Ventilation
1 Use the lever to change the direction of the
air flow
2 Use the knurled wheels to smoothly open
and close the air vents
Ventilation for cooling
Adjust the vent outlets to direct the flow of cool
air in your direction, for instance if it has become
too hot in the car.
Draft-free ventilation
Set the vent outlets so that the air flows past
you and not straight at you.
Microfilter
The microfilter removes dust and pollen from
the incoming air. The microfilter is changed
by your BMW center during routine mainte-
nance work.
Page 98 of 248
Climate
96
Switching the cooling function
on and off
The cooling function cools and
dehumidifies the incoming air
before reheating it as required,
according to the temperature set-
ting. This function is only available while the
engine is running.
The cooling function he lps prevent condensa-
tion on the windows or removes it quickly.
Depending on the weathe r, the windshield may
fog over briefly when the engine is started.
The cooling function is automatically switched
on along with the AUTO program.
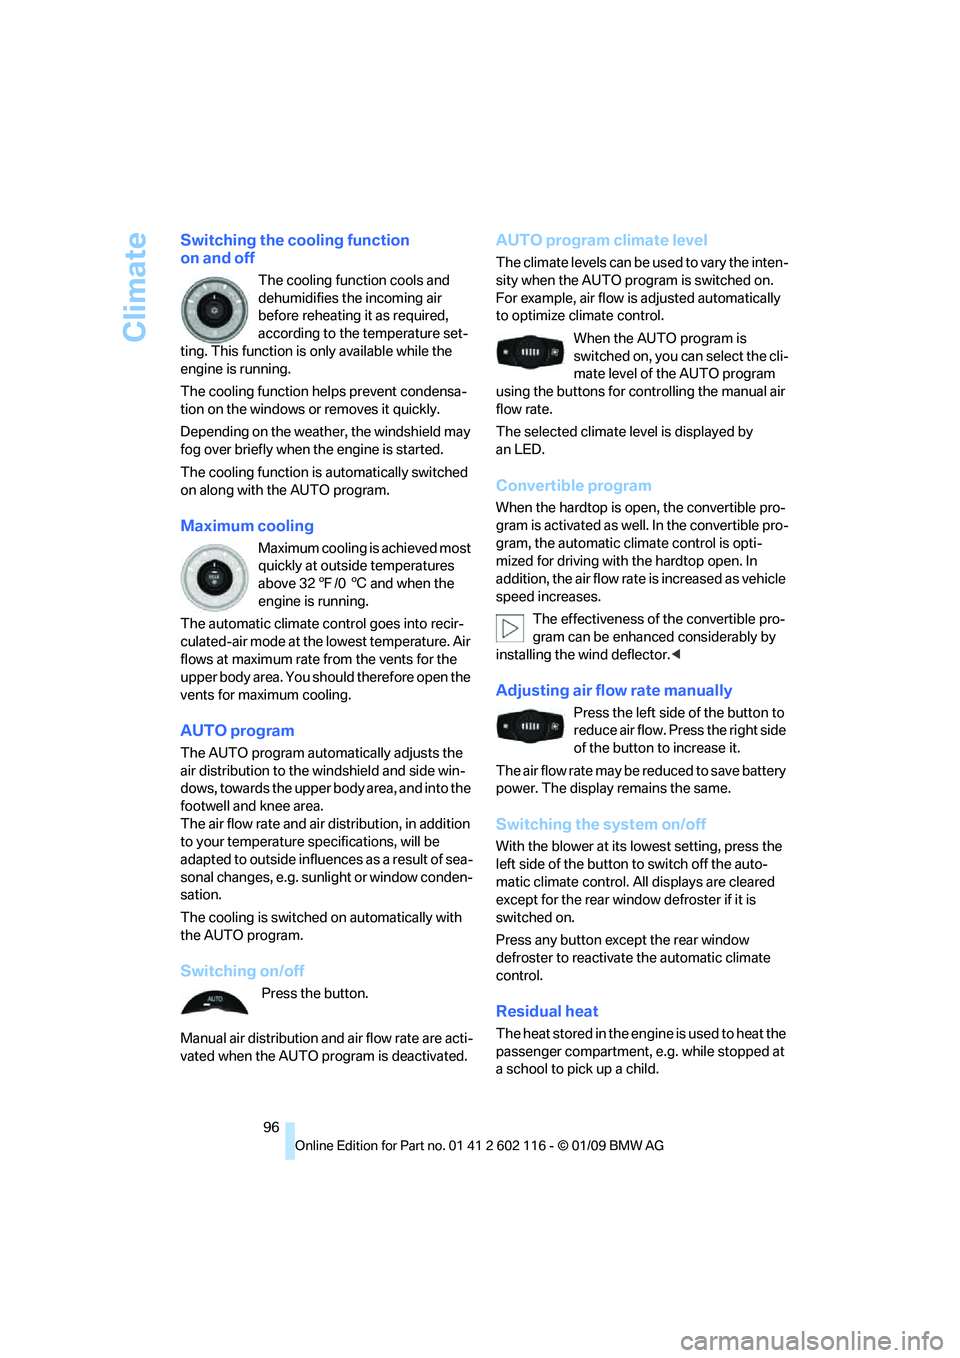
Maximum cooling
Maximum cooling is achieved most
quickly at outside temperatures
above 32 7/06 and when the
engine is running.
The automatic climate control goes into recir-
culated-air mode at the lowest temperature. Air
flows at maximum rate from the vents for the
upper body area. You should therefore open the
vents for maximum cooling.
AUTO program
The AUTO program auto matically adjusts the
air distribution to the windshield and side win-
dows, towards the upper bo dy area, and into the
footwell and knee area.
The air flow rate and air distribution, in addition
to your temperature specifications, will be
adapted to outside influenc es as a result of sea-
sonal changes, e.g. sunlight or window conden-
sation.
The cooling is switched on automatically with
the AUTO program.
Switching on/off
Press the button.
Manual air distribution and air flow rate are acti-
vated when the AUTO program is deactivated.
AUTO program climate level
The climate levels can be used to vary the inten-
sity when the AUTO program is switched on.
For example, air flow is adjusted automatically
to optimize climate control.
When the AUTO program is
switched on, you ca n select the cli-
mate level of the AUTO program
using the buttons for controlling the manual air
flow rate.
The selected climate le vel is displayed by
an LED.
Convertible program
When the hardtop is open, the convertible pro-
gram is activated as well. In the convertible pro-
gram, the automatic climate control is opti-
mized for driving with the hardtop open. In
addition, the air flow rate is increased as vehicle
speed increases.
The effectiveness of the convertible pro-
gram can be enhanced considerably by
installing the wind deflector. <
Adjusting air flow rate manually
Press the left side of the button to
reduce air flow. Press the right side
of the button to increase it.
The air flow rate may be reduced to save battery
power. The display remains the same.
Switching the system on/off
With the blower at its lowest setting, press the
left side of the button to switch off the auto-
matic climate control. All displays are cleared
except for the rear window defroster if it is
switched on.
Press any button except the rear window
defroster to reactivate the automatic climate
control.
Residual heat
T h e h e a t s t o r e d i n t h e e n g i n e i s u s e d t o h e a t t h e
passenger compartment, e.g. while stopped at
a school to pick up a child.
Page 115 of 248
Driving tips
113Reference
At a glance
Controls
Communications
Navigation
Entertainment
Mobility
Before driving into a car wash
General information on caring for your BMW
can be found on page204.
With convenient access and automatic
transmission
Insert the remote control into the ignition
switch.
The engine can be switched off when the selec-
tor lever is in position N. Refer also to page 204.
With convenient access and 7-gear
sport automatic transm ission with dual
clutch
Insert the remote control into the ignition
switch.
The engine can be switched off when the trans-
mission is in position N. Refer also to page 205.
Cargo loading
To avoid loading the tires beyond their
approved carrying capacity, never over-
load the vehicle. Overlo ading can lead to over-
heating and increases the rate at which damage
develops inside the tires. This can ultimately
result in a sudden blow-out. <
Make sure that no liquids are spilled or
leak from their containers in the cargo
bay, as this could result in damage to the
vehicle. <
When storing objects in the rear storage
shelf, do not move both seats all the way
forward while moving th em to their uppermost
position and leaning the backrests forward.
Otherwise, the seats could hit and damage the
seal on the windshield, the sun visor and the
headliner. <
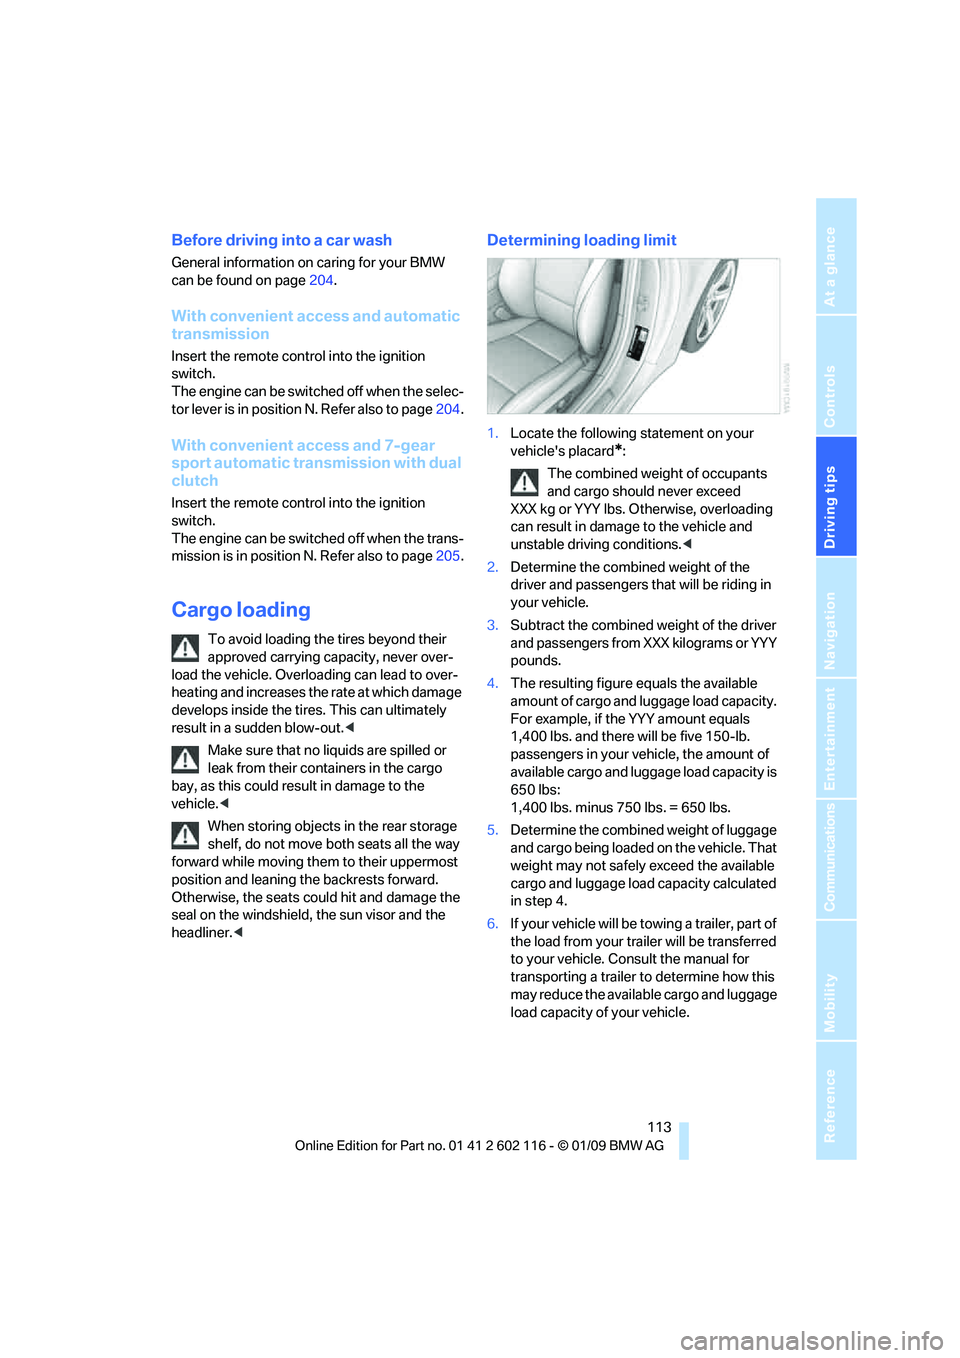
Determining loading limit
1.Locate the following statement on your
vehicle's placard
*:
The combined weight of occupants
and cargo should never exceed
XXX kg or YYY lbs. Otherwise, overloading
can result in damage to the vehicle and
unstable driving conditions.<
2. Determine the combined weight of the
driver and passengers that will be riding in
your vehicle.
3. Subtract the combined weight of the driver
and passengers from XXX kilograms or YYY
pounds.
4. The resulting figure equals the available
amount of cargo and luggage load capacity.
For example, if the YYY amount equals
1,400 lbs. and there will be five 150-lb.
passengers in your ve hicle, the amount of
available cargo and lugga ge load capacity is
650 lbs:
1,400 lbs. minus 750 lbs. = 650 lbs.
5. Determine the combined weight of luggage
and cargo being loaded on the vehicle. That
weight may not safely exceed the available
cargo and luggage load capacity calculated
in step 4.
6. If your vehicle will be towing a trailer, part of
the load from your tra iler will be transferred
to your vehicle. Consult the manual for
transporting a trailer to determine how this
may reduce the availa ble cargo and luggage
load capacity of your vehicle.