2009 BMW Z4 SDRIVE30I power steering
[x] Cancel search: power steeringPage 81 of 248
Controls
79Reference
At a glance
Driving tips
Communications
Navigation
Entertainment
Mobility
Dynamic Driving Control
The concept
Dynamic Driving Control can be used to adjust
the driving dynamics of the vehicle.
Several programs are available for this purpose;
they can be activated using the two Dynamic
Driving Control buttons.
The following characteristics are adapted,
depending on which program was selected:
> Engine response.
> Shift times of the automatic transmission
*.
> Power steering support
*.
> Changes in the suspension characteristics
through damping control
*.
> Vehicle stabilization through DSC Dynamic
Stability Control.
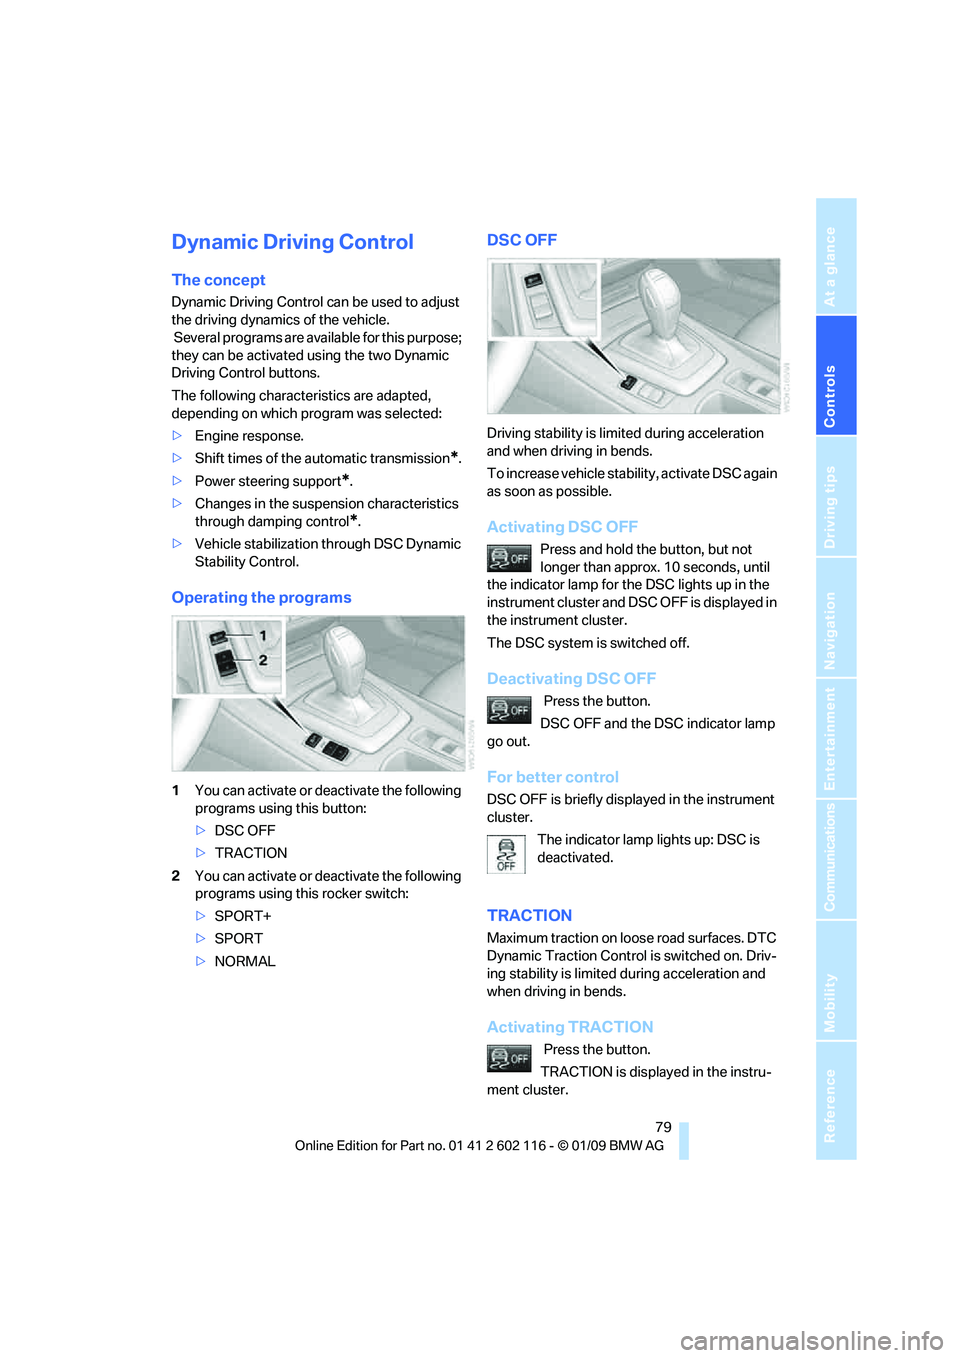
Operating the programs
1You can activate or de activate the following
programs using this button:
> DSC OFF
> TRACTION
2 You can activate or de activate the following
programs using this rocker switch:
> SPORT+
> SPORT
> NORMAL
DSC OFF
Driving stability is limited during acceleration
and when driving in bends.
To increase vehicle stability, activate DSC again
as soon as possible.
Activating DSC OFF
Press and hold the button, but not
longer than approx. 10 seconds, until
the indicator lamp for the DSC lights up in the
instrument cluster and DSC OFF is displayed in
the instrument cluster.
The DSC system is switched off.
Deactivating DSC OFF
Press the button.
DSC OFF and the DSC indicator lamp
go out.
For better control
DSC OFF is briefly displayed in the instrument
cluster.
The indicator lamp lights up: DSC is
deactivated.
TRACTION
Maximum traction on loose road surfaces. DTC
Dynamic Traction Control is switched on. Driv-
ing stability is limited during acceleration and
when driving in bends.
Activating TRACTION
Press the button.
TRACTION is displayed in the instru-
ment cluster.
Page 87 of 248
Controls
85Reference
At a glance
Driving tips
Communications
Navigation
Entertainment
Mobility
The TPMS malfunction indicator is combined
with the low tire pressure telltale. When the sys-
tem detects a malfunction, the telltale will flash
for approximately one minute and then remain
continuously lit. This sequence will continue
upon subsequent vehicle startups as long as
the malfunction exists. When the malfunction
indicator is illuminated, the system may not be
able to detect or signal low tire pressure as
intended. TPMS malfunctions may occur for a
variety of reasons, including the installation of
replacement or alternate tires or wheels on the
vehicle that prevent the TPMS from functioning
properly. Always check the TPMS malfunction
telltale after replacing one or more tires or
wheels on your vehicle to ensure that the
replacement or alternate tires and wheels allow
the TPMS to continue to function properly.
Servotronic*
The concept
The Servotronic varies the steering force
required to turn the wh eels depending on the
speed at which you are driving. When you are
driving at low speeds, power steering provides
more support, i. e. little effort is needed to turn
the wheels. Power steering support lessens as
your speed increases.
The system works automatically.
Malfunction
Malfunctions are displayed via Check Control
Airbags
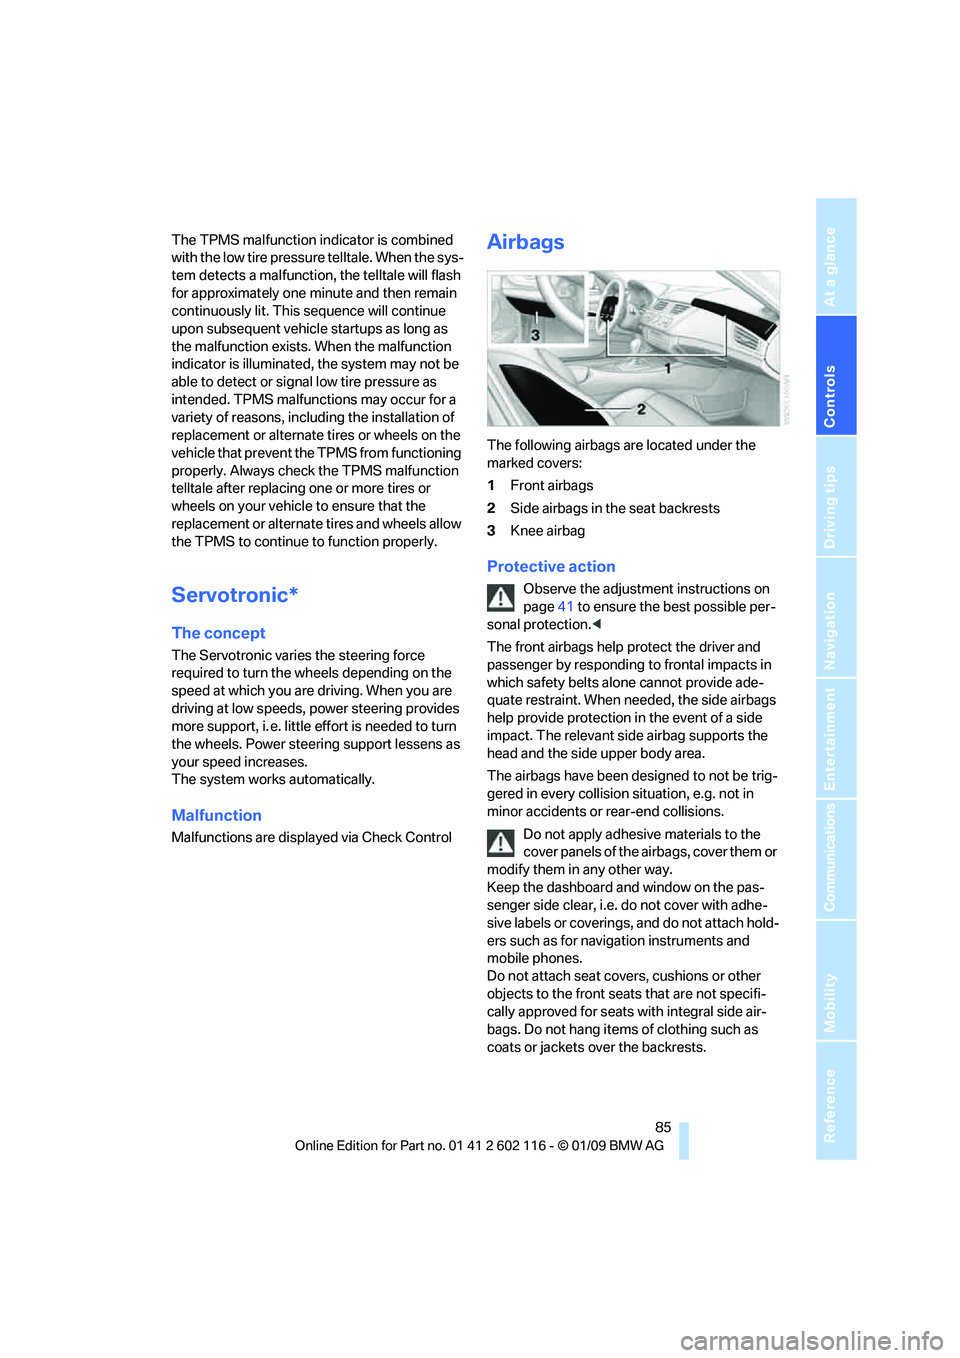
The following airbags are located under the
marked covers:
1 Front airbags
2 Side airbags in the seat backrests
3 Knee airbag
Protective action
Observe the adjustment instructions on
page 41 to ensure the best possible per-
sonal protection. <
The front airbags help protect the driver and
passenger by responding to frontal impacts in
which safety belts alone cannot provide ade-
quate restraint. When needed, the side airbags
help provide protection in the event of a side
impact. The relevant side airbag supports the
head and the side upper body area.
The airbags have been designed to not be trig-
gered in every collision situation, e.g. not in
minor accidents or rear-end collisions.
Do not apply adhesive materials to the
cover panels of the airbags, cover them or
modify them in any other way.
Keep the dashboard and window on the pas-
senger side clear, i.e. do not cover with adhe-
sive labels or coverings, and do not attach hold-
ers such as for navigation instruments and
mobile phones.
Do not attach seat cove rs, cushions or other
objects to the front seats that are not specifi-
cally approved for seats with integral side air-
bags. Do not hang items of clothing such as
coats or jackets over the backrests.
Page 91 of 248
Controls
89Reference
At a glance
Driving tips
Communications
Navigation
Entertainment
Mobility
Welcome lamps are activated and are
stored for the remote control currently in use.
Pathway lighting
If you activate the head lamp flasher after park-
ing the car, with the lig hts switched off, the
low beams come on and remain on for a
certain time.
You can adjust the operating period or deacti-
vate the function.
iDrive, for operating principle refer to page 16.
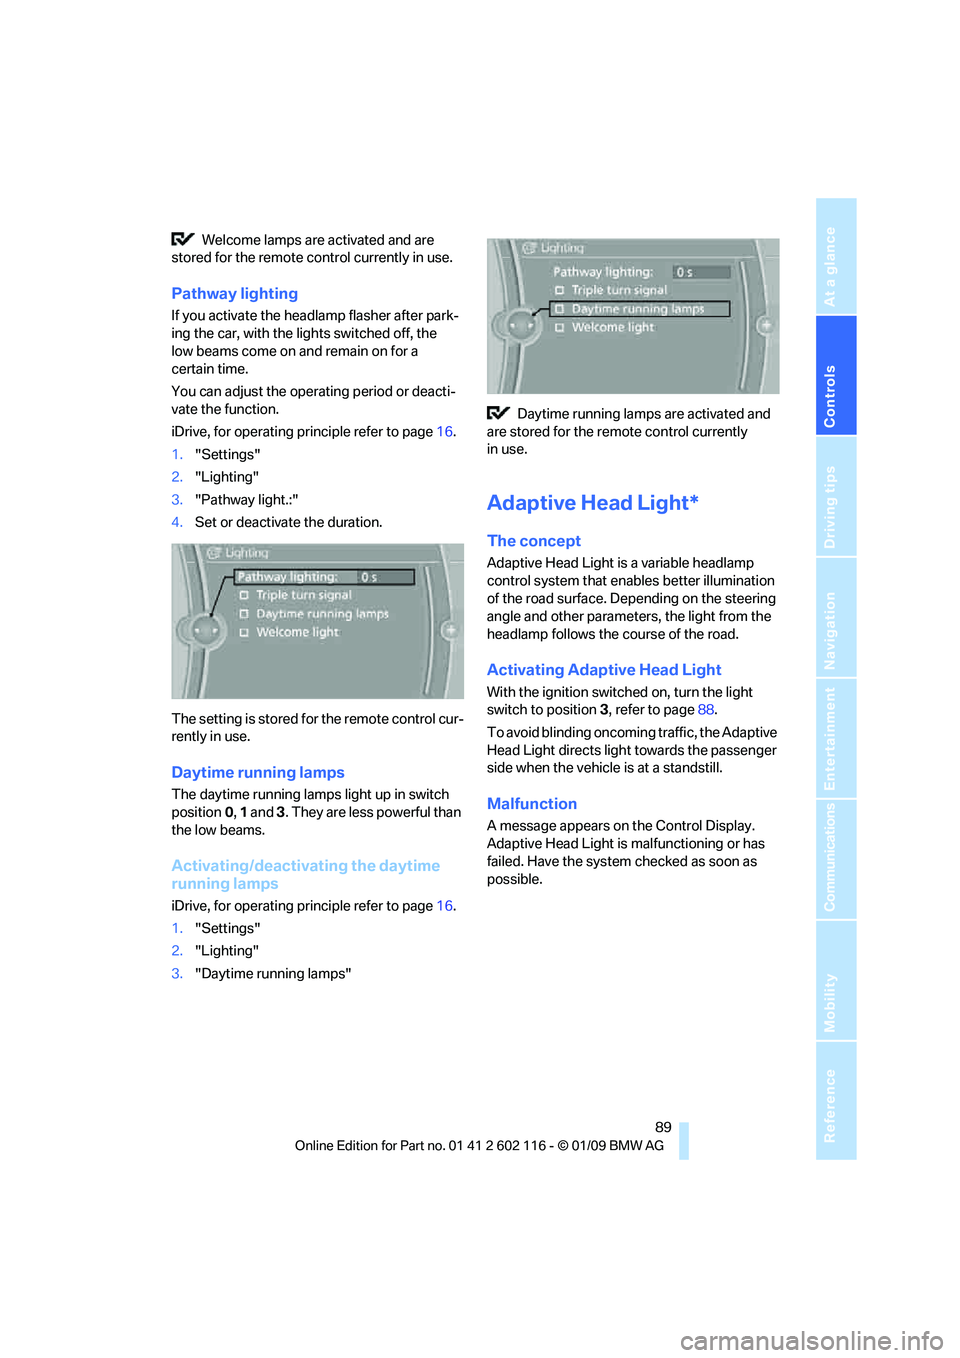
1. "Settings"
2. "Lighting"
3. "Pathway light.:"
4. Set or deactivate the duration.
The setting is stored for the remote control cur-
rently in use.
Daytime running lamps
The daytime running lamps light up in switch
position 0, 1 and 3. They are less powerful than
the low beams.
Activating/deactivating the daytime
running lamps
iDrive, for operating principle refer to page 16.
1. "Settings"
2. "Lighting"
3. "Daytime running lamps" Daytime running lamps are activated and
are stored for the remote control currently
in use.
Adaptive Head Light*
The concept
Adaptive Head Light is a variable headlamp
control system that en ables better illumination
of the road surface. Depending on the steering
angle and other parameters, the light from the
headlamp follows the course of the road.
Activating Adapti ve Head Light
With the ignition switched on, turn the light
switch to position 3, refer to page 88.
To avoid blinding oncoming traffic, the Adaptive
Head Light directs light towards the passenger
side when the vehicle is at a standstill.
Malfunction
A message appears on the Control Display.
Adaptive Head Light is malfunctioning or has
failed. Have the system checked as soon as
possible.
Page 95 of 248
Controls
93Reference
At a glance
Driving tips
Communications
Navigation
Entertainment
Mobility
Air conditioning system
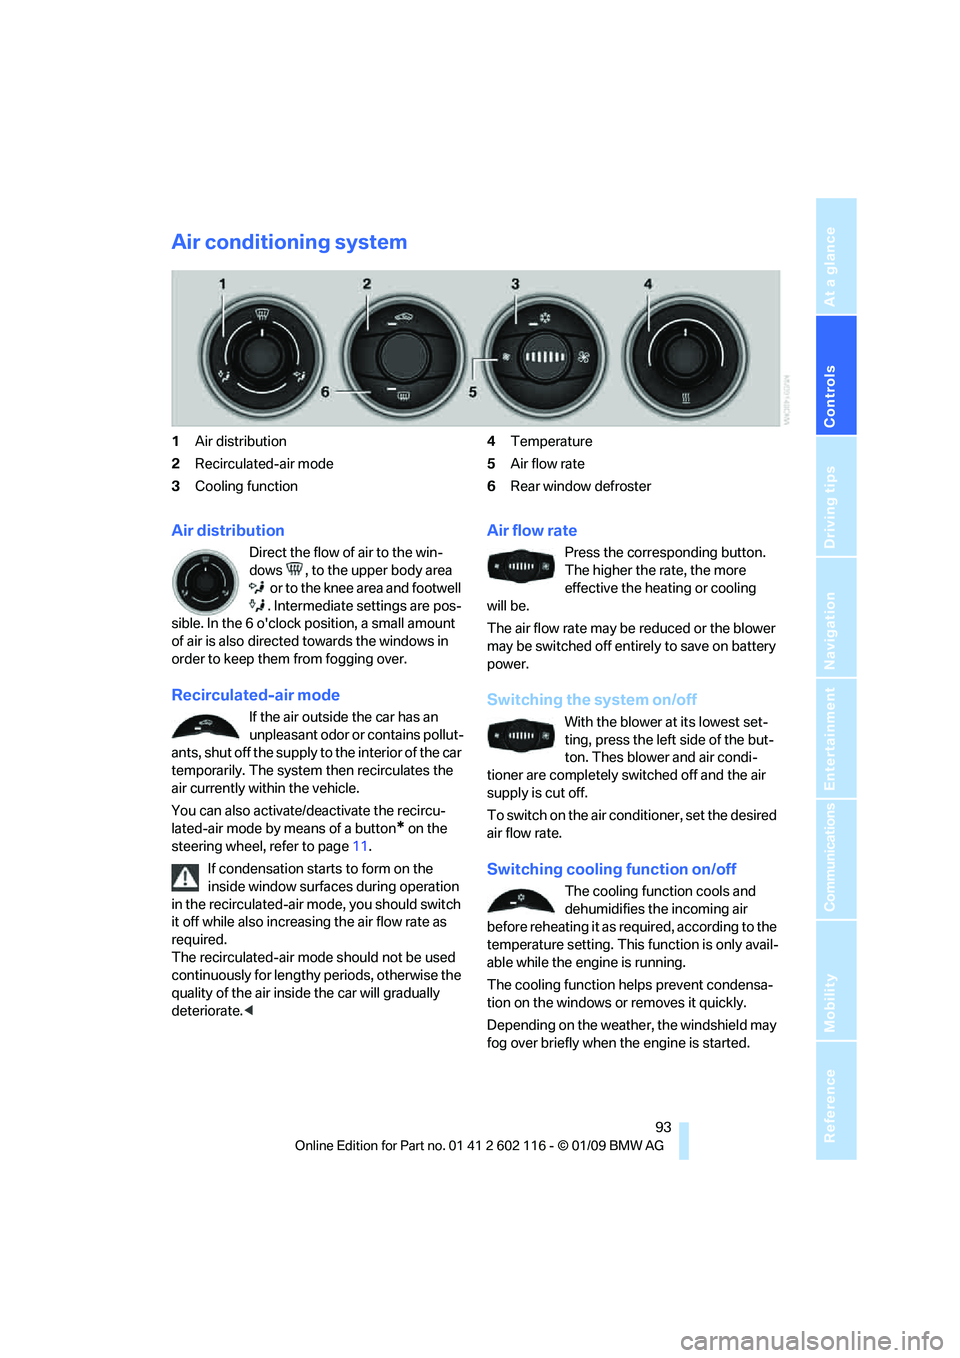
1Air distribution
2 Recirculated-air mode
3 Cooling function 4
Temperature
5 Air flow rate
6 Rear window defroster
Air distribution
Direct the flow of air to the win-
dows , to the upper body area
or to the knee area and footwell
. Intermediate settings are pos-
sible. In the 6 o'clock position, a small amount
of air is also directed towards the windows in
order to keep them from fogging over.
Recirculated-air mode
If the air outside the car has an
unpleasant odor or contains pollut-
ants, shut off the supply to the interior of the car
temporarily. The system then recirculates the
air currently within the vehicle.
You can also activate/d eactivate the recircu-
lated-air mode by means of a button
* on the
steering wheel, refer to page 11.
If condensation starts to form on the
inside window surfaces during operation
in the recirculated-air mode, you should switch
it off while also increasing the air flow rate as
required.
The recirculated-air mode should not be used
continuously for lengthy periods, otherwise the
quality of the air inside the car will gradually
deteriorate. <
Air flow rate
Press the corresponding button.
The higher the rate, the more
effective the heating or cooling
will be.
The air flow rate may be reduced or the blower
may be switched off entire ly to save on battery
power.
Switching the system on/off
With the blower at its lowest set-
ting, press the left side of the but-
ton. Thes blower and air condi-
tioner are completely switched off and the air
supply is cut off.
To switch on the air cond itioner, set the desired
air flow rate.
Switching cooling function on/off
The cooling function cools and
dehumidifies the incoming air
before reheating it as re quired, according to the
temperature setting. This function is only avail-
able while the engine is running.
The cooling function helps prevent condensa-
tion on the windows or removes it quickly.
Depending on the weathe r, the windshield may
fog over briefly when the engine is started.
Page 103 of 248

Controls
101Reference
At a glance
Driving tips
Communications
Navigation
Entertainment
Mobility
Calibrating the digital compass
The digital compass must be calibrated in the
following situations:
> An incorrect compass direction is shown.
> The compass direction shown does not
change although the direction of
travel does.
> Not all compass directions are shown.
Procedure
1.Make sure that no la rge metal objects or
overhead power lines are in the vicinity of
your vehicle and that you have enough
space to drive in a circle.
2. Set the currently valid compass zone.
3. ensure that the retractable hardtop is fully
closed.
4. Press the adjustment button for approx.
6-7 seconds to call up C. Then drive in at
least one full circle at a speed of no more
than 4mph or 7km/h.
If calibration is successful, the display
changes from C to a compass direction.
5. Open the retractable hardtop fully and
repeat step 4.
Setting right-hand/left-hand steering
Your digital compass is factory-set to right-
hand or left-hand steeri ng, in accordance with
your vehicle.
Setting the language
You can set the language of the display:
Press the adjustment button for approx.
12-13 seconds. Briefly press the adjustment
button again to switch between English, "E",
and German, "O".
The setting is automatically saved after approx.
10 seconds.
Glove compartment
Opening
Pull the handle, arrow 2.
The light in the glove compartment comes on.
To prevent injury in the event of an acci-
dent while the vehicle is being driven,
close the glove compartment immediately
after use. <
Closing
Fold cover up.
Locking
Lock with a key, arrow 1.
If you hand out the remote control without
the integrated key, such as at a hotel,
refer to page 28, the glove compartment cannot
be unlocked.
USB interface for data transmission
Port for importing and exporting data on USB
devices, e.g. music collections, refer to
page 153.
Page 114 of 248
Things to remember when driving
112
The risk of hydroplaning
increases with declin-
ing tread depth on the tire s, refer also to Mini-
mum tread depth on page 194.
Driving through water
Drive though calm water only if it is not
deeper than 1 ft/25 cm and at this height
no faster than walking speed, up to 6 mph/
10 km/h. Otherwise, the vehicle's engine, the
electrical systems and the transmission may be
damaged. <
Use the parking brake on inclines
On inclines, do not hold the vehicle for a
lengthy period using the clutch; use the
parking brake instead. Ot herwise greater clutch
wear will result. <
For more information about the drive-off assis-
tant, refer to page 80.
Braking safely
Your BMW is equipped with ABS as a standard
feature. Applying the brakes fully is the most
effective way of braking in situations in which
this is necessary. Since the vehicle maintains
steering responsiveness, you can still avoid
possible obstacles with a minimum of steering
effort.
Pulsation of the brake pedal, combined with
sounds from the hydraulic circuits, indicate that
ABS is in its active mode.
Driving in wet conditions
When roads are wet or there is heavy rain,
briefly exert gentle pre ssure on the brake pedal
every few miles. Monitor traffic conditions to
ensure that this maneuver does not endanger
other road users. The heat generated in this
process helps dry the pads and rotors. Full
braking efficiency will th en be available when
you need it.
Hills
To prevent overheating and the resulting
reduced efficiency of the brake system,
drive long or steep downhill gradients in the
gear in which the least br aking is required. Even light but consistent brak
e pressure can lead to
high temperatures, brake wear and possibly
even brake failure. <
You can increase the engine's braking effect by
shifting down, all the way to first gear if neces-
sary. This strategy helps you avoid placing
excessive loads on the brake system. Down-
shifting in manual mode of the automatic trans-
mission, refer to page 54.
7-gear sport automatic transmission with
dual clutch: Never drive with the trans-
mission in neutral or with the engine switched
off; otherwise, engine braking action will not be
present or there will be no power assistance to
the brakes or steering.
Manual transmission: Never drive with the
clutch held down, with the transmission in neu-
tral or with the engine switched off; otherwise,
engine braking action will not be present or
there will be no power a ssistance to the brakes
or steering.
Never allow floor mats, carpets or any other
objects to protrude into the area around the
pedals, otherwise peda l function could be
impaired. <
Corrosion on brake rotors
When the vehicle is driv en only occasionally,
during extended periods when the vehicle is not
used at all, and in op erating conditions where
brake applications are less frequent, there is an
increased tendency for corrosion to form on
rotors, while contaminan ts accumulate on the
brake pads. This occurs because the minimum
pressure which must be exerted by the pads
during brake applications to clean the rotors is
not reached.
Should corrosion form on the brake rotors, the
brakes will tend to re spond with a pulsating
effect that even extended application will fail
to cure.
When the vehicle is parked
Condensation forms wh ile the automatic cli-
mate control is in operation, and then exits
under the vehicle. Traces of condensed water
under the vehicle are therefore normal.
Page 218 of 248
Giving and receiving assistance
216
Being towed
Make sure that the ignition is switched on,
refer to page50, otherwise the low-beam
headlamps, tail lamps, turn signal indicators and
windshield wipers may be unavailable.
If the electrical system fails, do not tow-start or
tow the vehicle. The electrical steering wheel
lock cannot be released and the vehicle cannot
be steered. Jump-starting, refer to page 214.
Power steering assistance is not available when
the engine is not running. Thus, braking and
steering will requir e increased effort.<
Manual transmission
Gearshift lever in neutral position.
Automatic transmission
Selector lever in position N.
Changing selector leve r positions, refer to
page 54.
Do not exceed a towing speed of 31 mph
or 50 km/h and a towing distance of
31 miles/50 km, otherwise the automatic trans-
mission may be damaged. <
7-gear sport automatic transmission
with dual clutch
Ensure that transmission lock P is not
engaged as the rear wheels will otherwise
be blocked.
When using the car wash function, refer to
page 205, note that the parking lock P is
engaged automatically after approx. 30 min-
utes, blocking the rear wheels.
If an electrical malfunction occurs or if towing
takes longer than approx. 20 minutes, manually
release the parking lock, refer to page 58.<
Do not exceed a towing speed of 31 mph
or 50 km/h and a towing distance of
31 miles/50 km, otherwise the 7-gear sport
automatic transmission may be damaged. <
Towing methods
Do not lift the vehicle by a tow fitting or
body and chassis parts, otherwise dam-
age may result. <
With a tow bar
The towing vehicle must not be lighter
than the towed vehicle, otherwise it may
be impossible to maintain control. <
The tow fittings used should be on the same
side on both vehicles. Should it prove impossi-
ble to avoid mounting the tow bar at an angle,
please observe the following:
> Clearance and maneuvering capability will
be sharply limited during cornering.
> The tow bar will generate la teral forces if it is
attached offset.
Attach the tow bar to the tow fittings only,
as attaching it to othe r parts of the vehicle
could result in damage. <
With a tow rope
When starting off in the towing vehicle, make
sure that the tow rope is taut.
To avoid jerking and the associated
stresses on vehicle components when
towing, always use nylon ropes or nylon straps.
Attach the tow rope to the tow fittings only, as
attaching it to other pa rts of the vehicle could
result in damage. <
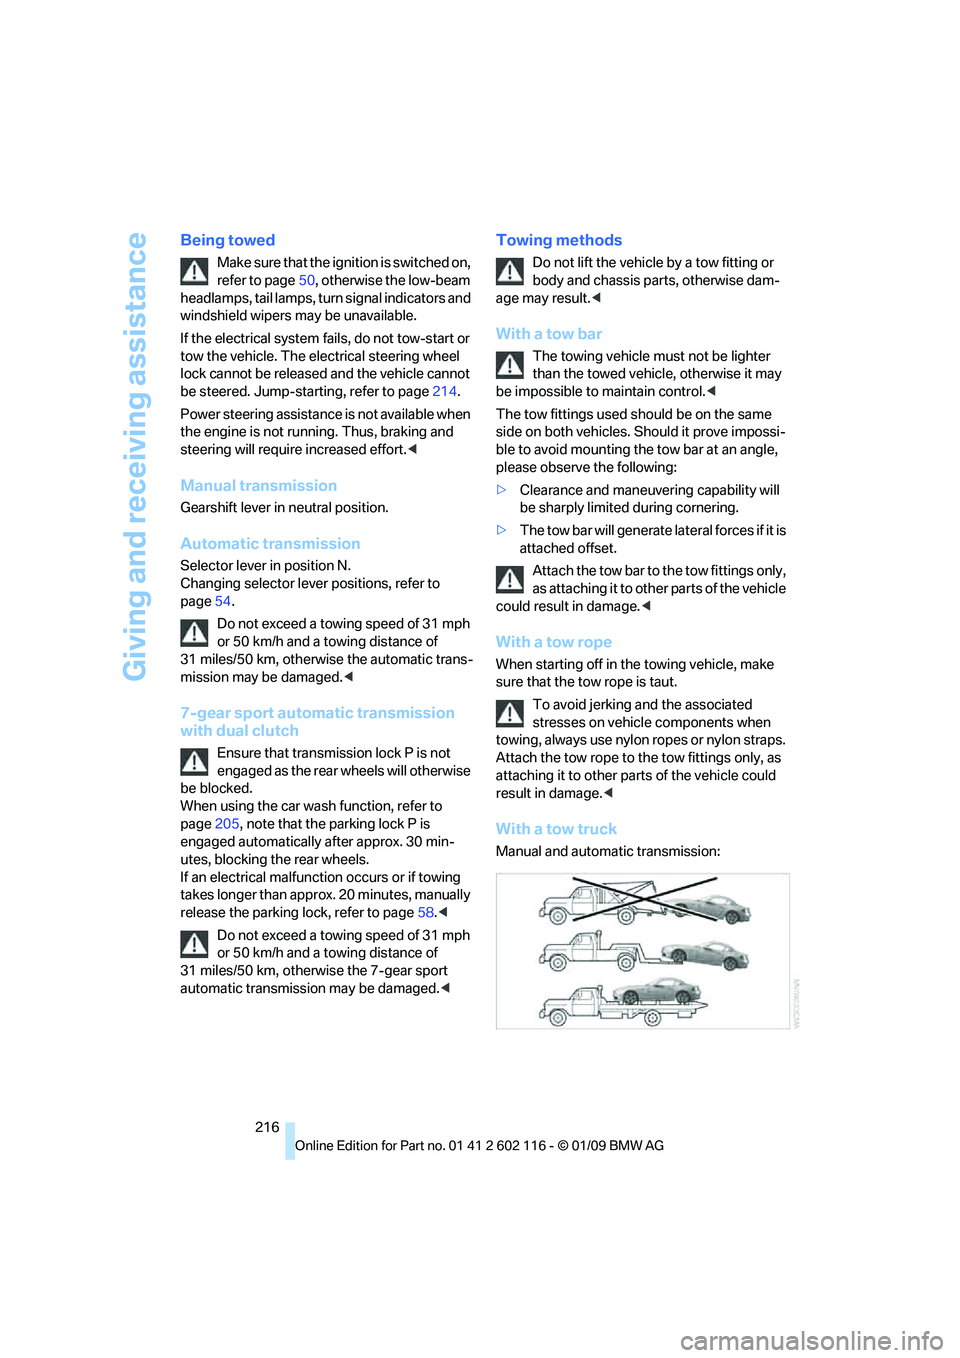
With a tow truck
Manual and automatic transmission:
Page 233 of 248
Reference 231
At a glance
Controls
Driving tips
Communications
Navigation
Entertainment
Mobility
Automatic Service Request 184
Automatic transmission with Steptronic 53
– interlock 53,54
– overriding selector lever lock 55
– shiftlock, refer to Changing
selector lever position 54
– sport program 54
– towing 215
– tow-starting 215
AUTO program for automatic
climate control 96
AUX-IN
– port 102
AUX-IN port 158
Average fuel consumption 66
– setting the units 68
Average speed 66
Avoiding unintentional alarms 34
Axle loads, refer to Weights 222
B
Backrest contour, refer to
Lumbar support 43
Backrests, refer to Seat adjustment 42
Backrest width adjustment 43
Backup lamps
– replacing bulb 210
Backup lamps, refer to Tail lamps 210
Band-aids, refer to First-aid
pouch 214
Bar, refer to Towing methods 216
Base plate for telephone or mobile phone
– refer to Snap-in adapter 174
– refer to Snap-in adapter in the center armrest storage
compartment 102
Bass, tone setting 138Battery
212
– charging 212
– disposal 36,212
– jump starting 214
– remote control 28
– temporary power failure 212
Battery for mobile phone 175
Battery renewal
– remote control 36
– remote control for vehicle 36
Being towed 216
Belts, refer to Safety belts 44
Belt tensioner, refer to Safety
belts 44
Beverage holders, refer to Cup holders 103
Blower, refer to Air flow rate 93,96
Bluetooth, activating/
deactivating 166
Bluetooth, refer to separate Owner's Manual
BMW
– car shampoo 207
BMW Assist, activating 180
BMW Assist 178
BMW center 184
BMW Homepage 4
BMW Maintenance System 202
BMW Search 180
BMW webpage 4
Bottle holders, refer to Cup holders 103
Brake
– parking brake 52
Brake assist, refer to Dynamic
Brake Control DBC 78
Brake fluid, refer to Service requirements 69
Brake lamps
– replacing bulb 210
Br
ake pads 110
– breaking in 110
Brake rotors 112
– brakes 110
– breaking in 110 Brakes
– ABS
78
– BMW Maintenance System 202
– breaking in 110
– service requirements 69
Brakes, refer to Braking safely 112
Brake system 110
– BMW Maintenance System 202
– breaking in 110
– disc brakes 112
Breakdown services, refer to Roadside Assistance 213
Breaking in the clutch 110
Breaking in the differential, refer to Engine and
differential 110
Break-in period 110
Brightness of Control Display 76
Bulb changing, refer to Lamps and bulbs 208
Button for starting the engine,
refer to Start/stop button 50
Buttons on the steering wheel 11
Buttons on the steering wheel 11
C
California Proposition 65
warning 6
Call
– accepting 167
– ending 168
– rejecting 168
Calling, refer to Phone
numbers, dialing 168
Can holders, refer to Cup holders 103
Capacities 222
Capacity of the cargo bay 222
Car battery, refer to Vehicle
battery 212
Car care, refer to Care 204