2009 BMW Z4 SDRIVE30I towing
[x] Cancel search: towingPage 35 of 248
Controls
33Reference
At a glance
Driving tips
Communications
Navigation
Entertainment
Mobility
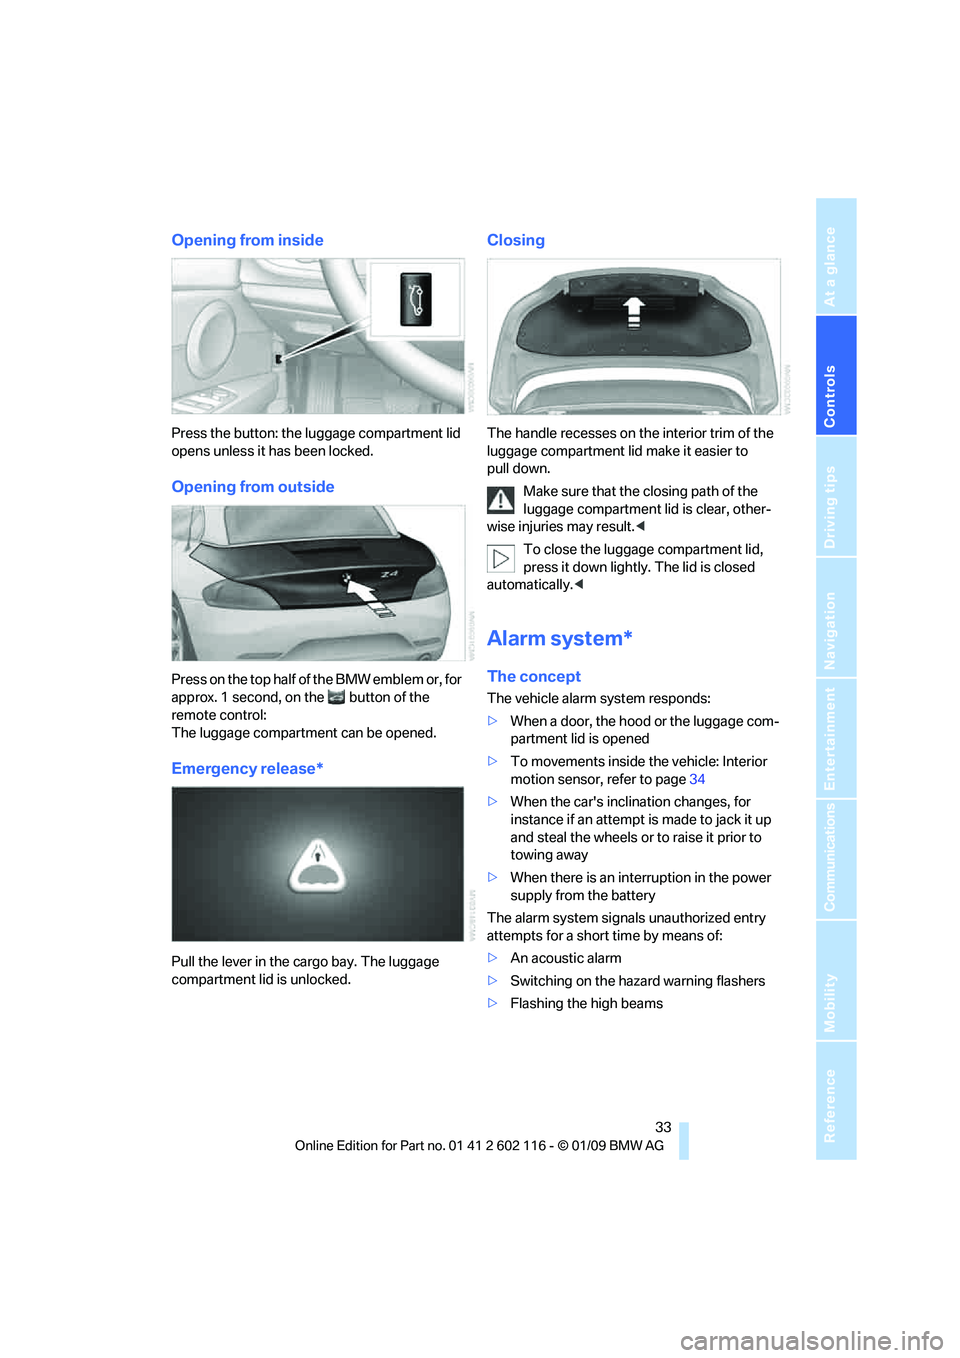
Opening from inside
Press the button: the luggage compartment lid
opens unless it has been locked.
Opening from outside
Press on the top half of the BMW emblem or, for
approx. 1 second, on the button of the
remote control:
The luggage compartment can be opened.
Emergency release*
Pull the lever in the cargo bay. The luggage
compartment lid is unlocked.
Closing
The handle recesses on the interior trim of the
luggage compartment lid make it easier to
pull down.
Make sure that the closing path of the
luggage compartment lid is clear, other-
wise injuries may result. <
To close the luggage compartment lid,
press it down lightly. The lid is closed
automatically. <
Alarm system*
The concept
The vehicle alarm system responds:
>When a door, the hood or the luggage com-
partment lid is opened
> To movements inside the vehicle: Interior
motion sensor, refer to page 34
> When the car's inclination changes, for
instance if an attempt is made to jack it up
and steal the wheels or to raise it prior to
towing away
> When there is an interruption in the power
supply from the battery
The alarm system signals unauthorized entry
attempts for a short time by means of:
> An acoustic alarm
> Switching on the haza rd warning flashers
> Flashing the high beams
Page 61 of 248
Controls
59Reference
At a glance
Driving tips
Communications
Navigation
Entertainment
Mobility
5.Turn the Allen wrench as far as it will go,
arrow 2. The transmission lock is released.
Do not turn the Allen wrench in the
opposite direction as this may dam-
age the mechanism.<
6. Draw the Allen wrench out of the opening.
After parking the vehicle, lock the trans-
mission lock again. Otherwise, there is a
danger of the vehicle rolling. <
Locking
1.Press the button, see arrow.
The transmission lock is locked again.
2. Clip the sleeve of the selector lever back in
place.
3. Set the parking brake.
Jump-starting and towing, refer to page 214.
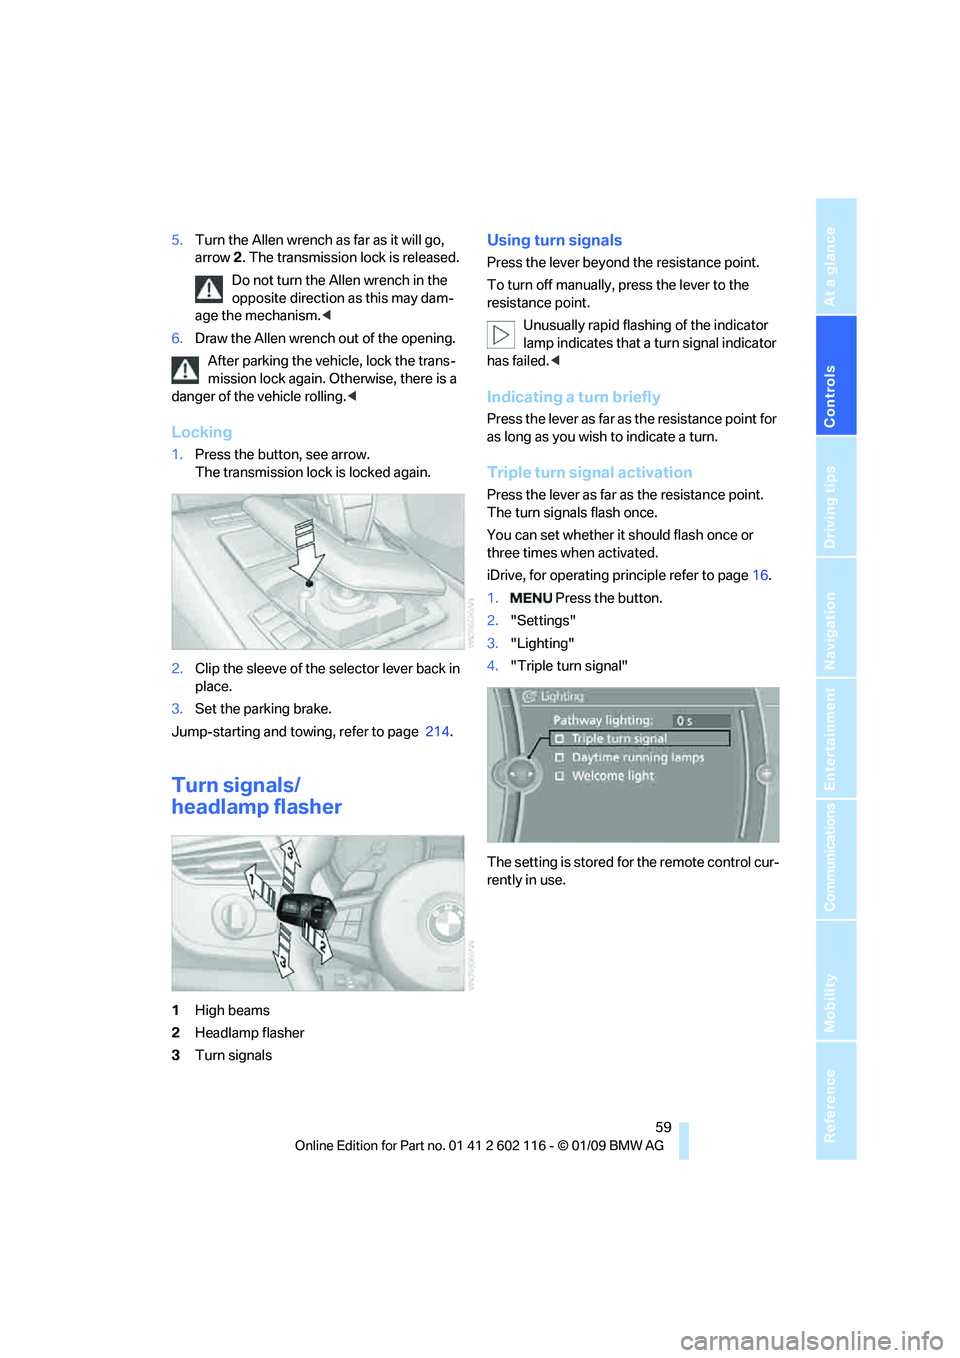
Turn signals/
headlamp flasher
1High beams
2 Headlamp flasher
3 Turn signals
Using turn signals
Press the lever beyond the resistance point.
To turn off manually, press the lever to the
resistance point.
Unusually rapid flashi ng of the indicator
lamp indicates that a turn signal indicator
has failed. <
Indicating a turn briefly
Press the lever as far as the resistance point for
as long as you wish to indicate a turn.
Triple turn signal activation
Press the lever as far as the resistance point.
The turn signals flash once.
You can set whether it should flash once or
three times when activated.
iDrive, for operating pr inciple refer to page16.
1. Press the button.
2. "Settings"
3. "Lighting"
4. "Triple turn signal"
The setting is stored for the remote control cur-
rently in use.
Page 115 of 248
Driving tips
113Reference
At a glance
Controls
Communications
Navigation
Entertainment
Mobility
Before driving into a car wash
General information on caring for your BMW
can be found on page204.
With convenient access and automatic
transmission
Insert the remote control into the ignition
switch.
The engine can be switched off when the selec-
tor lever is in position N. Refer also to page 204.
With convenient access and 7-gear
sport automatic transm ission with dual
clutch
Insert the remote control into the ignition
switch.
The engine can be switched off when the trans-
mission is in position N. Refer also to page 205.
Cargo loading
To avoid loading the tires beyond their
approved carrying capacity, never over-
load the vehicle. Overlo ading can lead to over-
heating and increases the rate at which damage
develops inside the tires. This can ultimately
result in a sudden blow-out. <
Make sure that no liquids are spilled or
leak from their containers in the cargo
bay, as this could result in damage to the
vehicle. <
When storing objects in the rear storage
shelf, do not move both seats all the way
forward while moving th em to their uppermost
position and leaning the backrests forward.
Otherwise, the seats could hit and damage the
seal on the windshield, the sun visor and the
headliner. <
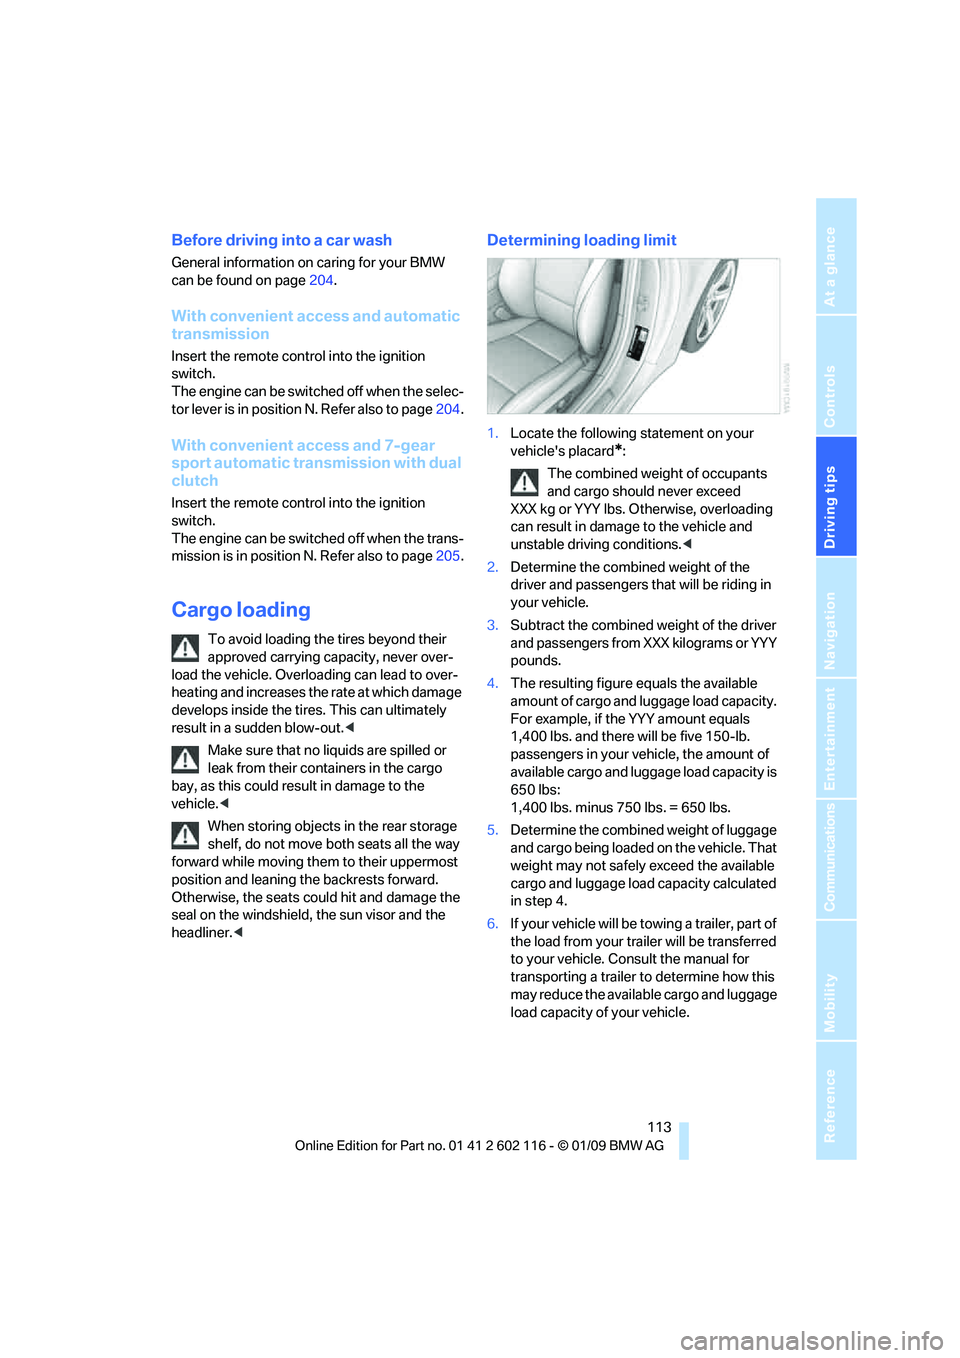
Determining loading limit
1.Locate the following statement on your
vehicle's placard
*:
The combined weight of occupants
and cargo should never exceed
XXX kg or YYY lbs. Otherwise, overloading
can result in damage to the vehicle and
unstable driving conditions.<
2. Determine the combined weight of the
driver and passengers that will be riding in
your vehicle.
3. Subtract the combined weight of the driver
and passengers from XXX kilograms or YYY
pounds.
4. The resulting figure equals the available
amount of cargo and luggage load capacity.
For example, if the YYY amount equals
1,400 lbs. and there will be five 150-lb.
passengers in your ve hicle, the amount of
available cargo and lugga ge load capacity is
650 lbs:
1,400 lbs. minus 750 lbs. = 650 lbs.
5. Determine the combined weight of luggage
and cargo being loaded on the vehicle. That
weight may not safely exceed the available
cargo and luggage load capacity calculated
in step 4.
6. If your vehicle will be towing a trailer, part of
the load from your tra iler will be transferred
to your vehicle. Consult the manual for
transporting a trailer to determine how this
may reduce the availa ble cargo and luggage
load capacity of your vehicle.
Page 116 of 248
Things to remember when driving
114
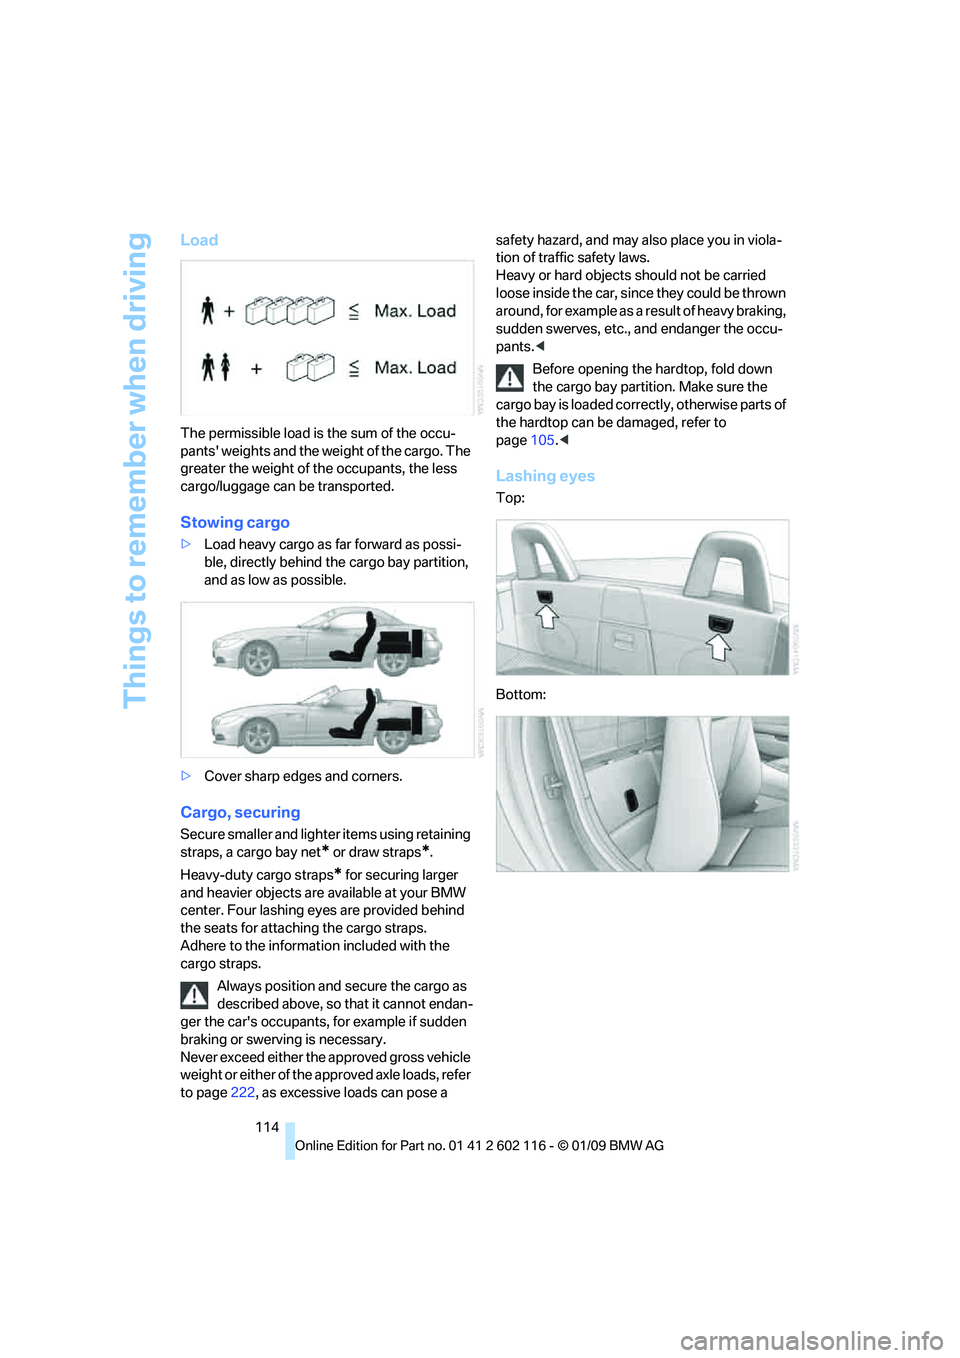
Load
The permissible load is the sum of the occu-
pants' weights and the weight of the cargo. The
greater the weight of the occupants, the less
cargo/luggage can be transported.
Stowing cargo
>Load heavy cargo as far forward as possi-
ble, directly behind the cargo bay partition,
and as low as possible.
> Cover sharp edges and corners.
Cargo, securing
Secure smaller and lighter items using retaining
straps, a cargo bay net
* or draw straps*.
Heavy-duty cargo straps
* for securing larger
and heavier objects are available at your BMW
center. Four lashing eyes are provided behind
the seats for attaching the cargo straps.
Adhere to the informat ion included with the
cargo straps.
Always position and secure the cargo as
described above, so that it cannot endan-
ger the car's occupants, for example if sudden
braking or swerving is necessary.
Never exceed either the approved gross vehicle
weight or either of the a pproved axle loads, refer
to page 222, as excessive loads can pose a safety hazard, and may al
so place you in viola-
tion of traffic safety laws.
Heavy or hard objects should not be carried
loose inside the car, since they could be thrown
around, for example as a result of heavy braking,
sudden swerves, etc., and endanger the occu-
pants. <
Before opening the hardtop, fold down
the cargo bay partition. Make sure the
cargo bay is loaded correctly, otherwise parts of
the hardtop can be damaged, refer to
page 105.<
Lashing eyes
Top:
Bottom:
Page 217 of 248
Mobility
215Reference
At a glance
Controls
Driving tips
Communications
Navigation
Entertainment
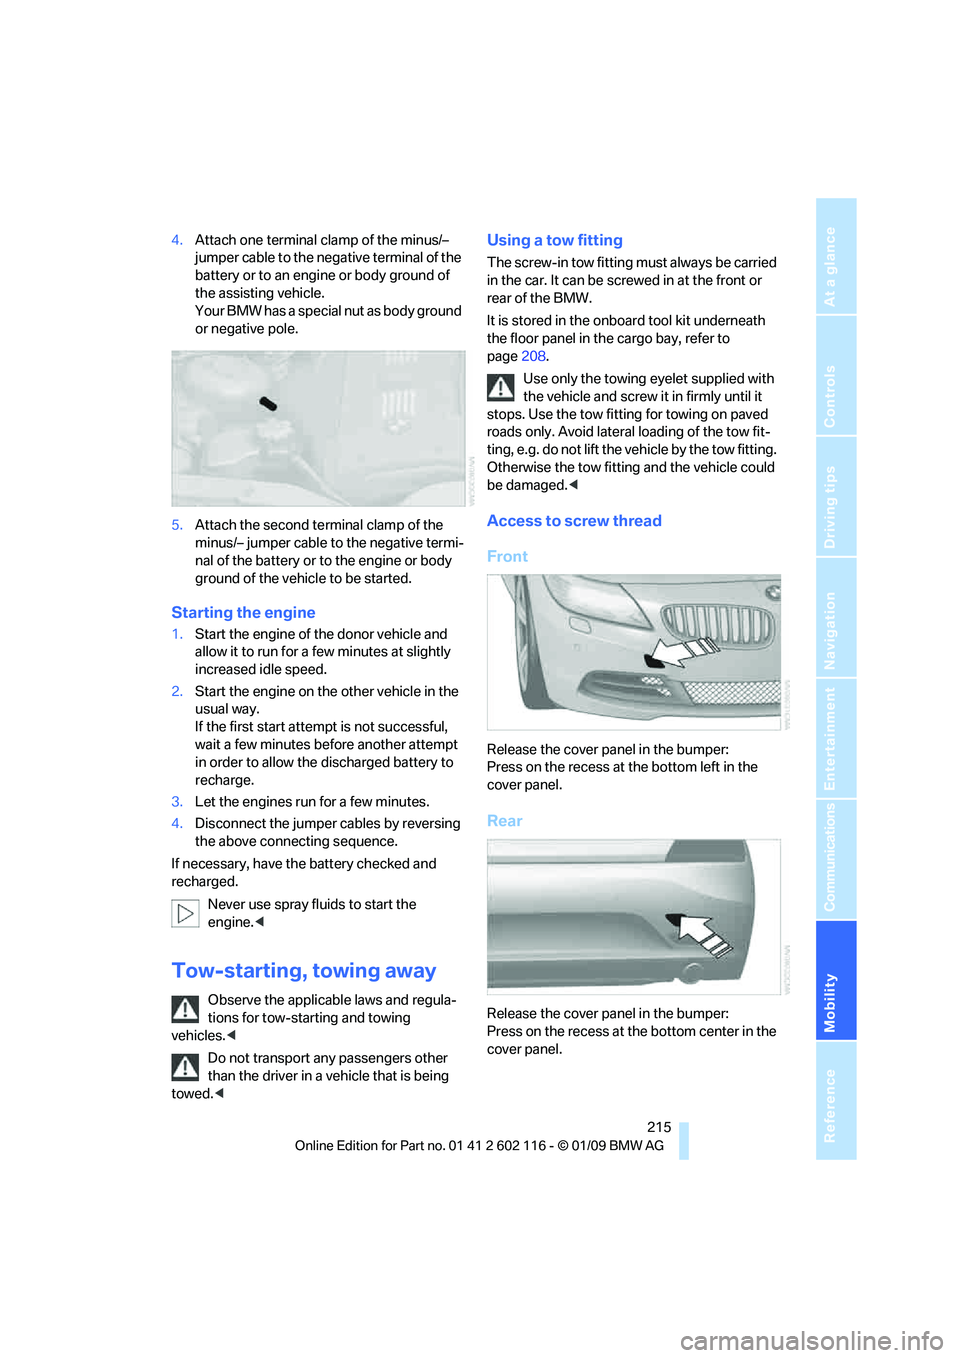
4.Attach one terminal clamp of the minus/–
jumper cable to the nega tive terminal of the
battery or to an engine or body ground of
the assisting vehicle.
Your BMW has a special nut as body ground
or negative pole.
5. Attach the second te rminal clamp of the
minus/– jumper cable to the negative termi-
nal of the battery or to the engine or body
ground of the vehicle to be started.
Starting the engine
1. Start the engine of the donor vehicle and
allow it to run for a few minutes at slightly
increased idle speed.
2. Start the engine on the other vehicle in the
usual way.
If the first start attempt is not successful,
wait a few minutes be fore another attempt
in order to allow the discharged battery to
recharge.
3. Let the engines run for a few minutes.
4. Disconnect the jumper cables by reversing
the above connecting sequence.
If necessary, have the battery checked and
recharged.
Never use spray fluids to start the
engine. <
Tow-starting, towing away
Observe the applicable laws and regula-
tions for tow-starting and towing
vehicles. <
Do not transport any passengers other
than the driver in a vehicle that is being
towed. <
Using a tow fitting
The screw-in tow fitting must always be carried
in the car. It can be sc rewed in at the front or
rear of the BMW.
It is stored in the onboard tool kit underneath
the floor panel in the cargo bay, refer to
page 208.
Use only the towing eyelet supplied with
the vehicle and screw it in firmly until it
stops. Use the tow fitting for towing on paved
roads only. Avoid lateral loading of the tow fit-
ting, e.g. do not lift the vehicle by the tow fitting.
Otherwise the tow fitting and the vehicle could
be damaged. <
Access to screw thread
Front
Release the cover panel in the bumper:
Press on the recess at the bottom left in the
cover panel.
Rear
Release the cover panel in the bumper:
Press on the recess at the bottom center in the
cover panel.
Page 218 of 248
Giving and receiving assistance
216
Being towed
Make sure that the ignition is switched on,
refer to page50, otherwise the low-beam
headlamps, tail lamps, turn signal indicators and
windshield wipers may be unavailable.
If the electrical system fails, do not tow-start or
tow the vehicle. The electrical steering wheel
lock cannot be released and the vehicle cannot
be steered. Jump-starting, refer to page 214.
Power steering assistance is not available when
the engine is not running. Thus, braking and
steering will requir e increased effort.<
Manual transmission
Gearshift lever in neutral position.
Automatic transmission
Selector lever in position N.
Changing selector leve r positions, refer to
page 54.
Do not exceed a towing speed of 31 mph
or 50 km/h and a towing distance of
31 miles/50 km, otherwise the automatic trans-
mission may be damaged. <
7-gear sport automatic transmission
with dual clutch
Ensure that transmission lock P is not
engaged as the rear wheels will otherwise
be blocked.
When using the car wash function, refer to
page 205, note that the parking lock P is
engaged automatically after approx. 30 min-
utes, blocking the rear wheels.
If an electrical malfunction occurs or if towing
takes longer than approx. 20 minutes, manually
release the parking lock, refer to page 58.<
Do not exceed a towing speed of 31 mph
or 50 km/h and a towing distance of
31 miles/50 km, otherwise the 7-gear sport
automatic transmission may be damaged. <
Towing methods
Do not lift the vehicle by a tow fitting or
body and chassis parts, otherwise dam-
age may result. <
With a tow bar
The towing vehicle must not be lighter
than the towed vehicle, otherwise it may
be impossible to maintain control. <
The tow fittings used should be on the same
side on both vehicles. Should it prove impossi-
ble to avoid mounting the tow bar at an angle,
please observe the following:
> Clearance and maneuvering capability will
be sharply limited during cornering.
> The tow bar will generate la teral forces if it is
attached offset.
Attach the tow bar to the tow fittings only,
as attaching it to othe r parts of the vehicle
could result in damage. <
With a tow rope
When starting off in the towing vehicle, make
sure that the tow rope is taut.
To avoid jerking and the associated
stresses on vehicle components when
towing, always use nylon ropes or nylon straps.
Attach the tow rope to the tow fittings only, as
attaching it to other pa rts of the vehicle could
result in damage. <
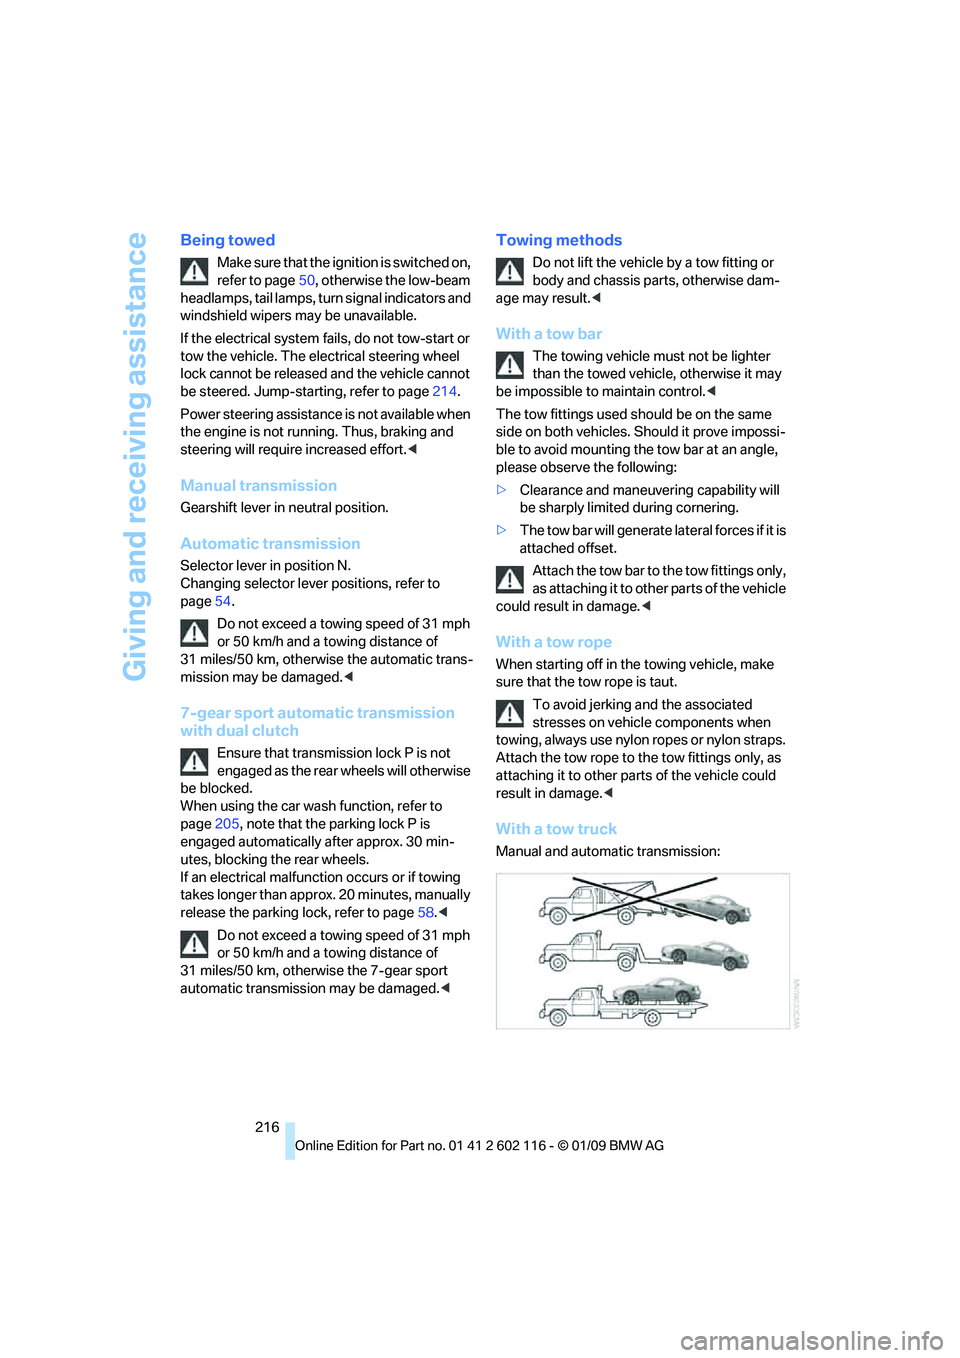
With a tow truck
Manual and automatic transmission:
Page 233 of 248
Reference 231
At a glance
Controls
Driving tips
Communications
Navigation
Entertainment
Mobility
Automatic Service Request 184
Automatic transmission with Steptronic 53
– interlock 53,54
– overriding selector lever lock 55
– shiftlock, refer to Changing
selector lever position 54
– sport program 54
– towing 215
– tow-starting 215
AUTO program for automatic
climate control 96
AUX-IN
– port 102
AUX-IN port 158
Average fuel consumption 66
– setting the units 68
Average speed 66
Avoiding unintentional alarms 34
Axle loads, refer to Weights 222
B
Backrest contour, refer to
Lumbar support 43
Backrests, refer to Seat adjustment 42
Backrest width adjustment 43
Backup lamps
– replacing bulb 210
Backup lamps, refer to Tail lamps 210
Band-aids, refer to First-aid
pouch 214
Bar, refer to Towing methods 216
Base plate for telephone or mobile phone
– refer to Snap-in adapter 174
– refer to Snap-in adapter in the center armrest storage
compartment 102
Bass, tone setting 138Battery
212
– charging 212
– disposal 36,212
– jump starting 214
– remote control 28
– temporary power failure 212
Battery for mobile phone 175
Battery renewal
– remote control 36
– remote control for vehicle 36
Being towed 216
Belts, refer to Safety belts 44
Belt tensioner, refer to Safety
belts 44
Beverage holders, refer to Cup holders 103
Blower, refer to Air flow rate 93,96
Bluetooth, activating/
deactivating 166
Bluetooth, refer to separate Owner's Manual
BMW
– car shampoo 207
BMW Assist, activating 180
BMW Assist 178
BMW center 184
BMW Homepage 4
BMW Maintenance System 202
BMW Search 180
BMW webpage 4
Bottle holders, refer to Cup holders 103
Brake
– parking brake 52
Brake assist, refer to Dynamic
Brake Control DBC 78
Brake fluid, refer to Service requirements 69
Brake lamps
– replacing bulb 210
Br
ake pads 110
– breaking in 110
Brake rotors 112
– brakes 110
– breaking in 110 Brakes
– ABS
78
– BMW Maintenance System 202
– breaking in 110
– service requirements 69
Brakes, refer to Braking safely 112
Brake system 110
– BMW Maintenance System 202
– breaking in 110
– disc brakes 112
Breakdown services, refer to Roadside Assistance 213
Breaking in the clutch 110
Breaking in the differential, refer to Engine and
differential 110
Break-in period 110
Brightness of Control Display 76
Bulb changing, refer to Lamps and bulbs 208
Button for starting the engine,
refer to Start/stop button 50
Buttons on the steering wheel 11
Buttons on the steering wheel 11
C
California Proposition 65
warning 6
Call
– accepting 167
– ending 168
– rejecting 168
Calling, refer to Phone
numbers, dialing 168
Can holders, refer to Cup holders 103
Capacities 222
Capacity of the cargo bay 222
Car battery, refer to Vehicle
battery 212
Car care, refer to Care 204
Page 234 of 248
Everything from A to Z
232
Care
204
– automatic car washes 204
– care products 204
– carpets 206
– CD/DVD drives 207
– chrome parts 206
– displays 207
– exterior 204
– fine wood parts 207
– headlamps 205
– high-pressure washer 205
– interior 206
– leather 206
– light-alloy wheels 206
– paintwork 205
– plastic parts 207
– retractable hardtop 205
– rubber seals 206
– safety belts 207
– sensors and cameras 207
– upholstery and cloth trim 206
– washing the car manually 205
– windows 205
Cargo, securing 114
Cargo bay
– capacity 222
– convenient access 35
– lamp, refer to Interior lamps 90
– opening from inside 33
– opening from outside 33
Cargo loading
– securing cargo 114
– stowing cargo 114
– vehicle 113
Car jack
– jacking points 211
Car key, refer to Integrated
key/remote control 28
Car phone
– installation location, refer to
Center armrest 102
– refer to separate Owner's Manual
Car phone, refer to Telephone 164
Car radio, refer to Radio 141Car shampoo
207
Car wash 113
– with convenient access 36
Car wash, refer to the Caring for your vehicle brochure
Catalytic converter, refer to Hot exhaust system 111
CBS Condition Based
Service 202
CD, audio playback 146
CD/DVD changer 14
6
– controls 138
– fast forward/reverse 148
– random sequence 147
– switching on/off 138
– tone control 138
– volume 138
CD/DVD player 146
– controls 138
– fast forward/reverse 148
– random sequence 147
– switching on/off 138
– tone control 138
– volume 138
CD changer
– selecting a track 146
CD player
– selecting a track 146
Center armrest 102
Center brake lamp
– replacing bulb 211
Center console, refer to Around the center
console 14
Central locking
– from inside 32
– from outside 29
Central locking system 29
– convenient access 35
– setting unlocking
characteristics 29
Changes, technical, refer to For your own safety 5
Changing bulbs, refer to Lamps and bulbs 208
Changing the measurement
units on the Control
Display 68
Changing wheels 211Chassis number, refer to
Engine compartment 198
Check Control 73
Child-restraint systems 48
Child seats, refer to
Transporting children
safely 48
Chrome parts 207
Chrome polish 207
Cigarette lighter, refer to Lighter 104
Cleaning headlamps 60
– washer fluid 61
Cleaning your BMW, refer to Care 204
Clock 64
– 12h/24h mode 72
– setting the time and date 72
– setting time 71
Closing
– from inside 32
– from outside 29
Cockpit 10
Cold start, refer to Starting
the
engine 51
Combined instrument, refer to Instrument cluster 12
Comfort access, refer to
Convenient access 35
Comfort area, refer to Around the center console 14
Compartment for remote control, refer to
Ignition lock 50
Compass 100
Computer 65
– displays on Control
Display 66
Computer, refer to iDrive 16
Concierge service 179
Condensation, refer to When the vehicle is parked 112
Condition Based Service
CBS 202
Configuring settings, refer to Personal Profile 28
Confirmation signals for locking/unlocking the
vehicle 31