Page 42 of 275
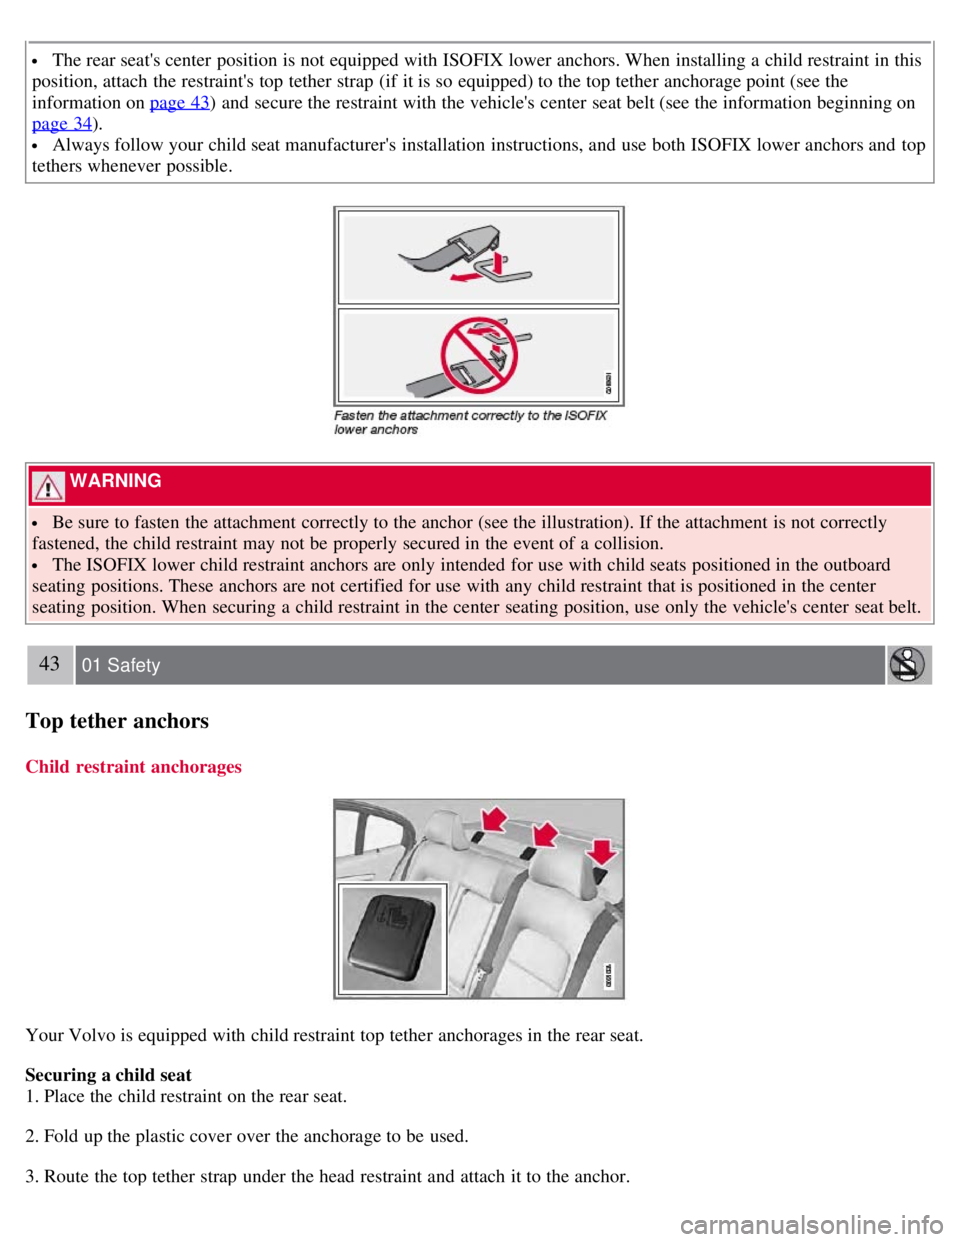
The rear seat's center position is not equipped with ISOFIX lower anchors. When installing a child restraint in this
position, attach the restraint's top tether strap (if it is so equipped) to the top tether anchorage point (see the
information on page 43
) and secure the restraint with the vehicle's center seat belt (see the information beginning on
page 34
).
Always follow your child seat manufacturer's installation instructions, and use both ISOFIX lower anchors and top
tethers whenever possible.
WARNING
Be sure to fasten the attachment correctly to the anchor (see the illustration). If the attachment is not correctly
fastened, the child restraint may not be properly secured in the event of a collision.
The ISOFIX lower child restraint anchors are only intended for use with child seats positioned in the outboard
seating positions. These anchors are not certified for use with any child restraint that is positioned in the center
seating position. When securing a child restraint in the center seating position, use only the vehicle's center seat belt.
43 01 Safety
Top tether anchors
Child restraint anchorages
Your Volvo is equipped with child restraint top tether anchorages in the rear seat.
Securing a child seat
1. Place the child restraint on the rear seat.
2. Fold up the plastic cover over the anchorage to be used.
3. Route the top tether strap under the head restraint and attach it to the anchor.
Page 69 of 275
2 0 0 8
VOLVO S80
70 03 Your driving environment
Instruments and controls 72
Ignition modes80
Seats82
Steering wheel87
Lighting89
Wipers and washers95
Power windows97
Mirrors99
Power moonroof101
HomeLink® Universal Transceiver103
Starting the engine107
Transmission110
Brakes113
Parking brake115
71 03 Your driving environment
72 03 Your driving environment
Instruments and controls
Instrument overview
Page 79 of 275
82 03 Your driving environment
Seats
Front seats
Lumbar support: turn the control for firmer or softer lumbar support.
Front-rear adjustment: lift the bar and move the seat to the position of your choice.
Raise/lower front edge of seat cushion, pump up/down.
Backrest tilt: turn the control to adjust the angle of the backrest.
Raise/lower the seat, pump up/down.
Control panel for power seat.
WARNING
Do not adjust the seat while driving. The seat should be adjusted so that the brake pedal can be depressed fully. In
addition, position the seat as far rearward as comfort and control allow.
Check that the seat is securely locked into position after adjusting.
Folding the front seat backrest
The front passenger seat backrest can be folded to a horizontal position to make room for a long load. Fold the
backrest as follows:
Move the seat as far back as possible.
Page 80 of 275
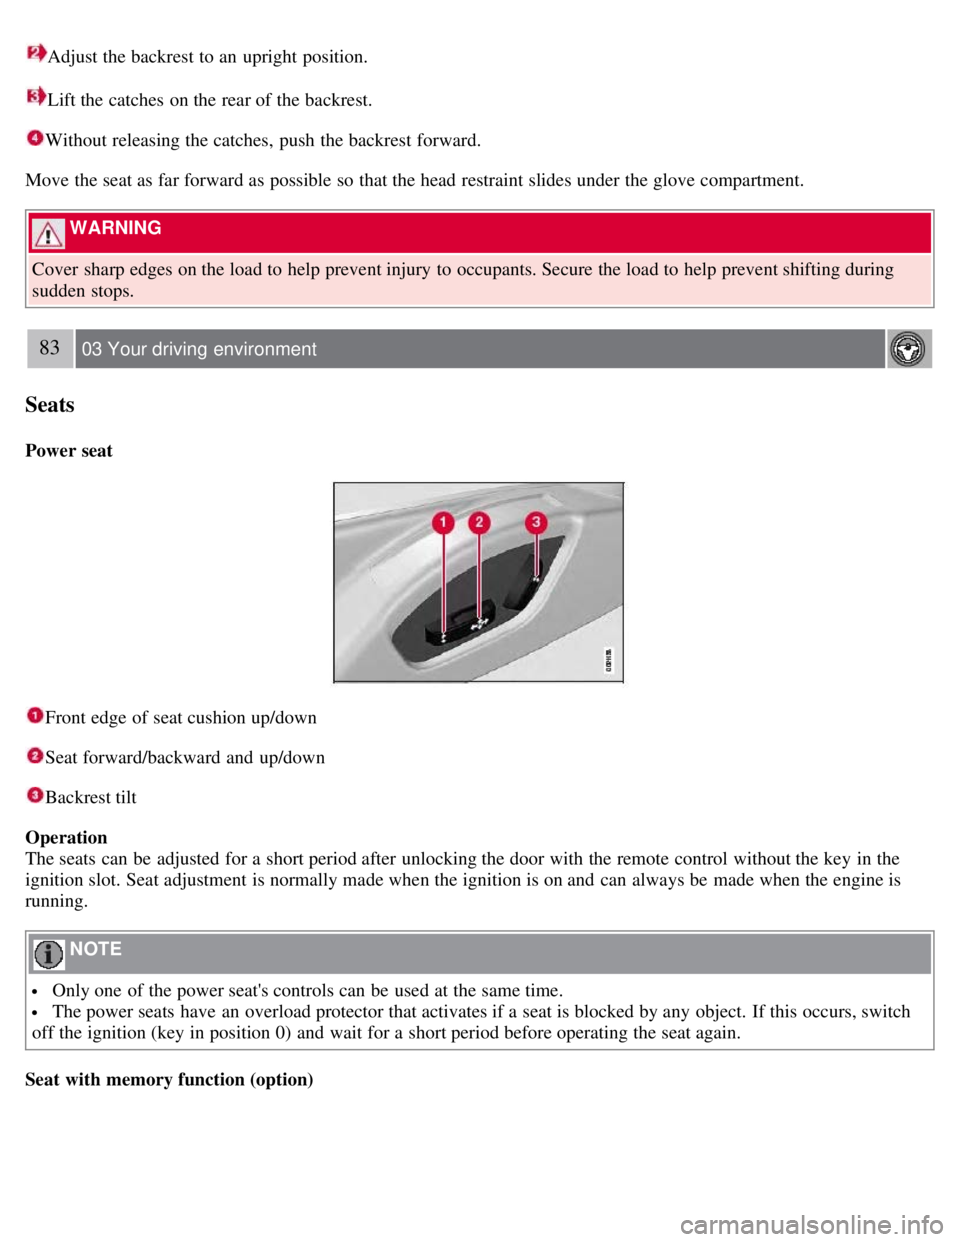
Adjust the backrest to an upright position.
Lift the catches on the rear of the backrest.
Without releasing the catches, push the backrest forward.
Move the seat as far forward as possible so that the head restraint slides under the glove compartment.
WARNING
Cover sharp edges on the load to help prevent injury to occupants. Secure the load to help prevent shifting during
sudden stops.
83 03 Your driving environment
Seats
Power seat
Front edge of seat cushion up/down
Seat forward/backward and up/down
Backrest tilt
Operation
The seats can be adjusted for a short period after unlocking the door with the remote control without the key in the
ignition slot. Seat adjustment is normally made when the ignition is on and can always be made when the engine is
running.
NOTE
Only one of the power seat's controls can be used at the same time.
The power seats have an overload protector that activates if a seat is blocked by any object. If this occurs, switch
off the ignition (key in position 0) and wait for a short period before operating the seat again.
Seat with memory function (option)
Page 81 of 275
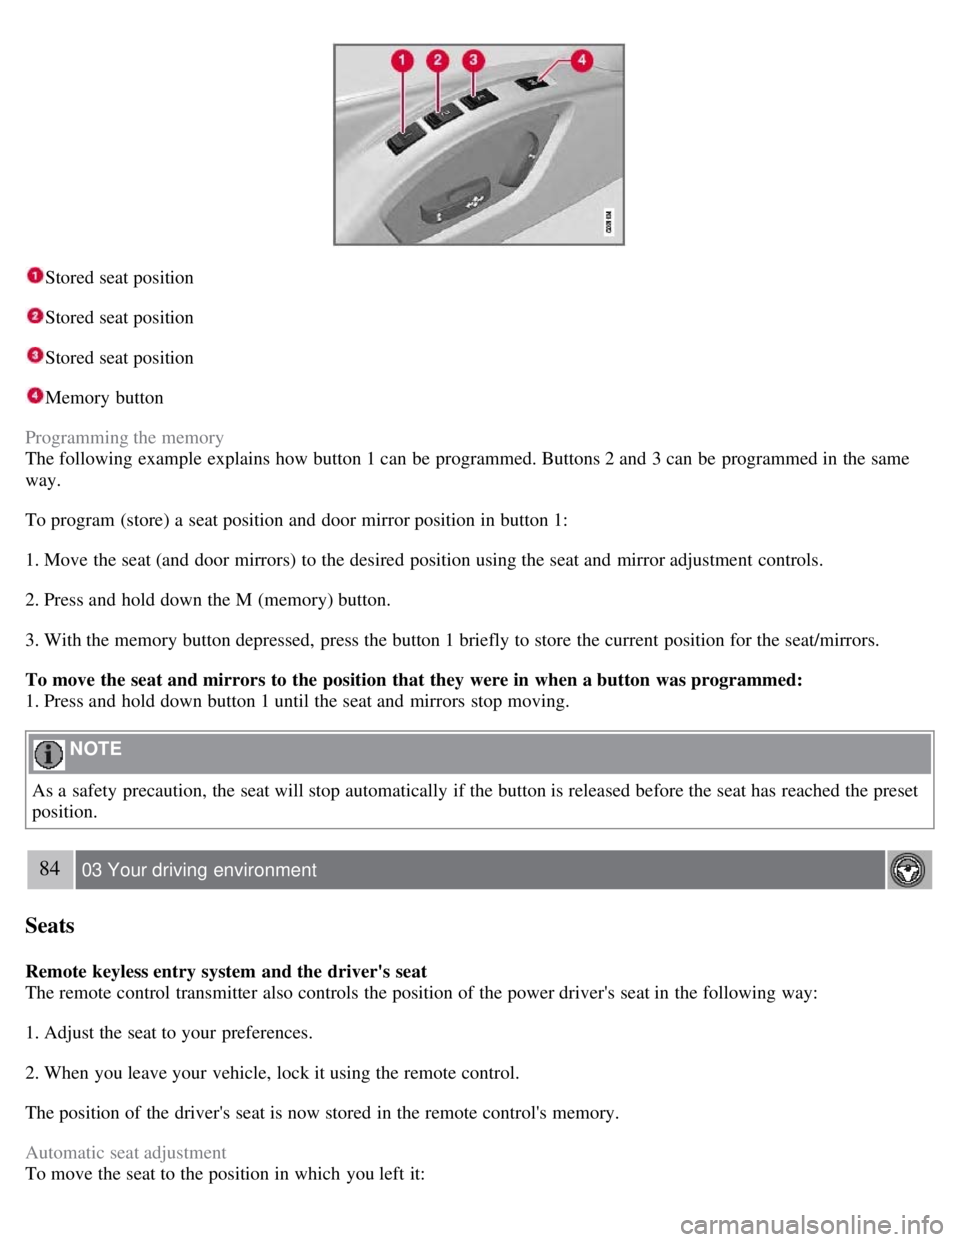
Stored seat position
Stored seat position
Stored seat position
Memory button
Programming the memory
The following example explains how button 1 can be programmed. Buttons 2 and 3 can be programmed in the same
way.
To program (store) a seat position and door mirror position in button 1:
1. Move the seat (and door mirrors) to the desired position using the seat and mirror adjustment controls.
2. Press and hold down the M (memory) button.
3. With the memory button depressed, press the button 1 briefly to store the current position for the seat/mirrors.
To move the seat and mirrors to the position that they were in when a button was programmed:
1. Press and hold down button 1 until the seat and mirrors stop moving.
NOTE
As a safety precaution, the seat will stop automatically if the button is released before the seat has reached the preset
position.
84 03 Your driving environment
Seats
Remote keyless entry system and the driver's seat
The remote control transmitter also controls the position of the power driver's seat in the following way:
1. Adjust the seat to your preferences.
2. When you leave your vehicle, lock it using the remote control.
The position of the driver's seat is now stored in the remote control's memory.
Automatic seat adjustment
To move the seat to the position in which you left it:
Page 82 of 275
1. Unlock the driver's door with the same remote control (the one used to lock the doors)
2. Open the driver's door within 2 minutes.
The driver's seat will automatically move to the position in which you left it.
NOTE
The key memory is independent of the seat memory.
The seat will Move to this position even if someone else has moved it to a different seating position and locked
the vehicle with a different remote control.
This feature will work in the same way with all of the remote control transmitters that you use with your vehicle.
The function can be activated/deactivated under Car key memory
Seat & mirror positions . For a description of the
menu system, see the information beginning on page 123
.
Emergency stop
If the seat accidentally begins to move, press one of the buttons to stop the seat.
WARNING
Because the driver's seat can be adjusted with the ignition off, children should never be left unattended in the
vehicle.
Movement of the seat can be STOPPED at any time by pressing any button on the power seat control panel.
Do not adjust the seat while driving. The seat should be adjusted so that the brake pedal can be depressed fully. In
addition, position the seat as far rearward as comfort and control allow.
The seat rails on the floor must not be obstructed in any way when the seat is in motion.
Heated/ventilated seats (option)
See page 129
.
85 03 Your driving environment
Seats
Rear seats
Folding down the rear seat backrests
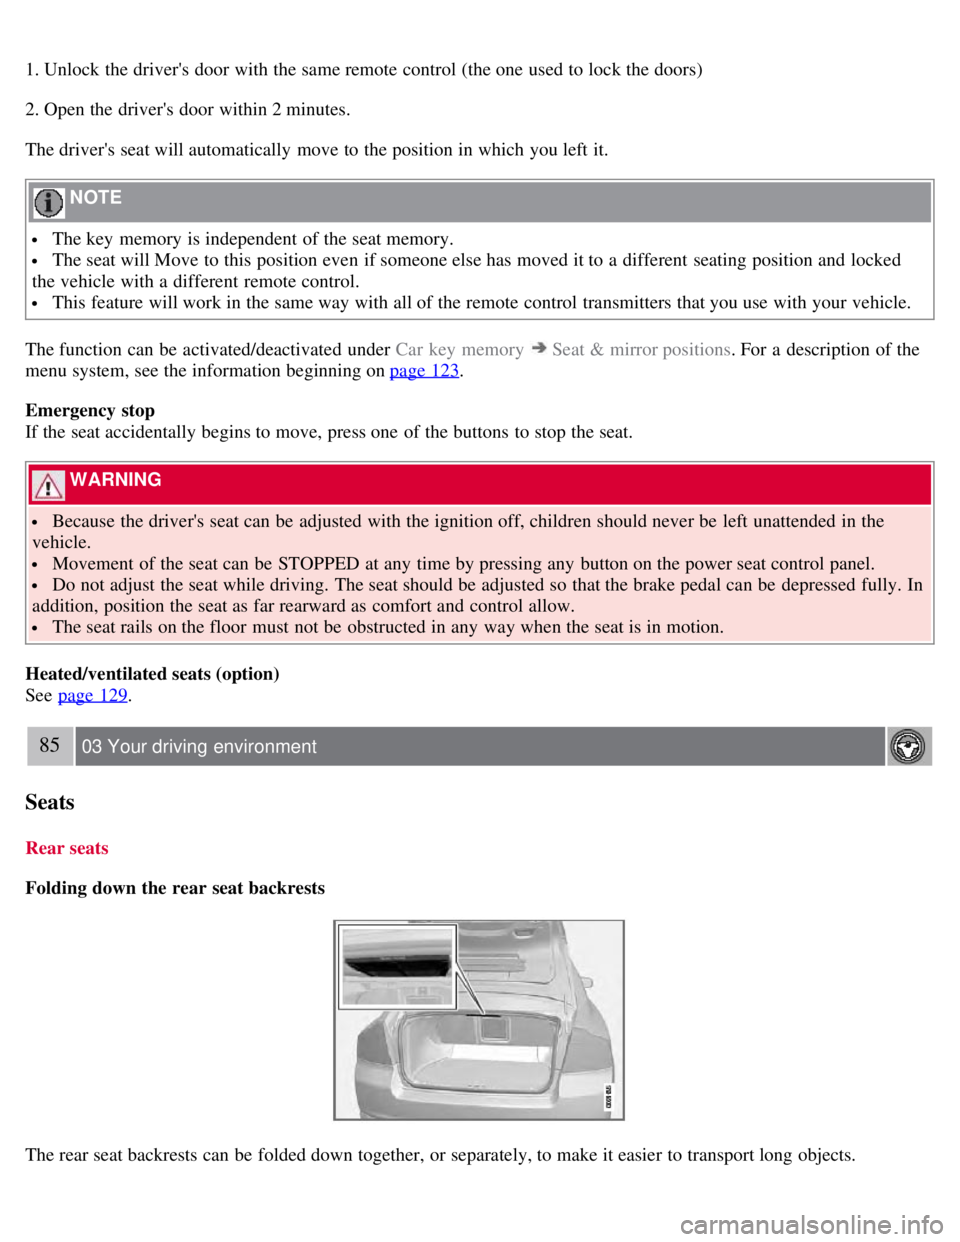
The rear seat backrests can be folded down together, or separately, to make it easier to transport long objects.
Page 84 of 275
Seats
Automatically lowering the rear seat's outboard head restraints
1. The ignition must be in mode I or II.
2. Press the button to lower the rear head restraints for improved visibility.
NOTE
The head restraint must be returned to the upright position manually.
The outboard head restraints cannot be folded down on models that are not equipped with this button.
WARNING
For safety reasons, no one should be allowed to sit in the outboard rear seat positions if the head restraints are folded
down. If these positions are occupied, the head restraints should be in the upright (fixed) position.
87 03 Your driving environment
Steering wheel
Adjusting
Lever for releasing/locking the steering wheel
Possible positions
The steering wheel can be adjusted for both height and reach:
Page 127 of 275
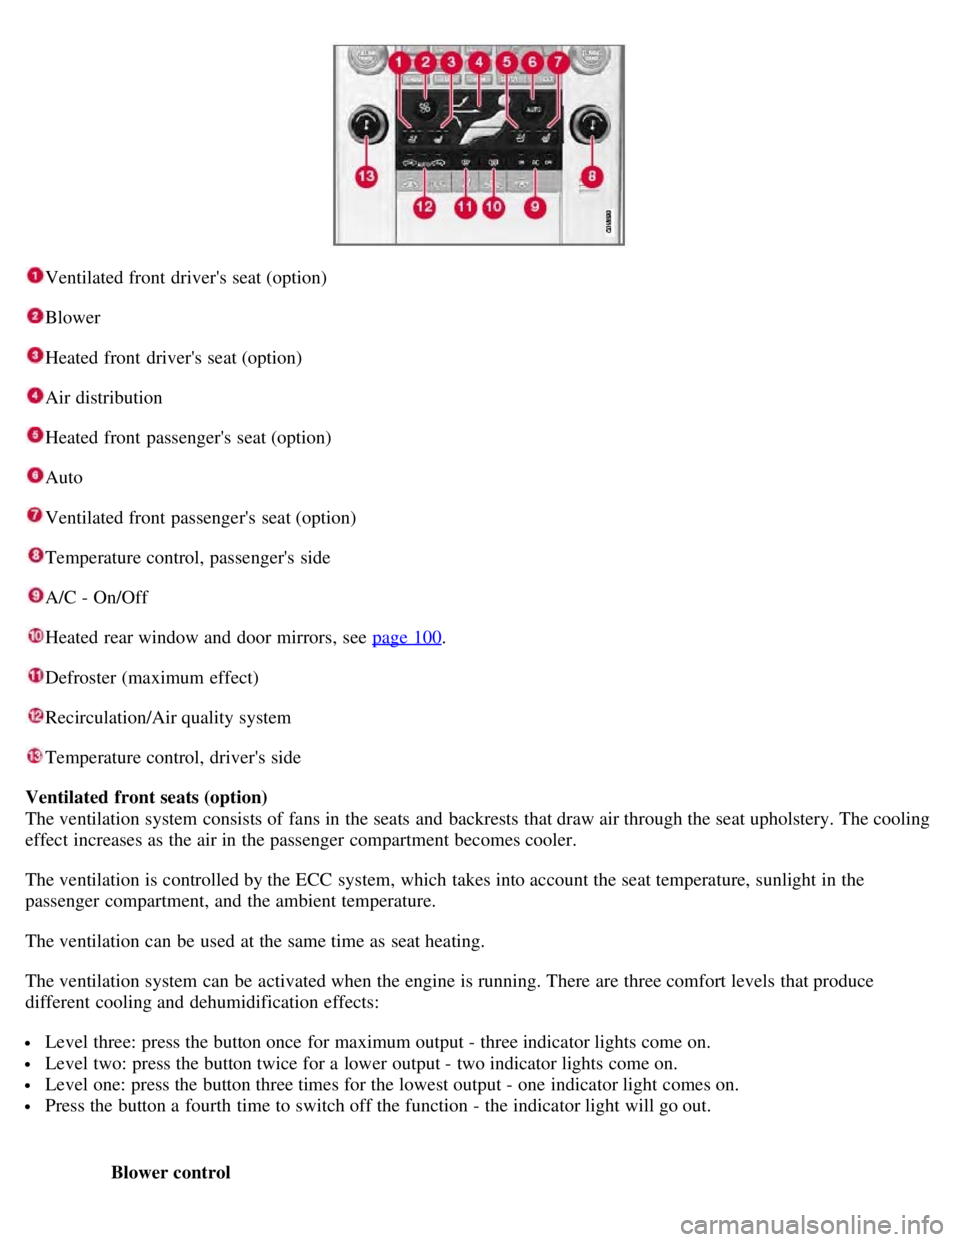
Ventilated front driver's seat (option)
Blower
Heated front driver's seat (option)
Air distribution
Heated front passenger's seat (option)
Auto
Ventilated front passenger's seat (option)
Temperature control, passenger's side
A/C - On/Off
Heated rear window and door mirrors, see page 100.
Defroster (maximum effect)
Recirculation/Air quality system
Temperature control, driver's side
Ventilated front seats (option)
The ventilation system consists of fans in the seats and backrests that draw air through the seat upholstery. The cooling
effect increases as the air in the passenger compartment becomes cooler.
The ventilation is controlled by the ECC system, which takes into account the seat temperature, sunlight in the
passenger compartment, and the ambient temperature.
The ventilation can be used at the same time as seat heating.
The ventilation system can be activated when the engine is running. There are three comfort levels that produce
different cooling and dehumidification effects:
Level three: press the button once for maximum output - three indicator lights come on.
Level two: press the button twice for a lower output - two indicator lights come on.
Level one: press the button three times for the lowest output - one indicator light comes on.
Press the button a fourth time to switch off the function - the indicator light will go out.
Blower control