2008 VOLVO S80 ECU
[x] Cancel search: ECUPage 83 of 275
1. Pull the release control handle(s).
2. Fold the backrest forward. Adjust the center seat head restraint if necessary.
NOTE
The outboard head restraints must be folded up (in the upright position) before lowering the backrests.
WARNING
Keep vehicle doors and the trunk locked and keep keys out of a child's reach. Unsupervised children could lock
themselves in an open trunk and risk injury. Children should be taught not to play in vehicles.
On hot days, the temperature in the trunk or vehicle interior can rise very quickly. Exposure of people to these
high temperatures for even a short period of time can cause heat-related injury or death. Small children are
particularly at risk.
WARNING
When the backrest is returned to the upright position, check that it is properly locked in place. Return the head
restraints to the upright position.
Long loads should always be securely anchored to help avoid injury in the event of a sudden stop.
Always turn the engine off and apply the parking brake when loading/unloading the vehicle.
Place the transmission in the Park ( P) position to help prevent inadvertent movement of the gear selector.
The vehicle features a 60/40 split fold-down rear seat. The backrest(s) can be folded down by pulling the release
control handles inside the trunk.
Rear center head restraint
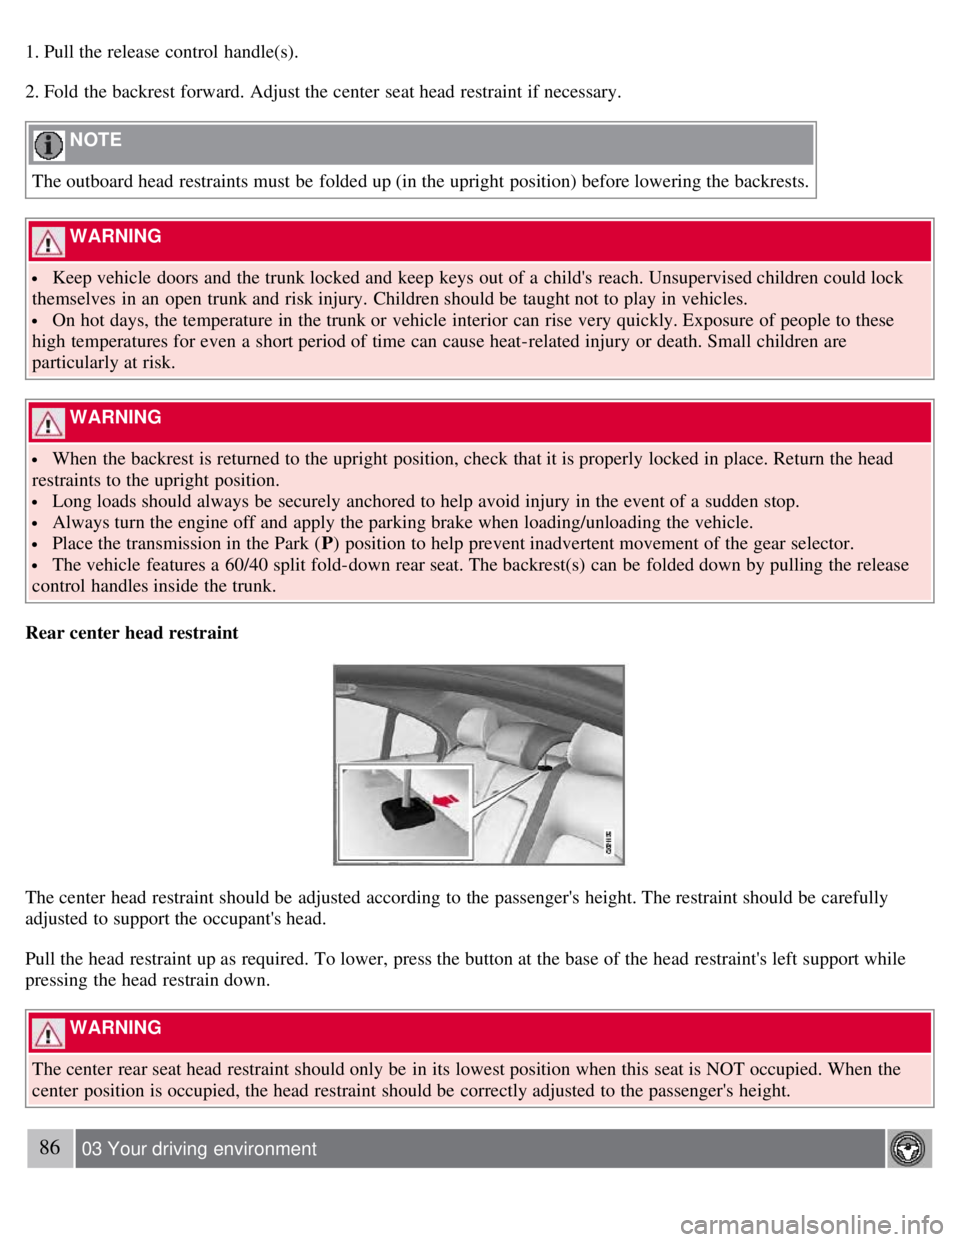
The center head restraint should be adjusted according to the passenger's height. The restraint should be carefully
adjusted to support the occupant's head.
Pull the head restraint up as required. To lower, press the button at the base of the head restraint's left support while
pressing the head restrain down.
WARNING
The center rear seat head restraint should only be in its lowest position when this seat is NOT occupied. When the
center position is occupied, the head restraint should be correctly adjusted to the passenger's height.
86 03 Your driving environment
Page 101 of 275
Introduction
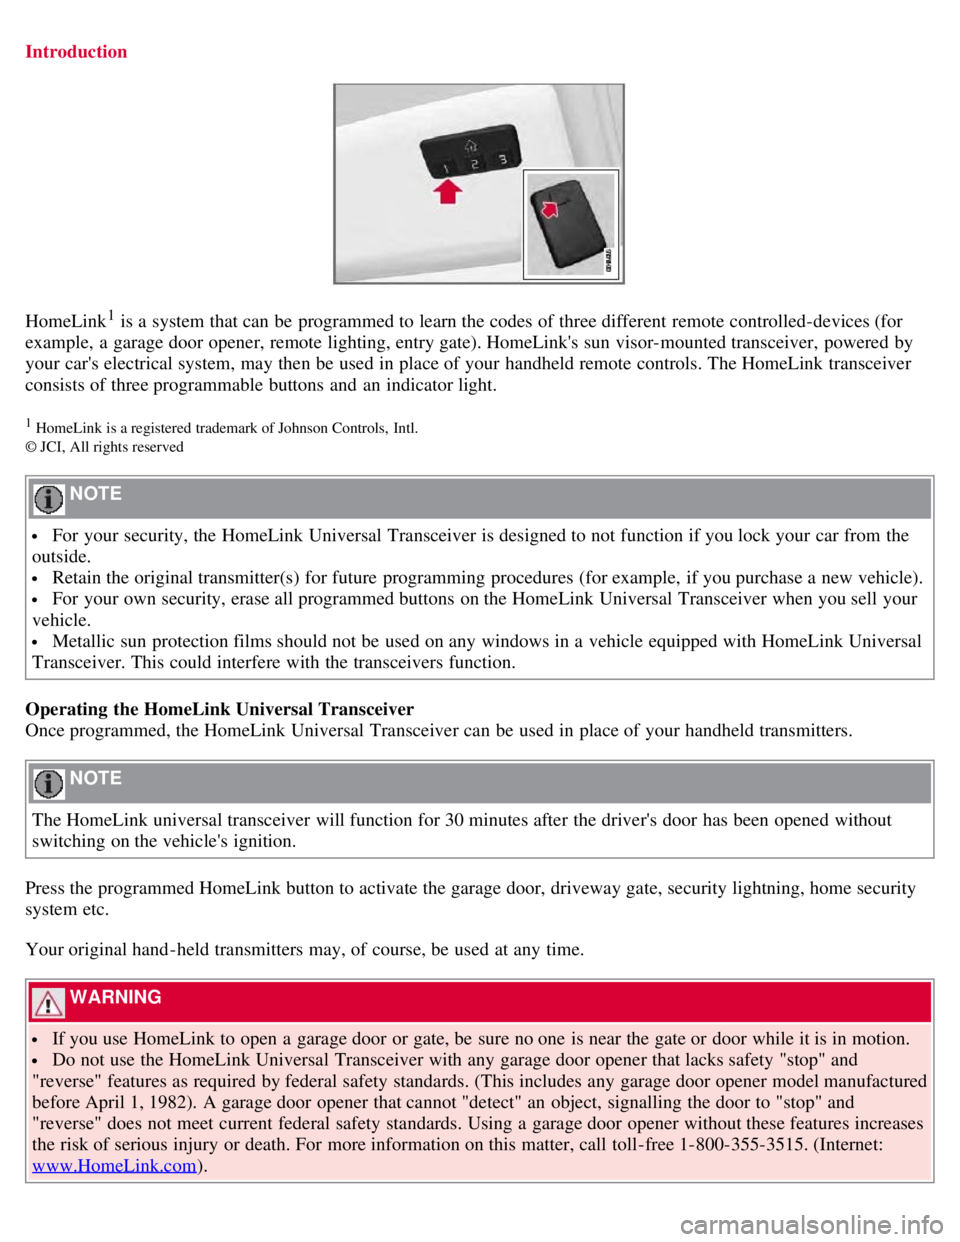
HomeLink1 is a system that can be programmed to learn the codes of three different remote controlled-devices (for
example, a garage door opener, remote lighting, entry gate). HomeLink's sun visor-mounted transceiver, powered by
your car's electrical system, may then be used in place of your handheld remote controls. The HomeLink transceiver
consists of three programmable buttons and an indicator light.
1 HomeLink is a registered trademark of Johnson Controls, Intl.
© JCI, All rights reserved
NOTE
For your security, the HomeLink Universal Transceiver is designed to not function if you lock your car from the
outside.
Retain the original transmitter(s) for future programming procedures (for example, if you purchase a new vehicle).
For your own security, erase all programmed buttons on the HomeLink Universal Transceiver when you sell your
vehicle.
Metallic sun protection films should not be used on any windows in a vehicle equipped with HomeLink Universal
Transceiver. This could interfere with the transceivers function.
Operating the HomeLink Universal Transceiver
Once programmed, the HomeLink Universal Transceiver can be used in place of your handheld transmitters.
NOTE
The HomeLink universal transceiver will function for 30 minutes after the driver's door has been opened without
switching on the vehicle's ignition.
Press the programmed HomeLink button to activate the garage door, driveway gate, security lightning, home security
system etc.
Your original hand -held transmitters may, of course, be used at any time.
WARNING
If you use HomeLink to open a garage door or gate, be sure no one is near the gate or door while it is in motion.
Do not use the HomeLink Universal Transceiver with any garage door opener that lacks safety "stop" and
"reverse" features as required by federal safety standards. (This includes any garage door opener model manufactured
before April 1, 1982). A garage door opener that cannot "detect" an object, signalling the door to "stop" and
"reverse" does not meet current federal safety standards. Using a garage door opener without these features increases
the risk of serious injury or death. For more information on this matter, call toll-free 1-800-355-3515. (Internet:
www.HomeLink.com
).
Page 191 of 275
To increase loading space, the rear seat backrests can be folded down, see page 85.
The trunk lid can be unlocked via the button located on the lighting panel, see page 64.
Load the cargo in the trunk against the backrest.
Load wide cargo in the trunk on both sides of the rear seat split.
Unstable loads can be secured to the load anchoring eyelets with straps or web lashings to help keep them from
shifting.
Folding down the rear seat backrests
See page 85
for information.
WARNING
The vehicle's driving characteristics may change depending on the weight and distribution of the load.
A 44-pound (20 kg) object produces a force of 2,200 pounds (1,000 kg) in a head-on collision at 30 mph (50
km/h).
Loading the cargo area
Stop the engine and apply the parking brake when loading or unloading long objects. The gear selector can be knocked
out of position by long loads, which could set the vehicle in motion. To increase loading space, the rear seat backrests
can be folded down, see page 85
.
WARNING
Stop the engine, put the gear selector in P , and apply the parking brake when loading or unloading long objects.
The rear seat should not be loaded to a level higher than 2 in. (5 cm) below the upper edge of the rear side
windows. Objects placed higher than this level could impede the function of the Volvo Inflatable Curtain.
Load anchoring eyelets
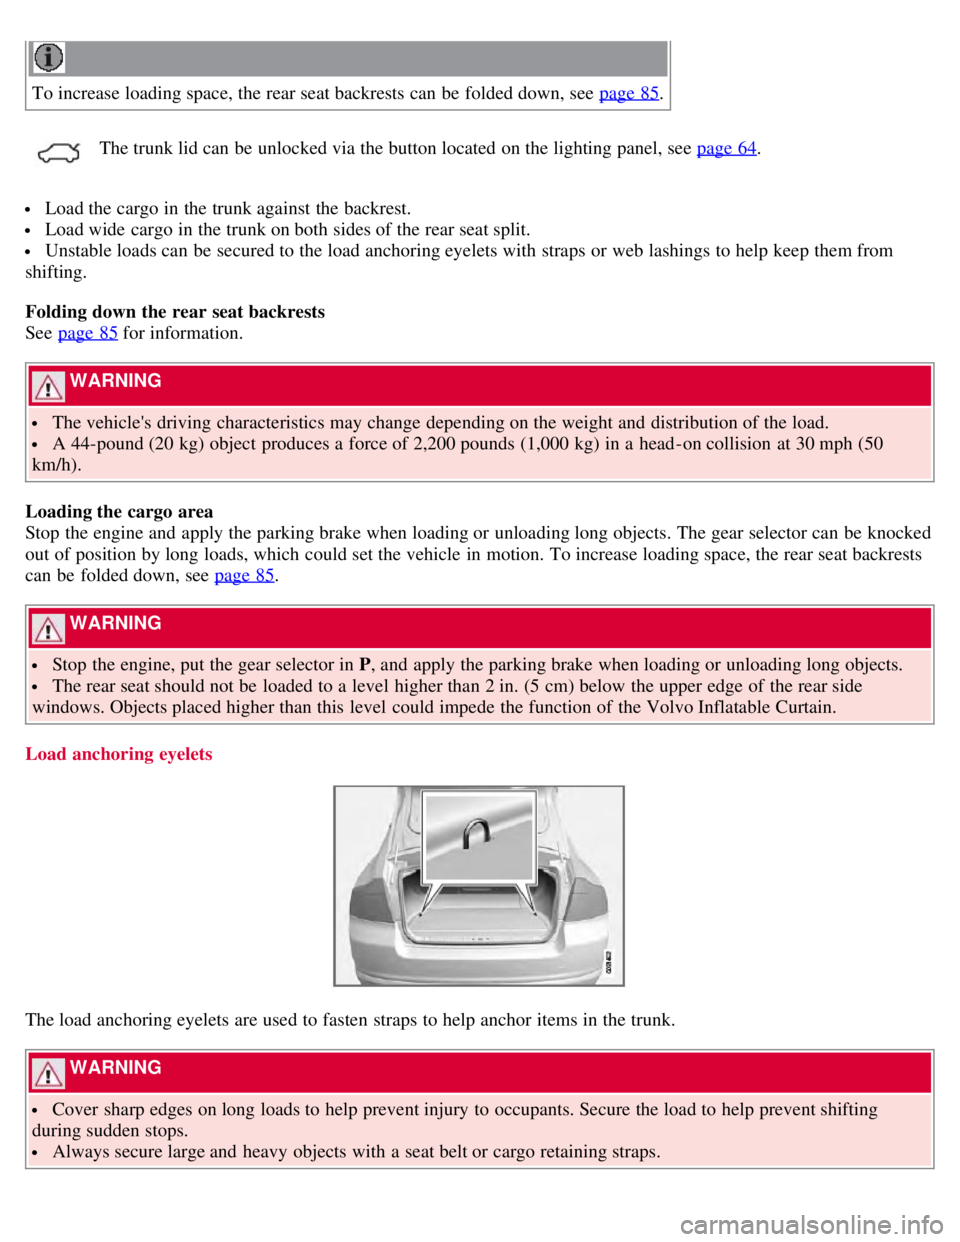
The load anchoring eyelets are used to fasten straps to help anchor items in the trunk.
WARNING
Cover sharp edges on long loads to help prevent injury to occupants. Secure the load to help prevent shifting
during sudden stops.
Always secure large and heavy objects with a seat belt or cargo retaining straps.
Page 192 of 275
199 05 During your trip
Loading
Grocery bag holder1
Grocery bag holder under the floor of the trunk
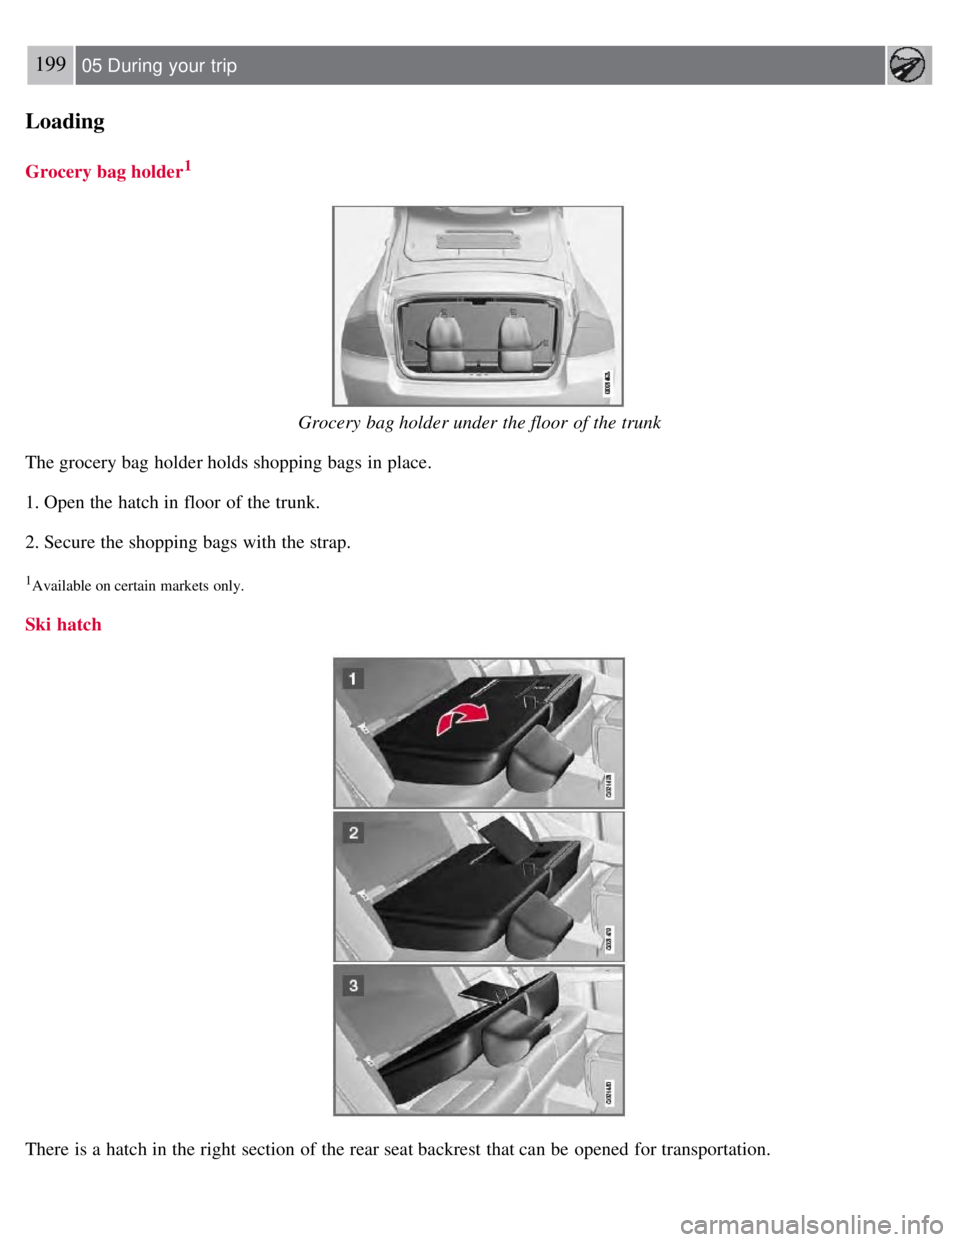
The grocery bag holder holds shopping bags in place.
1. Open the hatch in floor of the trunk.
2. Secure the shopping bags with the strap.
1Available on certain markets only.
Ski hatch
There is a hatch in the right section of the rear seat backrest that can be opened for transportation.
Page 193 of 275
Fold the right backrest forward.
Release the hatch in the rear seat backrest by sliding the catch up while folding the hatch forward.
Return the backrest to the upright position with the hatch open.
Use the seat belt to prevent the load from moving.
WARNING
Always secure the load to help prevent it from moving in the event of sudden.
Switch off the engine, apply the parking brake and put the gear selector in P when loading and unloading the
vehicle.
NOTE
If the vehicle is equipped with the optional integrated booster cushion, fold it out first.
200 05 During your trip
Loading
The cover on the rear seat armrest/child seat has no hinge. The cover must be removed before the ski hatch is used.
Removal:
Open the cover 30 degrees and lift straight up.
Installation:
Insert the cover in the grooves behind the upholstery and close the cover.
Roof loads
Using load carriers
Load carriers are available as Volvo accessories. Observe the following points when in use:
To avoid damaging your vehicle and to achieve maximum safety when driving, we recommend using the load
carriers that Volvo has developed especially for your vehicle.
Volvo-approved removable roof racks are designed to carry the maximum allowable roof load for this vehicle: 220
lbs (100 kg). For non-Volvo roof racks, check the manufacturer's weight limits for the rack.
Never exceed the rack manufacturer's weigh limits and never exceed the maximum rated roof load of 220 lbs (100
kg).
Avoid single-point loads. Distribute loads evenly.
Place heavier cargo at the bottom of the load.
Secure the cargo correctly with appropriate tie-down equipment.
Check periodically that the load carriers and load are properly secured.
Remember that the vehicle's center of gravity and handling change when you carry a load on the roof.
The vehicle's wind resistance and fuel consumption will increase with the size of the load.
Drive smoothly. Avoid rapid starts, fast cornering and hard braking.
Page 196 of 275
204 05 During your trip
Emergency towing
Towing eyelet
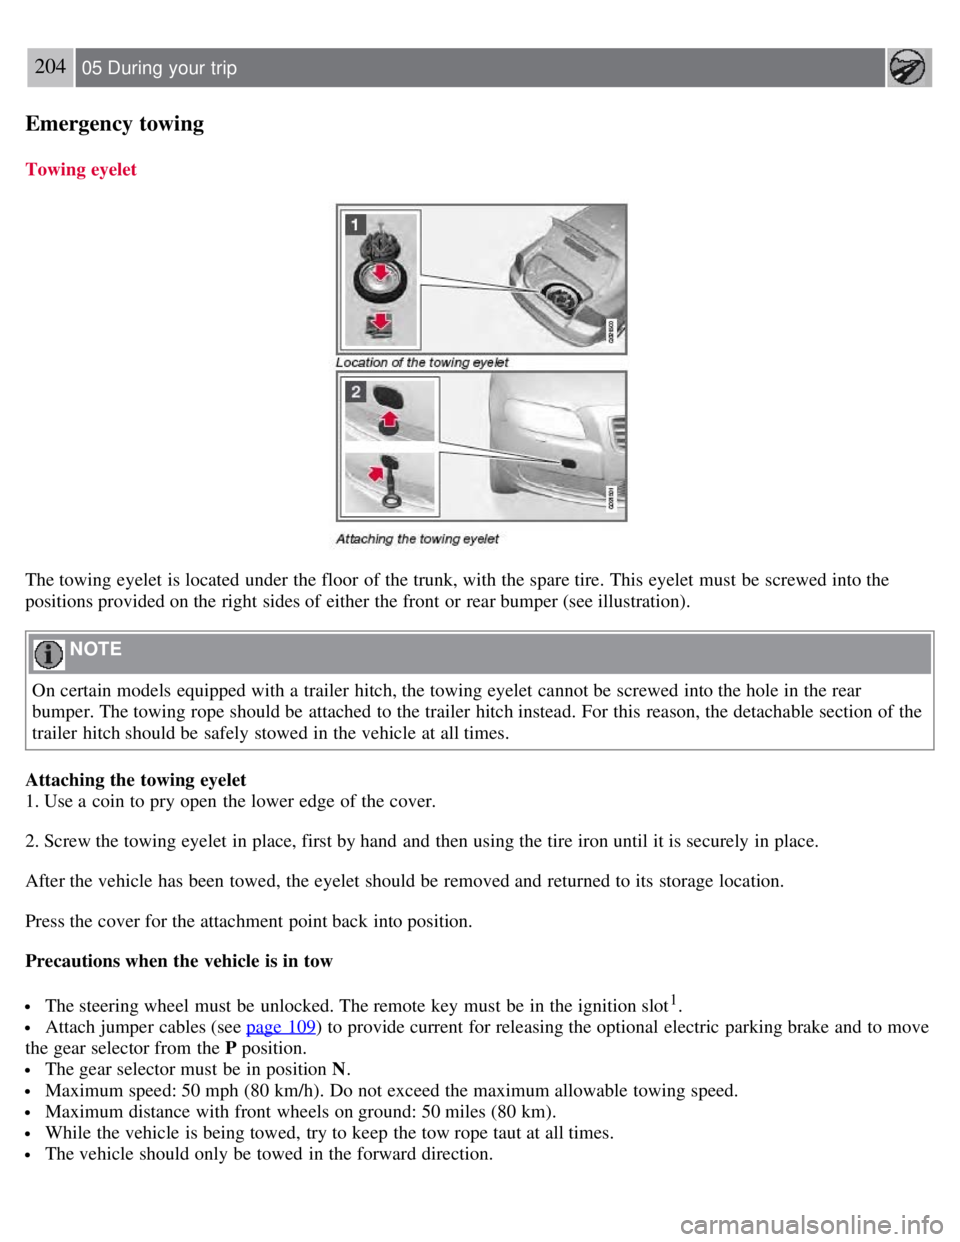
The towing eyelet is located under the floor of the trunk, with the spare tire. This eyelet must be screwed into the
positions provided on the right sides of either the front or rear bumper (see illustration).
NOTE
On certain models equipped with a trailer hitch, the towing eyelet cannot be screwed into the hole in the rear
bumper. The towing rope should be attached to the trailer hitch instead. For this reason, the detachable section of the
trailer hitch should be safely stowed in the vehicle at all times.
Attaching the towing eyelet
1. Use a coin to pry open the lower edge of the cover.
2. Screw the towing eyelet in place, first by hand and then using the tire iron until it is securely in place.
After the vehicle has been towed, the eyelet should be removed and returned to its storage location.
Press the cover for the attachment point back into position.
Precautions when the vehicle is in tow
The steering wheel must be unlocked. The remote key must be in the ignition slot1.
Attach jumper cables (see page 109) to provide current for releasing the optional electric parking brake and to move
the gear selector from the P position.
The gear selector must be in position N .
Maximum speed: 50 mph (80 km/h). Do not exceed the maximum allowable towing speed.
Maximum distance with front wheels on ground: 50 miles (80 km).
While the vehicle is being towed, try to keep the tow rope taut at all times.
The vehicle should only be towed in the forward direction.
Page 197 of 275

1On vehicles with the optional keyless drive, the remote key must be in the passenger compartment.
CAUTION
Please check with state and local authorities before attempting this type of towing, as vehicles being towed are
subject to regulations regarding maximum towing speed, length and type of towing device, lighting, etc.
If the vehicle's battery is dead, do not attempt to start the vehicle by pushing or pulling it as this will damage the
three-way catalytic converter(s). The engine must be jump started using an auxiliary battery (see page 109
).
If the vehicle is being towed on a flat bed truck, the towing eyelets must not be used to secure the vehicle on the
flat bed. Consult the tow truck operator.
205 05 During your trip
Emergency towing
Towing vehicles with front wheel drive/All Wheel Drive
Volvo recommends the use of flat bed equipment.
If wheel lift equipment must be used, please use extreme caution to help avoid damage to the vehicle. In this case,
the vehicle should be towed with the rear wheels on the ground if at all possible .
If it is absolutely necessary to tow the vehicle with the front wheels on the ground, please refer to the towing
information on the page 204
.
CAUTION
Sling-type equipment applied at the front will damage radiator and air conditioning lines.
It is equally important not to use sling -type equipment at the rear or apply lifting equipment inside the rear
wheels; serious damage to the rear axle may result.
If the vehicle is being towed on a flat bed truck, the towing eyelets must not be used to secure the vehicle on the
flat bed. Consult the tow truck operator.
Contents | Top of Page
Page 208 of 275
4. Lift out the housing and place it on a soft surface to avoid scratching the lens.
5. Replace the defective bulb(s), see page 223
.
Reinserting the headlight housing
1. Plug in the connector until it clicks into place.
2. Reinstall the headlight housing and locking pins. Check that they are correctly inserted. The headlight housing must
be properly inserted and secured in place before the lighting is switched on or the remote key is inserted into the
ignition slot.
3. Check that the lights function properly.
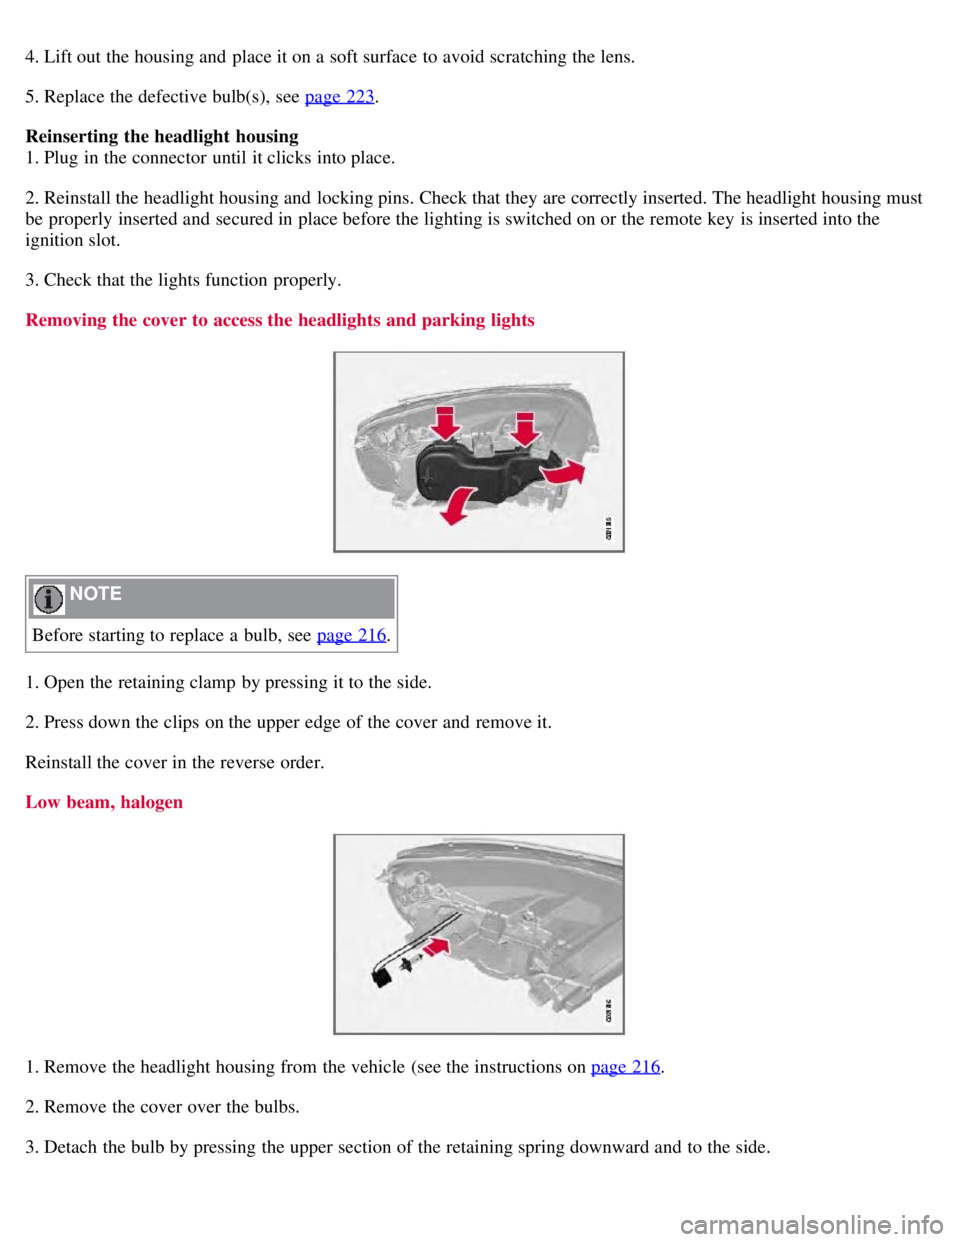
Removing the cover to access the headlights and parking lights
NOTE
Before starting to replace a bulb, see page 216
.
1. Open the retaining clamp by pressing it to the side.
2. Press down the clips on the upper edge of the cover and remove it.
Reinstall the cover in the reverse order.
Low beam, halogen
1. Remove the headlight housing from the vehicle (see the instructions on page 216.
2. Remove the cover over the bulbs.
3. Detach the bulb by pressing the upper section of the retaining spring downward and to the side.