2008 VOLKSWAGEN SCIROCCO LED
[x] Cancel search: LEDPage 62 of 138
Downloaded from www.Manualslib.com manuals search engine f!l In cool or damp wea her, the mtenor of the
L!J headltgh s. rear lights and turn stgnals may
m1st up bm.:fly Thts 1s normal and does not affect
the serv•ce life of the hghts on your vehicle
l'('n First read and observo the Introductory
L-..kJ.J Information and safety warnings.&. on
page 105 .
Main beam assist (Light Assist)
W•thtn the limit s of th e sy s te m , th e main b eam as
sis t au t
omatically swi tc h es the main bea m on at
speeds o f o ve r approxim ate ly 60 km/h (3 7 m ph) ,
depending on environm ent al a nd traffic condttions,
and swi tc hes it off again at spee ds und er appr oxi
mately 30 km /h (18 mph) ~&.The fun ction is
controlled by a came ra lo ca te d nea r the int erior
mirro r.
Main beam ass is t n ormall y recog nises illumin ate d
areas such as to wn s and deac tivates
the main
beam while driving throug h th em .
Automatic main beam assist (Dynamic Light
Assist)
W ithin the limits of the sys tem , the aut omatic main
beam assist (Dynamic Light A ssist) ca n minimi se
or even prevent dazzling of other road use rs ~ &.
The system detects other road users and their dis
tan ce from your vehic le and covers part o f th e
he adlights appropriately .
If dazz ling other road u
so rs canno t be
pre vented , th e ligh t dtstnbution rs
automa ticall y se t to d1pped beam headlights . The
func tion is controlled by a camera located on the
in side of th e wind screen above the mterior m~rror
The automatic m am beam assist automati cally
s w it c hes the main beam on at speeds
of more than
approximately 60 km /h (37 m ph) and off again at
speeds under approxima te ly 30 km /h (18 mph ) de
pending on whether there a re vehicles ahead.
wh eth er t here is oncoming traffic, and also on
oth
e r g eneral factors and traffic conditions .
Th e
automat1c main beam assist does no t work
w hen
travel mode is ac tt v ated ~page 111.
If the dynamt c bend llgh ttng is deac tivate d
~page 109 , or t he headltgh t switc h -ove r is acti va
t ed
~page 111, the f ull beam lights are only
s w it ched on and off automa ttcall y. This occurs i n
r esponse to
the v ehtcles ahead, oncoming traffic
a nd
the road lighting
Aut oma t
1c main beam assist normally dete cts illu
min ate d areas such as to wns and deac tiv a tes the
mai n beam wh ile dnving throug h them .
Switching main beam assist or automatic main beam assist on and off
Function Action
- Switch on the ignition and turn the light switch to positio n AUTO.
Switching on -Push the turn signal and main be am le ve r forwards out of the basic position ~page 106.
Wh en the m ain beam assis t or the au tom atic main beam assist is activ ated, the indica tor
la mp W in the instrument clu ste r display ligh ts up .
- Swi tc h off
the ignition .
-
OR : turn the light swit ch to a position other than AUTO ~page 107.
S wit ching off -OR : when the main bea m is swi tc h ed on, pull back the turn signal a nd main beam lever.
- OR : push the turn signa l and main beam le ver forwards in order to switch on manual
main bea m. The main beam assist is then switched off. -
Fault
1t may not be pos sibl e to switch off the main beam
qui ckly e nou gh or at all using main bea m assist
due to
the follo win g:
• In poo rly lit
str ee ts whe re the re are highly -re
flec tiv e sig ns.
• Wh en enco unt ering other road u sers with insuf
ficie nt lighting , su ch as p ed es trian s or cyc lis ts .
• In tigh t bends, brows of hills or dep ressions in
the land or h alf-h idde n oncomi ng traffic.
• W ith oncoming traff ic on str eets with a central
barrier where the driver can see clearly over the
central barrier e .g . lo rry drivers .
• If the came ra is broken or the pow er supply is
interrupt ed .
• In fog , sno w or hea vy rain.
... ~.==~~~~~~------1•1•0.i .. B .. ef•o •re .. th •e• j•o •u •rn•e•y._ .................. __________________ .............. ~ -.,
Page 63 of 138
Downloaded from www.Manualslib.com manuals search engine • In dusty or sandy a re a s.
• If thore is s to ne damage in the cam era's field of
V IO W .
• If the viewing fie ld of the camera is mis te d up,
d
irty, cov e re d by a sticke r, snow or ice.
I '~A WARNING ~
~ .
Do not le t the extra convenience afforded by
main b
eam assist or automatic main beam
ass is t tempt you Into taking any risks when
driving . The system is not a substitute
for the
full concentration of the driver.
• Always check the lights yourself and ad
just them to the prevailing conditions for
lights, vision and road traffic .
• The main beam assist or automatic main
beam assist may not
be able to detect all
driving situations correctly and may not work
properly in certain situations.
A WARNING (Continued)
• If the camera's field of view is dirty, cov
ered or damaged, the function of the main
beam assist and automatic main beam assist
may
be impaired. This also applies if changes
are made
to the vehicle's lighting system, for
example if additional headlights are fitted.
(Dt
Please observe the following points in order to
avoid impairing the proper function of the sys
tem:
• Regularly clean the camera's field of view,
and keep it free from snow and ice.
• Do not cover the camera's field of view.
• Check the area of the windscreen that is in
the camera's field
of view for damage.
r::l The headlight flasher and the main beam can
L!:J be switched on and off manually at any time
with the turn signal and main beam lever
~page 106.
r-l'n First read and observe the introductory
L-W.I information and safety warnings£ on
page 105.
If you have to drive a right -hand drive vehicle in a
l e ft-h a nd drive country , or vice versa , the asymmet
ric dipped beam headlights may dazzle oncoming
traffic . Th erefo re, the headl
ights must be masked
or switched over
if you are driving abroad.
Th e headlight orientation can be adjusted using
the@) button and the 0 and (L ight ] function but
t o ns in the infotai nment system
~page 31.
In vehicles in which the headl ights cannot be ad
just ed via a
menu , stickers should be applied to
certain parts
of the headlight lenses, or the head
lights should be adjusted by a qualified workshop.
A qualified workshop can provide you with further
information . Volkswagen recom mends using a
Volkswagen dea lership for this purpose .
r::l The use of travel mode and stickers on the
L!J headlights is only permitted for limited peri
ods .
Please contact a qualified workshop for a per
manent alteration . Volkswagen recommends using
a Volkswag en dealership for this purpose.
r-('n First read and observe the i~troductory
L-W.I information and safety warnmgs • on
page 105.
The Coming Home function is switched on manual
ly. However, the Leaving Home function is cotltrol-
led automatically
by a twilight sensor . ..,.
Lights and vision 111
Page 65 of 138
Downloaded from www.Manualslib.com manuals search engine To adjust, turn the control CD to:
-Set~ng I Vehicle load lev~la) -------
1
2
3
Fron t seats occupied and luggage
compa rtment
empty.
All seats occupied and luggage com
partment empty.
All sea ts occ upi ed and luggage com
partm ent fully loaded . Towing a trai le r
wit h a
lo w drawbar load .
Only the driver sea t occupi ed and lug
ga ge compartm ent fully load ed . Tow
ing a trai le r w ith maximum drawbar
l
oad.
a) If you have diff ere nt loads. you can select a positi on be
tween th e settings.
Dynamic headlight range control
Th ere is no control CD for headlight range if the ve
hicle
has dynamic headli ght control. The head light
r ange is
automatically adapted to suit the ve hicle
load level as soon as the headli ghts are switched
on~&.
Instrument and switch lighting
The brightness of the in strument and switch li gh t
ing can be adjusted using the @ill button and the
~and !Ltght] function buttons in the infot ainm ent
system
~page 31 .
Depending on the vehicle equipment level, it may
be possible to adjust the brightness of the instru
ment and switch lighting to suit your requirements
by turning control® when the headlights are
switched on.
Interior and reading lights
Instrument cluster lighting
The instrumen t cl uste r ligh ting sw it c hes off auto
mati cally
in darkness and at other times, e.g . when
driving through a tunnel. This is in tended to prompt
the driver to switch on the dipped beam so that the
v e hi cle' s rea r l
ights are swit c hed on ~page 109.
.A WARNING
-
Heavy objects in the vehicle can cause the
headlights to dazzle and distract other road
users. This can lead to accidents and serious
injuries.
• The light cone should always be adjusted
to the load level of the vehicle to ensure that
other road users are not dazzled.
A WARNING
A failure or malfunction in the dynamic head
light range control can cause the headlights
to dazzle or distract other road users. This
can lead to accidents and serious injuries.
• Proceed to a qualified workshop to have
the headlight range control checked immedi
I
ately. ~--------------- --------------------~
ClJ] First read and observe the introductory information and safety warnings & on page 105.
Button
~REAR
Function
Switches the front interior lights on or off.
Switches the rear interior lights on or off.
Switches the door contact switch on or off.
The interior lights are switche d on automatically when the vehicle is unlocked , a door
is opened, or the ve hicle key is removed from the ignition lock.
The light will go out a few seconds after all doors are closed, the vehicle is locked, or
the ignition is switched on.
/q'j/
---------j Switches the reading lights on or off.
Lights and vision 113
Page 69 of 138
Downloaded from www.Manualslib.com manuals search engine -~
....,
m
.u \ 1n j w v ip r 1 switched on auto
.1t1 ',111 if the front -.. ind creen wipers are
<::' t ' ' r ~ rse gear i eng ged.
m The automatic switch-on function when in. re
W verse gear can be switched on and off us1ng
the@] button and the G and (Mirror and wipers ) func
tion buttons in the infotainment system ~page 31.
ro Fi tread and observe the introductory information and safety warnings & on page 117.
iper response in various situat ions:
\.._e t e e d~ sat na•y
Healed a her jet
Headlight
hen sw1tched on , the wipers will temporarily be switched to the
ext setting down.
T e C hmatromc w1ll sw1tch to air recirculation mode for approxits ru -n a e l 30 seconds to prevent the smell of the windscreen wash-
a s t
er utd from entering the vehicle interior.
T e
rper in tervals are adjusted depending on the vehicle
speed. The faster the vehicle is travelling, the shorter the inter
a!
nses on
ward s the steering wheel when the dipped beam
headlights or main beam are switched on. Clean
off stubborn dirt (msects, etc.) from the headl ights
at regular intervals, for instance when filling the
tank .
In winter, you should remove any snow from the
headligh t w as her nozzles in the
bumper to keep
the headligh t washer system in work ing order. Re
move any ice with a de-icer spray.
r:l The w1per will try to wipe away any obstacles
L!J that are on the wind screen . The w 1per will
sop moving 1f the obstacle blocks its path . Re-
mo e the obstacle and swttch the wiper back on
agam
Service position for the front windscreen wipers
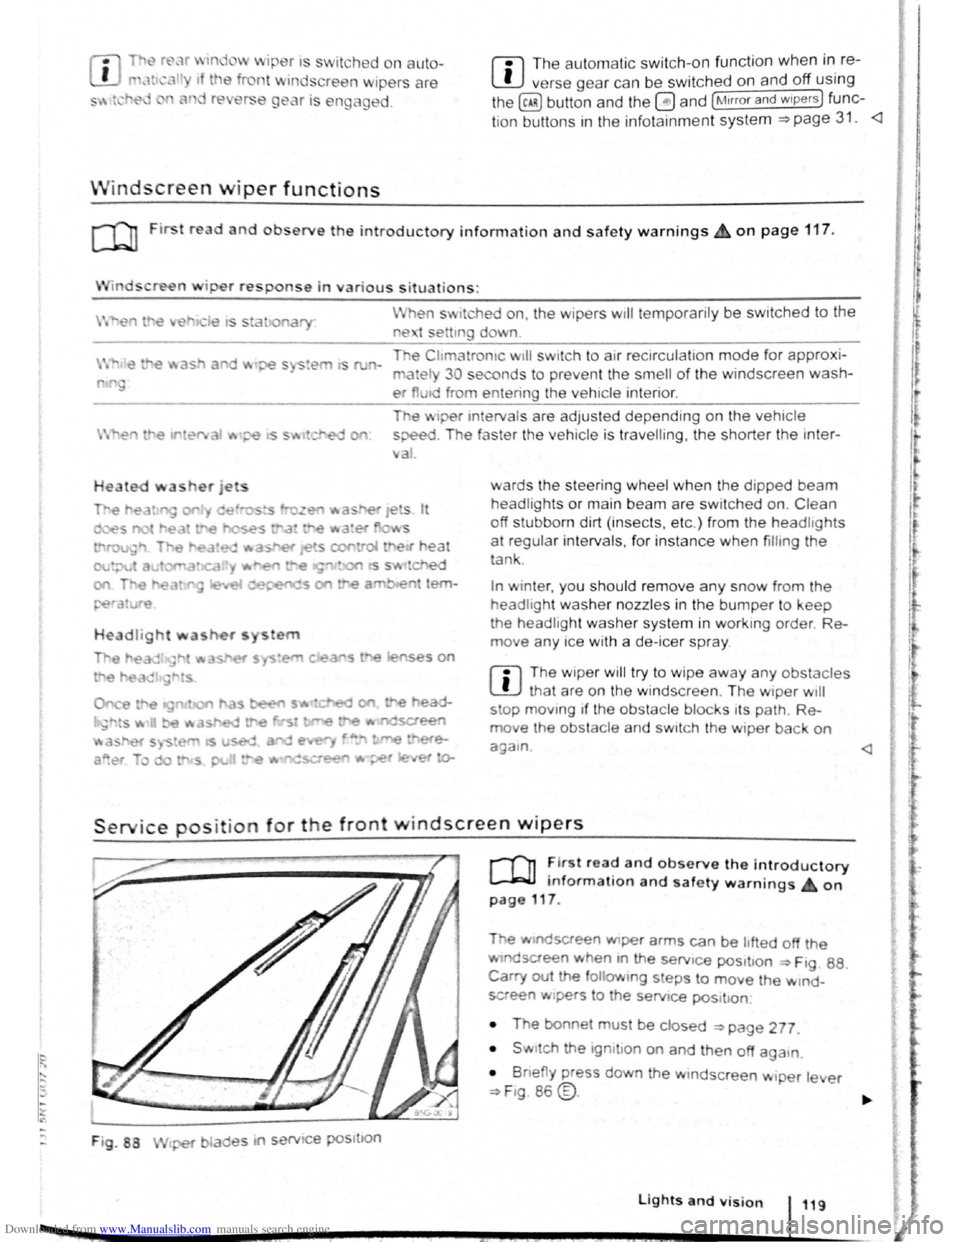
F ig . 88
2 -!.
r-T'n ~lr t rea~ and observe the introductory
L-Jr:J.J mformat1on and safety warnings on
page 117 .
Tt>e .vtndscreen Wlper arms can be h fted off the
ndsaeen when 10 the serv1ce pos1t1on ~ Ftg. 88.
Carry out e followtng s eps to move the w rnd
screen w1pers
t o the servtce pos1t1on
• The bonnet must be closed ~page 277.
• Swrtch the 1gntlton on and then off aga
1n
•
B ne y press down the wtndsc reen w1per le er
~F1g. 86 @.
Lights and vision 119
I 3£
Page 71 of 138
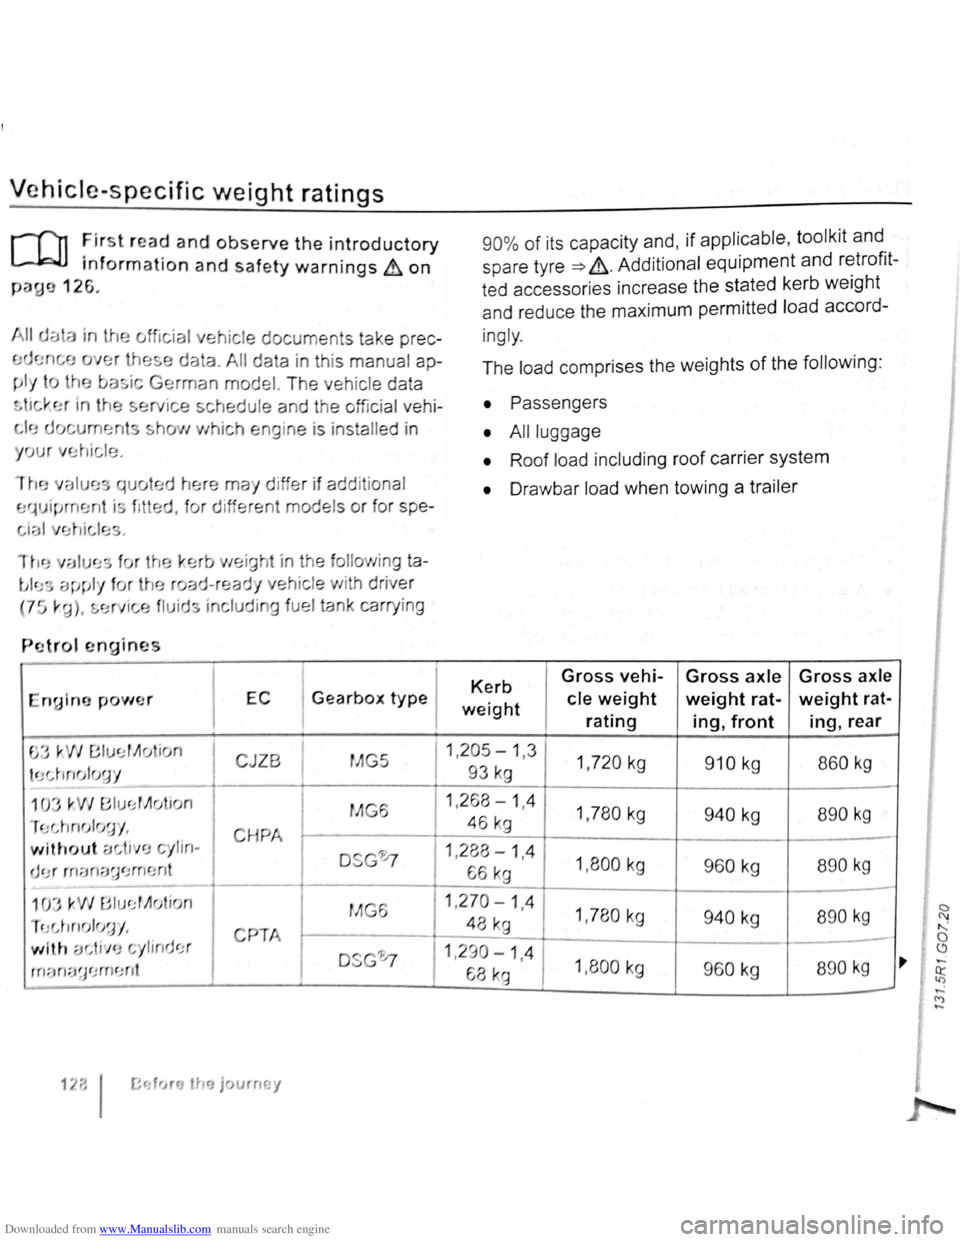
Downloaded from www.Manualslib.com manuals search engine Vehicle·specific weight ratings
r-f11 First r ea d and observe the introductory
L.J,:JJ information and safety warnings & on
paue 126.
ial vehicle document s tak e
prec
data. All data in this manu al ap
man model. T he veh ic le data
ted h
, f
ng ine is inst alled in
may d iffer if add it ional
d ifferent models
or for spe-
a
EC I Gearbox type I
90
% of its capacity and, if applicable , tool kit and
spare tyre
=> &. Addit ional equipment and retrofit
ted accessories increase the stated kerb
weight
and reduce the maximum permitted load accord-
ingly .
The load comprises the weights
of the following :
• Passengers
•
Al l luggage
• Roof load including roof carrier system
• Drawbar load when towing a trailer
Kerb Gross vehi-Gross axle Gross axle
weight cle weight weight rat-weight rat-
rating ing, front ing, rear
JZB I MG5 11 .29~ ~ 1 ,3 1 1 ,720 kg 910 kg I 860 kg
1 ,780 kg 940 kg I 890 kg
H I - -_r.~-I 1 ?P.R -1 Ll. I
1,8 00 kg I 960 kg 890 kg
1,780kg 940 kg 890 kg
I
"', , , 9
I
-ylimJc.:r DSG'0 11,290-1,4 rn ::m:;~~ '.J rn CJ nt 68 ka 1,800 kg 960 kg 890 k g
1 2;; I fr~rcJ tha jr> u rm. y
0 (\1
" 0 ~ ,.. ,...;
~
-<"')
-
Page 81 of 138
Downloaded from www.Manualslib.com manuals search engine • o;;--"cc A WAR'I'G (Contmued)
tf the brake warning lamp 0 does not go
'Jt or if it lights up when driving, the brake Ol , . • fluid level in the reservoir IS too low or there
is a fault in the brake system. Stop the vehi
c le immediately and seek expert assistance
=>page 188 , Brake fluid.
, tf the brake warning lamp ID lights up to
gether with the ABS indicator lamp 8, the
control function of the ABS may have failed.
This can cause the rear wheels to lock quick
ly when you brake. Locked rear wheels can
lead to a loss of control of the vehicle. If pos
s ible, reduce your speed and drive carefully
at low speed to the nearest qualified work
shop in order to have the brake system tes
ted . Avoid sudden braking and driving ma
noeuvres on the way.
• The ABS is not functioning correctly if the
ABS indicator lamp Et does not go out or
com es on while the vehicle is in motion. The
Electronic parking brake
BSIV)•~9
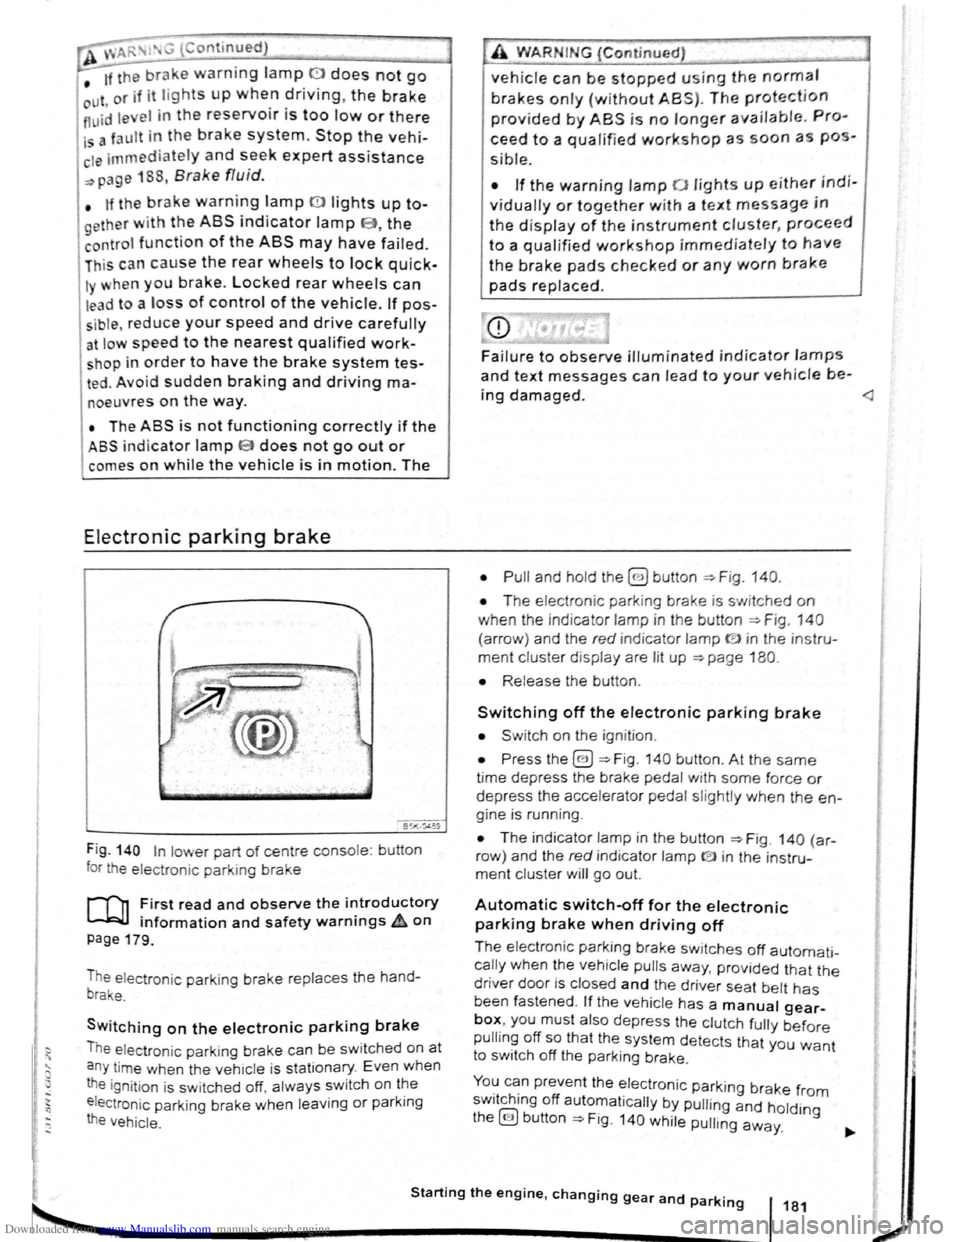
Fig . 140 In lower part of centre console : bu tton
for the electron ic parkin g brake
rf'n First read and observe the i~troductory
~ information and safety warnmgs A on
page 179.
The electronic parking brake replaces the hand
brake.
Switching on the electronic parking brake
The elec tron ic park ing brake can be swit ched on at
a n y time when the vehic le
is stationary . Even when
the ignition is sw itched off, always switch on the
e lectroni c parking brake when leaving
or parking
the vehicle .
_,
A WARN IN.G (Continued) .,~ ,1
vehicle can be stopped using the normal
brakes only {without ABS). The protection
provided by ABS is no longer available. Pro
ceed to a qualified workshop as soon a s pos
s ible.
• If the warning lamp 0 lights up either indi
vidually or together with a text message in
the d isplay of the instrument cluster, proceed
to a qualified workshop immediately to have
the brake pads checked or any worn brake
pads replaced.
Fa i
lure to observe illuminated indicator lamps
and text messages can lead to your vehicle be-
ing damaged.
• T he electron ic park ing brake is switched on
when the indicato r lamp in the button ::;;. Fig. 140
(a rro w) and the red indicator lamp ID in the instru
ment cluster displ ay are lit up ::;;. page 180.
• Release the button .
Switching off the electronic parking brake
• Swit ch on the ignition .
• Press the@) ::;;. Fig . 140 button . At the same
time depress the brake pedal with some force or
depress the accele rator pedal slightly when the en
gine is run ning .
• The indicator lamp in the button =:;.Fig . 140 (a r
row ) and the red indicator lamp ® in the instru
ment cluster will go out.
Automatic switch-off for the electronic
parking brake when driving off
The elec tronic parking brake switches off automati
cally when the vehi cle pulls away, prov ided that the
driver door is closed and the drive r sea t belt has
been fastened . If the vehicle has a manual gear
box, you must also depress the clutch fully before
pulling off so that the system detects that you want
to switch off the parking brake.
You can prevent the electronic parking brake f 0 . h. ff r m sw1tc 1ng o automat ically by pulling and hold.
the@) button::;;. Fig. 140 while pulling away. lng
Starting the engine, changing gear and parking 181
2
Page 84 of 138
Downloaded from www.Manualslib.com manuals search engine ~S~ta~~~st~o~p~s~y~s~te~m~--------------------------------------
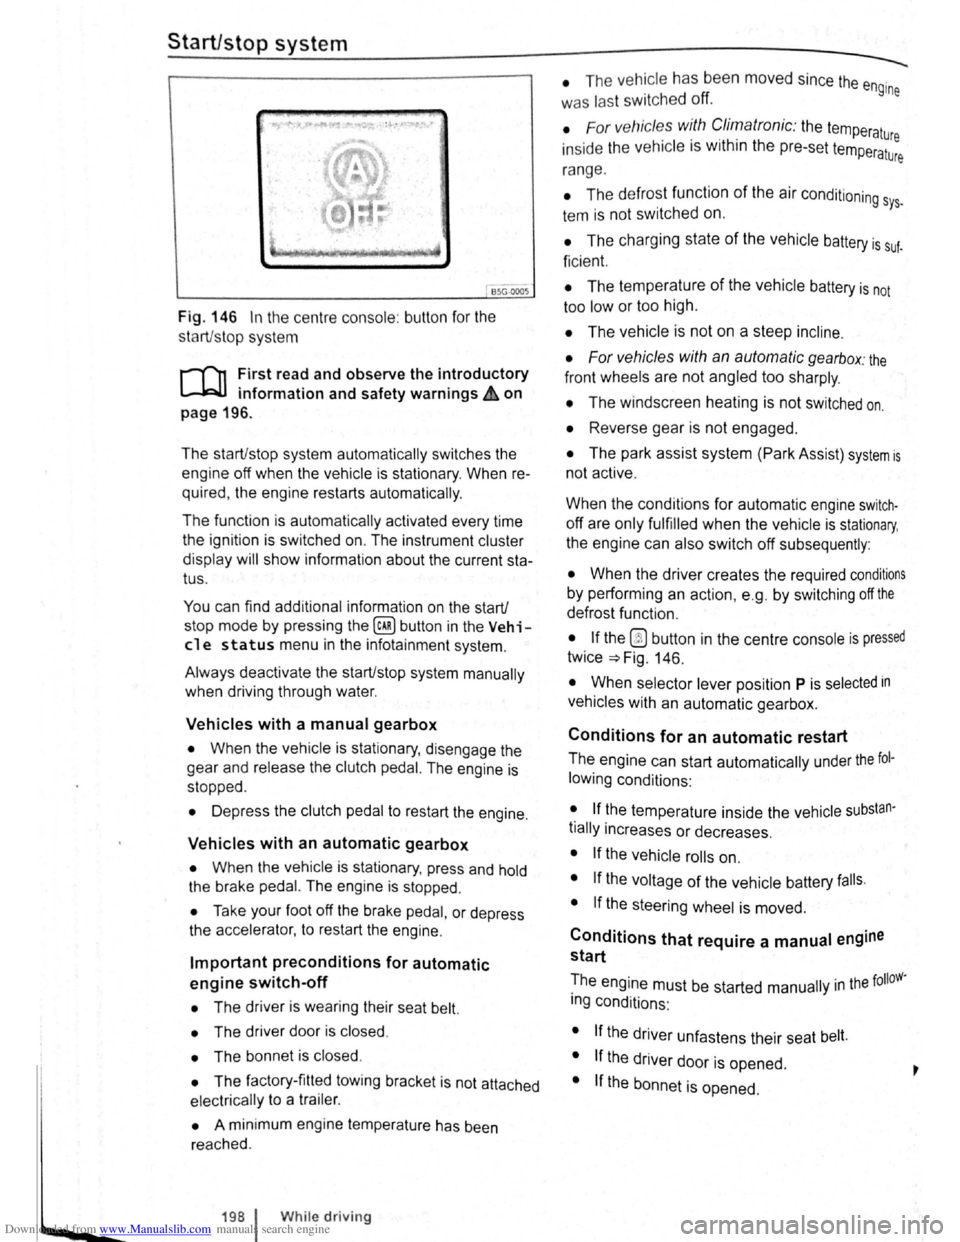
BSG-0005
Fig. 146 In the centre consol e: butt on for the
s tart/s top syst em
r-T'n First read and observe the introductory
L-lcJJ information and safety warnings .&. on
page
196.
The start/stop system automatically switches the
engine off when the vehicle is stationary . When re
quired , the engine restarts automatically .
The function is automatically activated every time
the ignit ion is switched on. The instrument cluster
display will show information about the current sta
tus .
You can find additional information on the start/
stop mode by pressing
the~ button in the Vehi
cl e status menu in the infota inment system .
Always deactivate the start/stop system manually
when driving through water.
Vehicles with a manual gearbox
• When the vehicle is stat ionary , d isengage the
g e
ar and release the clutch pedal. The engine is
stopped .
• Depress the clutch pedal to restart the engine .
Vehicles with an automatic gearbox
• When the vehicle is stationary , press and hold
the brake pedal. The engine
is stopped.
• Ta ke your foot off the brake pedal, or depress
the acce lerator, to restart the engine .
Important preconditions for automatic
engine switch-off
• The driv er is wearing their seat belt.
• The driver door is closed .
• The bonnet is closed .
• The factory-fitted towing bracket is not attached
ele ctrically to a trailer .
• A minimum engine temperature has been
rea ched .
198 I While driving
• The ve hicle has been moved since the engine
was las t switc he d off.
• F or v ehicle s with Climatronic: the temperatu
inside the ve hicle is within the pre-set temperat~~e
ra nge .
• The de frost function of the air conditioning sys.
tem is not switched on.
• The charging state of the vehicle battery is suf.
ficient.
• The temperature of the vehicle battery is not
too
low or too high .
• The vehicle is not on a steep incline.
• For vehicles with an automatic gearbox: the
front wheels are not angled too sharply .
• The windscreen heating is not switched on.
• Reverse gear is not engaged .
• The park assist system (Park Assist) system is
not active .
When the condit ions
for automatic engine swit ch
off are only fulfilled when the vehicle is stationary,
the engine can also switch off subsequently :
• When the driver creates the required conditions
by performing an action , e .g . by switching off the
defrost function .
• If the @ button in the centre console is pressed
twice ~Fig. 146.
• When selector lever position P is selected in
vehicles with an automatic gearbox.
Conditions for an automatic restart
The engine can start automatically under the fol
lowing conditions :
• If the temperature inside the vehicle substan
tially increases or decreases .
• If the vehicle rolls on.
• If the voltage of the vehicle battery falls.
• If the steering wheel is moved.
Conditions that require a manual engine
start
The engine must be started manually in the folloW·
ing conditions :
• If the driver unfastens their seat belt.
• If the driver door is opened .
• If the bonnet is opened.
Page 91 of 138
Downloaded from www.Manualslib.com manuals search engine • When a vehi cle doo r is opened .
• When the TCS or ESC systems are taking cor
rective action.
• If the vehicle is sta tionary for longe r than ap
proximately
3 minutes .
~ ~~ .....
A WARNING
'"
Do not allow the images shown on the screen
to distract you from the traffic around you.
ParkPilot menu
r-('n First read and observe the i~troductory
l.-.l.:JJ information and safety warnmgs on
page 201.
ParkPilot settings in the infotainment
system menu
Switch on the ignition .
If necessary , switch on the infota inment system .
Function button: action
CD
Failure to observe thhe.ill
1
umbi~ated text messag.
es can lead to the ve tc e emg damaged .
1:1 lt can take a fe w seconds be for e the area
L!J scanned by the sensors ls displayed on the
screen
of the factory- fitted infot ainm ent system .
Press the@) button .
Touch the
G fu n ction button .
Touch the
(Parkmg and mAnoeuverin g) fun ction button.
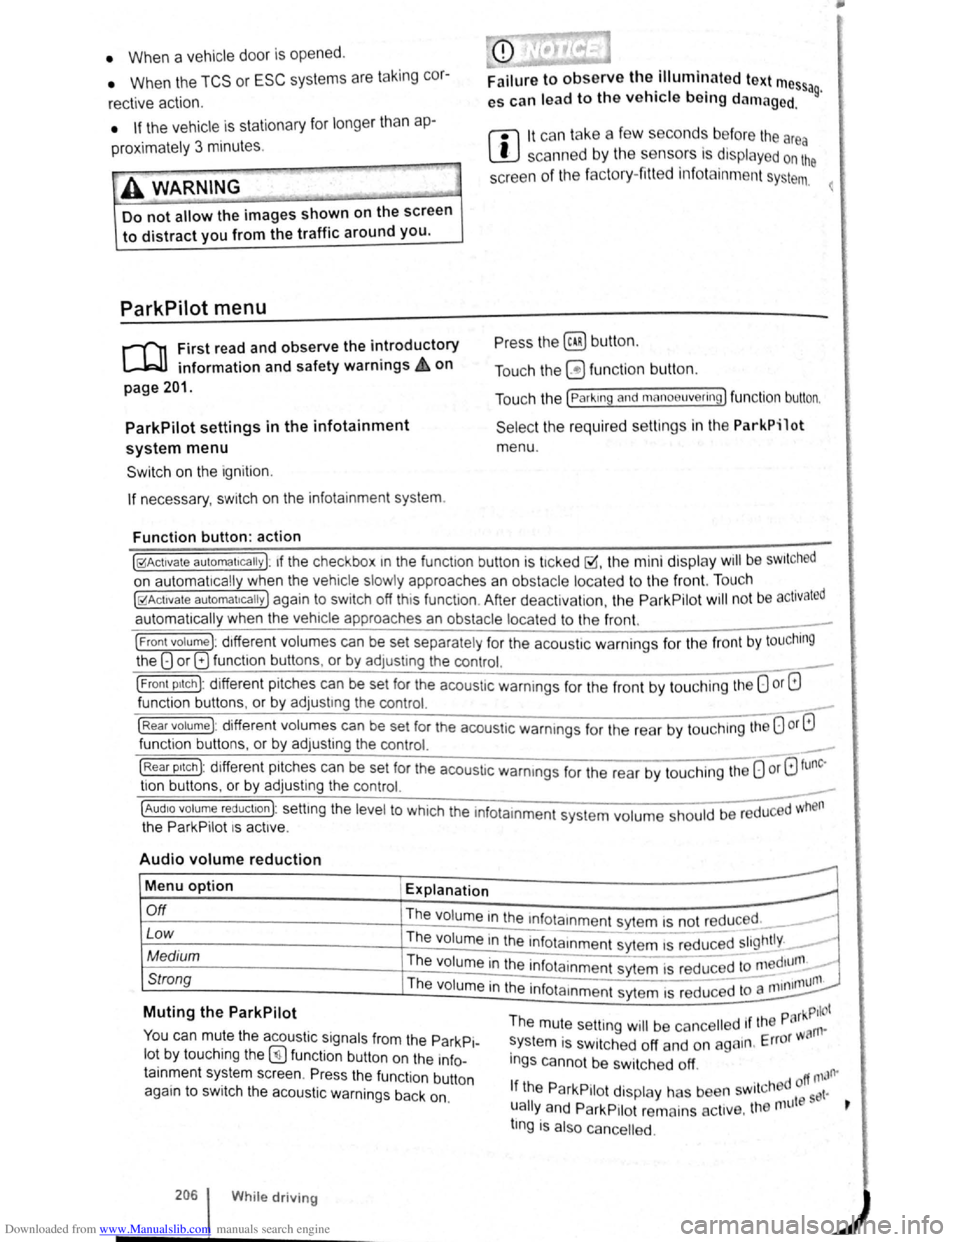
Select the required settings in the ParkPilot
menu .
[10Act1vate automatically ): 1f the checkbox 1n the functio n button is t1cked ~.the mini display will be SWitched
on automat ically when the vehicle slowly approaches an obstacle located to the front. Touc h .
[10Act1vate automat1ca lly) again to switch off this function . After deactiva tion, the ParkPilot will no t be activated
automatically when the veh1cle approa ches an obstacle located to the front.
(Front volume): d1fferent volumes can be set separately fo r the acoustic warnings for the fron t by touching
the 8 or 8 funct ion butt ons , or by adJusting the control. ___
(Front p1tch): different pit ches can be set for the acoustic warnings for the front by touching the 0 or G
fun ction buttons , o r by adjust1ng the control.
(Rear volume) : different volumes can be set for the acoustic warnings for the rear by touchtng the 0 or G
function buttons. o r by adjusting the control. _
(Rear p1tc h ): different pitches can be set for the acoust ic warmngs for the rear by tou ch ing the 0 or 8 tunc·
tio n buttons . o r by adjusting the control. _
~~==~==~~~~-=~~--~~~-----------------------------~---(AudiO volume reduct1on): settmg the level to which the infota inment system volume should be reduced when
the ParkPilot 1s act1ve.
Audio volume reduction
Menu option Explanation
r.O:-ff ___________________ -+-=T~he::.._ . ..:.v.:..ol:.:u::.m.:..:e~i~n:,:th~e~~n~fotamment sytem is not reduced. __ ----
Low Th e volume in the infota1nmen t sytem IS red~c;;d ~~~~tly. _..
Medium The volume in the infota inment syt e m is red uced to ~~~d1unl. -
Strong Th e 1 . - -11111un1. vo ume m the infota1nmen t sytem is reduced to a 11111
Muting the ParkPilot
You can mute the acoustic signals from the ParkPi
lot by touching the (!) fun ction button on the info
tainment system screen. Pr ess the functio n button
again to switch the acoustic warnings back on.
206 While driving
park Pilot The mute setting will be ca ncelled 1f the rn·
system is switched off and on again . Error w a
ings canno t be swi tc h ed off.
. d off ntJfl'
If the ParkPilot display has been sw1tcl'~9 et·
ually
and ParkP1Iot remains act1ve. the nnlt s t
tlng is also cance lled .