Page 9 of 260

BASIC FUNCTIONS
29
INFORMATION
�After battery disconnection, or on a
new vehicle, the current position
may not be correct. As soon as the
system receives signals from the
GPS, the correct current position is
displayed.
�To correct the current position
manually, see “� Current position/
tire change calibration” on page
11 5 .
When any point on the map is touched,
that point moves to the center of the screen
and is shown by the cursor mark (
1).
Use the scroll feature to move the desired
point to the center of the screen for looking
at a point on the map that is different from
the current position of the vehicle.
If the finger is continuously held on the
screen, the map will continue scrolling in
that direction until the finger is removed.
A street name, city name, etc. of the
touched point will be shown, depending on
the scale of the map (
2). Distance from
the current position to will also be
shown (3).
After the screen is scrolled, the map re-
mains centered at the selected location
until another function is activated. The cur-
rent vehicle position mark will continue to
move along your actual route and may
move off the screen. When the “MAP/
VOICE” button is pushed, the current ve-
hicle position mark returns to the center of
the screen and the map moves as the ve-
hicle proceeds along the designated route.
INFORMATION
When the one�touch scroll feature is
used, the current vehicle position
mark may disappear from the screen.
Move the map with a one�touch scroll
again or push the “MAP/VOICE” but-
ton to return to the current vehicle
position map location display.
— Screen scroll operation
(one�touch scroll)
Page 99 of 260

OTHER FUNCTIONS
11 9
INFORMATION ITEMS
“ENGINE OIL”: Replace engine oil
“OIL FILTER”: Replace engine oil filter
“ROTATION”: Rotate tires
“TIRES”: Replace tires
“BATTERY”: Replace battery
“BRAKE PAD”: Replace brake linings
“WIPERS”: Replace wiper blades
“LLC”: Replace engine coolant
“BRAKE OIL”: Replace brake fluid
“ATF”: Replace ATF
“SERVICE”: Scheduled maintenance
“AIR FILTER”: Replace air filter
“PERSONAL”: New information items
can be created separately from provided
ones
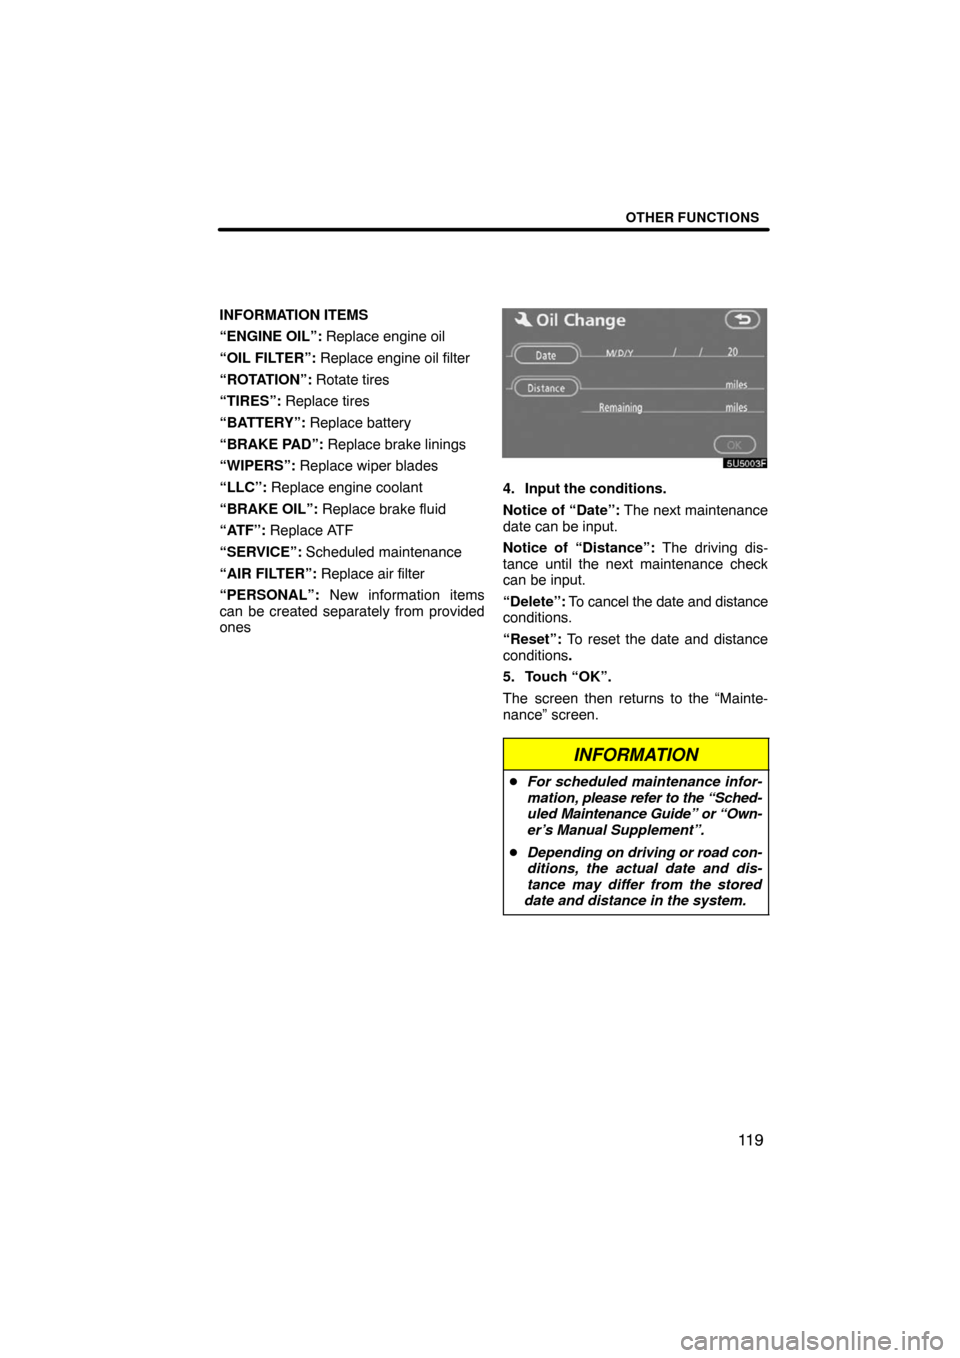
4. Input the conditions.
Notice of “Date”: The next maintenance
date can be input.
Notice of “Distance”: The driving dis-
tance until the next maintenance check
can be input.
“Delete”: To cancel the date and distance
conditions.
“Reset”: To reset the date and distance
conditions.
5. Touch “OK”.
The screen then returns to the “Mainte-
nance” screen.
INFORMATION
�For scheduled maintenance infor-
mation, please refer to the “Sched-
uled Maintenance Guide” or “Own-
er’s Manual Supplement”.
�Depending on driving or road con-
ditions, the actual date and dis-
tance may differ from the stored
date and distance in the system.
Page 108 of 260

OTHER FUNCTIONS
128
INFORMATION
�Talk alternately with the other party
on the phone. If you talk at the same
time, the voice may not reach each
other. (It is not a malfunction.)
�Keep the volume of receiving voice
down. Otherwise, echo is coming
up. When you talk on the phone,
speak clearly towards the micro-
phone.
�In the following situations, your
voice may not reach the other party.
�Driving on unpaved road. (Too
much road noise.)
�Driving at high speed.
�Windows are open.
�If air�conditioning vents are
turned towards the microphone.
�The sound of the air�condition-
ing fan is loud.
1Indicates the condition of
Bluetooth� connection.
“Blue” indicates an excellent connection
to Bluetooth�.
“Yellow” indicates a bad connection to
Bluetooth�, resulting in possible deteriora-
tion of voice quality.
: no connection to Bluetooth�.
2Indicates the amount of battery
charge left.
Empty Full
It is not displayed while the Bluetooth� is
connecting or the phone book data is be-
ing transferred.
The amount left does not always corre-
spond with the one of your cellular phone.
This system doesn’t have a charging func-
tion.
3Indicates the receiving area.
“Rm” is displayed when receiving in
Roaming area.
“Hm” is displayed when receiving in
Home area.
Page 167 of 260
AUDIO/VIDEO SYSTEM
187
8“PWR/VOL” knob
Push this knob to turn the audio/video
system on and off, and turn it to adjust
the volume. For details, see page
188.
9“SEEK/TRACK” button
Push either side of this button to seek
up or down for a station, or to access
a desired track, file or chapter. For
details, see pages 195, 208, 212,219
and 222.This section describes some of the basic
features of your audio/video system.
Some information may not pertain to your
system.
Vehicles with smart key system —
Your audio system works when the “EN-
GINE START STOP” switch is in ACCES-
SORY or IGNITION ON mode.
Vehicles without smart key system —
Your audio system works when the engine
switch is in “ACC” or “ON” position.
NOTICE
To prevent the battery from being dis-
charged, do not leave the audio/video
system on longer than necessary
when the engine is not running.
Using your audio/video
system —
— Some basics
Page 174 of 260

AUDIO/VIDEO SYSTEM
194
Turn the knob clockwise to step up the
station band or counterclockwise to
step down.
Your radio automatically changes to stereo
reception when a stereo broadcast is re-
ceived. “ST” appears on the screen. If the
signal becomes weak, the radio reduces
the amount of channel separation to pre-
vent the weak signal from creating noise.
If the signal becomes extremely weak, the
radio switches from stereo to mono recep-
tion. In this case, “ST” disappears from the
screen.
(b) Presetting a station
1. Tune in the desired station.
2. Touch one of the touch�screen but-
tons (1 — 6) you want and hold it until
a beep is heard. This sets the station to
the touch�screen button and the fre-
quency appears on the touch�screen
button.
Each radio mode (AM, FM1 or FM2) can
store up to 6 stations. To change the pre-
set station to a different one, follow the
same procedure.
The preset station memory is cancelled
when the power source is interrupted by
battery disconnection or a blown fuse.
Page 180 of 260

AUDIO/VIDEO SYSTEM
200 �
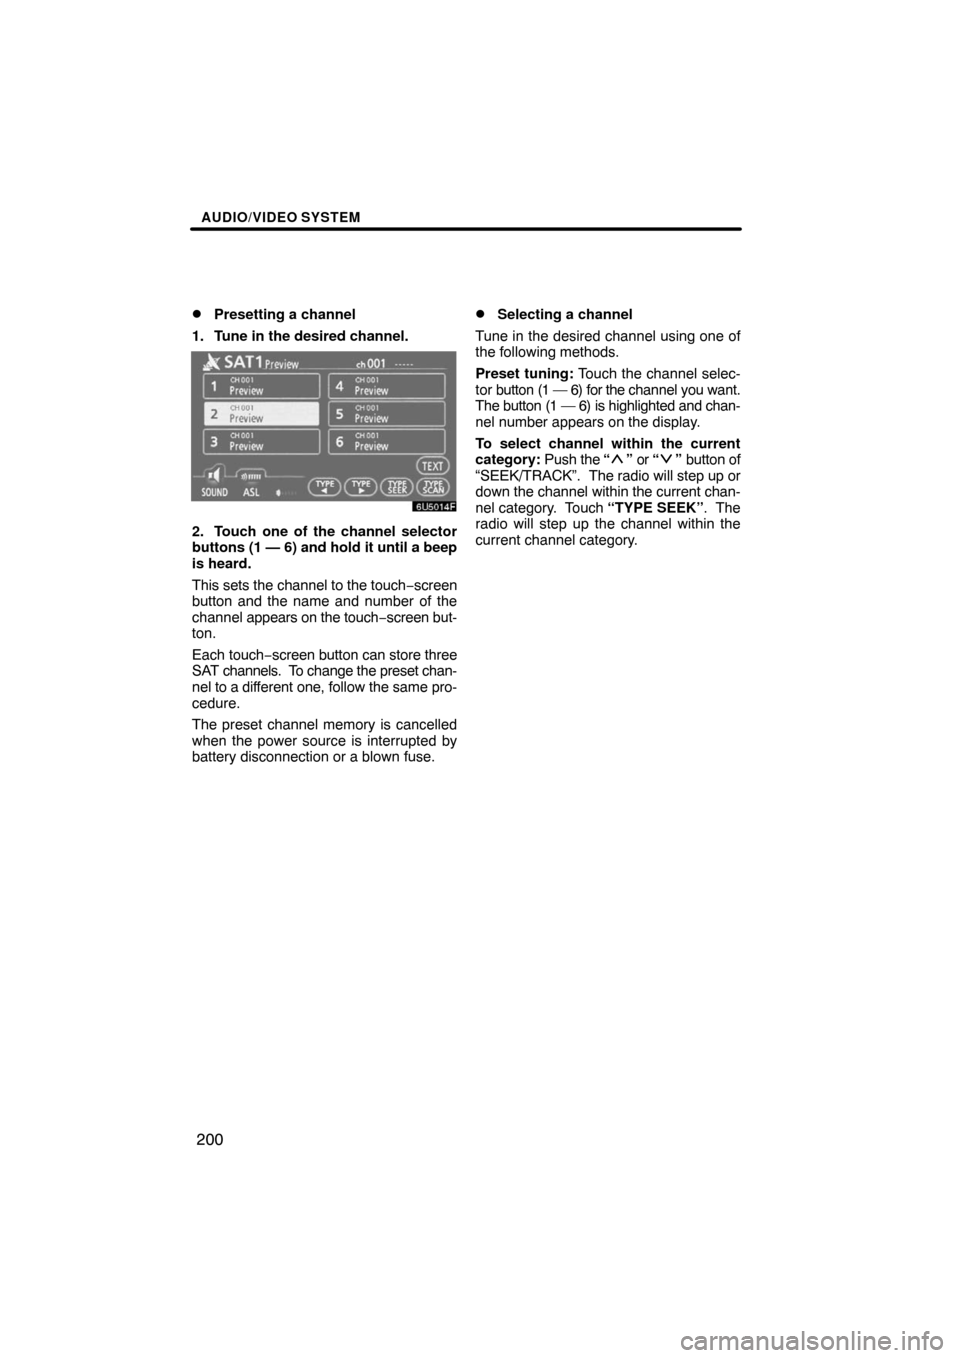
Presetting a channel
1. Tune in the desired channel.
2. Touch one of the channel selector
buttons (1 — 6) and hold it until a beep
is heard.
This sets the channel to the touch−screen
button and the name and number of the
channel appears on the touch−screen but-
ton.
Each touch−screen button can store three
SAT channels. To change the preset chan-
nel to a different one, follow the same pro-
cedure.
The preset channel memory is cancelled
when the power source is interrupted by
battery disconnection or a blown fuse.
�Selecting a channel
Tune in the desired channel using one of
the following methods.
Preset tuning: Touch the channel selec-
tor button (1 — 6) for the channel you want.
The button (1 — 6) is highlighted and chan-
nel number appears on the display.
To select channel within the current
category: Push the “
” or “” button of
“SEEK/TRACK”. The radio will step up or
down the channel within the current chan-
nel category. Touch “TYPE SEEK”. The
radio will step up the channel within the
current channel category.