Page 103 of 476

103
1-7. Safety information
1
Before driving
■
When the child restrain t system is not in use
Leave the child restraint system properly secured on the seat. Do not store
the restraint loosely on a passenger seat or in the trunk.
■ Selecting an appropriat e child restraint system
Get an appropriate child restraint system for the child. If a child is too large
for a child restraint system, sit the child on a rear seat and use the vehicle's
seat belt. ( P. 55)
CAUTION
■Child restraint precautions
●For effective protection in automobile accidents and sudden stops, a child
must be properly restrained, using a seat belt or child restraint system
depending on the age and size of the child. Holding a child in your arms is
not a substitute for a child restraint system. In an accident, the child can be
crushed against the windshield, or between you and the vehicle's interior.
● Toyota strongly urges the use of a proper child restraint system that con-
forms to the size of the child, installed on the rear seat. According to acci-
dent statistics, the child is safer when properly restrained in the rear seat
than in the front seat.
Page 104 of 476

104 1-7. Safety information
CAUTION
■Child restraint precautions
●Never install a rear-facing child restraint system on the front passenger
seat even if the “AIR BAG OFF” indicator light is illuminated. In the event
of an accident, the force of the rapid inflation of the front passenger airbag
can cause death or serious injury to the child if the rear-facing child
restraint system is installed on the front passenger seat.
● A forward-facing child restraint system should be installed on the front
passenger seat only when it is unavoidable. Always move the seat as far
back as possible even if the “AIR BAG OFF” indicator light is illuminated,
because the front passenger airbag could inflate with considerable speed
and force. Otherwise, the child may be killed or seriously injured.
● Do not use the seat belt extender when installing a child restraint system
on the front or rear passenger seat. If installing a child restraint system
with the seat belt extender connected to the seat belt, the seat belt will not
securely hold the child restraint system, which could cause death or seri-
ous injury to the child or other passengers in the event of collision.
● Do not allow the child to lean his/her head or any part of his/her body
against the door or the area of the sea t, front and rear pillars or roof side
rail from which the side airbags or curtain shield airbags deploy even if the
child is seated in the child restraint system. It is dangerous if the side air-
bags and curtain shield airbags inflate, and the impact could cause death
or serious injury to the child.
● Make sure you have complied with all installation instructions provided by
the child restraint manufacturer and that the system is properly secured. If
it is not secured properly, it may cause death or serious injury to the child
in the event of a sudden stop or accident.
Page 107 of 476
107
1-7. Safety information
1
Before driving
While pushing the child seat
down into the rear seat, allow the
shoulder belt to retract until the
child seat is securely in place.
After the shoulder belt has
retracted to a point where there is
no slack in the belt, pull the belt to
check that in cannot be extended.
■
Forward facing Convertible seat
Place the child seat on the seat
facing the front of the vehicle.
Run the seat belt through the
child seat and insert the plate
into the buckle. Make sure that
the belt is not twisted.
Fully extend the shoulder strap
and then allow it to retract
slightly into the ALR lock mode.
Lock mode allows the seat belt to
retract only.
STEP4
STEP1
STEP2
STEP3
Page 108 of 476
108 1-7. Safety information
While pushing the child seat into
the rear seat, allow the shoulder
belt to retract until the child seat
is securely in place.
After the shoulder belt has
retracted to a point where there is
no slack in the belt, pull the belt to
check that it cannot be extended.
■Booster seat
Place the booster seat on the
seat facing the front of the vehi-
cle.
Sit the child in the booster seat.
Fit the seat belt to the booster
seat according to the manufac-
turer's instructions and insert the
plate into the buckle. Make sure
that the belt is not twisted.
Check that the shoulder belt is
correctly positioned over the
child's shoulder, and that the lap
belt is as low as possible.
(P. 55)
STEP4
STEP1
STEP2
Page 112 of 476

112 1-7. Safety information
CAUTION
■When installing a booster seat
Do not fully extend the shoulder belt to prevent the belt from going to ALR
lock mode: ( P. 58)
● ALR mode causes the belt to tighten only which could cause injury or dis-
comfort to the child.
● Do not allow the child to play with the seat belt or the child could be killed
or seriously injured.
■ When installing a child restraint system
Follow the directions given in the child restraint system installation manual
and fix the child restraint system securely in place.
If the child restraint system is not correctly fixed in place, the child may be
seriously injured or even killed in the event of sudden braking or an accident.
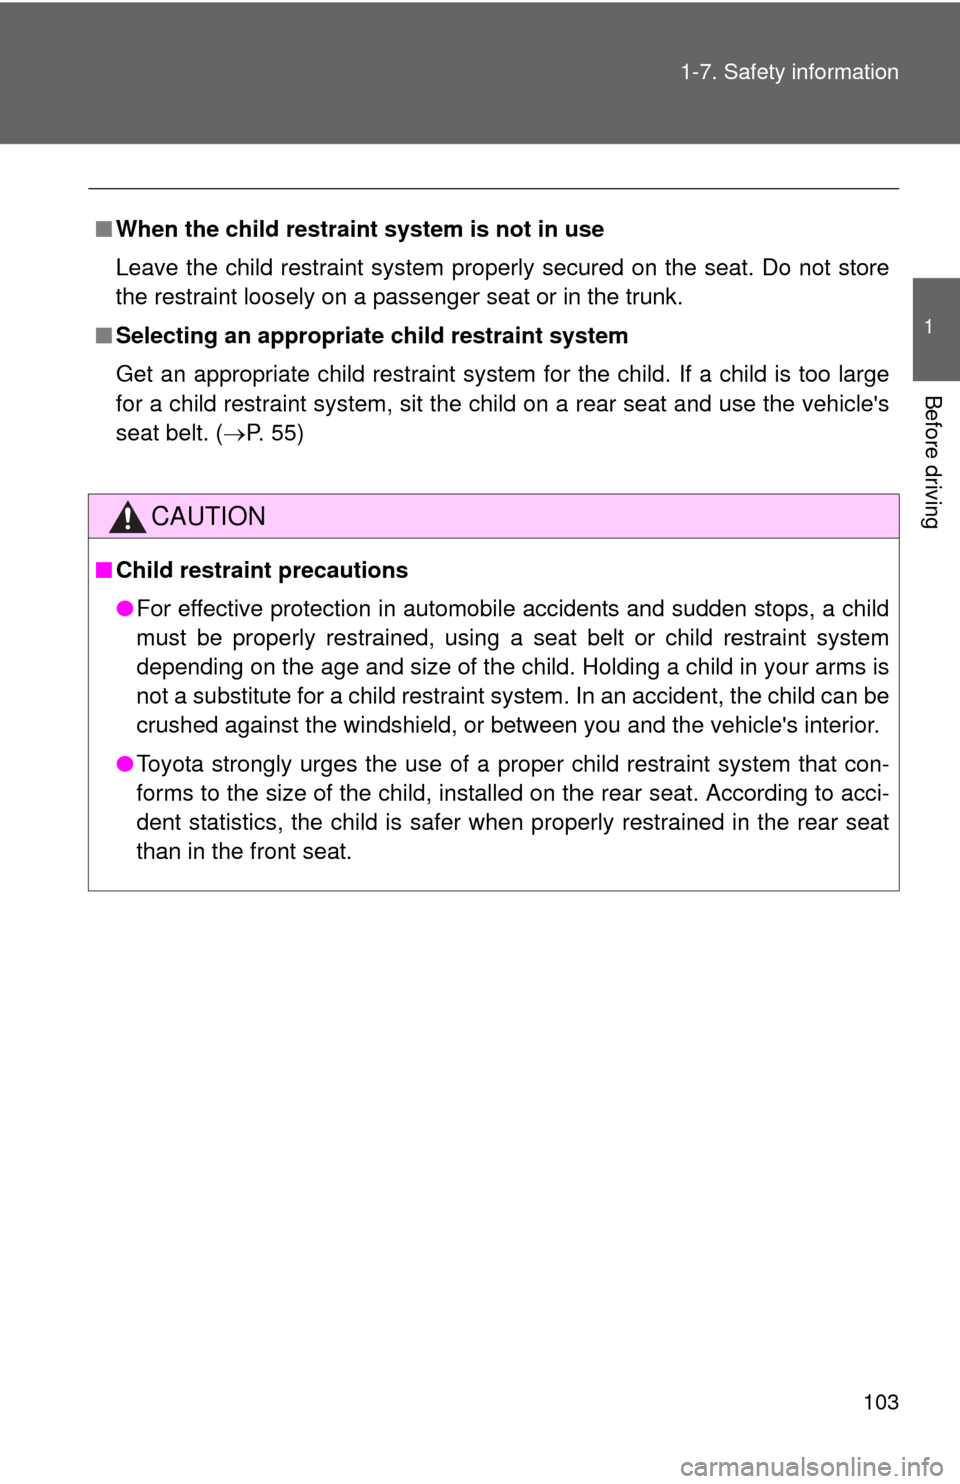
●If the driver's seat interferes with the
child restraint system and prevents it
from being attached correctly, attach
the child restraint system to the right-
hand rear seat.
● Adjust the front passenger seat so that
it does not interfere with the child
restraint system.
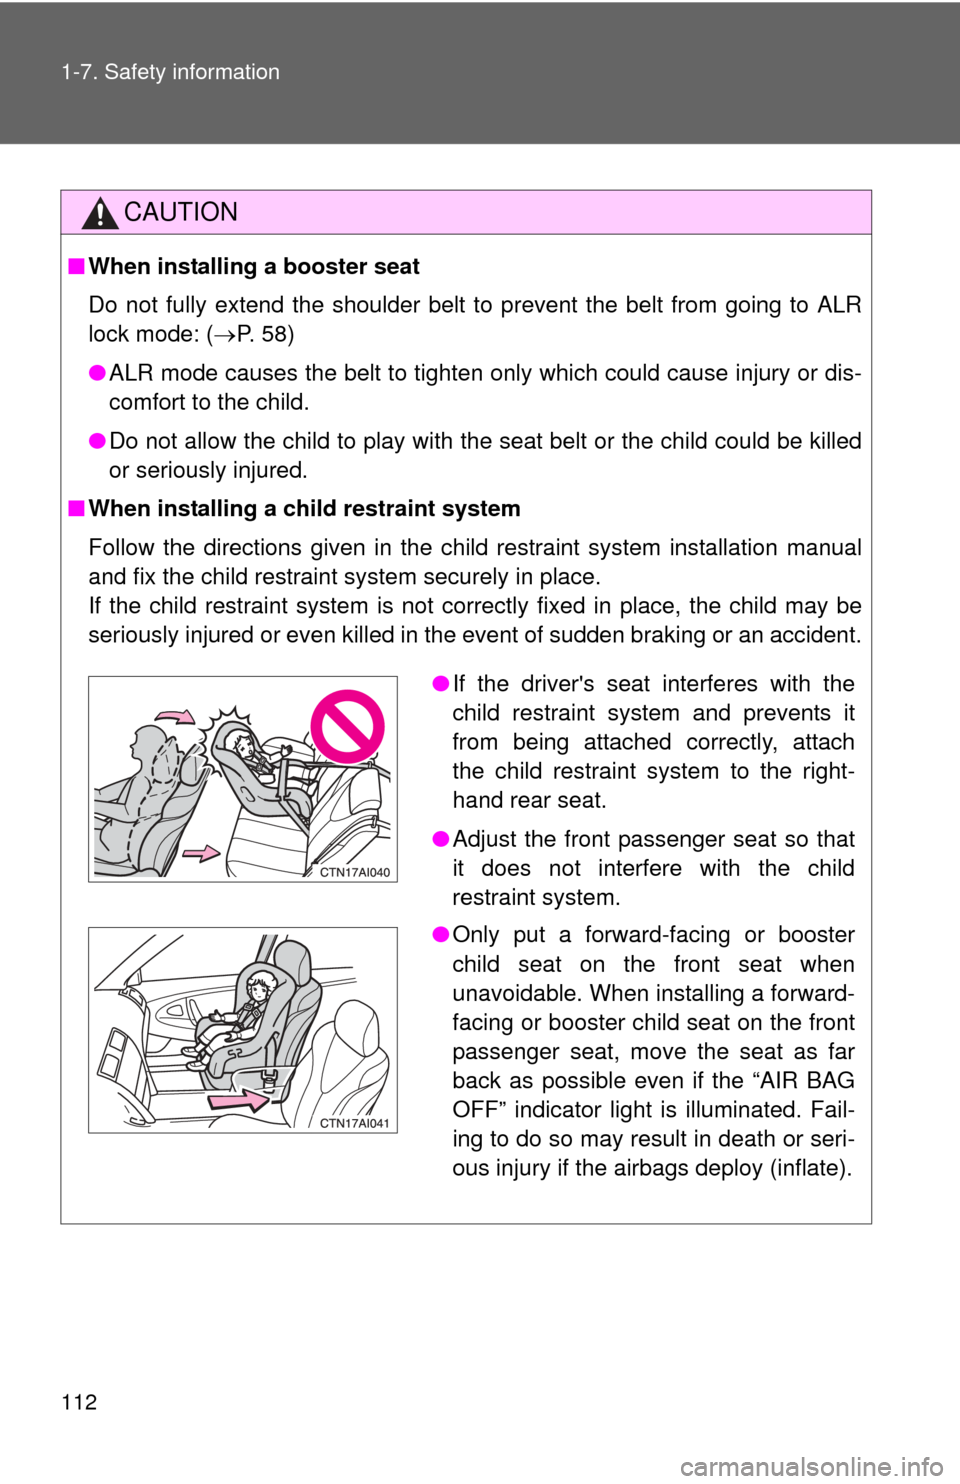
● Only put a forward-facing or booster
child seat on the front seat when
unavoidable. When installing a forward-
facing or booster child seat on the front
passenger seat, move the seat as far
back as possible even if the “AIR BAG
OFF” indicator light is illuminated. Fail-
ing to do so may result in death or seri-
ous injury if the airbags deploy (inflate).
Page 119 of 476

119
2-1. Driving procedures
2
When driving
■
Drum-in-disc type parking brake system
Your vehicle has a drum-in-disc type parking brake system. This type of
brake system needs bedding-down of the brake shoes periodically or when-
ever the parking brake shoes and/or drum are replaced. Have your Toyota
dealer perform the bedding down.
■ Operating your vehicle in a foreign country
Comply with the relevant vehicle registration laws and confirm the availability
of the correct fuel. ( P. 430)
■ Normal characteristics afte r turning off the engine
Approximately five hours after the engine is turned off, you may hear sound
coming from under the vehicle for several minutes. This is because the fuel
evaporation leakage check is performed. It does not indicate a malfunction.
CAUTION
■ When starting the vehicle
Vehicles with automatic transmission: Always keep your foot on the brake
pedal while stopped with the engine running. This prevents the vehicle from
creeping.
■ When driving the vehicle
●Do not drive if you are unfamiliar with the location of the brake and accel-
erator pedals to avoid depressing the wrong pedal.
• Accidentally depressing the accelerator pedal instead of the brake
pedal will result in sudden acceleration that may lead to an accident
that could result in death or serious injury.
• When backing up, you may twist your body around, leading to a diffi- culty in operating the pedals. Make sure to operate the pedals properly.
• Make sure to keep a correct driving posture even when moving the vehicle only slightly, allowing you to depress the brake and accelerator
pedals properly.
• Depress the brake pedal using your right foot. Depressing the brake pedal using your left foot may delay response in an emergency, result-
ing in an accident.
Page 126 of 476
126
2-1. Driving procedures
Engine (ignition) switch (vehicles with smart key system)
Modes can be switched by pressing the “ENGINE START STOP”
switch when carrying the electronic key on your person. (The engine
can be started in any mode by operating the “ENGINE START STOP”
switch at the same time as depressing the brake pedal.)
■Starting the engine
Check that the parking brake is set.
Check that the shift lever is set in P.
Sit in the driver’s seat and firmly depress the brake pedal.
The “ENGINE START STOP” switch indicator turns green. If the
indicator does not turn green, the engine cannot be started.
Press the “ENGINE START
STOP” switch.
The engine will crank until it
starts or for up to 25 seconds,
whichever is less. If you press
and hold the “ENGINE START
STOP” switch, the engine will
keep cranking for about 30
seconds maximum.
Continue depressing the brake
pedal until the engine is com-
pletely started.
STEP1
STEP2
STEP3
STEP4
Page 128 of 476
128 2-1. Driving procedures
■Steering lock release
■ If the engine does not start
The engine immobilizer system may not have been deactivated. ( P. 77)
■ When the “ENGINE START STOP” s witch indicator flashes in amber
The system may be malfunctioning. Have the vehicle inspected by your
Toyota dealer immediately.
■ Auto power OFF function
If the vehicles is left in ACCESSORY mode for more than an hour with the
shift lever in P, the “ENGINE START STOP” switch will automatically turn
OFF.
■ Key battery depletion
P. 3 2
■ When the electronic key battery is discharged
P. 353
■ Conditions affecting operation
P. 3 0
■ Note for the entry function
P. 3 3
Make sure that the steering wheel lock is
released.
To release the steering wheel lock, gently
turn the wheel left or right while pressing
the “ENGINE START STOP” switch.
If the steering wheel lock does not
release, the “ENGINE START STOP”
switch indicator will flash green.