Page 36 of 230
DESTINATION SEARCH
56
1. Push the “DEST” button.
2. Touch “Emergency” on the “Des-
tination” screen.
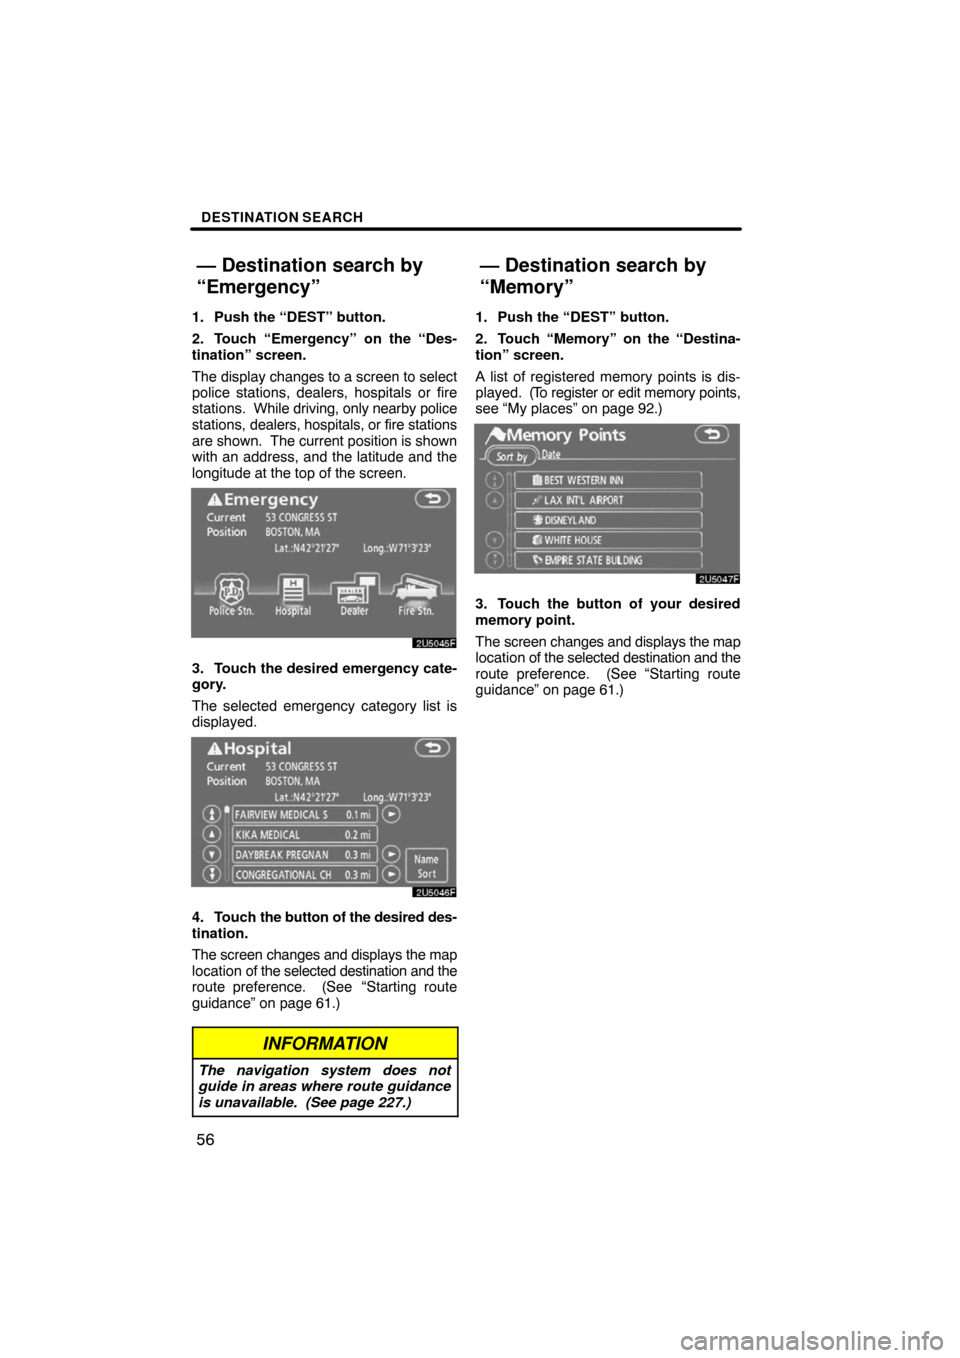
The display changes to a screen to select
police stations, dealers, hospitals or fire
stations. While driving, only nearby police
stations, dealers, hospitals, or fire stations
are shown. The current position is shown
with an address, and the latitude and the
longitude at the top of the screen.
3. Touch the desired emergency cate-
gory.
The selected emergency category list is
displayed.
4. Touch the button of the desired des-
tination.
The screen changes and displays the map
location of the selected destination and the
route preference. (See
“Starting route
guidance” on page 61.)
INFORMATION
The navigation system does not
guide in areas where route guidance
is unavailable. (See page 227.)
1. Push the “DEST” button.
2. Touch “Memory” on the “Destina-
tion” screen.
A list of registered memory points is dis-
played. (To register or edit memory points,
see “My places” on page 92.)
3. Touch the button of your desired
memory point.
The screen changes and displays the map
location of the selected destination and the
route preference. (See “Starting route
guidance” on page 61.)
— Destination search by
“Emergency”
— Destination search by
“Memory”
Page 42 of 230
DESTINATION SEARCH
62
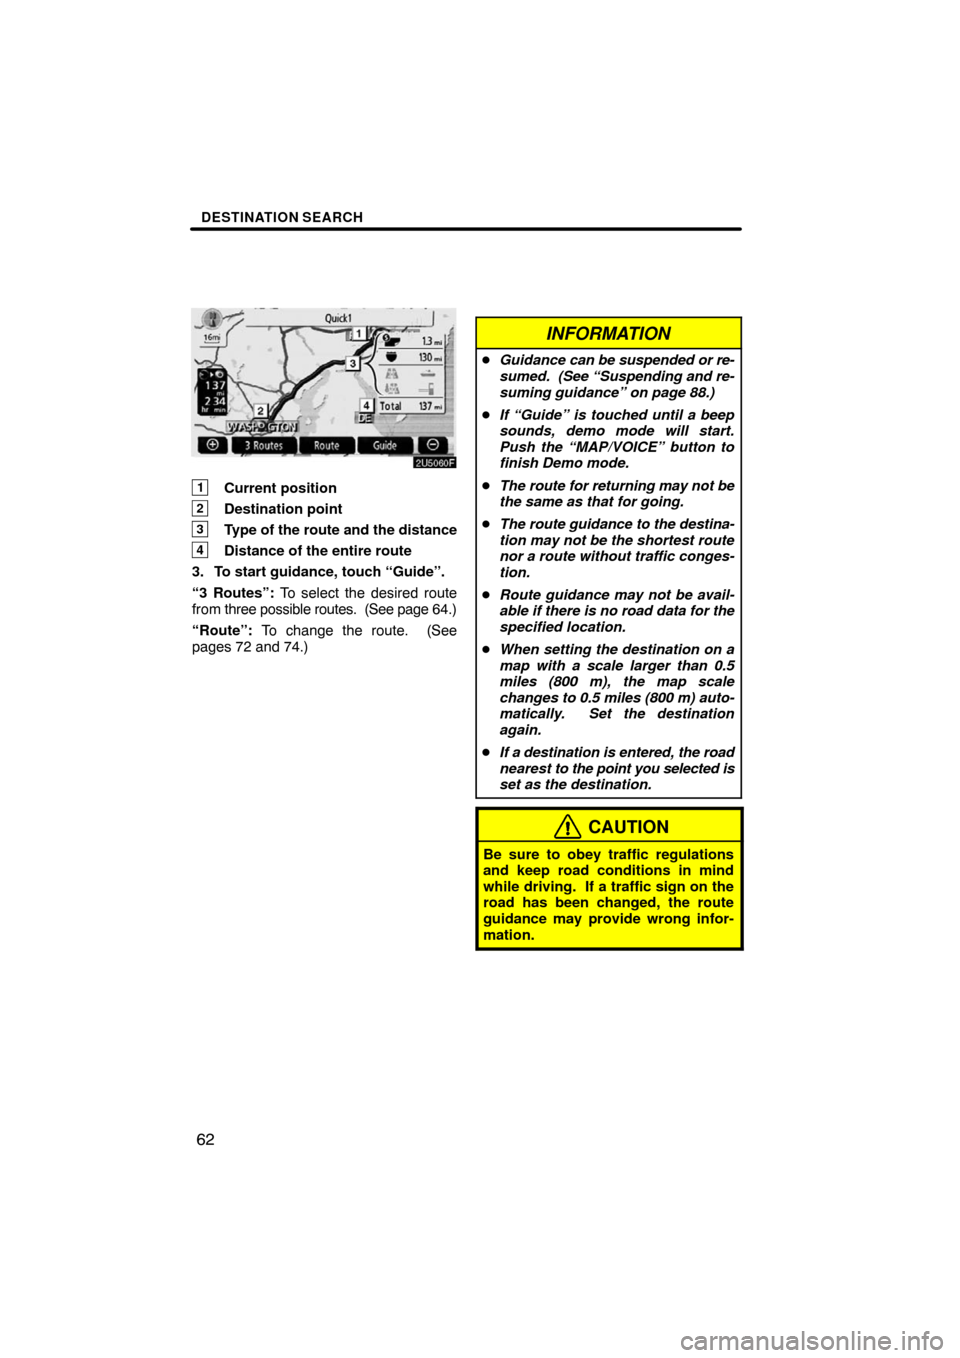
1Current position
2Destination point
3Type of the route and the distance
4Distance of the entire route
3. To start guidance, touch “Guide”.
“3 Routes”: To select the desired route
from three possible routes. (See page 64.)
“Route”: To change the route. (See
pages 72 and 74.)
INFORMATION
�Guidance can be suspended or re-
sumed. (See “Suspending and re-
suming guidance” on page 88.)
�If “Guide” is touched until a beep
sounds, demo mode will start.
Push the “MAP/VOICE” button to
finish Demo mode.
�The route for returning may not be
the same as that for going.
�The route guidance to the destina-
tion may not be the shortest route
nor a route without traffic conges-
tion.
�Route guidance may not be avail-
able if there is no road data for the
specified location.
�When setting the destination on a
map with a scale larger than 0.5
miles (800 m), the map scale
changes to 0.5 miles (800 m) auto-
matically. Set the destination
again.
�If a destination is entered, the road
nearest to the point you selected is
set as the destination.
CAUTION
Be sure to obey traffic regulations
and keep road conditions in mind
while driving. If a traffic sign on the
road has been changed, the route
guidance may provide wrong infor-
mation.
Page 46 of 230
ROUTE GUIDANCE
66
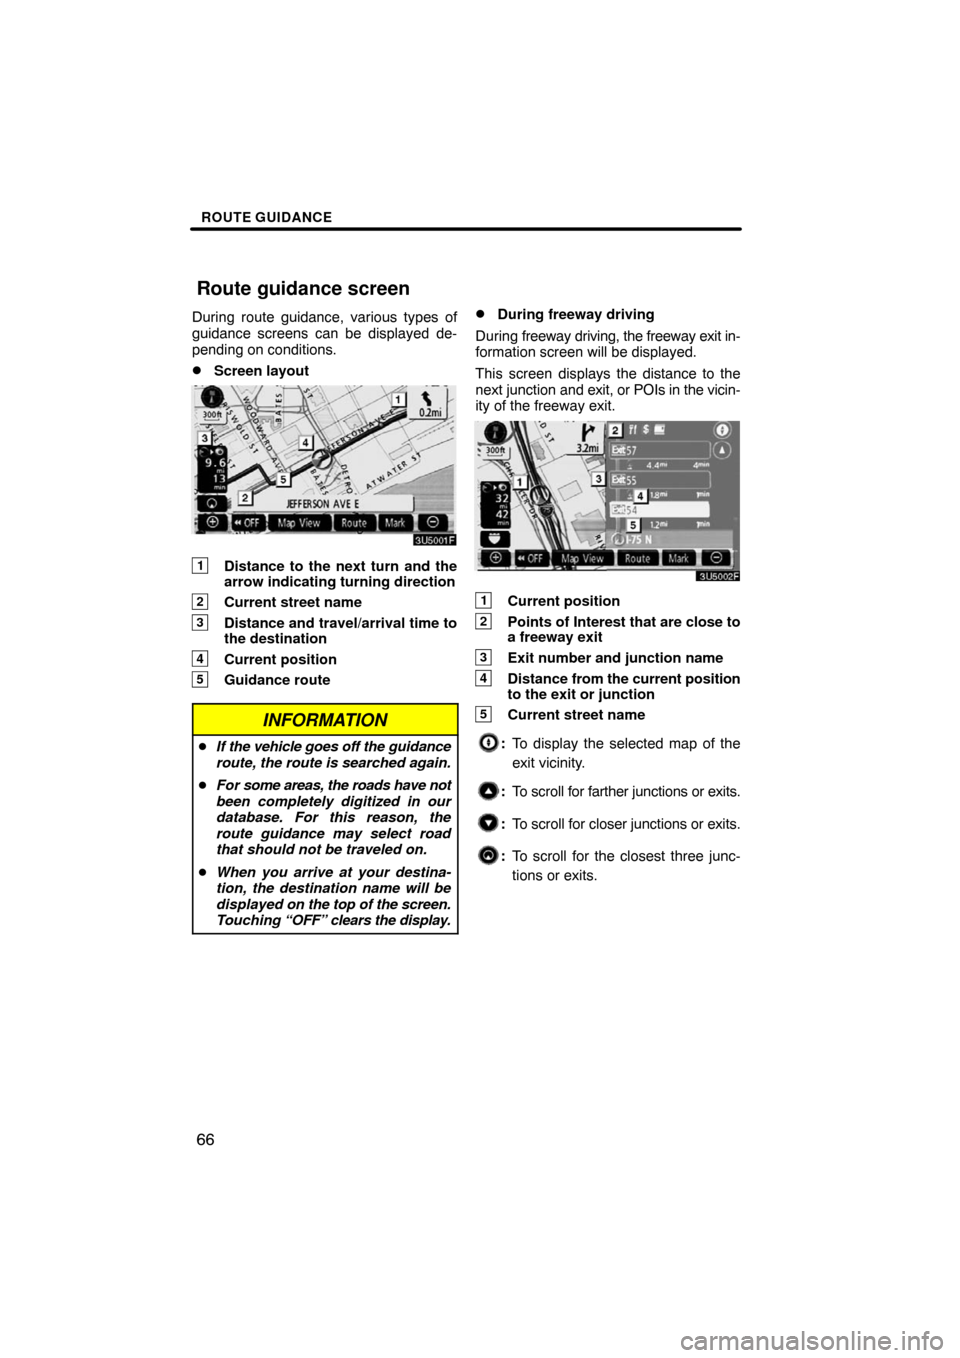
During route guidance, various types of
guidance screens can be displayed de-
pending on conditions.
�Screen layout
1Distance to the next turn and the
arrow indicating turning direction
2Current street name
3Distance and travel/arrival time to
the destination
4Current position
5Guidance route
INFORMATION
�If the vehicle goes off the guidance
route, the route is searched again.
�For some areas, the roads have not
been completely digitized in our
database. For this reason, the
route guidance may select road
that should not be traveled on.
�When you arrive at your destina-
tion, the destination name will be
displayed on the top of the screen.
Touching “OFF” clears the display.
�During freeway driving
During freeway driving, the freeway exit in-
formation screen will be displayed.
This screen displays the distance to the
next junction and exit, or POIs in the vicin-
ity of the freeway exit.
1Current position
2Points of Interest that are close to
a freeway exit
3Exit number and junction name
4Distance from the current position
to the exit or junction
5Current street name
:To display the selected map of the
exit vicinity.
:To scroll for farther junctions or exits.
:To scroll for closer junctions or exits.
:To scroll for the closest three junc-
tions or exits.
Route guidance screen
Page 47 of 230
ROUTE GUIDANCE
67 �
When approaching a freeway exit or
junction
When the vehicle approaches an exit or
junction, the guidance screen for the free-
way will be displayed.
1Road/area name
2Distance from the current position
to the exit or junction
3Current position
“OFF”: The guidance screen on freeway
disappears and the map screen appears.
When touching
or pushing the
“MAP/VOICE” button, the guidance
screen on freeway reappears.
�When approaching an intersection
When the vehicle approaches an intersec-
tion, the intersection guidance screen will
be displayed.
1Next street name
2Distance to the intersection
3Current position
“OFF”: The intersection guidance screen
disappears and the map screen appears.
When touching
or pushing the
“MAP/VOICE” button, the intersection
guidance screen reappears.
Page 50 of 230
ROUTE GUIDANCE
70
One−way road
One−way road
∗: The system indicates a U−turn if the dis-
tance between two one−way roads (of op-
posite directions) is less than 50 feet (15
m) in residential areas or 164 feet (50 m)
in non−residential areas.
1“In half of a mile, make a legal
U−turn.”
2“Make a legal U−turn ahead.”
3(Beep sound only)
The system announces the approach to
the final destination.
1“Your destination is ahead.”
2“You have arrived at your des-
tination. The route guidance is
now finished.”
INFORMATION
�If the system cannot determine the
current vehicle position correctly
(in cases of poor GPS signal recep-
tion), the voice guidance may be
made early or delayed.
�If you did not hear the voice guid-
ance command, push the “MAP/
VOICE” button to hear it again.
�To adjust the voice guidance vol-
ume, see “Volume” on page 89.
Page 51 of 230
ROUTE GUIDANCE
71
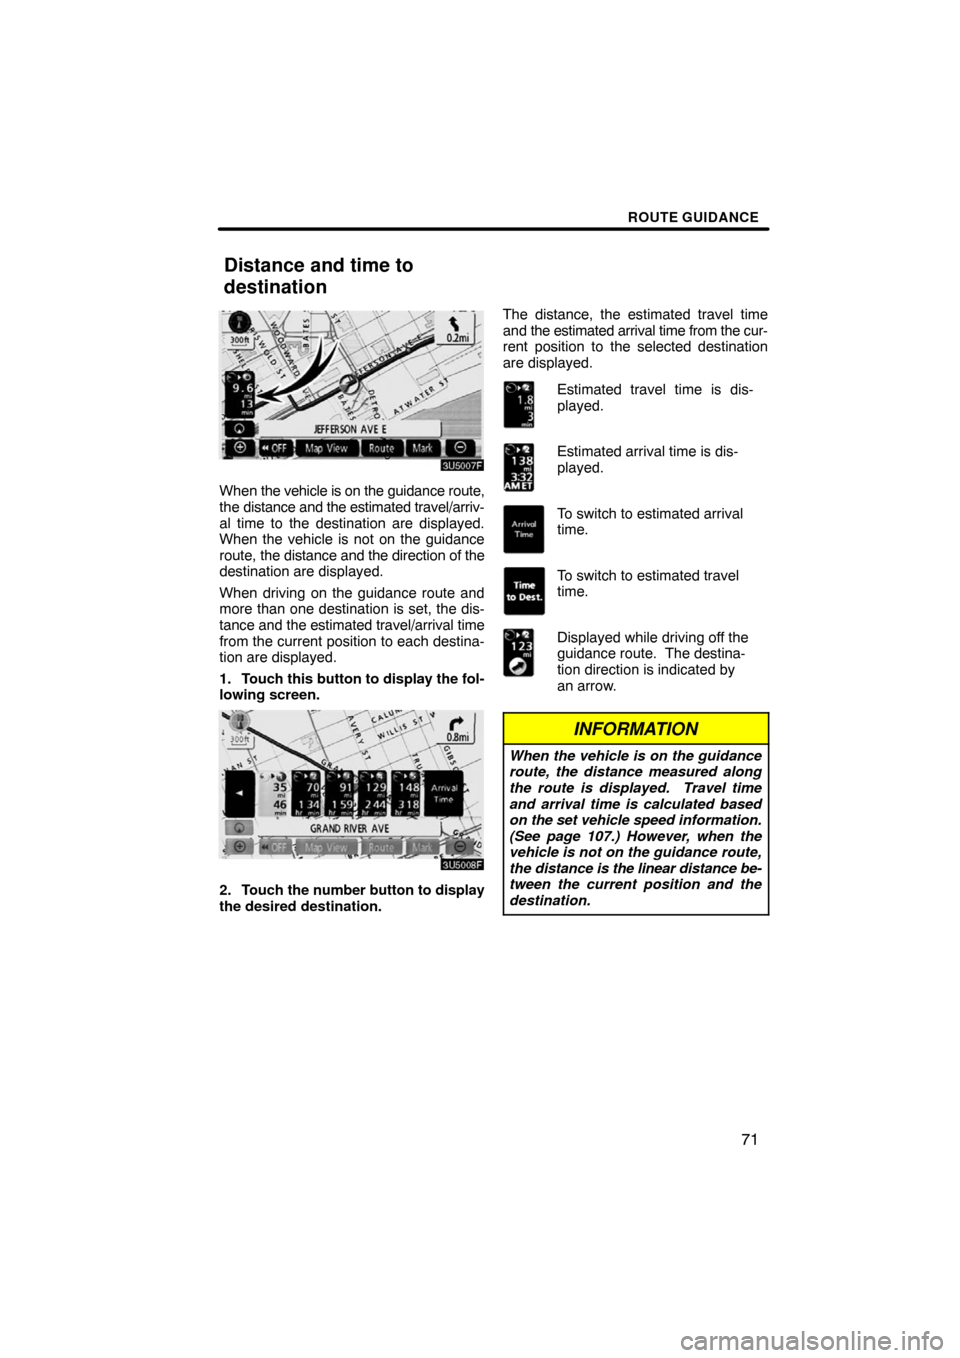
When the vehicle is on the guidance route,
the distance and the estimated travel/arriv-
al time to the destination are displayed.
When the vehicle is not on the guidance
route, the distance and the direction of the
destination are displayed.
When driving on the guidance route and
more than one destination is set, the dis-
tance and the estimated travel/arrival time
from the current position to each destina-
tion are displayed.
1. Touch this button to display the fol-
lowing screen.
2. Touch the number button to display
the desired destination.The distance, the estimated travel time
and the estimated arrival time from the cur-
rent position to the selected destination
are displayed.
Estimated travel time is dis-
played.
Estimated arrival time is dis-
played.
To switch to estimated arrival
time.
To switch to estimated travel
time.
Displayed while driving off the
guidance route. The destina-
tion direction is indicated by
an arrow.
INFORMATION
When the vehicle is on the guidance
route, the distance measured along
the route is displayed. Travel time
and arrival time is calculated based
on the set vehicle speed information.
(See page 107.) However, when the
vehicle is not on the guidance route,
the distance is the linear distance be-
tween the current position and the
destination.
Distance and time to
destination
Page 56 of 230
ROUTE GUIDANCE
76
3. Select the button below to select the
desired detour distance.
“1 mile (km)”, “3 miles (km)” or “5 miles
(km)”: Touch one of these buttons to start
the detour process. After detouring, the
system returns to the original guidance
route.
“Whole Route”: By touching this button,
the system will calculate an entire new
route to the destination.
This picture shows an example of how the
system would guide around a delay
caused by a traffic jam.
1This position indicates the location of
a traffic jam caused by road repairs or
an accident.
2This route indicates the detour sug-
gested by the system.
INFORMATION
�When your vehicle is on a freeway,
the detour distance selections are
5, 15, and 25 miles (km).
�The system may not be able to cal-
culate a detour route depending on
the selected distance and sur-
rounding road conditions.
Page 59 of 230
ROUTE GUIDANCE
79
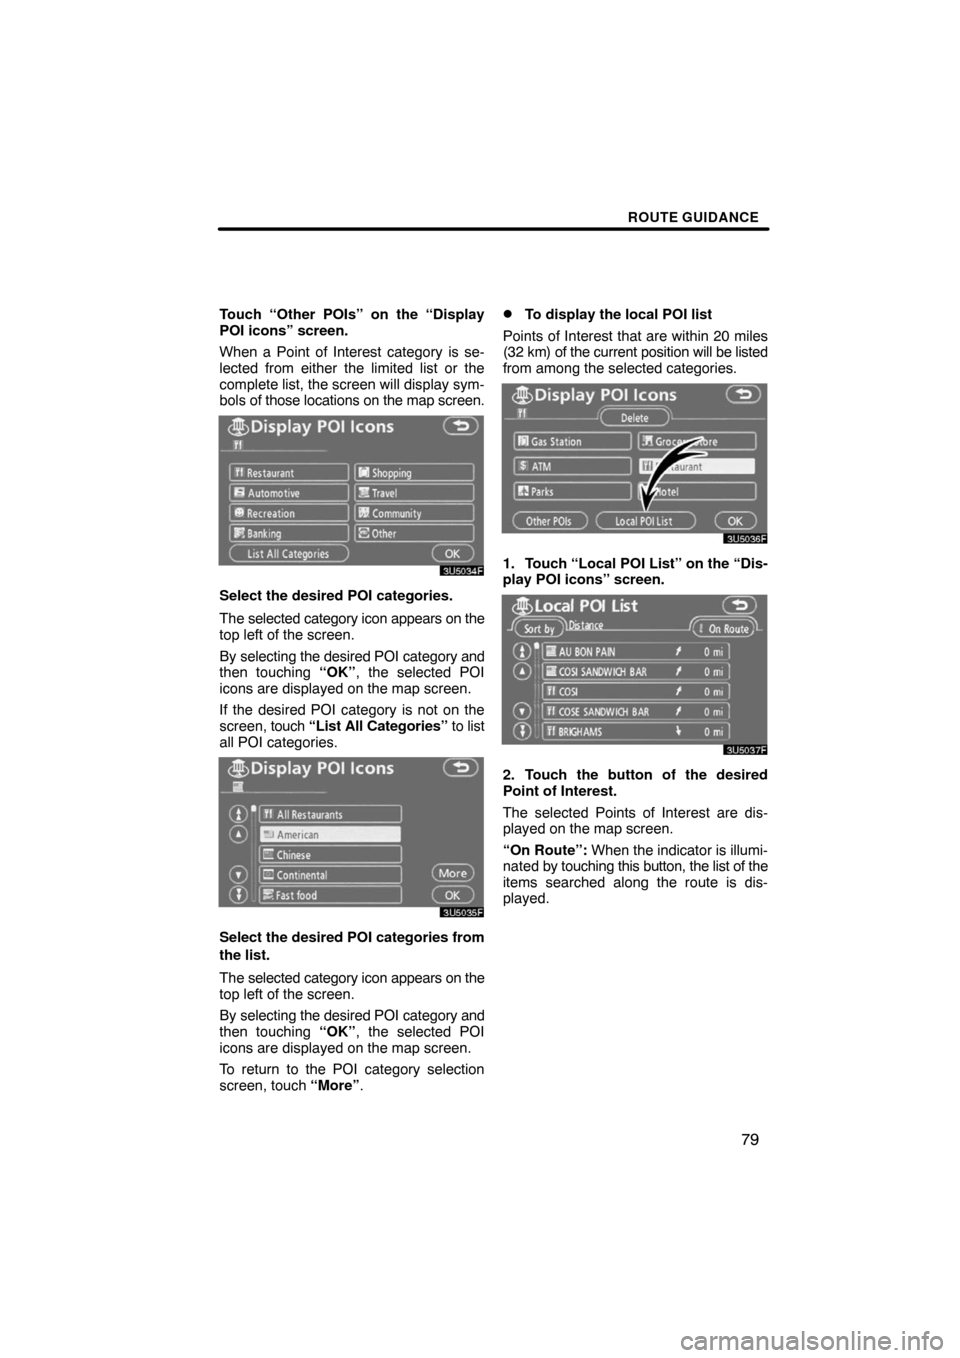
Touch “Other POIs” on the “Display
POI icons” screen.
When a Point of Interest category is se-
lected from either the limited list or the
complete list, the screen will display sym-
bols of those locations on the map screen.
Select the desired POI categories.
The selected category icon appears on the
top left of the screen.
By selecting the desired POI category and
then touching “OK”, the selected POI
icons are displayed on the map screen.
If the desired POI category is not on the
screen, touch “List All Categories” to list
all POI categories.
Select the desired POI categories from
the list.
The selected category icon appears on the
top left of the screen.
By selecting the desired POI category and
then touching “OK”, the selected POI
icons are displayed on the map screen.
To return to the POI category selection
screen, touch “More”.
�To display the local POI list
Points of Interest that are within 20 miles
(32 km) of the current position will be listed
from among the selected categories.
1. Touch “Local POI List” on the “Dis-
play POI icons” screen.
2. Touch the button of the desired
Point of Interest.
The selected Points of Interest are dis-
played on the map screen.
“On Route”: When the indicator is illumi-
nated by touching this button, the list of the
items searched along the route is dis-
played.