Page 174 of 230

AUDIO SYSTEM
194 �
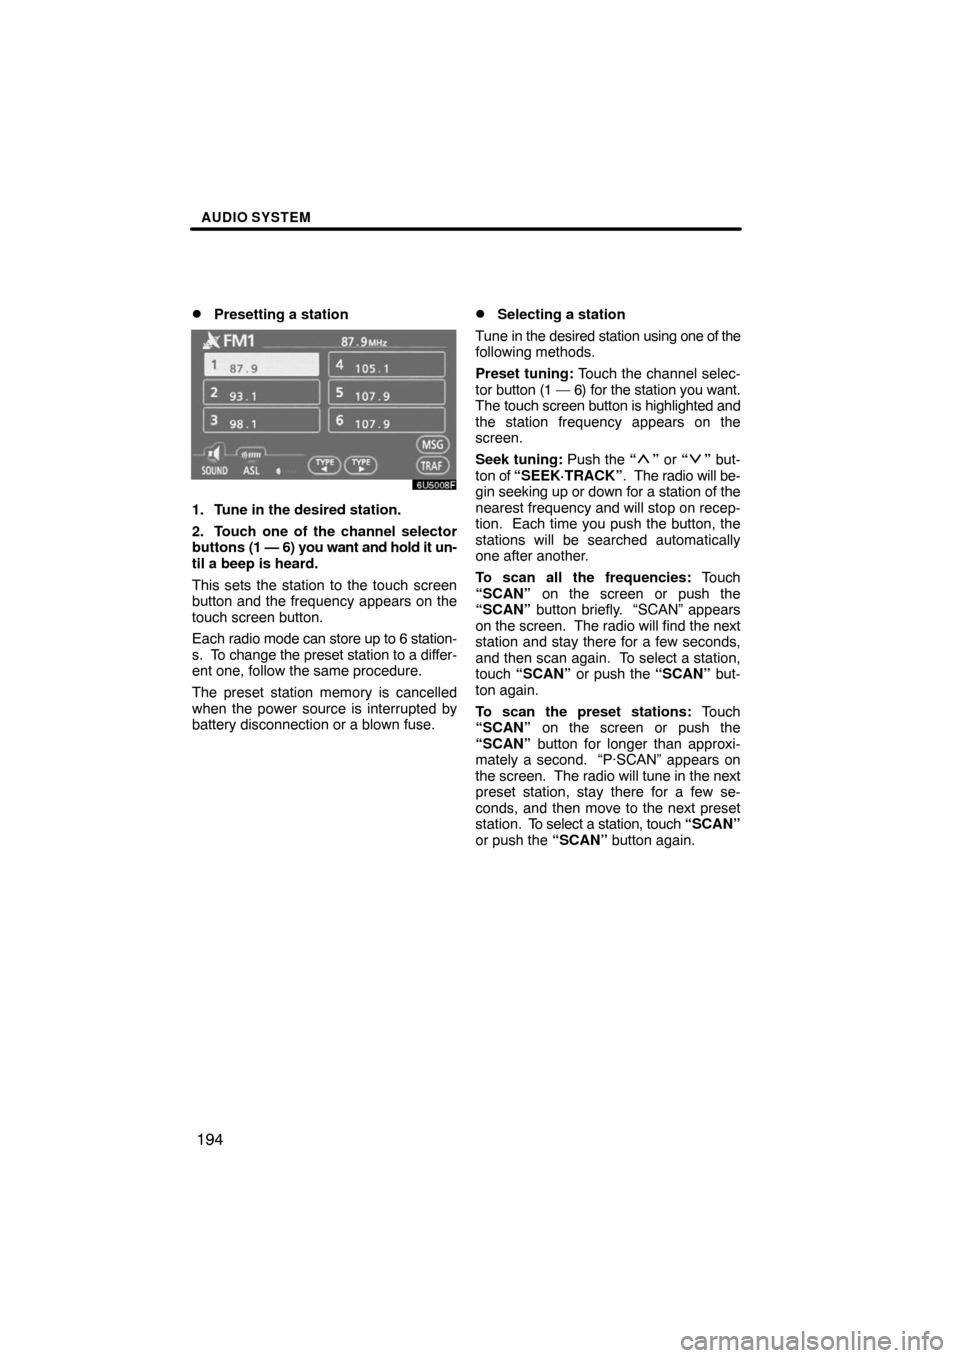
Presetting a station
1. Tune in the desired station.
2. Touch one of the channel selector
buttons (1 — 6) you want and hold it un-
til a beep is heard.
This sets the station to the touch screen
button and the frequency appears on the
touch screen button.
Each radio mode can store up to 6 station-
s. To change the preset station to a differ-
ent one, follow the same procedure.
The preset station memory is cancelled
when the power source is interrupted by
battery disconnection or a blown fuse.
�Selecting a station
Tune in the desired station using one of the
following methods.
Preset tuning: Touch the channel selec-
tor button (1 — 6) for the station you want.
The touch screen button is highlighted and
the station frequency appears on the
screen.
Seek tuning: Push the “
” or “” but-
ton of “SEEK·TRACK”. The radio will be-
gin seeking up or down for a station of the
nearest frequency and will stop on recep-
tion. Each time you push the button, the
stations will be searched automatically
one after another.
To scan all the frequencies: Touch
“SCAN” on the screen or push the
“SCAN” button briefly. “SCAN” appears
on the screen. The radio will find the next
station and stay there for a few seconds,
and then scan again. To select a station,
touch “SCAN” or push the “SCAN” but-
ton again.
To scan the preset stations: Touch
“SCAN” on the screen or push the
“SCAN” button for longer than approxi-
mately a second. “P·SCAN” appears on
the screen. The radio will tune in the next
preset station, stay there for a few se-
conds, and then move to the next preset
station. To select a station, touch “SCAN”
or push the “SCAN” button again.
Page 179 of 230
AUDIO SYSTEM
199 �
Channel category
Touch either “TYPE�” or “TYPE�” to go
to the next or previous category.
�Presetting a channel
1. Tune in the desired channel.
2. Touch one of the channel selector
buttons (1 — 6) and hold it until a beep
is heard.
This sets the channel to the touch screen
button and the name and number of the
channel appears on the touch screen but-
ton.
Each touch screen button can store three
SAT channels. To change the preset chan-
nel to a different one, follow the same pro-
cedure.
The preset channel memory is cancelled
when the power source is interrupted by
battery disconnection or a blown fuse.
Page 188 of 230
AUDIO SYSTEM
208
(e) Operating an audio CD
�Playing an audio CD
Push the “AUDIO” button to display
this screen.
CD text only — The disc title and track title
will appear on the screen when pushing
the “DISC·AUX” button.
You can operate the touch screen buttons
and choose the number of the disc you
want to play. The selected disc is automat-
ically played.
�Selecting a desired track
“SEEK·TRACK” button: Use for a direct
access to a desired track.
Push the “
” or “” button of
“SEEK·TRACK” and repeat it until the de-
sired track number appears on the screen.
As you release the button, the changer will
start playing the selected track from the
beginning.
“TRACK LIST”: The desired track can be
selected from a list. This function is avail-
able only when the vehicle is not moving.
Touch “TRACK LIST”. The track list is
displayed.
Page 191 of 230

AUDIO SYSTEM
211
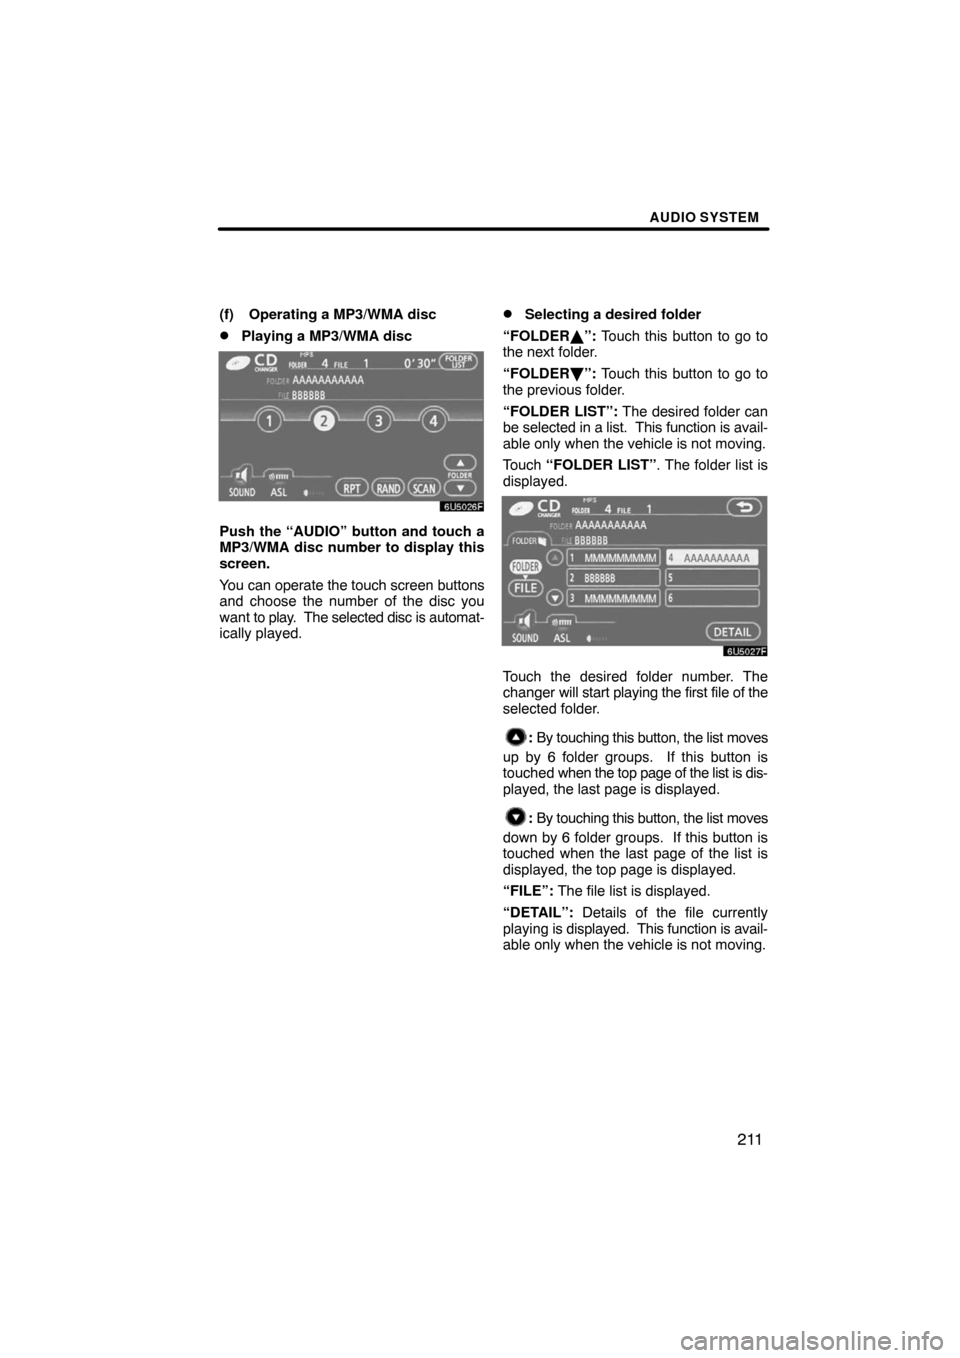
(f) Operating a MP3/WMA disc
�Playing a MP3/WMA disc
Push the “AUDIO” button and touch a
MP3/WMA disc number to display this
screen.
You can operate the touch screen buttons
and choose the number of the disc you
want to play. The selected disc is automat-
ically played.
�Selecting a desired folder
“FOLDER�”: Touch this button to go to
the next folder.
“FOLDER ”: Touch this button to go to
the previous folder.
“FOLDER LIST”: The desired folder can
be selected in a list. This function is avail-
able only when the vehicle is not moving.
Touch “FOLDER LIST”. The folder list is
displayed.
Touch the desired folder number. The
changer will start playing the first file of the
selected folder.
: By touching this button, the list moves
up by 6 folder groups. If this button is
touched when the top page of the list is dis-
played, the last page is displayed.
: By touching this button, the list moves
down by 6 folder groups. If this button is
touched when the last page of the list is
displayed, the top page is displayed.
“FILE”: The file list is displayed.
“DETAIL”: Details of the file currently
playing is displayed. This function is avail-
able only when the vehicle is not moving.
Page 221 of 230

CAMRY_Navi_U(L/O 0708)
3
For safety reasons, this manual indicates
items requiring particular attention with the
following marks.
CAUTION
This is a warning against anything
which may cause injury to people if
the warning is ignored. You are in-
formed about what you must or must
not do in order to reduce the risk of
injury to yourself and others.
NOTICE
This is a warning against anything
which may cause damage to the ve-
hicle or its equipment if the warning
is ignored. You are informed about
what you must or must not do in or-
der to avoid or reduce the risk of dam-
age to your vehicle and its equip-
ment.
INFORMATION
This provides additional information.
To use this system in the safest possible
manner, follow all the safety tips shown be-
low.
This system is intended to assist in reach-
ing the destination and, if used properly,
can do so. The driver is solely responsible
for the safe operation of your vehicle and
the safety of your passengers.
Do not use any feature of this system to the
extent it becomes a distraction and pre-
vents safe driving. The first priority while
driving should always be the safe opera-
tion of the vehicle. While driving, be sure
to observe all traffic regulations.
Prior to the actual use of this system, learn
how to use it and become thoroughly famil-
iar with it. Read the entire Navigation Sys-
tem Owner’s Manual to make sure you un-
derstand the system. Do not allow other
people to use this system until they have
read and understood the instructions in
this manual.
For your safety, some functions may be-
come inoperable when driving. Unavail-
able touch screen buttons are dimmed.
Only when the vehicle is not moving, can
the destination and route selection be
done.
Important information about
this manualSafety Instruction
Page 223 of 230
5
0U5018X
No.NameFunctionPage
1
North�up or
heading�up
symbolThis symbol indicates a map view with
north−up or heading−up. Touching this
symbol changes the map orientation.
38
2Scale indicatorThis figure indicates the map scale.36
3“DISP” buttonPush this button to display the “Display”
screen.178
4Zoom out buttonTouch this button to reduce the map
scale.36
5“Mark”
Touch this button to register the current
position or the cursor position as a
memory point.
31
6“Route”Touch this button to change the route.72, 74
Quick guide —
— Overview buttons and guidance screen
Page 224 of 230

6
No.NameFunctionPage
7“Map View”
Touch this button to browse information
about guidance route, to set the Points
of Interest to be displayed on the
screen, or to record the route.
78, 80, 81, 82
8“��OFF”
Touch this button to obtain a broader
view. Some of the buttons on the screen
are not displayed. They are displayed
again by touching “ON��”.
11 0
9Zoom in buttonTouch this button to magnify the map
scale.36
10Foot print map
buttonTouch this button to display the foot print
map and the building information.37
11“MAP/VOICE”
buttonPush this button to repeat a voice guid-
ance, cancel one touch scroll, start
guidance, and display the current posi-
tion.
28, 70
12“DEST” buttonPush this button to display the “Destina-
tion” screen.11, 12, 40, 41
13
Screen
configuration
buttonTouch this button to change the screen
mode.34
14“MENU” buttonPush this button to display the “Menu”
screen.7, 9, 86, 88,
89, 90, 92, 106,
238
15Distance and time
to destinationDisplays the distance, the estimated
travel time to the destination, and the
estimated arrival time at the destination.
71
16“INFO” buttonPush this button to display the “Informa-
tion” screen.118, 122, 131,
179, 182
17
“GPS” mark
(Global
Positioning
System)Whenever the vehicle is receiving sig-
nals from the GPS, this mark is dis-
played.
226
18
Speech
command system
indicatorThe microphone is shown by pushing
the talk switch. The speech command
system can be operated while this indi-
cator is shown.
174
Page 228 of 230
10
5Touch “Enter”.
The “Memory Point” screen is displayed.
6Touch “Quick Access”.
7Touch one of preset buttons 1 to
5.
8Touch “OK”.
Registration of the preset memory point is
complete.
You can change the icon, quick access,
name, location and phone number. (See
“ — Editing memory points” on page 94.)
The registered points can be used on the
“Destination” screen. (See “ — Destination
search by Quick access” on page 44.)
Page:
< prev 1-8 9-16 17-24