Page 157 of 230
OTHER FUNCTIONS
177
This system has a function which dis-
plays the voice recognition help
screen. You can see the command list
and operating guide on it.
(a) Command list
1. If the “Operating Guide” screen is
displayed, touch “Command List” on
the upper side of the screen.
2. Select the desired category by
touching the buttons on the right side of
the “Command List” screen.
3. You can scroll through the list of the
command list by touching
or .
Touch “OK” after you check it.(b) Operating guide
1. If the “Command List” screen is dis-
played, touch “Operating Guide” on the
upper side of the screen.
2. Select the desired category by
touching the buttons on the right side of
the “Operating Guide” screen.
3. You can scroll through the list of the
operating guide by touching
or .
Touch “OK” after you check it.
Help screen
Page 160 of 230
OTHER FUNCTIONS
180
(a) Automatic transition
You can select a function that enables au-
tomatic return to the navigation screen
from the audio screen.
Select “ON” or “OFF” and then touch
“OK”.
“ON”: The navigation screen automatical-
ly returns from the audio screen 20 sec-
onds after the end of audio screen opera-
tion.
“OFF”: The audio screen remains on.(b) Switch color
You can select the color of the touch
screen buttons.
Select “Green” or “Orange” and then
touch “OK”.
Page 162 of 230
OTHER FUNCTIONS
182
You can set a beep sound off.
1. Push the “INFO” button.
2. Touch “Beep Off”.
“Beep Off” is highlighted.
To switch the beep sound on, touch “Beep
Off” again.The language of the touch screen buttons,
pop−up messages and the voice guidance
can be changed.
1. Push the “INFO” button.
2. Touch “Language”.
Beep settingSelecting a language
Page 166 of 230

AUDIO SYSTEM
186
1Function menu display screen
To control the radio or CD changer,
touch the touch screen buttons. For
details, see page 189.
2“TUNE·FILE” knob
Turn this knob to move the station
band and files up or down. For de-
tails, see pages 193 and 212.
3“AM·SAT” button
Push this button to choose an AM or
SAT station. For details, see pages
189 and 193.
4“FM1” or “FM2” button
Push this button to choose an FM sta-
tion. For details, see pages 189 and
193.
5“DISC·AUX” button
Push this button to turn the CD
changer and AUX on. For details,
see pages 189, 192, 207 and 208.
6“SCAN” button
Push this button to scan radio sta-
tions. For details, see pages 194 and
200.
7“AUDIO” button
Push this button to display the audio
control screen. For details, see page
188.
8“ CLOSE” button
Push this button to display the
“LOAD·EJECT” screen or close the
display. For details, see page 206.
9“SEEK·TRACK” button
Push either side of this button to seek
up or down for a station, or to access
a desired track or file. For details, see
pages 194, 200, 208 and 212.
10“POWER·VOLUME” knob
Push this knob to turn the audio sys-
tem on and off, and turn it to adjust the
volume. For details, see page 188.
Quick reference
Page 168 of 230
AUDIO SYSTEM
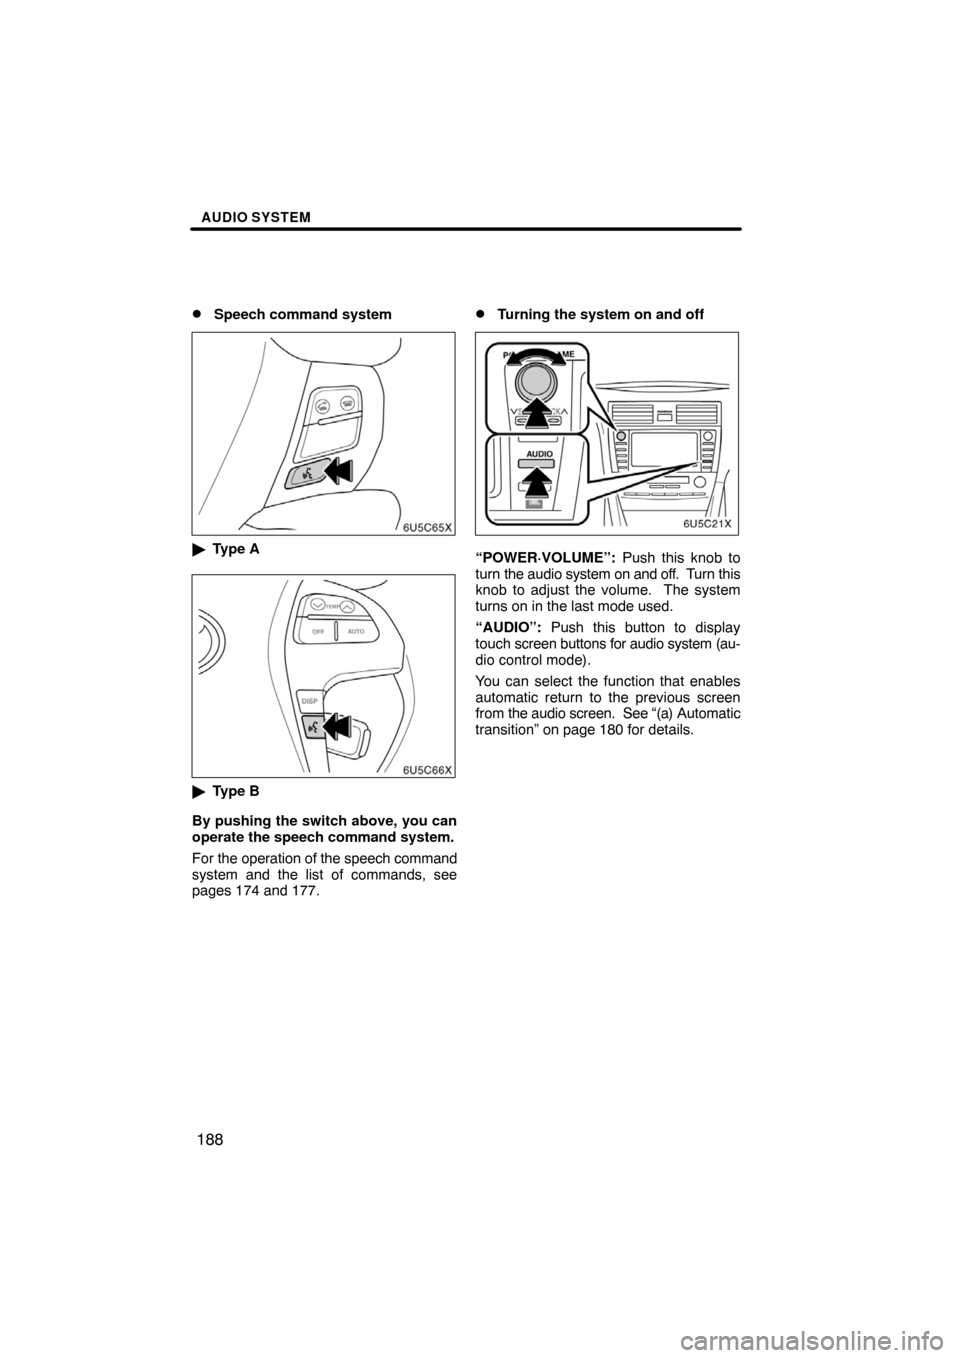
188 �
Speech command system
�Type A
�Type B
By pushing the switch above, you can
operate the speech command system.
For the operation of the speech command
system and the list of commands, see
pages 174 and 177.
�Turning the system on and off
“POWER·VOLUME”: Push this knob to
turn the audio system on and off. Turn this
knob to adjust the volume. The system
turns on in the last mode used.
“AUDIO”: Push this button to display
touch screen buttons for audio system (au-
dio control mode).
You can select the function that enables
automatic return to the previous screen
from the audio screen. See “(a) Automatic
transition” on page 180 for details.
Page 169 of 230
AUDIO SYSTEM
189 �
Switching between functions
Push “AM·SAT”, “FM1”, “FM2” or
“DISC·AUX” button to turn on the de-
sired mode. The selected mode turns
on immediately.
Push these buttons if you want to switch
from one mode to another.
If the disc is not set, the CD changer does
not turn on.
You can turn off the CD changer by eject-
ing the all disc. If the audio system was
previously off, then the entire audio system
will be turned off when you eject the disc.
If another function was previously playing,
it will come on again.
The function buttons for radio and CD
changer operation are displayed on the
screen when the audio control mode is se-
lected.
Page 170 of 230

AUDIO SYSTEM
190
Touch them lightly and directly on the
screen.
The selected button is highlighted.
INFORMATION
�If the system does not respond to a
touch of a touch screen button,
move your finger away from the
screen and then touch it again.
�You cannot operate dimmed touch
screen buttons.
�Wipe off fingerprints on the surface
of the display using a glass clean-
ing cloth.
�Tone and balance
How good an audio program sounds to you
is largely determined by the mix of the
treble, midrange, and bass levels. In fact,
different kinds of music and vocal pro-
grams usually sound better with different
levels of treble, midrange, and bass.
A good balance of the left and right stereo
channels and of the front and rear sound
levels is also important.
Keep in mind that if you are listening to a
stereo recording or broadcast, changing
the right/left balance will increase the vol-
ume of one group of sounds while de-
creasing the volume of another.
1. Push the “AUDIO” button.
2. Touching “SOUND” displays the
sound adjustment screen.
Page 173 of 230
AUDIO SYSTEM
193 �
Listening to the radio
Push these buttons to choose either an
AM or FM station.
“AM”, “FM1” or “FM2” appears on the
screen.
If your vehicle is equipped with a satellite
radio broadcast system, when you push
the “AM·SAT” button, “AM”, “SAT1”,
“SAT2”, “SAT3” station appears on the dis-
play. For details about satellite radio
broadcast, see “— Radio operation (XM�
Satellite Radio broadcast)” on page 197.
Turn the knob clockwise to step up the
station band or counterclockwise to
step down.
Your radio automatically changes to stereo
reception when a stereo broadcast is re-
ceived. “ST” appears on the screen. If the
signal becomes weak, the radio reduces
the amount of channel separation to pre-
vent the weak signal from creating noise.
If the signal becomes extremely weak, the
radio switches from stereo to mono recep-
tion. In this case, “ST” disappears from the
screen.
— Radio operation
 Command list
1. If the “Operating Guid")
 Automatic transition
You can select a function that enables au-
tomatic return to the navigation screen
from the audio screen.
Select “ON” or “OFF” and then touch
“OK")