2008 SUZUKI GRAND VITARA heating
[x] Cancel search: heatingPage 158 of 290

5-27OTHER CONTROLS AND EQUIPMENT
66J22-03E
Gate Operator / Canadian Program-
mingCanadian radio-frequency laws require
transmitter signals to “time-out” (or quit)
after several seconds of transmission –
which may not be long enough for
HomeLink
® to pick up the signal during
programming. Similar to this Canadian law,
some U.S. gate operators are designed to
“time-out” in the same manner.
If you live in Canada or you are having dif-
ficulties programming a gate operator by
using the Programming procedures
(regardless of where you live), replace
“Programming HomeLink
®” step 3) with
the following:
NOTE:
If programming a garage door opener or
gate operator, it is advised to unplug the
device during the “cycling” process to pre-
vent possible overheating.
3) Continue to press and hold the
HomeLink
® button while you press and
release – every two seconds (“cycle”)
your hand-held transmitter until the fre-
quency signal has successfully been
accepted by HomeLink
®. (The indicator
light will flash slowly and then rapidly.)
Proceed with “Programming HomeLink
®”
step 4) to complete.
Using HomeLink
®
To operate, simply press and release the
programmed HomeLink
® button. Activation
will now occur for the trained device (i.e.
garage door opener, gate operator, secu-
rity system, entry door lock, home/office
lighting, etc.). For convenience, the hand-
held transmitter of the device may also be
used at any time. In the event that there
are still programming difficulties or ques-
tions, contact HomeLink
® at
www.homelink.com
or 1-800-355-3515.
Erasing HomeLink
® Buttons
To erase programming from the three but-
tons (individual buttons cannot be erased
but can be “reprogrammed” as outlined
below), follow the step noted:
Press and hold the two outer HomeLink
®
buttons until the indicator light begins to
flash-after 20 seconds. Release both but-
tons. Do not hold for longer that 30 sec-
onds. HomeLink
® is now in the train (or
learning) mode and can be programmed at
any time beginning with “Programming
HomeLink
®” – step 2).
Reprogramming a Single
HomeLink
® Button
To program a device to HomeLink
® using a
HomeLink
® button previously trained, fol-
low these steps:
1) Press and hold the desired HomeLink
®
button. DO NOT release the button.2) The indicator light will begin to flash
after 20 seconds. Without releasing the
HomeLink
® button, proceed with “Pro-
gramming HomeLink
®” – step 2).
For questions or comments, contact
HomeLink
® at www.homelink.com
or 1-
800-355-3515.
Page 163 of 290

6-4
OPERATING YOUR VEHICLE
66J22-03E
When the remote controller is in the vehi-
cle except the rear luggage area, you can
turn the ignition switch without using an
ignition key.
NOTE:
If the battery of the remote controller
runs down or there are strong radio
waves or noise, the operating range may
be narrower or the remote controller may
be inoperative.
If the remote controller is too close to the
door glass, it may not operate.
The ignition switch may not turn when
the remote controller is on the instru-
ment panel, in the glove box, in the door
pocket, in the sun visor or on the floor.
You can also turn the ignition switch by
inserting the ignition key into the slot.
Engine Block Heater
(if equipped)
65D420
The engine block heater will help you start
the engine more easily in very cold
weather (–18°C (0°F) or below). To use the
engine block heater:
1) Turn off the engine.
2) Open the engine hood.
3) Untie the block heater cord and remove
the block heater plug cap. When the
engine block heater is not in use,
ensure the heater cord is secured to
prevent contact with any moving parts.
4) Using a heavy-duty, three-prong
grounded extension cord, plug the
female end into the block heater socket
and the male end into a normal,
grounded 110-volt AC outlet.NOTE:
Activate the heater at least four hours
before you start the engine. However, as
the heating time varies depending on the
ambient temperature and other factors,
adjust the time by observing the engine
cranking condition.
After using the block heater:
1) Unplug the extension cord and reinstall
the plug cap.
2) Tie the block heater cord back to its
original position.
CAUTION
The remote controller is a sensitive
electronic instrument. To avoid dam-
aging it, do not expose it to impacts,
moisture or high temperature (such
as on the dashboard under direct
sunlight).
WARNING
To avoid serious personal injury
caused by electrical shock or fire:
Do not plug the cord into a non-
grounded outlet. Only use a prop-
erly grounded three-prong 110-volt
AC outlet.
Do not use a 2-wire (non-grounded)
extension cord.
Only use a heavy-duty, three-prong
extension cord rated for at least 15
amps.
CAUTION
Secure the block heater cord back to
its original position or to the routed
position. A loose cord could get
caught in the engine accessory drive
belt(s) or other moving parts.
Starting the Engine: 1
Engine Block Heater: 1
Page 180 of 290

6-21OPERATING YOUR VEHICLE
66J22-03E
traction, and the “ESP OFF” indicator
light will come on.
When the transfer switch (if equipped) is
turned to the “4L LOCK” position, brake-
traction control can be activated. Brake-
traction control brakes the spinning
wheel to distribute drive power to the
other wheels for increased climbing abil-
ity or for better performance on a rolling
hill or a slippery surface.
If the ESP
® systems operate continu-
ously, such as when driving on slippery
roads, the traction control functions of
the ESP
® systems may be canceled
temporarily to avoid overheating the
brake pads, and the “ESP OFF” indicator
light will come on. After a short period of
time, the ESP
® systems (other than
ABS) will turn on automatically and the
“ESP OFF” indicator light will go out.
ABS Warning Light / Brake System
Warning LightSee “Braking” in the “OPERATING YOUR
VEHICLE” section.
Tire Pressure Monitoring
System (TPMS) (if equipped)The tire pressure monitoring system is
designed to alert you when one or more of
the tires on your vehicle is significantly
under-inflated. A Tire Pressure Monitoring
System (TPMS) sensor containing a
unique identification code is mounted on
each wheel. The TPMS sensors transmit
tire pressure signals to a central receiver
which relays the information to a tire pres-
sure monitoring system controller. When
the inflation pressure of one or more tires
indicates significant under-inflation, the low
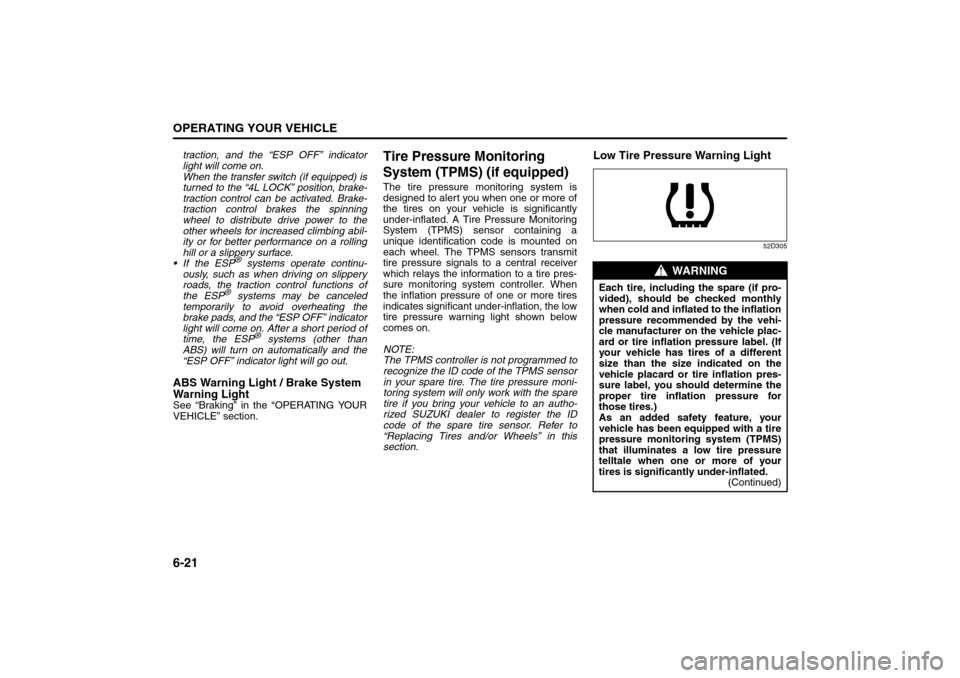
tire pressure warning light shown below
comes on.
NOTE:
The TPMS controller is not programmed to
recognize the ID code of the TPMS sensor
in your spare tire. The tire pressure moni-
toring system will only work with the spare
tire if you bring your vehicle to an autho-
rized SUZUKI dealer to register the ID
code of the spare tire sensor. Refer to
“Replacing Tires and/or Wheels” in this
section.
Low Tire Pressure Warning Light
52D305
WARNING
Each tire, including the spare (if pro-
vided), should be checked monthly
when cold and inflated to the inflation
pressure recommended by the vehi-
cle manufacturer on the vehicle plac-
ard or tire inflation pressure label. (If
your vehicle has tires of a different
size than the size indicated on the
vehicle placard or tire inflation pres-
sure label, you should determine the
proper tire inflation pressure for
those tires.)
As an added safety feature, your
vehicle has been equipped with a tire
pressure monitoring system (TPMS)
that illuminates a low tire pressure
telltale when one or more of your
tires is significantly under-inflated.
(Continued)
Tire Pressure Monitoring System (TPMS):
Break-In: 6
Page 184 of 290

6-25OPERATING YOUR VEHICLE
66J22-03E
For Vehicles Sold in U.S.A.This device complies with Part 15 of the
FCC Rules.
Operation is subject to the following two
conditions:
1) This device may not cause harmful
interference.
2) This device must accept any interfer-
ence received, including interference
that may cause undesired operation.
NOTE:
Changes or modifications not expressly
approved by the party responsible for com-
pliance could void the user’s authority to
operate the equipment.Traveling to CANADAPlease note that service for the tire pres-
sure monitoring system may not be avail-
able in CANADA should there be any
problems or malfunctions in the system.
Break-In Catalytic Converter
54G236
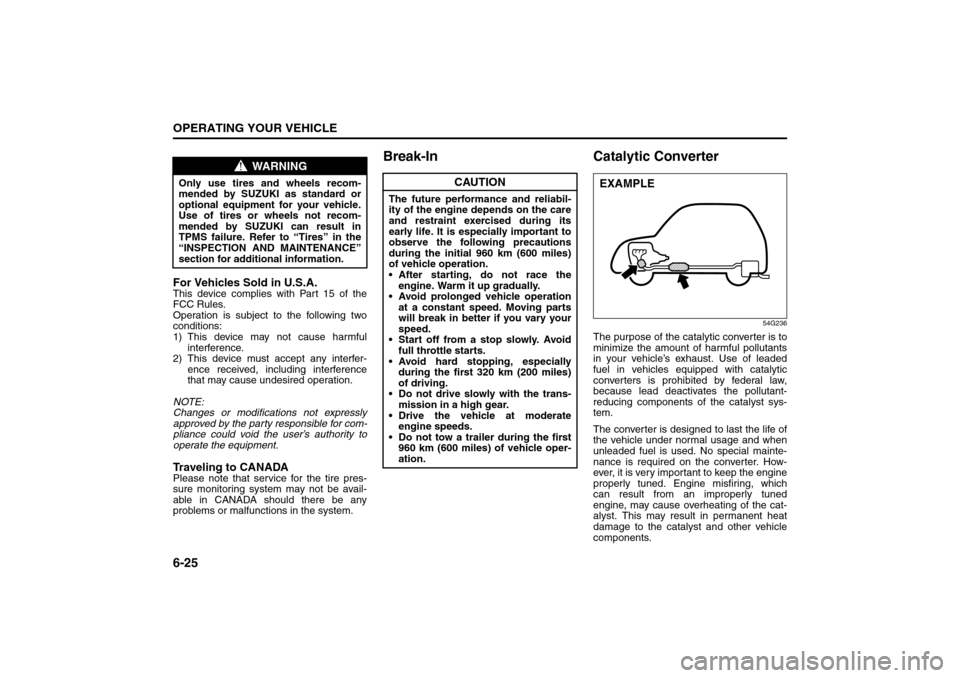
The purpose of the catalytic converter is to
minimize the amount of harmful pollutants
in your vehicle’s exhaust. Use of leaded
fuel in vehicles equipped with catalytic
converters is prohibited by federal law,
because lead deactivates the pollutant-
reducing components of the catalyst sys-
tem.
The converter is designed to last the life of
the vehicle under normal usage and when
unleaded fuel is used. No special mainte-
nance is required on the converter. How-
ever, it is very important to keep the engine
properly tuned. Engine misfiring, which
can result from an improperly tuned
engine, may cause overheating of the cat-
alyst. This may result in permanent heat
damage to the catalyst and other vehicle
components.
WARNING
Only use tires and wheels recom-
mended by SUZUKI as standard or
optional equipment for your vehicle.
Use of tires or wheels not recom-
mended by SUZUKI can result in
TPMS failure. Refer to “Tires” in the
“INSPECTION AND MAINTENANCE”
section for additional information.
CAUTION
The future performance and reliabil-
ity of the engine depends on the care
and restraint exercised during its
early life. It is especially important to
observe the following precautions
during the initial 960 km (600 miles)
of vehicle operation.
After starting, do not race the
engine. Warm it up gradually.
Avoid prolonged vehicle operation
at a constant speed. Moving parts
will break in better if you vary your
speed.
Start off from a stop slowly. Avoid
full throttle starts.
Avoid hard stopping, especially
during the first 320 km (200 miles)
of driving.
Do not drive slowly with the trans-
mission in a high gear.
Drive the vehicle at moderate
engine speeds.
Do not tow a trailer during the first
960 km (600 miles) of vehicle oper-
ation.
EXAMPLE
Page 192 of 290

7-5DRIVING TIPS
66J22-03E
Tire ChainsTire chains should only be used if they are
needed to increase traction or are required
by law. Make sure that the chains you use
are small-link chains or cable-type chains
and are the correct size for your vehicle’s
tires. Also make sure that there is enough
clearance between the fenders and the
chains as installed on the tires.
Install the chains on the rear tires tightly,
according to the chain manufacturer’s
instructions. Retighten the chains after
driving about 1.0 km (1/2 mile) if neces-
sary. With the chains installed, drive slowly.Do not drive through deep or rushing
water
Driving in deep or rushing water can be
hazardous. You could lose control of the
vehicle and the occupants could drown.
Also, your vehicle could be seriously dam-
aged. To avoid these risks, observe the fol-
lowing instructions and precautions.
Do not drive through deep or rushing
water. Deep or rushing water, such as
fast-moving streams or floodwaters,
could carry your vehicle away from your
intended path. The water is too deep if it
covers your wheel hubs, axles or
exhaust tailpipe. Know the depth of the
water before you attempt to drive
through it.
If water blocks the tailpipe, the engine
may not start or run. If the water is deep
enough to get drawn into the engine
intake system, the engine will be badly
damaged.
Submerged brakes will have poor brak-
ing performance. Drive slowly and care-
fully. Driving slowly will also help avoid
water splashing onto the ignition system,
which could cause the engine to stall.
Even when driving through shallow or
still waters, drive carefully since the
water may be hiding ground hazards
such as holes, ditches or bumps.
WARNING
Do not allow anyone to stand near
the vehicle when you are rocking it,
and do not spin the wheels faster
than an indicated 40 km/h (25 mph)
on the speedometer. Personal
injury and/or vehicle damage may
result from spinning the wheels too
fast.
Be sure to turn the transfer switch
from “4H” to “4H LOCK” or “4L
LOCK” when the tires slip in “4H”.
The continuing tires slip in “4H”
can cause the limited slip differen-
tial gear damage in the center dif-
ferential.
CAUTION
Release the accelerator pedal when
operating the gearshift lever. Operat-
ing the lever with the engine racing
can damage the gears.
CAUTION
Do not continue rocking the vehicle
for more than a few minutes. Pro-
longed rocking can cause engine
overheating, transmission or trans-
fer case damage or tire damage.
CAUTION
If you hear the chains hitting against
the vehicle body while driving, stop
and tighten them.
Off-Road Driving: NO
Page 197 of 290

8-2
VEHICLE LOADING AND TOWING
66J22-03E
Trailer TowingYou can use your SUZUKI to tow a trailer,
but you should always observe the require-
ments and recommendations in this sec-
tion. If you intend to tow a trailer, it is
essential to select a trailer and trailer tow-
ing equipment which are compatible. A
reputable trailer dealer can help you.
For Automatic transmission vehicles, shift
into “3” (Low 2) or “L” (Low 1) (if necessary)
and frequently monitor the coolant temper-
ature gauge when towing up a steep hill. If
the gauge indicates overheating, park the
vehicle in a safe place and let the enginecool down. Refer to “If the Engine Over-
heats” section for details on how to deal
with overheating.
HitchesUse only a trailer hitch bracket that is
designed to bolt to the frame of your vehi-
cle, and a hitch that is designed to bolt to
this bracket. We recommend that you use
a genuine SUZUKI trailer hitch bracket and
trailer hitch (available as options), or equiv-
alent.Safety ChainsAlways attach safety chains between your
vehicle and trailer. Cross safety chains
under the tongue of the trailer so that the
tongue will not drop to the road if the trailer
becomes separated from the hitch. Follow
the manufacturer’s recommendation for
attaching safety chains. Always leave just
enough slack to permit full turning. Never
allow safety chains to drag on the road.
Trailer LightsMake sure your trailer is equipped with
lights which meet federal, state and local
requirements. Always check for the proper
operation of all trailer lights before you
start to tow.Brakes CAUTION
Trailer towing puts additional stress
on the engine, drive train and brakes
of your vehicle. Never tow a trailer
during the first 960 km (600 miles) of
vehicle operation.
CAUTION
Because towing a trailer puts addi-
tional stress on your vehicle, more
frequent maintenance will be
required than under normal driving
conditions. Follow the schedule for
Maintenance Recommended Under
Severe Driving Conditions or perform
more frequent maintenance as nec-
essary.
CAUTION
Towing in “D” range up a steep hill
can cause coolant overheating which
may result in engine/automatic trans-
mission damage.
WARNING
Never use a bumper hitch or a hitch
which attaches to the axle of your
vehicle.
WARNING
Never attach safety chains to the
bumper of your vehicle. Secure con-
nections so that they can’t come
loose.
WARNING
Never splice trailer lights directly into
your vehicle’s electrical system, or
electrical system damage may occur.
WARNING
If trailer brakes are used, you should
follow all instructions provided by the
manufacturer. Never tap into the
brake system of your vehicle.
Trailer Towing: 5, 11, 13
Page 201 of 290

8-6
VEHICLE LOADING AND TOWING
66J22-03E
60A186
WARNING
(Continued)
Avoid “riding” the brakes. “Riding”
the brakes could cause the brakes
to overheat, resulting in reduced
braking efficiency. Use engine
braking as much as possible.
Because of the added trailer
weight, your engine may overheat
on hot days when going up long or
steep hills. Pay attention to your
engine temperature gauge. If it indi-
cates overheating, pull off the road
and stop in a safe place. Refer to
the “If the Engine Overheats” in
“EMERGENCY SERVICE” section
for details on how to proceed.
WARNING
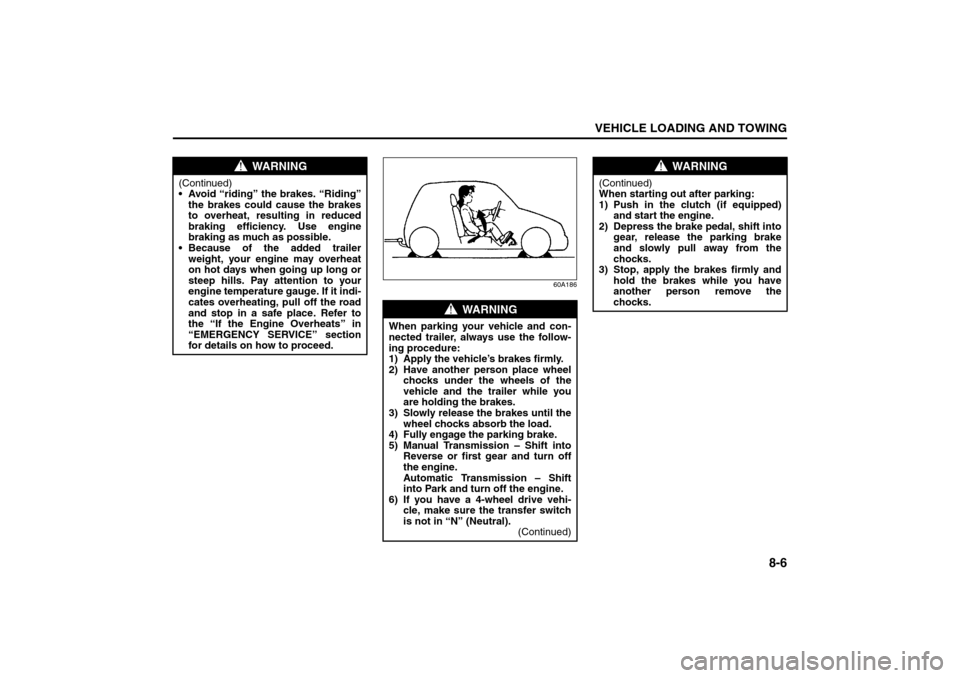
When parking your vehicle and con-
nected trailer, always use the follow-
ing procedure:
1) Apply the vehicle’s brakes firmly.
2) Have another person place wheel
chocks under the wheels of the
vehicle and the trailer while you
are holding the brakes.
3) Slowly release the brakes until the
wheel chocks absorb the load.
4) Fully engage the parking brake.
5) Manual Transmission – Shift into
Reverse or first gear and turn off
the engine.
Automatic Transmission – Shift
into Park and turn off the engine.
6) If you have a 4-wheel drive vehi-
cle, make sure the transfer switch
is not in “N” (Neutral).
(Continued)
WARNING
(Continued)
When starting out after parking:
1) Push in the clutch (if equipped)
and start the engine.
2) Depress the brake pedal, shift into
gear, release the parking brake
and slowly pull away from the
chocks.
3) Stop, apply the brakes firmly and
hold the brakes while you have
another person remove the
chocks.
Trailer Towing: 5, 11, 13
Page 216 of 290

9-9INSPECTION AND MAINTENANCE
66J22-03E
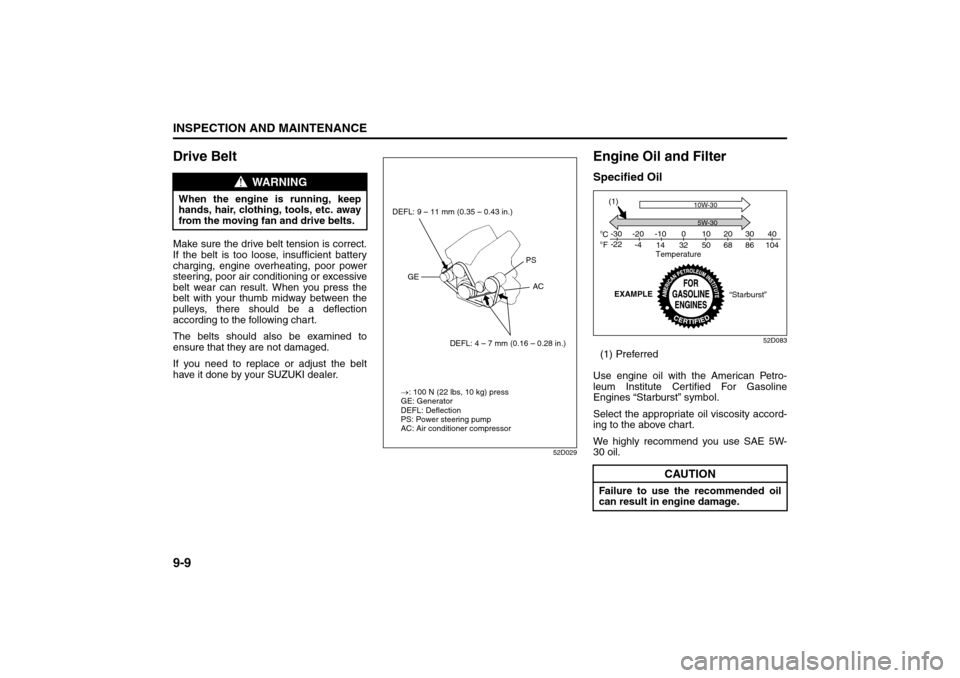
Drive BeltMake sure the drive belt tension is correct.
If the belt is too loose, insufficient battery
charging, engine overheating, poor power
steering, poor air conditioning or excessive
belt wear can result. When you press the
belt with your thumb midway between the
pulleys, there should be a deflection
according to the following chart.
The belts should also be examined to
ensure that they are not damaged.
If you need to replace or adjust the belt
have it done by your SUZUKI dealer.
52D029
Engine Oil and FilterSpecified Oil
52D083
(1) Preferred
Use engine oil with the American Petro-
leum Institute Certified For Gasoline
Engines “Starburst” symbol.
Select the appropriate oil viscosity accord-
ing to the above chart.
We highly recommend you use SAE 5W-
30 oil.
WARNING
When the engine is running, keep
hands, hair, clothing, tools, etc. away
from the moving fan and drive belts.
DEFL: 4 – 7 mm (0.16 – 0.28 in.) DEFL: 9 – 11 mm (0.35 – 0.43 in.)
PS
GE
AC
→: 100 N (22 lbs, 10 kg) press
GE: Generator
DEFL: Deflection
PS: Power steering pump
AC: Air conditioner compressor
CAUTION
Failure to use the recommended oil
can result in engine damage.C
Fo o-30
-22-20
-4-10
14 32 50 68 86 104010203040
10W-30
(1)
5W-30
Temperature
EXAMPLE
“Starburst”
Drive Belt: 1, 2
Engine Oil and Filter: 1, 2