2008 SUBARU TRIBECA mirror
[x] Cancel search: mirrorPage 160 of 409
3-40
Instruments and controls
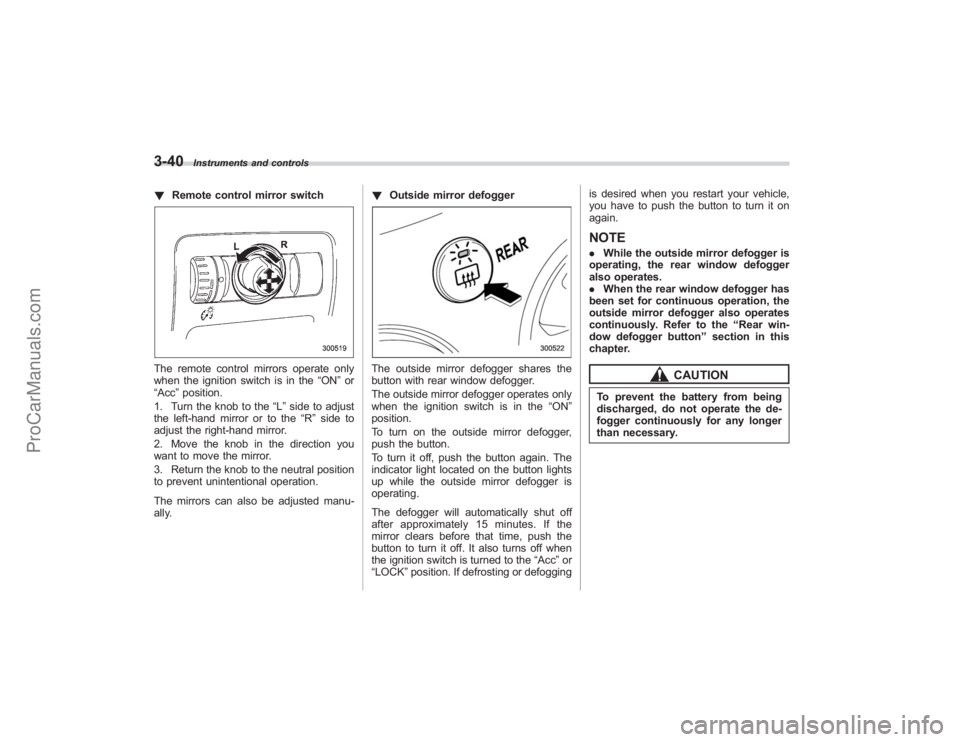
!Remote control mirror switchThe remote control mirrors operate only
when the ignition switch is in the “ON”or
“Acc ”position.
1. Turn the knob to the “L”side to adjust
the left-hand mirror or to the “R”side to
adjust the right-hand mirror.
2. Move the knob in the direction you
want to move the mirror.
3. Return the knob to the neutral position
to prevent unintentional operation.
The mirrors can also be adjusted manu-
ally. !
Outside mirror defogger
The outside mirror defogger shares the
button with rear window defogger.
The outside mirror defogger operates only
when the ignition switch is in the “ON”
position.
To turn on the outside mirror defogger,
push the button.
To turn it off, push the button again. The
indicator light located on the button lights
up while the outside mirror defogger is
operating.
The defogger will automatically shut off
after approximately 15 minutes. If the
mirror clears before that time, push the
button to turn it off. It also turns off when
the ignition switch is turned to the “Acc ”or
“LOCK” position. If defrosting or defogging is desired when you restart your vehicle,
you have to push the button to turn it on
again.
NOTE.
While the outside mirror defogger is
operating, the rear window defogger
also operates.
. When the rear window defogger has
been set for continuous operation, the
outside mirror defogger also operates
continuously. Refer to the “Rear win-
dow defogger button” section in this
chapter.
CAUTION
To prevent the battery from being
discharged, do not operate the de-
fogger continuously for any longer
than necessary.
ProCarManuals.com
Page 161 of 409
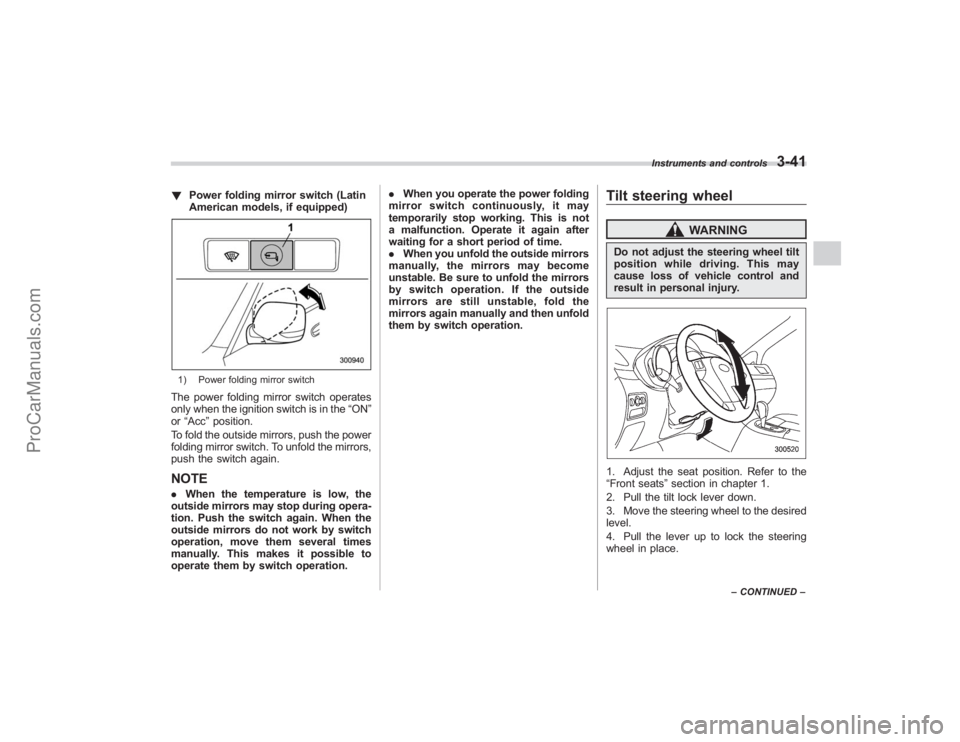
!Power folding mirror switch (Latin
American models, if equipped)1) Power folding mirror switchThe power folding mirror switch operates
only when the ignition switch is in the “ON”
or “Acc ”position.
To fold the outside mirrors, push the power
folding mirror switch. To unfold the mirrors,
push the switch again.NOTE. When the temperature is low, the
outside mirrors may stop during opera-
tion. Push the switch again. When the
outside mirrors do not work by switch
operation, move them several times
manually. This makes it possible to
operate them by switch operation. .
When you operate the power folding
mirror switch continuously, it may
temporarily stop working. This is not
a malfunction. Operate it again after
waiting for a short period of time.
. When you unfold the outside mirrors
manually, the mirrors may become
unstable. Be sure to unfold the mirrors
by switch operation. If the outside
mirrors are still unstable, fold the
mirrors again manually and then unfold
them by switch operation.
Tilt steering wheel
WARNING
Do not adjust the steering wheel tilt
position while driving. This may
cause loss of vehicle control and
result in personal injury.1. Adjust the seat position. Refer to the
“Front seats ”section in chapter 1.
2. Pull the tilt lock lever down.
3. Move the steering wheel to the desired
level.
4. Pull the lever up to lock the steering
wheel in place.
Instruments and controls
3-41
– CONTINUED –
ProCarManuals.com
Page 209 of 409
Interior light...................................................... 6-2
Dome light....................................................... 6-2
Cargo area light ............................................... 6-2
Rear gate light ................................................. 6-3
Automatic ambient light for center console area (if equipped) .................................................. 6-3
Map light........................................................... 6-3
Sun visors ........................................................ 6-4
Sun visor extension plate ................................. 6-4
Vanity mirror with light ..................................... 6-4
Storage compartment...................................... 6-5
Glove box........................................................ 6-5
Center console box .......................................... 6-6
Rear console .................................................... 6-7
Overhead console ............................................ 6-7
Cup holder........................................................ 6-7
Front passenger ’s cup holder ........................... 6-8
Rear seat (5-seater models)/Second-row seat (7-seater models) passenger ’s cup holder ....... 6-8
Third-row seat cup holders (7-seater models) ........................................... 6-9
Accessory power outlets ................................. 6-9
Coat hook ....................................................... 6-11
Rear (5-seater models)/Second-row
(7-seater models) passenger area .................. 6-11
Shopping bag hook........................................ 6-12
Floor mat ........................................................ 6-12 Cargo area cover (if equipped)
..................... 6-13
Using the cover.............................................. 6-13
To remove the cover ....................................... 6-14
To install the cover housing ............................ 6-14
Convenient tie-down hooks.......................... 6-15
Under-floor storage compartment ................ 6-15
5-seater models.............................................. 6-15
7-seater models .............................................. 6-16
HomeLink®Wireless Control System
(if equipped) ................................................ 6-16
Garage door opener programming in the
U.S.A. ........................................................... 6-17
Programming rolling-code-protected garage door openers in the U.S.A. .................................... 6-18
Programming for entrance gates and garage door openers in Canada ........................................ 6-19
Programming other devices ............................ 6-20
Operating the HomeLink ®Wireless Control
System ......................................................... 6-20
Reprogramming a single HomeLink ®
button .......................................................... 6-20
Erasing HomeLink ®button memory ................ 6-20
In case a problem occurs ................................ 6-20
Rear view camera (if equipped) .................... 6-21
Position of rear view camera........................... 6-22
How to use the rear view camera .................... 6-22
Viewing range on the screen ........................... 6-22
Distance marker (help line) ............................. 6-24
Interior equipment
6
ProCarManuals.com
Page 212 of 409
6-4
Interior equipment
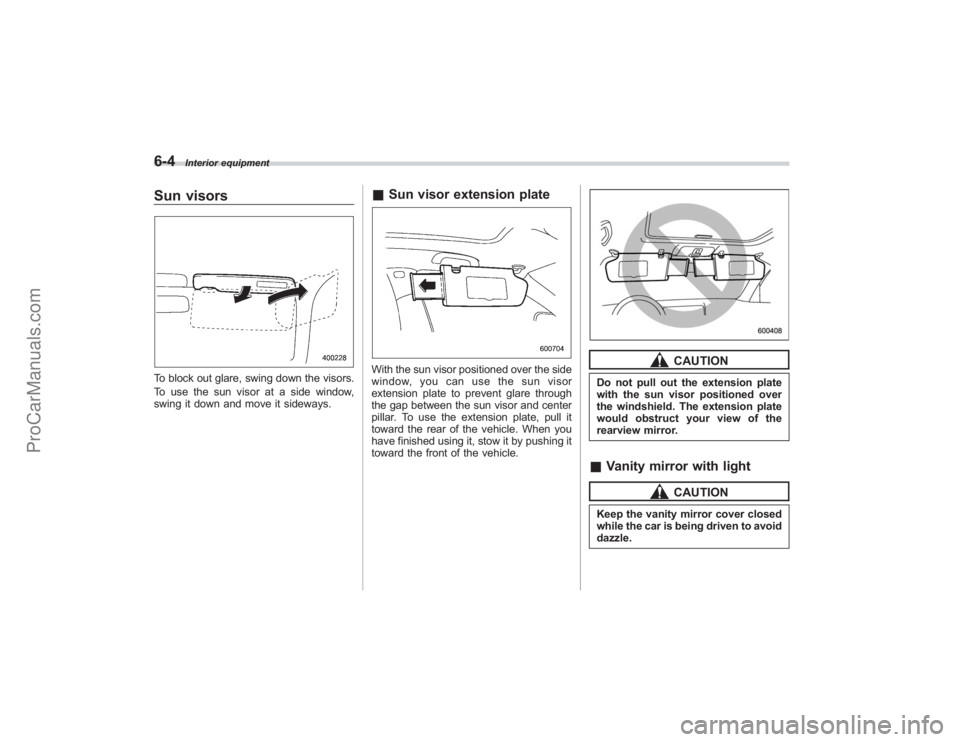
Sun visorsTo block out glare, swing down the visors.
To use the sun visor at a side window,
swing it down and move it sideways.
&Sun visor extension plateWith the sun visor positioned over the side
window, you can use the sun visor
extension plate to prevent glare through
the gap between the sun visor and center
pillar. To use the extension plate, pull it
toward the rear of the vehicle. When you
have finished using it, stow it by pushing it
toward the front of the vehicle.
CAUTION
Do not pull out the extension plate
with the sun visor positioned over
the windshield. The extension plate
would obstruct your view of the
rearview mirror.&Vanity mirror with light
CAUTION
Keep the vanity mirror cover closed
while the car is being driven to avoid
dazzle.
ProCarManuals.com
Page 213 of 409
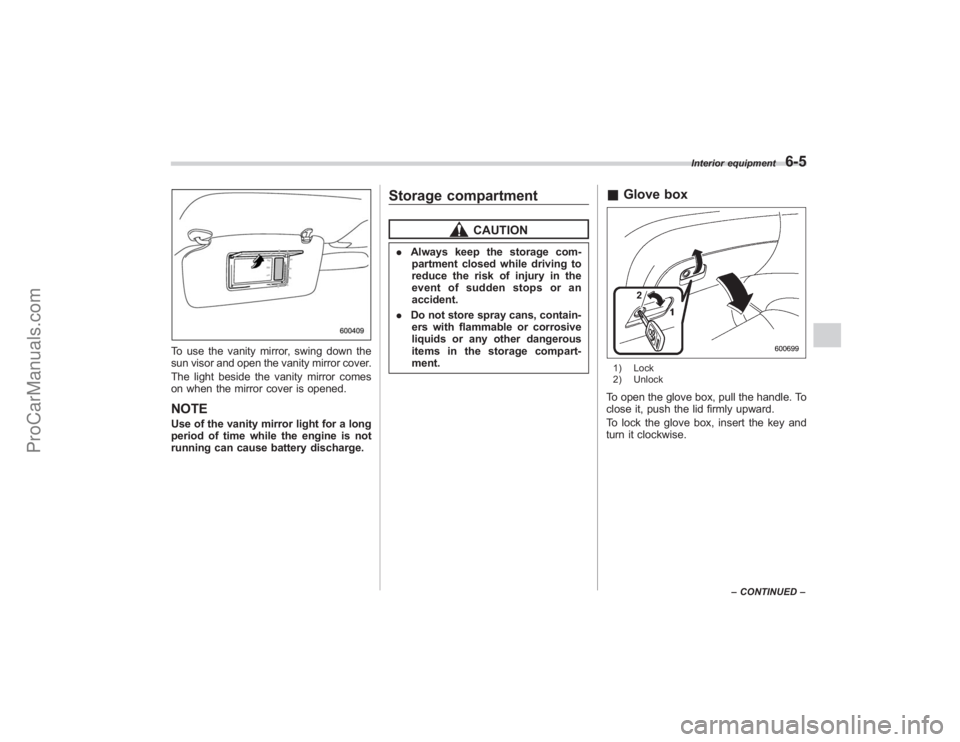
To use the vanity mirror, swing down the
sun visor and open the vanity mirror cover.
The light beside the vanity mirror comes
on when the mirror cover is opened.NOTEUse of the vanity mirror light for a long
period of time while the engine is not
running can cause battery discharge.
Storage compartment
CAUTION
.Always keep the storage com-
partment closed while driving to
reduce the risk of injury in the
event of sudden stops or an
accident.
. Do not store spray cans, contain-
ers with flammable or corrosive
liquids or any other dangerous
items in the storage compart-
ment.
& Glove box1) Lock
2) UnlockTo open the glove box, pull the handle. To
close it, push the lid firmly upward.
To lock the glove box, insert the key and
turn it clockwise.
Interior equipment
6-5
–CONTINUED –
ProCarManuals.com
Page 230 of 409
6-22
Interior equipment
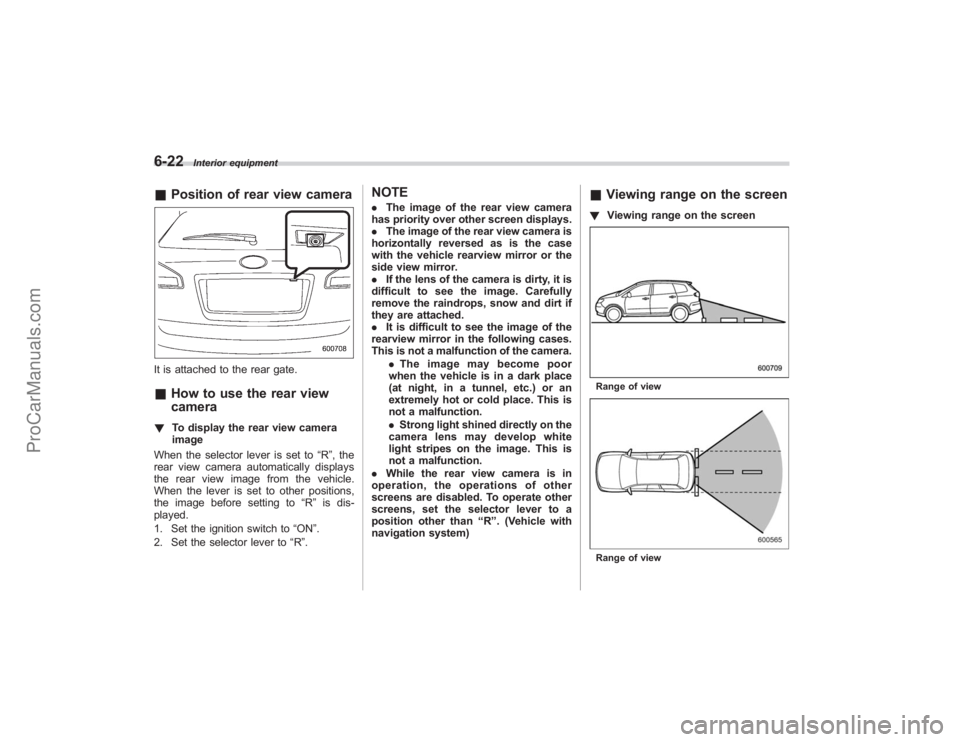
&Position of rear view cameraIt is attached to the rear gate.&How to use the rear view
camera! To display the rear view camera
image
When the selector lever is set to “R”, the
rear view camera automatically displays
the rear view image from the vehicle.
When the lever is set to other positions,
the image before setting to “R”is dis-
played.
1. Set the ignition switch to “ON”.
2. Set the selector lever to “R ”.
NOTE. The image of the rear view camera
has priority over other screen displays.
. The image of the rear view camera is
horizontally reversed as is the case
with the vehicle rearview mirror or the
side view mirror.
. If the lens of the camera is dirty, it is
difficult to see the image. Carefully
remove the raindrops, snow and dirt if
they are attached.
. It is difficult to see the image of the
rearview mirror in the following cases.
This is not a malfunction of the camera.
.The image may become poor
when the vehicle is in a dark place
(at night, in a tunnel, etc.) or an
extremely hot or cold place. This is
not a malfunction.
. Strong light shined directly on the
camera lens may develop white
light stripes on the image. This is
not a malfunction.
. While the rear view camera is in
operation, the operations of other
screens are disabled. To operate other
screens, set the selector lever to a
position other than “R ”. (Vehicle with
navigation system)
& Viewing range on the screen! Viewing range on the screenRange of viewRange of view
ProCarManuals.com
Page 241 of 409

Preparing to driveYou should perform the following checks
and adjustments every day before you
start driving.
1. Check that all windows, mirrors, and
lights are clean and unobstructed.
2. Check the appearance and condition
of the tires. Also check tires for proper
inflation.
3. Look under the vehicle for any sign of
leaks.
4. Check that the hood and rear gate are
fully closed.
5. Check the adjustment of the seat.
6. Check the adjustment of the inside
and outside mirrors.
7. Fasten your seatbelt. Check that your
passengers have fastened their seatbelts.
8. Check the operation of the warning
and indicator lights when the ignition
switch is turned to the“ON”position.
9. Check the gauges, indicator and warn-
ing lights after starting the engine.NOTEEngine oil, engine coolant, brake fluid,
washer fluid and other fluid levels
should be checked daily, weekly or at
fuel stops.
Starting the engine
CAUTION
. Do not operate the starter motor
continuously for more than 10
seconds. If the engine fails to
start after operating the starter
for 5 to 10 seconds, wait for 10
seconds or more before trying
again.
. If you restart the engine while the
vehicle is moving, shift the se-
lector lever into the “N ” position.
Do not attempt to place the
selector lever of a moving vehicle
into the “P ” position.
1. Apply the parking brake.
2. Turn off unnecessary lights and ac-
cessories.
3. Shift the selector lever to the “P”or “N”
position (preferably “P ” position). The
starter will only operate when the select
lever is at the “P”or “N”position.
4. Turn the ignition switch to the “ON”
position and check the operation of the
warning and indicator lights. Refer to the
“ Warning and indicator lights ”section
(chapter 3).
5. Turn the ignition switch to the “START”position
without depressing the accelera-
tor pedal. Release the key immediately
after the engine has started.
If the engine does not start, try the
following.
(1) Turn the ignition switch to the
“LOCK ”position and wait for at least
10 seconds. After checking that the
parking brake is firmly set, turn the
ignition switch to the “START”position
while depressing the accelerator pedal
slightly (approximately a quarter of the
full stroke). Release the accelerator
pedal as soon as the engine starts.
(2) If this fails to start the engine, turn
the ignition switch back to the “LOCK”
position and wait for at least 10
seconds. Then fully depress the accel-
erator pedal and turn the ignition
switch to the “START”position. If the
engine starts, quickly release the
accelerator pedal.
(3) If this fails to start the engine, turn
the ignition switch again to the “LOCK”
position. After waiting for 10 seconds
or longer, turn the ignition switch to the
“START ”position without depressing
the accelerator pedal.
(4)
If the engine still refuses to start,
contact your nearest SUBARU dealer
for assistance.
6. Confirm that all warning and indicator
Starting and operating
7-7
– CONTINUED –
ProCarManuals.com
Page 293 of 409
create a traffic safety hazard.
For safety, always connect the towing
vehicle and trailer with trailer safety
chains. Pass the chains crossing each
other under the trailer tongue to prevent
the trailer from dropping onto the ground
in case the trailer tongue should discon-
nect from the hitch ball. Allow sufficient
slack in the chains taking tight-turn situa-
tions into account; however, be careful not
to let them drag on the ground.
For more information about the safety
chain connection, refer to the instructions
for your hitch and trailer.
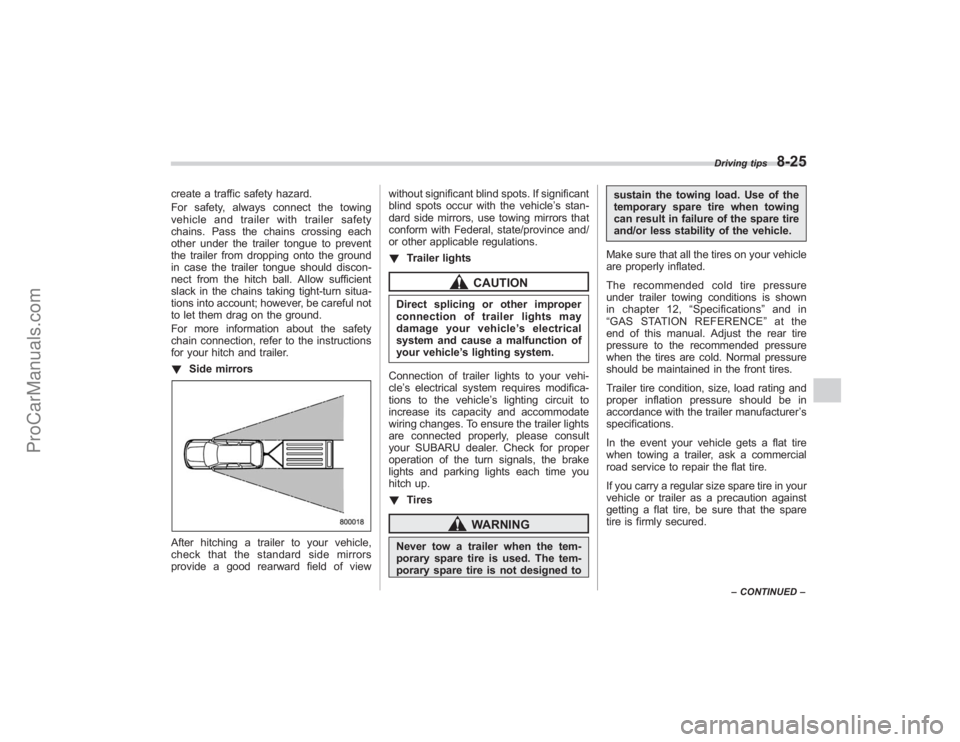
!Side mirrorsAfter hitching a trailer to your vehicle,
check that the standard side mirrors
provide a good rearward field of view without significant blind spots. If significant
blind spots occur with the vehicle’
s stan-
dard side mirrors, use towing mirrors that
conform with Federal, state/province and/
or other applicable regulations.
! Trailer lights
CAUTION
Direct splicing or other improper
connection of trailer lights may
damage your vehicle’ s electrical
system and cause a malfunction of
your vehicle ’s lighting system.
Connection of trailer lights to your vehi-
cle ’s electrical system requires modifica-
tions to the vehicle ’s lighting circuit to
increase its capacity and accommodate
wiring changes. To ensure the trailer lights
are connected properly, please consult
your SUBARU dealer. Check for proper
operation of the turn signals, the brake
lights and parking lights each time you
hitch up.
! Tires
WARNING
Never tow a trailer when the tem-
porary spare tire is used. The tem-
porary spare tire is not designed to sustain the towing load. Use of the
temporary spare tire when towing
can result in failure of the spare tire
and/or less stability of the vehicle.
Make sure that all the tires on your vehicle
are properly inflated.
The recommended cold tire pressure
under trailer towing conditions is shown
in chapter 12, “Specifications ”and in
“ GAS STATION REFERENCE ”at the
end of this manual. Adjust the rear tire
pressure to the recommended pressure
when the tires are cold. Normal pressure
should be maintained in the front tires.
Trailer tire condition, size, load rating and
proper inflation pressure should be in
accordance with the trailer manufacturer ’s
specifications.
In the event your vehicle gets a flat tire
when towing a trailer, ask a commercial
road service to repair the flat tire.
If you carry a regular size spare tire in your
vehicle or trailer as a precaution against
getting a flat tire, be sure that the spare
tire is firmly secured.
Driving tips
8-25
– CONTINUED –
ProCarManuals.com