2008 SUBARU OUTBACK engine
[x] Cancel search: enginePage 183 of 444
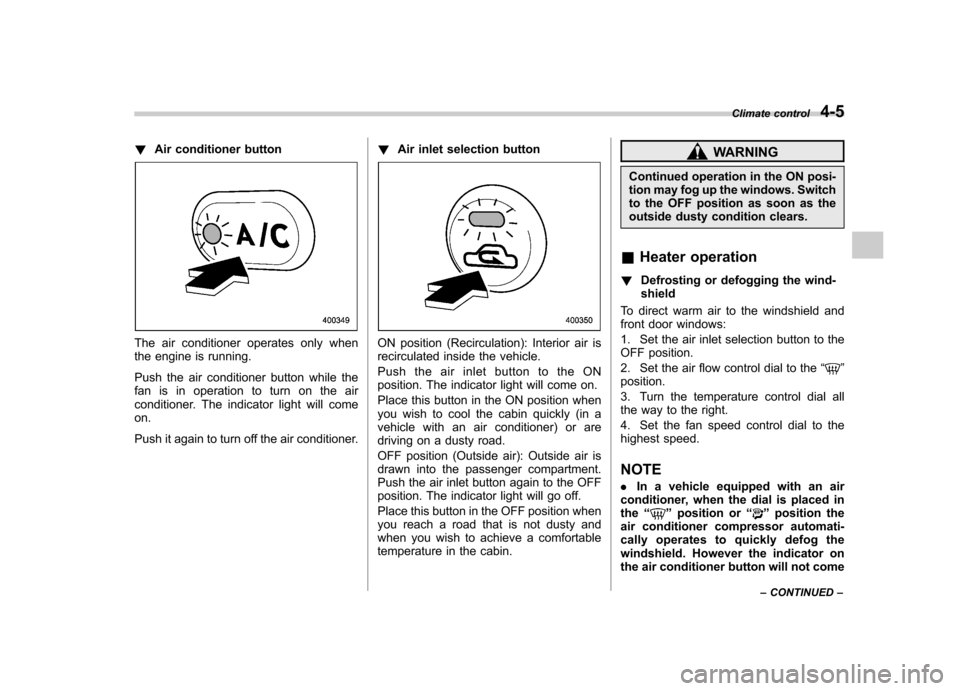
!Air conditioner button
The air conditioner operates only when
the engine is running.
Push the air conditioner button while the
fan is in operation to turn on the air
conditioner. The indicator light will comeon.
Push it again to turn off the air conditioner. !
Air inlet selection buttonON position (Recirculation): Interior air is
recirculated inside the vehicle.
Push the air inlet button to the ON
position. The indicator light will come on.
Place this button in the ON position when
you wish to cool the cabin quickly (in a
vehicle with an air conditioner) or are
driving on a dusty road.
OFF position (Outside air): Outside air is
drawn into the passenger compartment.
Push the air inlet button again to the OFF
position. The indicator light will go off.
Place this button in the OFF position when
you reach a road that is not dusty and
when you wish to achieve a comfortable
temperature in the cabin.
WARNING
Continued operation in the ON posi-
tion may fog up the windows. Switch
to the OFF position as soon as the
outside dusty condition clears.
& Heater operation
! Defrosting or defogging the wind-shield
To direct warm air to the windshield and
front door windows:
1. Set the air inlet selection button to the
OFF position.
2. Set the air flow control dial to the “
”
position.
3. Turn the temperature control dial all
the way to the right.
4. Set the fan speed control dial to the
highest speed.
NOTE . In a vehicle equipped with an air
conditioner, when the dial is placed in the “
”position or “”position the
air conditioner compressor automati-
cally operates to quickly defog the
windshield. However the indicator on
the air conditioner button will not come Climate control
4-5
– CONTINUED –
Page 186 of 444
4-8Climate control
Automatic climate control
system (if equipped) NOTE .Operate the automatic climate con-
trol system when the engine is running. . The blower fan rotates at a low
speed when the engine coolant tem-
perature is low.
For efficient defogging or dehumidify-
ing in cold weather, press the “A/C ”
button.. Even when cooling is not necessary,
setting the temperature much lower
than the current outlet air temperature
turns on the air conditioner compres-
sor automatically and the “A/C ”indi-
cator light on the control panel comeson.
The automatic climate control system
automatically controls outlet air tempera-
ture, fan speed, air flow distribution air-
inlet control, and air conditioner compres-
sor operation. It activates when the“ AUTO ”button is pressed, and is used to
maintain a constant, comfortable climate
within the passenger compartment.
The temperature can be set within a range
of 65 to 85 8F (18 to 32 8C). &
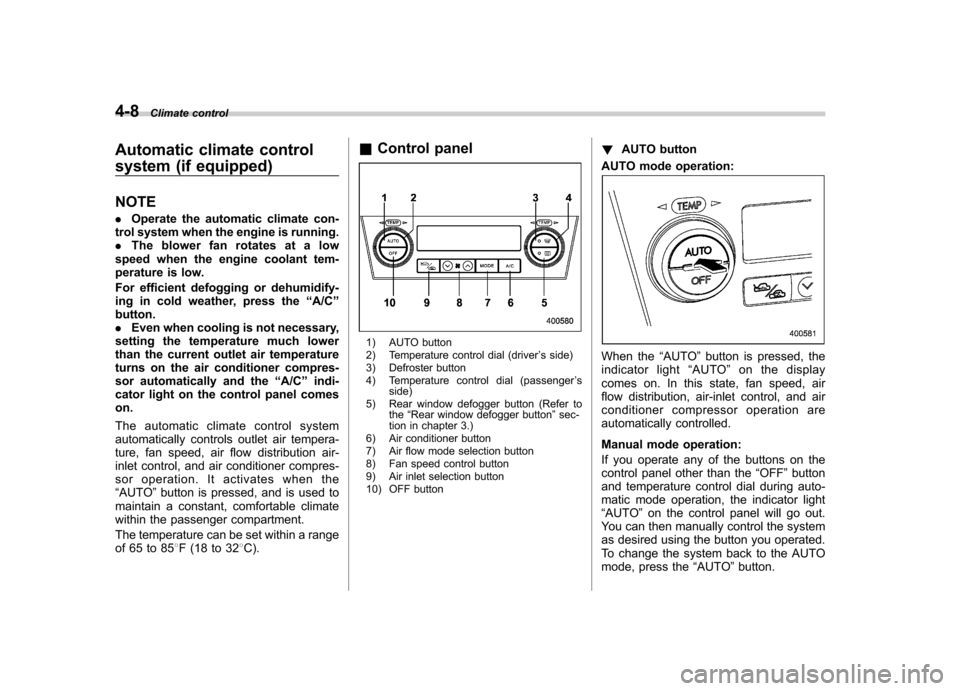
Control panel
1) AUTO button
2) Temperature control dial (driver ’s side)
3) Defroster button
4) Temperature control dial (passenger ’s
side)
5) Rear window defogger button (Refer to the“Rear window defogger button ”sec-
tion in chapter 3.)
6) Air conditioner button
7) Air flow mode selection button
8) Fan speed control button
9) Air inlet selection button
10) OFF button !
AUTO button
AUTO mode operation:
When the “AUTO ”button is pressed, the
indicator light “AUTO ”on the display
comes on. In this state, fan speed, air
flow distribution, air-inlet control, and air
conditioner compressor operation are
automatically controlled.
Manual mode operation:
If you operate any of the buttons on the
control panel other than the “OFF ”button
and temperature control dial during auto-
matic mode operation, the indicator light“ AUTO ”on the control panel will go out.
You can then manually control the system
as desired using the button you operated.
To change the system back to the AUTO
mode, press the “AUTO ”button.
Page 190 of 444

4-12Climate control
–Interior air temperature sensor: on the
side of the driver-side part of the center panel – Outside temperature sensor: behind
front grille. Operating tips for heater and
air conditioner &
Cleaning ventilator grille
Always keep the front ventilator inlet grille
free of snow, leaves, or other obstructions
to ensure efficient heating and defrosting.
Since the condenser is located in front of
the radiator, this area should be kept clean
because cooling performance is impaired
by any accumulation of insects and leaves
on the condenser. &Efficient cooling after parking
in direct sunlight
After parking in direct sunlight, drive with
the windows open for a few minutes to
allow outside air to circulate into the heated interior. This results in quicker
cooling by the air conditioner. Keep the
windows closed during the operation of
the air conditioner for maximum cooling
efficiency. &
Lubrication oil circulation in
the refrigerant circuit
Operate the air conditioner compressor at
a low engine speed (at idle or low driving
speeds) a few minutes each month during
the off-season to circulate its oil. & Checking air conditioning
system before summer sea-son
Check the air conditioner unit for refriger-
ant leaks, hose conditions, and proper
operation each spring. Have your
SUBARU dealer perform this check. & Cooling and dehumidifying in
high humidity and low tem-
perature weather condition
Under certain weather conditions (high
relative humidity, low temperatures, etc.) a
small amount of water vapor emission
from the air outlets may be noticed. This
condition is normal and does not indicate
any problem with the air conditioningsystem.
Page 191 of 444
&Air conditioner compressor
shut-off when engine is
heavily loaded
To improve acceleration and gas mileage,
the air conditioner compressor is designed
to temporarily shut off during air condi-
tioner operation whenever the accelerator
is fully depressed such as during rapid
acceleration or when driving on a steepupgrade. & Refrigerant for your climate
control system
Your air conditioner uses ozone friendly
refrigerant HFC134a. Therefore, the meth-
od of adding, changing or checking the
refrigerant is different from the method for
CFC12 (freon). Consult your SUBARU
dealer for service. Repairs needed as a
result of using the wrong refrigerant are
not covered under warranty. Air filtration system (if equipped)
If your vehicle
’s air conditioning system is
equipped with an air filtration system,
replace the filter element according to
the replacement schedule shown in the
following. This schedule should be fol-
lowed to maintain the filter ’s dust collec-
tion ability. Under extremely dusty condi-
tions, the filter should be replaced more
frequently. Have your filter checked or
replaced by your SUBARU dealer. For
replacement, we recommend the use of a
genuine SUBARU air filter kit.
Replacement schedule: Every 12 months or 9,300 miles (15,000
km) whichever comes first
CAUTION
Contact your SUBARU dealer if the
following occurs, even if it is not yet
time to change the filter: – Reduction of the air flow through
the vents.
– Windshield gets easily fogged ormisted. NOTE
The filter can influence the air condi-
tioning, heating and defroster perfor-
mance if not properly maintained.
Climate control
4-13
Page 224 of 444
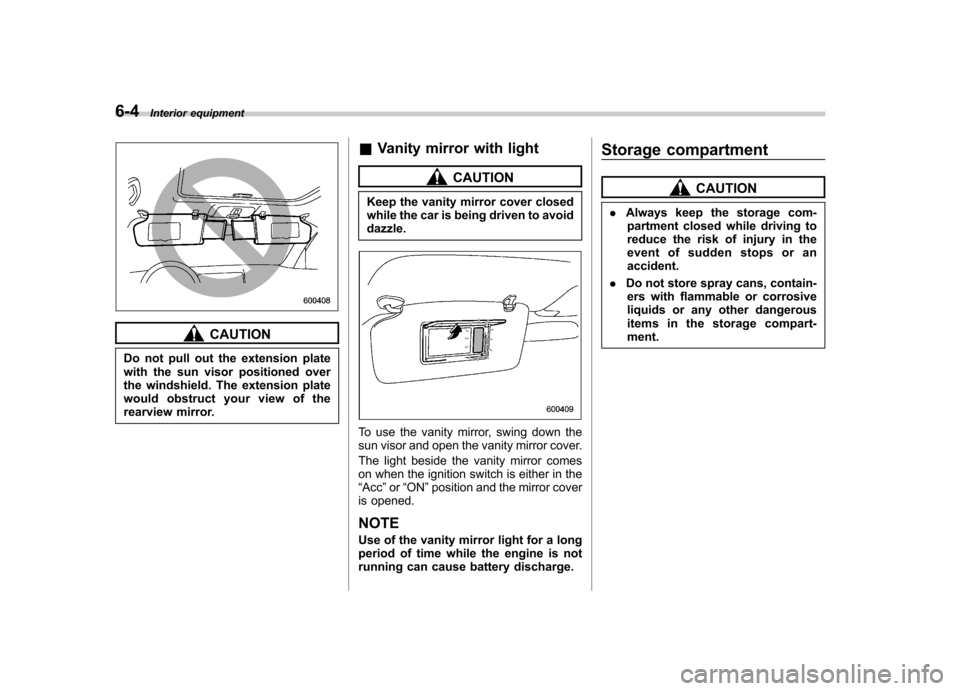
6-4Interior equipment
CAUTION
Do not pull out the extension plate
with the sun visor positioned over
the windshield. The extension plate
would obstruct your view of the
rearview mirror. &
Vanity mirror with light
CAUTION
Keep the vanity mirror cover closed
while the car is being driven to avoiddazzle.
To use the vanity mirror, swing down the
sun visor and open the vanity mirror cover.
The light beside the vanity mirror comes
on when the ignition switch is either in the“ Acc ”or “ON ”position and the mirror cover
is opened.
NOTE
Use of the vanity mirror light for a long
period of time while the engine is not
running can cause battery discharge. Storage compartment
CAUTION
. Always keep the storage com-
partment closed while driving to
reduce the risk of injury in the
event of sudden stops or anaccident.
. Do not store spray cans, contain-
ers with flammable or corrosive
liquids or any other dangerous
items in the storage compart-ment.
Page 229 of 444
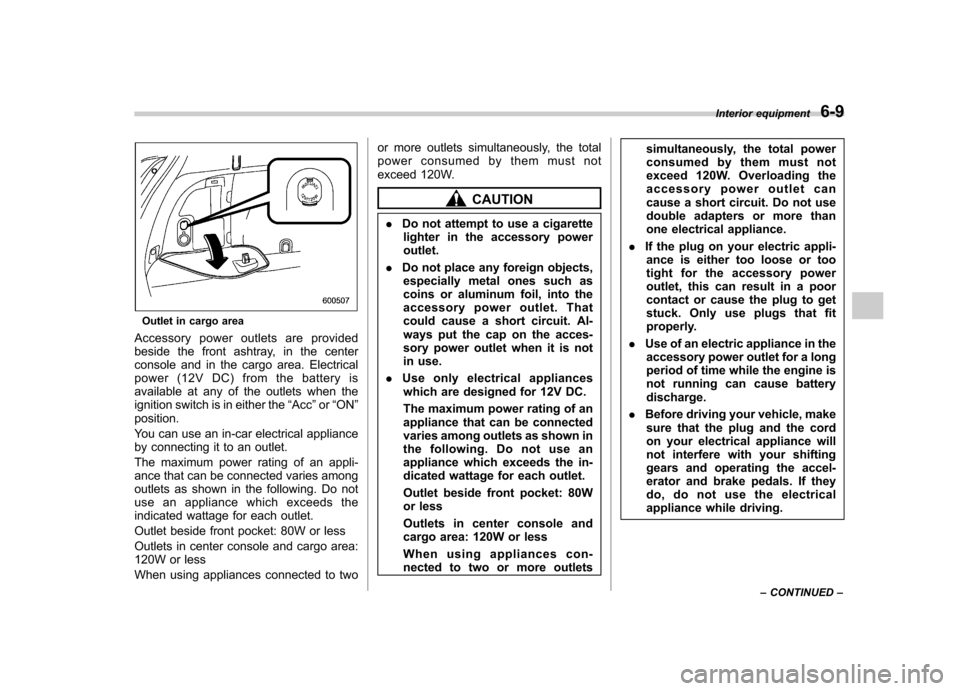
Outlet in cargo area
Accessory power outlets are provided
beside the front ashtray, in the center
console and in the cargo area. Electrical
power (12V DC) from the battery is
available at any of the outlets when the
ignition switch is in either the “Acc ”or “ON ”
position.
You can use an in-car electrical appliance
by connecting it to an outlet.
The maximum power rating of an appli-
ance that can be connected varies among
outlets as shown in the following. Do not
use an appliance which exceeds the
indicated wattage for each outlet.
Outlet beside front pocket: 80W or less
Outlets in center console and cargo area:
120W or less
When using appliances connected to two or more outlets simultaneously, the total
power consumed by them must not
exceed 120W.
CAUTION
. Do not attempt to use a cigarette
lighter in the accessory power outlet.
. Do not place any foreign objects,
especially metal ones such as
coins or aluminum foil, into the
accessory power outlet. That
could cause a short circuit. Al-
ways put the cap on the acces-
sory power outlet when it is not
in use.
. Use only electrical appliances
which are designed for 12V DC.
The maximum power rating of an
appliance that can be connected
varies among outlets as shown in
the following. Do not use an
appliance which exceeds the in-
dicated wattage for each outlet.
Outlet beside front pocket: 80W
or less
Outlets in center console and
cargo area: 120W or less
When using appliances con-
nected to two or more outlets simultaneously, the total power
consumed by them must not
exceed 120W. Overloading the
accessory power outlet can
cause a short circuit. Do not use
double adapters or more than
one electrical appliance.
. If the plug on your electric appli-
ance is either too loose or too
tight for the accessory power
outlet, this can result in a poor
contact or cause the plug to get
stuck. Only use plugs that fit
properly.
. Use of an electric appliance in the
accessory power outlet for a long
period of time while the engine is
not running can cause batterydischarge.
. Before driving your vehicle, make
sure that the plug and the cord
on your electrical appliance will
not interfere with your shifting
gears and operating the accel-
erator and brake pedals. If they
do, do not use the electrical
appliance while driving. Interior equipment
6-9
– CONTINUED –
Page 242 of 444
Fuel...................................................................... 7-3
Fuel requirements ............................................... 7-3
Fuel filler lid and cap ........................................... 7-5
State emission testing (U.S. only) ...................... 7-7
Preparing to drive ............................................... 7-8
Starting the engine .............................................. 7-9
Manual transmission vehicle ................................ 7-9
Automatic transmission vehicle ........................... 7-9
Stopping the engine ........................................... 7-10
Remote engine start system (dealer option) ................................................. 7-11
Starting your vehicle .......................................... 7-11
Remote start safety features ............................... 7-11
Entering the vehicle while it is running via remote start ................................................................. 7-12
Entering the vehicle following remote engine start shutdown ......................................................... 7-12
Pre-heating or pre-cooling the interior of the vehicle ............................................................. 7-12
Service mode ..................................................... 7-12
Remote transmitter programming and programmable feature option ............................ 7-12
System maintenance .......................................... 7-13
Manual transmission –5 speeds ...................... 7-14
Shifting speeds .................................................. 7-15
Driving tips ........................................................ 7-15
Manual transmission –6 speeds (2.5GT
spec.B) ............................................................. 7-16
Selecting reverse gear ........................................ 7-16
Shifting speeds .................................................. 7-17
Driving tips ........................................................ 7-17 Automatic transmission
–4-speed ................... 7-18
Selector lever .................................................... 7-18
Selector lever reverse inhibiting function ............ 7-20
Selection of manual mode .................................. 7-21
Maximum speeds ............................................... 7-22
Driving tips ........................................................ 7-22
SPORT mode ..................................................... 7-23
Shift lock release ............................................... 7-23
Automatic transmission –5-speed ................... 7-24
Selector lever .................................................... 7-25
Selector lever reverse inhibiting function ............ 7-26
Selection of manual mode .................................. 7-27
Maximum speeds ............................................... 7-29
Driving tips ........................................................ 7-29
Shift lock release ............................................... 7-29
SI-DRIVE (Except 2.5-liter non-Turbo models) ............................................................ 7-30
Intelligent (I) mode ............................................. 7-31
Sport (S) mode .................................................. 7-31
Sport Sharp (S#) mode. ...................................... 7-32
SI-DRIVE selector .............................................. 7-32
SI-DRIVE Sport Sharp (S#) switch ...................... 7-32
Rear viscous limited slip differential (LSD) (if equipped) .................................................... 7-33
Power steering ................................................... 7-33
Braking ............................................................... 7-34
Braking tips ....................................................... 7-34
Brake system .................................................... 7-34
Disc brake pad wear warning indicators ............. 7-34
ABS (Anti-lock Brake System) .......................... 7-35
Starting and operating
7
Page 244 of 444
Fuel
CAUTION
Use of a fuel which is low in quality
or use of an inappropriate fuel
additive may cause engine damage.
& Fuel requirements
! 2.5-liter non-turbo models
The 2.5-liter non-turbo engine is designed
to operate using unleaded gasoline with
an octane rating of 87 AKI or higher. ! 2.5-liter turbo models
The 2.5-liter turbo engine is designed to
operate using premium unleaded gasoline
with an octane rating of 91 AKI or higher. If
premium unleaded gasoline is not avail-
able, regular unleaded gasoline with an
octane rating of 87 AKI or higher may be
temporarily used. For optimum engine
performance and driveability, it is required
that you use premium grade unleadedgasoline. NOTE
Be sure to use premium unleaded
gasoline of 91 AKI or higher for a 2.5-
liter turbo engine model. If other gaso-
line (lower than 91 AKI) is used, knock-
ing, reduced output and poor accelera-
tor response will result. !
3.0-liter models
The 3.0-liter engine is designed to operate
using unleaded gasoline with an octane
rating of 91 AKI or higher. Regular
unleaded gasoline with an octane rating
of 87 AKI or higher may be used. However
for optimum engine performance and
driveability, it is recommended that you
use 91 AKI or higher grade unleaded
gasoline. You may experience reduced
output, poor accelerator response, and
reduced fuel economy when using gaso-
line with an octane rating lower than 91
AKI, depending on your driving habits and
conditions. If you experience any of these
conditions while using a lower octane
rated fuel, you may want to return to using
91 AKI octane rated fuel as soon as
possible. Additionally, if your vehicle
knocks heavily or persistently, or if you
are driving with heavy loads such as when
towing a trailer, the use of 91 AKI or higher
grade unleaded gasoline is required. !
Fuel octane rating
This octane rating is the average of the
Research Octane and Motor Octane
numbers and is commonly referred to as
the Anti Knock Index (AKI).
Using a gasoline with a lower octane
rating can cause persistent and heavy
knocking, which can damage the engine.
Do not be concerned if your vehicle
sometimes knocks lightly when you drive
up a hill or when you accelerate. See your
dealer or a qualified service technician if
you use a fuel with the specified octane
rating and your vehicle knocks heavily or
persistently. ! Unleaded gasoline
The neck of the fuel filler pipe is designed
to accept only an unleaded gasoline filler
nozzle. Under no circumstances should
leaded gasoline be used because it will
damage the emission control system and
may impair driveability and fuel economy. ! California fuel
If your vehicle was certified to California
Emission Standards as indicated on the
underhood tune-up label, it is designed to
optimize engine and emission control
system performance with gasoline that
meets the clean burning low-sulfur Cali-
fornia gasoline specifications. If you live in
any other state than California, your Starting and operating
7-3
– CONTINUED –