Page 187 of 444

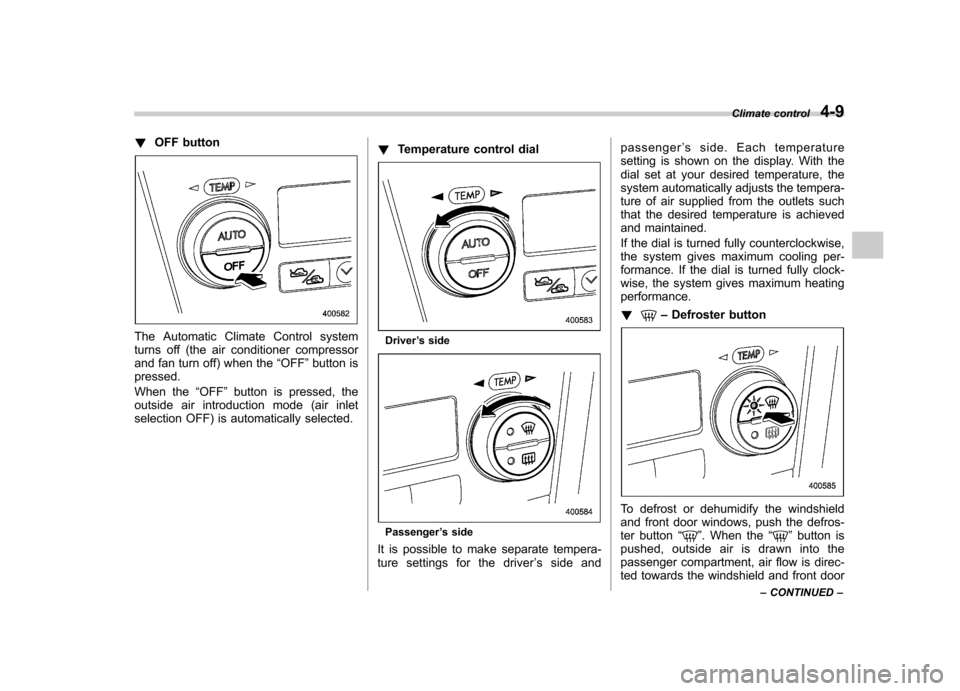
!OFF button
The Automatic Climate Control system
turns off (the air conditioner compressor
and fan turn off) when the “OFF ”button is
pressed.
When the “OFF ”button is pressed, the
outside air introduction mode (air inlet
selection OFF) is automatically selected. !
Temperature control dialDriver ’s side
Passenger ’s side
It is possible to make separate tempera-
ture settings for the driver ’ssideand passenger
’s side. Each temperature
setting is shown on the display. With the
dial set at your desired temperature, the
system automatically adjusts the tempera-
ture of air supplied from the outlets such
that the desired temperature is achieved
and maintained.
If the dial is turned fully counterclockwise,
the system gives maximum cooling per-
formance. If the dial is turned fully clock-
wise, the system gives maximum heatingperformance. !
– Defroster button
To defrost or dehumidify the windshield
and front door windows, push the defros-
ter button “
”. When the “”button is
pushed, outside air is drawn into the
passenger compartment, air flow is direc-
ted towards the windshield and front door Climate control
4-9
– CONTINUED –
Page 221 of 444

Interior light......................................................... 6-2
Dome light .......................................................... 6-2
Cargo area light (Station wagon) .......................... 6-2
Map light .............................................................. 6-2
Sun visors ........................................................... 6-3
Sun visor extension plate .................................... 6-3
Vanity mirror with light ........................................ 6-4
Storage compartment ......................................... 6-4
Glove box ........................................................... 6-5
Center console box ............................................. 6-5
Center panel compartment (if equipped)... ............ 6-6
Overhead console (if equipped) ........................... 6-7
Pocket ................................................................ 6-7
Cup holder ........................................................... 6-7
Front passenger ’s cup holder .............................. 6-8
Rear passenger ’s cup holder ............................... 6-8
Accessory power outlets .................................... 6-8
Coat hook ........................................................... 6-10
Rear passenger area .......................................... 6-10
Shopping bag hook ............................................ 6-11
For Sedan models .............................................. 6-11
For Station wagon models .................................. 6-11
Floor mat ............................................................ 6-12 Cargo area cover (if equipped)
......................... 6-12
Using the cover ................................................. 6-12
To remove the cover housing ... .......................... 6-13
To remove the rear gate board . .......................... 6-13
Stowage of the cargo area cover and rear gate board .............................................................. 6-13
To install the cover housing ............................... 6-14
To install the rear gate board ... .......................... 6-15
Stowage boxes (Station wagon) ....................... 6-15
Convenient tie-down hooks (if equipped) ........ 6-16
Under-floor storage compartment .................... 6-16
HomeLink ®Wireless Control System
(if equipped) .................................................... 6-17
Garage door opener programming in the U.S.A. .............................................................. 6-18
Programming rolling-code-protected garage door openers in the U.S.A. ....................................... 6-19
Programming for entrance gates and garage door openers in Canada ........................................... 6-20
Programming other devices ............................... 6-21
Operating the HomeLink ®Wireless Control
System ............................................................ 6-21
Reprogramming a single HomeLink ®button .. ..... 6-21
Erasing HomeLink ®button memory ................... 6-21
In case a problem occurs ................................... 6-21
Interior equipment
6
Page 223 of 444

Vehicle without moonroof
To turn on the map light, push the switch.
To turn it off, push the switch again.
When leaving the vehicle, make sure the
light is turned off to avoid battery dis-charge.
The light also can be turned on by use of
the remote keyless entry transmitter. Refer
to the “Remote keyless entry system ”
section in chapter 2 for detailed informa-tion.
The setting of the period for which the light
stays on can be changed by a SUBARU
dealer.
Contact the nearest SUBARU dealer for details. Sun visors
To block out glare, swing down the visors.
To use the sun visor at a side window,
swing it down and move it sideways.
&
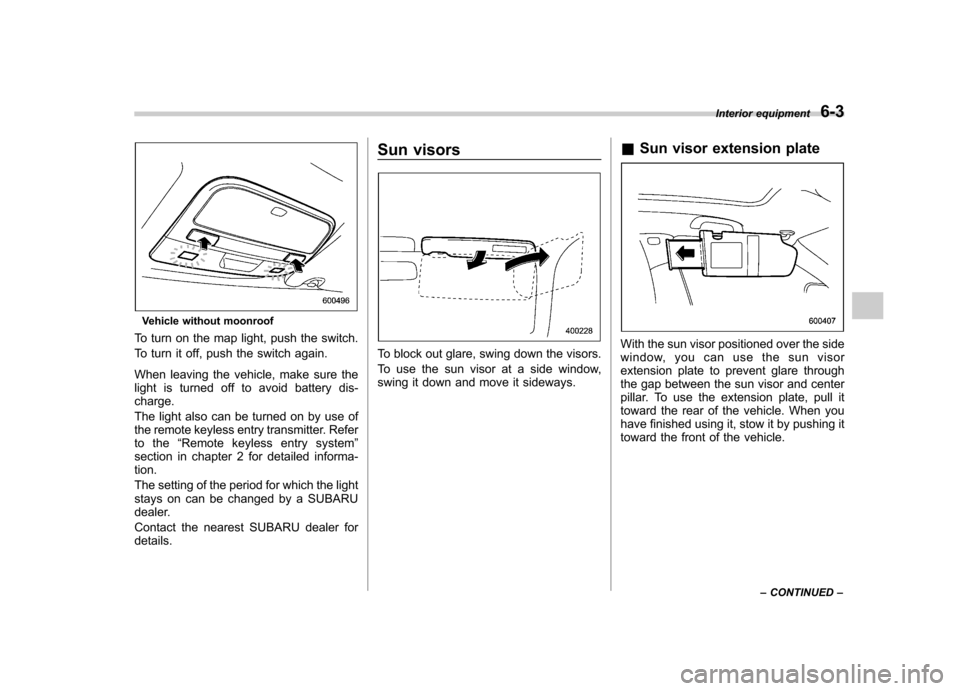
Sun visor extension plateWith the sun visor positioned over the side
window, you can use the sun visor
extension plate to prevent glare through
the gap between the sun visor and center
pillar. To use the extension plate, pull it
toward the rear of the vehicle. When you
have finished using it, stow it by pushing it
toward the front of the vehicle. Interior equipment
6-3
– CONTINUED –
Page 225 of 444
&Glove box
1) Lock
2) Unlock
To open the glove box, pull the handle. To
close it, push the lid firmly upward.
To lock the glove box, insert the key and
turn it clockwise. &
Center console box
Center console box (front)
If you remove the divider plate from the
dual cup holders, you can use the center
console box as a storage space. To use as storage space:
Slide the sliding lid (near the parking brake
lever) toward the rear.
Grasp the dual cup holders
’divider plate
at the base. Turn it counterclockwise to
remove it. Interior equipment
6-5
– CONTINUED –
Page 228 of 444
6-8Interior equipment
&Front passenger ’s cup holder
The dual cup holder is built into the center
console near the parking brake lever.
To access the cup holder, pull the lid
toward the rear. &
Rear passenger ’s cup holder
The rear passenger ’s cup holder is
located on the lower side of the back of
the center console. To use the cup holder,
open the lid by pulling its upper edge. Accessory power outlets
Outlet beside front pocket
Outlet in center console
Page 233 of 444
WARNING
Do not place anything on the ex-
tended cover. Putting excessive
weight on the extended cover can
break it and an object on the cover
could tumble forward in the event of
a sudden stop or collision. This
could cause serious injury.
& To remove the cover housing
1. Rewind the cover.
2. Hold down the button on the right-
hand rear quarter panel and lift up the
right-hand cover housing.
3. Remove the cover housing. &
To remove the rear gate board
1. Remove the top of the rear gate board
from the groove in the rear gate panel.
2. Hold both sides of the bottom edge of the rear gate board, rotate the rear gate
board toward you, and pull it out down-ward. &
Stowage of the cargo area
cover and rear gate board
The cargo area cover and rear gate board
can be stowed in under the cargo floor.
1. To open the lid, pull the handle up. Interior equipment
6-13
– CONTINUED –
Page 234 of 444
6-14Interior equipment
2. To keep the lid open, hang the hook
(provided on the back of the lid) on the
rear edge of the roof.
3. Remove the left and right parts of the
cargo floor lid.4. Stow the cover housing and rear gate
board in the cargo area end. &
To install the cover housing
To install the cover housing, insert both
ends of the cover housing into theretainers.
Page 235 of 444
&To install the rear gate board
Insert (tipped at an angle) the hooks on
the rear gate board into the holes in the
rear gate panel.
Rotate the rear gate board toward you
until its top touches the rear gate panel.
Fit the top of the rear gate board into the
groove in the rear gate panel. Stowage boxes (Station wa- gon)
A stowage box is located on each side of
the cargo area. You can access each one
by pushing up and pulling the knob on thelid.
Interior equipment
6-15