2008 SUBARU OUTBACK lock
[x] Cancel search: lockPage 267 of 444
7-26Starting and operating
WARNING
Do not drive the vehicle with the
selector lever in the “N ” (neutral)
position. Engine braking has no
effect in this condition and the risk
of an accident is consequently in-creased.
! D (Drive)
This position is for normal driving. The
transmission automatically shifts into a
suitable gear from 1st to 5th according to
the vehicle speed and the acceleration
you require.
When more acceleration is required in this
position, press the accelerator pedal fully
to the floor and hold that position. The
transmission will automatically downshift
to 4th, 3rd, 2nd or 1st gear. When you
release the pedal, the transmission will
return to the original gear position.
To use the manual mode, move the lever
from this position into the manual gate. ! While climbing a grade
When driving up a hill, undesired upshift to
4th or 5th gear is prevented from taking
place when the accelerator is released.
This minimizes the chance of subsequent
downshifting to a lower gear when accel- erating again. This prevents repeated
upshifting and downshifting resulting in a
smoother operation of the vehicle.
NOTE
The transmission may downshift to 2nd
or 1st gear, depending on the way the
accelerator pedal is pressed to accel-
erate the vehicle again. ! While going down a hill
When you are descending a hill or any
other slope while braking with the Sport
Sharp (S#) mode selected, the transmis-
sion may downshift to 4th or 3rd gear
depending on how hard you depress the
brake pedal, causing engine braking to
work. Reacceleration for a short time will
cause the transmission to upshift normally. NOTE . A 5th-to-4th automatic downshift will
not occur at speeds above 78 mph (126
km/h) and a 4th-to-3rd automatic down-
shift will not occur at speeds above 53
mph (86 km/h). . Automatic downshifts to 4th or 3rd
may occur even when driving on a level
road depending on conditions, such as
how hard you depress the brake pedal. &
Selector lever reverse inhi-
biting function
This function prevents accidental move-
ment of the selector lever to the “R ”
position while the vehicle is moving.
The function becomes operational when
the vehicle reaches a speed of approxi-
mately 6 mph (10 km/h). Once opera-
tional, it prevents the selector lever from
being moved from the “N ”position to the
“ R ” position. When the vehicle speed
drops below 6 mph (10 km/h), the function
is canceled. The selector lever can then
be moved to the “R ”and “P ”positions.
When the ignition switch has been turned
to the “LOCK ”position, movement of the
selector lever from the “N ”position to the
“ R ” position is possible for a limited time
period by depressing the brake pedal and
then becomes impossible. Also, the se-
lector lever cannot be moved to the “R ”
position after it has been placed in the “P ”
position and then placed again in the “N ”
position.
When the movement of the selector lever
from the “N ” position to the “R ” position
has become impossible, turn the ignition
switch back to the “ON ”position then
move the selector lever to the “P ”position.
Pressing the selector lever release button
alsomakesitpossibletomovethe
Page 268 of 444
selector lever to the“P ” position at this
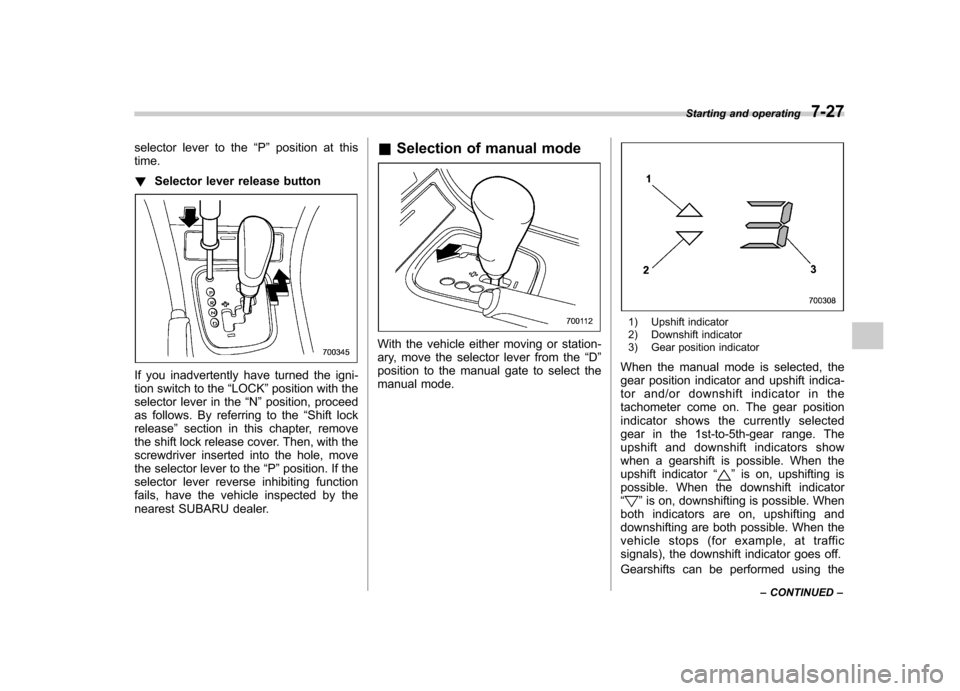
time. ! Selector lever release button
If you inadvertently have turned the igni-
tion switch to the “LOCK ”position with the
selector lever in the “N ”position, proceed
as follows. By referring to the “Shift lock
release ”section in this chapter, remove
the shift lock release cover. Then, with the
screwdriver inserted into the hole, move
the selector lever to the “P ”position. If the
selector lever reverse inhibiting function
fails, have the vehicle inspected by the
nearest SUBARU dealer. &
Selection of manual mode
With the vehicle either moving or station-
ary, move the selector lever from the “D ”
position to the manual gate to select the
manual mode.
1) Upshift indicator
2) Downshift indicator
3) Gear position indicator
When the manual mode is selected, the
gear position indicator and upshift indica-
tor and/or downshift indicator in the
tachometer come on. The gear position
indicator shows the currently selected
gear in the 1st-to-5th-gear range. The
upshift and downshift indicators show
when a gearshift is possible. When the
upshift indicator “
”is on, upshifting is
possible. When the downshift indicator “
” is on, downshifting is possible. When
both indicators are on, upshifting and
downshifting are both possible. When the
vehicle stops (for example, at traffic
signals), the downshift indicator goes off.
Gearshifts can be performed using the Starting and operating
7-27
– CONTINUED –
Page 270 of 444
moving. .If the temperature of the automatic
transmission fluid becomes too high,the “AT OIL TEMP ”warning light will
come on. Immediately stop the vehicle
in a safe place and let the engine idle
until the warning light goes off.
& Maximum speeds
WARNING
When down shifting, ensure that the
vehicle is not travelling at a speed
exceeding the Maximum Allowable
Speed for the gear which is about to
be selected. Failure to observe this
precaution can lead to engine over-
revving and this in turn can result in
engine damage.
In addition, sudden application of
engine braking caused by down
shifting when the vehicle is travel-
ling on a slippery surface can lead
to wheel locking; as a consequence,
control of the vehicle may be lost
and the risk of an accident in-creased.
The following tables show the maximum
speeds that are possible with each differ-
ent gear. When down shifting, it is important to
confirm that the current vehicle speed is
not in excess of the Maximum Allowable
Speed of the gear which is about to beselected.
Legacy mph (km/h)
Position 2.5-liter turbo
models 3.0-liter models
1 25 (40) 27 (43)
2 53 (85) 51 (82)
3 85 (137) 84 (135)
OUTBACK mph (km/h)
Position 2.5-liter turbo
models 3.0-liter models
1 25 (40) 28 (44)
2 53 (85) 52 (84)
3 86 (138) 87 (139)
Never exceed posted speed limits. & Driving tips
. On a road surface where there is a risk
of wheelspin (for example, a snow- or
gravel-covered road), you can pull away
from a standstill safely and easily by first
selecting the 2nd gear of the manualmode. . Always apply the foot or parking brake when the vehicle is stopped in the
“D ”or
“ R ”position.
. Always set the parking brake when
parking your vehicle. Do not hold the
vehicle with only the transmission. . Do not keep the vehicle in a stationary
position on an uphill grade by using the “ D ”position. Use the brake instead.
. The engine may, on rare occasions,
knock when the vehicle rapidly acceler-
ates or rapidly pulls away from a standstill.
This phenomenon does not indicate afault. . A slight reduction in output torque may
occur in the models with a 3.0-liter or 2.5-
liter turbo engine before the engine warms up. & Shift lock release
If the selector lever does not move from the “P ” position with the brake pedal
depressed and the ignition switch in the“ ON ”position, perform the following steps:
To override the shift lock:
1. Set the parking brake and stop the engine.
2. Take out the screwdriver from the tool bucket. Starting and operating
7-29
– CONTINUED –
Page 274 of 444
NOTE
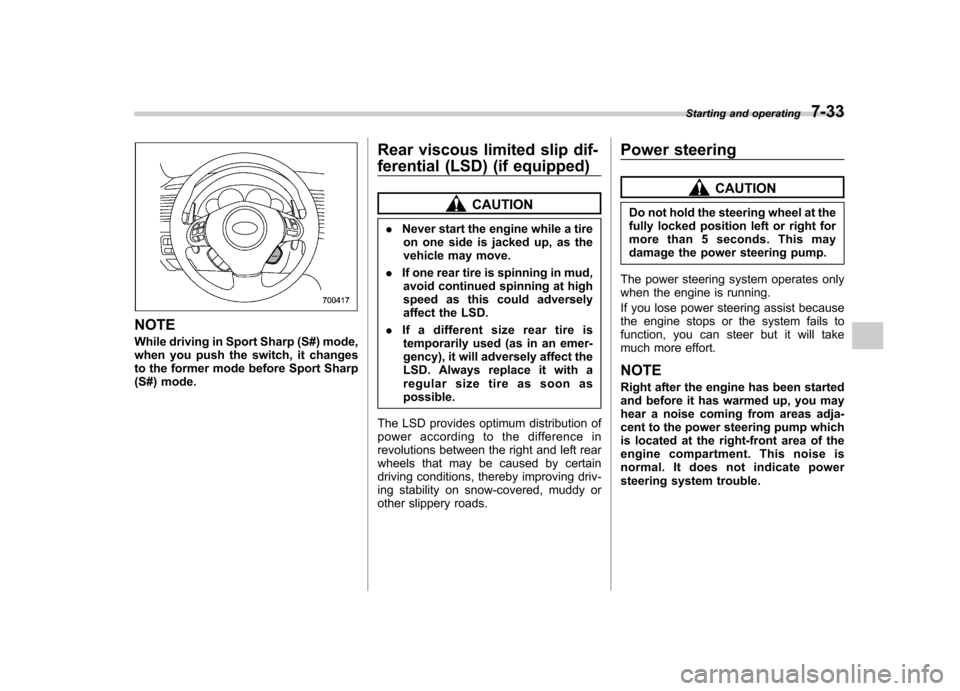
While driving in Sport Sharp (S#) mode,
when you push the switch, it changes
to the former mode before Sport Sharp
(S#) mode.Rear viscous limited slip dif-
ferential (LSD) (if equipped)
CAUTION
. Never start the engine while a tire
on one side is jacked up, as the
vehicle may move.
. If one rear tire is spinning in mud,
avoid continued spinning at high
speed as this could adversely
affect the LSD.
. If a different size rear tire is
temporarily used (as in an emer-
gency), it will adversely affect the
LSD. Always replace it with a
regularsizetireassoonaspossible.
The LSD provides optimum distribution of
power according to the difference in
revolutions between the right and left rear
wheels that may be caused by certain
driving conditions, thereby improving driv-
ing stability on snow-covered, muddy or
other slippery roads. Power steering
CAUTION
Do not hold the steering wheel at the
fully locked position left or right for
more than 5 seconds. This may
damage the power steering pump.
The power steering system operates only
when the engine is running.
If you lose power steering assist because
the engine stops or the system fails to
function, you can steer but it will take
much more effort. NOTE
Right after the engine has been started
and before it has warmed up, you may
hear a noise coming from areas adja-
cent to the power steering pump which
is located at the right-front area of the
engine compartment. This noise is
normal. It does not indicate power
steering system trouble. Starting and operating
7-33
Page 276 of 444
ABS (Anti-lock Brake Sys- tem)
WARNING
Always use the utmost care in driving –overconfidence because
youaredrivingwithanABS
equipped vehicle could easily lead
to a serious accident.
CAUTION
. The ABS system does not always
decrease stopping distance. You
should always maintain a safe
following distance from othervehicles.
. When driving on badly surfaced
roads, gravel roads, icy road, or
over deep newly fallen snow,
stopping distances may be long-
er for a vehicle with the ABS
system than one without. When
driving under these conditions,
therefore, reduce your speed and
leave ample distance from othervehicles.
. When you feel the ABS system
operating, you should maintain constant brake pedal pressure.
Do not pump the brake pedal
since doing so may defeat the
operation of the ABS system.
The ABS system prevents the lock-up of
wheels which may occur during sudden
braking or braking on slippery road sur-
faces. This helps prevent the loss of
steering control and directional stability
caused by wheel lock-up.
When the ABS system is operating, you
may hear a chattering noise or feel a slight
vibration in the brake pedal. This is normal
when the ABS operates.
The ABS system will not operate when the
vehicle speed is below approximately 6
mph (10 km/h).
& ABS system self-check
You may feel a slight shock in the brake
pedal and hear the operating sound of
ABS from the engine compartment just
after the vehicle is started. This is caused
by an automatic functional test of the ABS
system being carried out and does not
indicate any abnormal condition. &
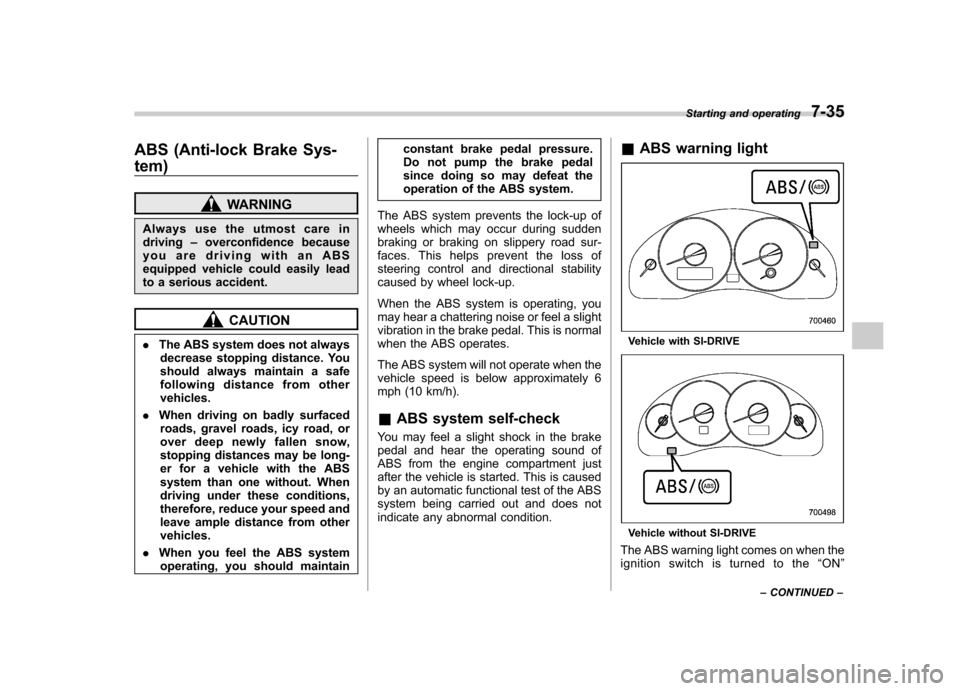
ABS warning light
Vehicle with SI-DRIVE
Vehicle without SI-DRIVE
The ABS warning light comes on when the
ignition switch is turned to the “ON ”
Starting and operating
7-35
– CONTINUED –
Page 278 of 444
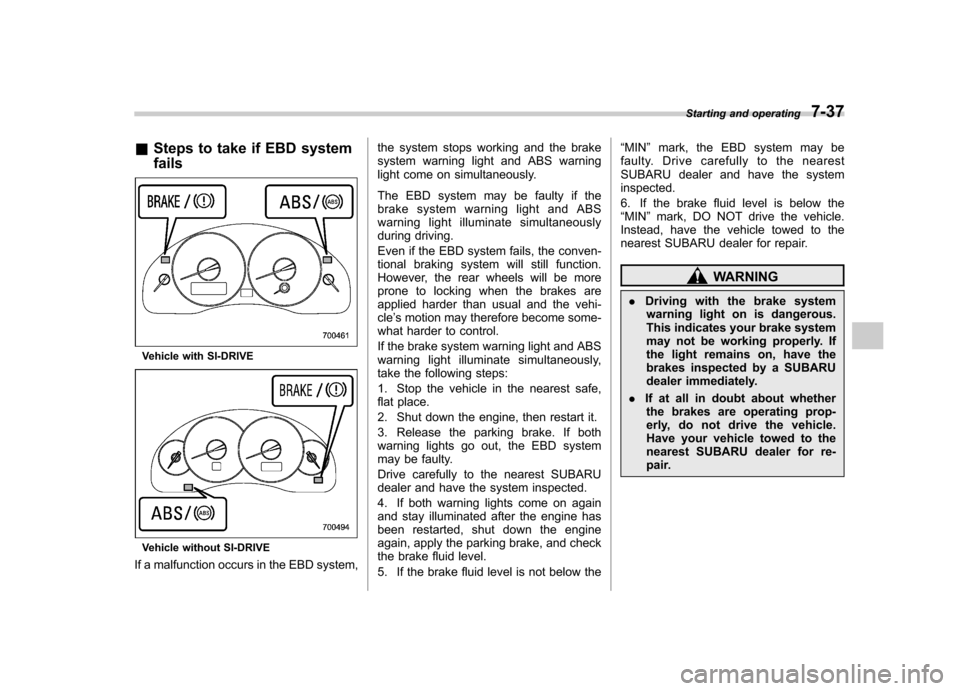
&Steps to take if EBD system fails
Vehicle with SI-DRIVE
Vehicle without SI-DRIVE
If a malfunction occurs in the EBD system, the system stops working and the brake
system warning light and ABS warning
light come on simultaneously.
The EBD system may be faulty if the
brake system warning light and ABS
warning light illuminate simultaneously
during driving.
Even if the EBD system fails, the conven-
tional braking system will still function.
However, the rear wheels will be more
prone to locking when the brakes are
applied harder than usual and the vehi-cle
’s motion may therefore become some-
what harder to control.
If the brake system warning light and ABS
warning light illuminate simultaneously,
take the following steps:
1. Stop the vehicle in the nearest safe,
flat place.
2. Shut down the engine, then restart it.
3. Release the parking brake. If both
warning lights go out, the EBD system
may be faulty.
Drive carefully to the nearest SUBARU
dealer and have the system inspected.
4. If both warning lights come on again
and stay illuminated after the engine has
been restarted, shut down the engine
again, apply the parking brake, and check
the brake fluid level.
5. If the brake fluid level is not below the “
MIN ”mark, the EBD system may be
faulty. Drive carefully to the nearest
SUBARU dealer and have the systeminspected.
6. If the brake fluid level is below the “ MIN ”mark, DO NOT drive the vehicle.
Instead, have the vehicle towed to the
nearest SUBARU dealer for repair.
WARNING
. Driving with the brake system
warning light on is dangerous.
This indicates your brake system
may not be working properly. If
the light remains on, have the
brakes inspected by a SUBARU
dealer immediately.
. If at all in doubt about whether
the brakes are operating prop-
erly, do not drive the vehicle.
Have your vehicle towed to the
nearest SUBARU dealer for re-
pair. Starting and operating
7-37
Page 283 of 444

7-42Starting and operating
& Vehicle Dynamics Control
OFF switch
Pressingtheswitchtodeactivatethe
Vehicle Dynamics Control system can
facilitate the following operations: .a standing start on a steeply sloping
road with a snowy, gravel-covered, or
otherwise slippery surface . extrication of the vehicle when its
wheels are stuck in mud or deep snow
When the switch is pressed during engine
operation, the “
”indicator light in the
combination meter illuminates. The Vehi-
cle Dynamics Control system will be
deactivated and the vehicle will behave
like a model not equipped with the Vehicle
Dynamics Control system. When the
switch is pressed again to reactivate the Vehicle Dynamics Control system, the
“
”
indicator light goes off.
With the Vehicle Dynamics Control system
deactivated, traction and stability en-
hancement offered by Vehicle Dynamics
Control system is unavailable. Therefore
you should not deactivate the Vehicle
Dynamics Control system except under
above-mentioned situations. NOTE . When the switch has been pressed
to deactivate the Vehicle Dynamics
Control system, the Vehicle Dynamics
Control system automatically reacti-
vates itself the next time the ignition
switch is turned to the “LOCK ”position
and the engine is restarted.. If the switch is held down for 10
seconds or longer, the indicator light
goes off, the Vehicle Dynamics Control
system is activated, and the system
ignores any further pressing of the
switch. To make the switch usable
again, turn the ignition switch to the“ LOCK ”position and restart the en-
gine.. When the switch is pressed to
deactivate the Vehicle Dynamics Con-
trol system, the vehicle ’s running per-
formance is comparable with that of a
vehicle that does not have a Vehicle Dynamics Control system. Do not de-
activate the Vehicle Dynamics Control
system except when absolutely neces-
sary.
Page 287 of 444
7-46Starting and operating
Cruise control
Cruise control enables you to maintain a
constant vehicle speed without holding
your foot on the accelerator pedal and it is
operative when the vehicle speed is 25
mph (40 km/h) or more. Make sure the
main switch is turned “OFF ”when the
cruise control is not in use to avoid
unintentionally setting the cruise control.
NOTE
If you press the main switch button
while turning the ignition switch “ON ”,
the cruise control function is deacti-
vated and the “CRUISE ”indicator light
flashes. To reactivate the cruise control
function, turn the ignition switch back
to the “Acc ”or “LOCK ”position, and
then turn it again to the “ON ”position.
WARNING
Do not use the cruise control under
any of the following conditions. This
may cause loss of vehicle control: . driving up or down a steep grade
. driving on slippery or winding
roads
. driving in heavy traffic &
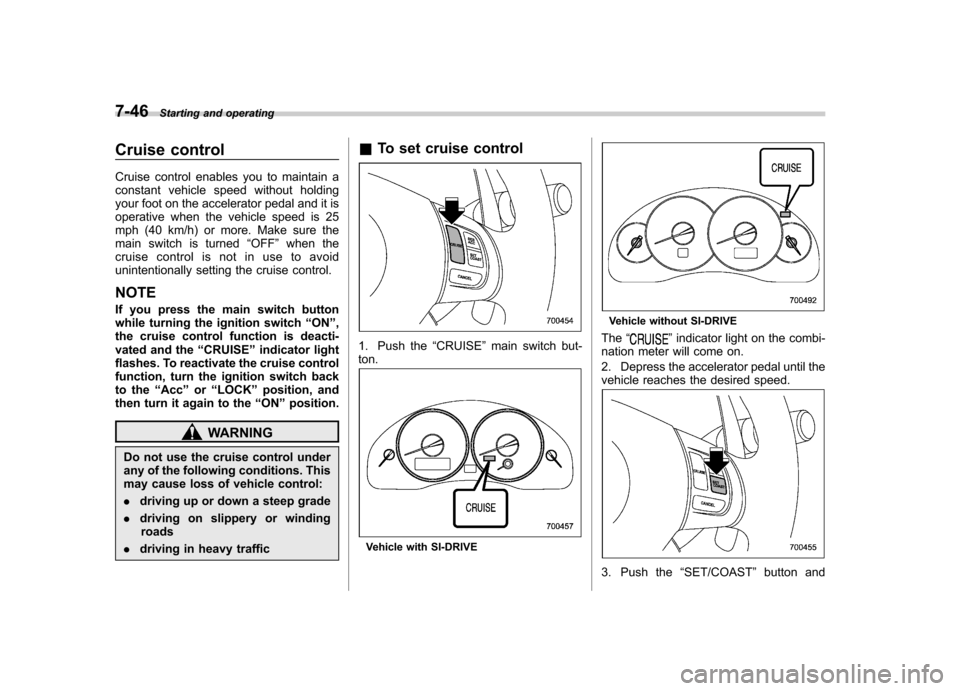
To set cruise control
1. Push the “CRUISE ”main switch but-
ton.
Vehicle with SI-DRIVE
Vehicle without SI-DRIVE
The “
”indicator light on the combi-
nation meter will come on.
2. Depress the accelerator pedal until the
vehicle reaches the desired speed.
3. Push the “SET/COAST ”button and