Page 391 of 444
&Rear window wiper blade assembly
1. Raise the wiper arm off the rear
window.
2. Turn the wiper blade assembly coun- terclockwise.
3. Pull the wiper blade assembly toward
you to remove it from the wiper arm. &
Rear window wiper blade rubber
1. Pull out the end of the blade rubber
assembly to unlock it from the plasticsupport.
Maintenance and service 11-45
– CONTINUED –
Page 392 of 444
11-46Maintenance and service
2. Pull the blade rubber assembly out of
the plastic support.
1) Metal spines
3. If the new blade rubber is not provided
with two metal spines, remove the metal
spines from the old blade rubber and
install them in the new blade rubber.
4. Align the claws of the plastic support
with the grooves in the blade rubber
assembly, then slide the blade rubber
assembly into place.
Securely retain both ends of the rubber
with the stoppers on the plastic support ends. If the rubber is not retained properly,
the wiper may scratch the rear windowglass.
5. Install the wiper blade assembly to the
wiper arm. Make sure that it locks in place.
6. Hold the wiper arm by hand and slowly
lower it in position.
Page 395 of 444

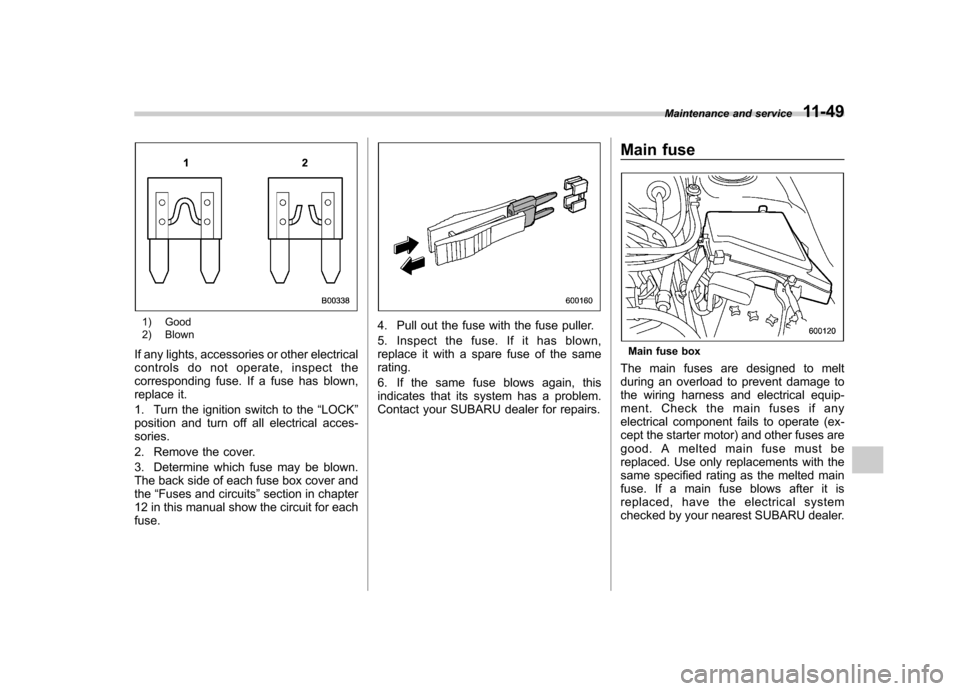
1) Good
2) Blown
If any lights, accessories or other electrical
controls do not operate, inspect the
corresponding fuse. If a fuse has blown,
replace it.
1. Turn the ignition switch to the “LOCK ”
position and turn off all electrical acces- sories.
2. Remove the cover.
3. Determine which fuse may be blown.
The back side of each fuse box cover andthe “Fuses and circuits ”section in chapter
12 in this manual show the circuit for eachfuse.4. Pull out the fuse with the fuse puller.
5. Inspect the fuse. If it has blown,
replace it with a spare fuse of the samerating.
6. If the same fuse blows again, this
indicates that its system has a problem.
Contact your SUBARU dealer for repairs. Main fuse
Main fuse box
The main fuses are designed to melt
during an overload to prevent damage to
the wiring harness and electrical equip-
ment. Check the main fuses if any
electrical component fails to operate (ex-
cept the starter motor) and other fuses are
good. A melted main fuse must be
replaced. Use only replacements with the
same specified rating as the melted main
fuse. If a main fuse blows after it is
replaced, have the electrical system
checked by your nearest SUBARU dealer. Maintenance and service
11-49
Page 399 of 444
!Low beam light bulbs
Right-hand side
1. Use a screwdriver to undo the clips on
the air intake duct, then remove the air
intake duct. (right-hand side)
Left-hand side 2. Use a screwdriver to remove the
secured clip of the washer tank. To make
it easy to access the bulb, move the
washer tank to the horizontal direction.
(left-hand side)
3. Remove the bulb cover, by turning it counterclockwise.
4. Disconnect the electrical connector.
5. Remove the retainer spring.
6. Replace the bulb, then set the retainer
spring securely.
7. Reconnect the electrical connector.
8. Install the bulb cover.
9. Install the air intake duct with clips.
(right-hand side)
10. Set the washer tank to the original
place and secure it by clip. (left-hand side)
Maintenance and service
11-53
– CONTINUED –
Page 400 of 444

11-54Maintenance and service
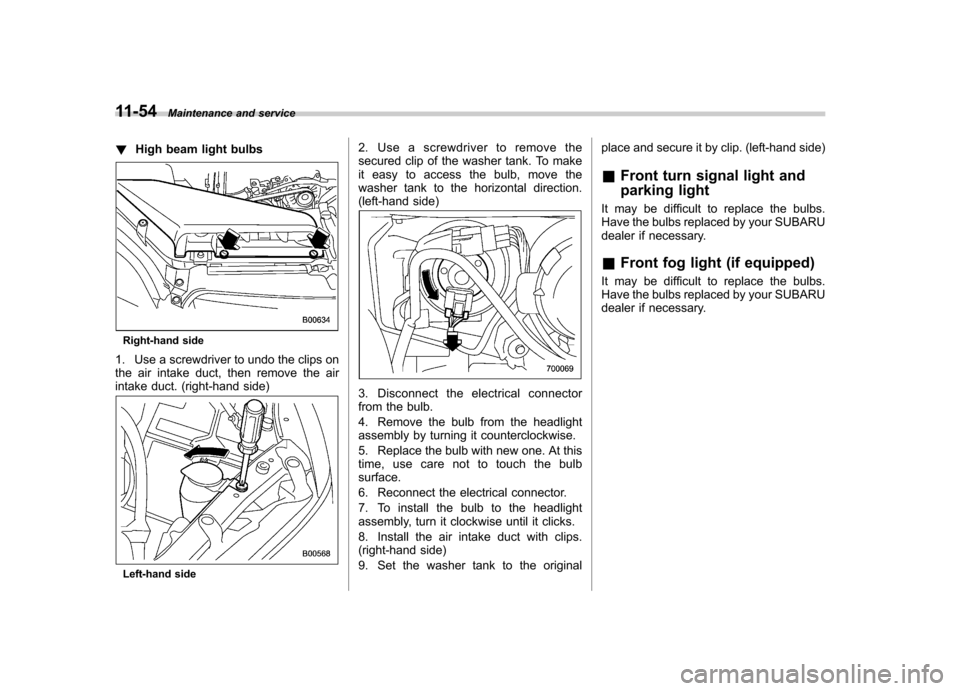
! High beam light bulbs
Right-hand side
1. Use a screwdriver to undo the clips on
the air intake duct, then remove the air
intake duct. (right-hand side)
Left-hand side 2. Use a screwdriver to remove the
secured clip of the washer tank. To make
it easy to access the bulb, move the
washer tank to the horizontal direction.
(left-hand side)
3. Disconnect the electrical connector
from the bulb.
4. Remove the bulb from the headlight
assembly by turning it counterclockwise.
5. Replace the bulb with new one. At this
time, use care not to touch the bulbsurface.
6. Reconnect the electrical connector.
7. To install the bulb to the headlight
assembly, turn it clockwise until it clicks.
8. Install the air intake duct with clips.
(right-hand side)
9. Set the washer tank to the original
place and secure it by clip. (left-hand side) &
Front turn signal light and
parking light
It may be difficult to replace the bulbs.
Have the bulbs replaced by your SUBARU
dealer if necessary. & Front fog light (if equipped)
It may be difficult to replace the bulbs.
Have the bulbs replaced by your SUBARU
dealer if necessary.
Page 401 of 444
&Rear combination lights
! Sedan
1. Push the knobs of the cover to open
the cover.
1) Rear turn signal light
2) Back-up light
3) Brake/tail and rear side marker light
2. Remove the bulb holder from the rear
combination light assembly by turning itcounterclockwise.
3. Pull the bulb out of the bulb holder and
replace it with a new one.
4. Set the bulb holder into the rear
combination light assembly and turn it
clockwise until it locks.
5. Securely lock the cover against the
trunk trim. !
Station wagon
1. Using a Phillips screwdriver, remove
the upper and lower screws.
Maintenance and service 11-55
– CONTINUED –
Page 402 of 444
11-56Maintenance and service
2. Wrap tape around a flat-head screw-
driver, then insert the screwdriver into the
gap between the side cover and rear
combination lamp and use it as a lever
to undo clip 1 in the illustration shown.
Undo clips 2 and 3 in the same way, then
remove the side cover.3. Remove the upper and lower screws.
Then, straightly slide the rear combination
lamp assembly rearward and remove it
from the vehicle.
1) Brake/tail light
2) Rear turn signal light 3) Rear side marker light
4. Remove the bulb holder from the rear
combination light assembly by turning itcounterclockwise.
5. Pull the bulb out of the bulb holder and
replace it with a new one.
6. Set the bulb holder into the rear
combination light assembly and turn it
clockwise until it locks.
7. Insert the harness into the holder.
Page 403 of 444
8. Reinstall the rear combination light
assembly by sliding the two-pronged part
of the combination light assembly securely
to each holder of the vehicle side.
9. Tighten the upper and lower screws.
10. Reinstall the side cover.&
Back-up light (Station wagon)
1. Apply a flat-head screwdriver to the
corner of the light cover as shown in the
illustration, and pry the light cover off from
the rear gate trim.
2. Turn the bulb socket counterclockwise and remove it.
3. Pull the bulb out of the bulb socket and
replace it with a new one.
4. Install the bulb socket by turning it
clockwise. Install the light cover on the
rear gate. &
License plate light
! Sedan
It may be difficult to replace the bulbs.
Have the bulbs replaced by your SUBARU
dealer if necessary. Maintenance and service
11-57
– CONTINUED –